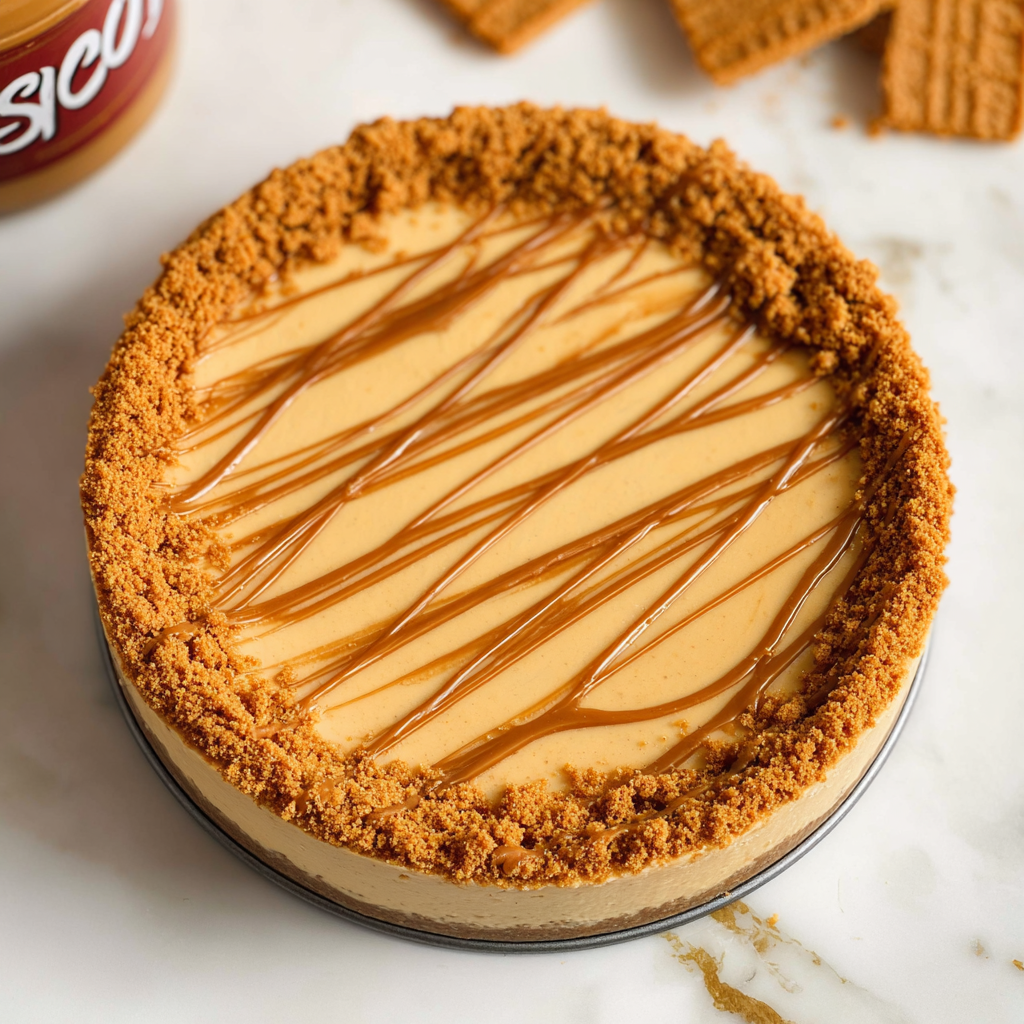
I forgot to chill it long enough and served what was essentially Biscoff soup in a crust. Ben poked it with his spoon, and it rippled. Mia said, “I think it is still alive.” I put it back in the fridge, waited four more hours, and sliced it again. That second attempt is what taught me that a perfect biscoff cheesecake is entirely about patience.
Why This Recipe Is Special
No baking. No water bath. No oven anxiety. This no-bake biscoff cheesecake has a buttery Lotus Biscoff crumb base, a silky cream cheese filling swirled with Biscoff spread, and a glossy caramelized cookie butter layer on top that makes every single slice look like it came from a bakery. It is the dessert I bring to every gathering and the one people ask me for every time. Mia calls it “the brown one” and requests it for her birthday every year. I have stopped suggesting alternatives.
How To Make Biscoff Cheesecake
The version that finally worked happened on a Friday night when both kids were supposed to be in bed and were absolutely not in bed. Mia was sitting on the counter crushing Biscoff biscuits in a zip-lock bag with the enthusiasm of someone who had been waiting for this their whole life. Ben was reading the Biscoff spread jar like it was a novel, announcing the ingredients out loud in a very serious voice. When I pressed the base into the tin and the whole kitchen smelled like caramelized spiced cookies, both of them immediately asked if they could lick the spatula. There were two spatulas. I had planned ahead.
The lesson that fixed everything was about the cream cheese. It has to be full-fat block cream cheese, completely at room temperature, beaten until smooth before anything else goes in. Cold or low-fat cream cheese never sets properly in a no-bake cheesecake. It stays soft, grainy, or wobbly no matter how long you chill it. Ben learned these lessons the hard way when he helped me with batch number two and accidentally used spreadable cream cheese from the tub. We waited six hours for that one to firm up. It did not. Full-fat block only, every single time.
Main Ingredients
For the Biscoff Base
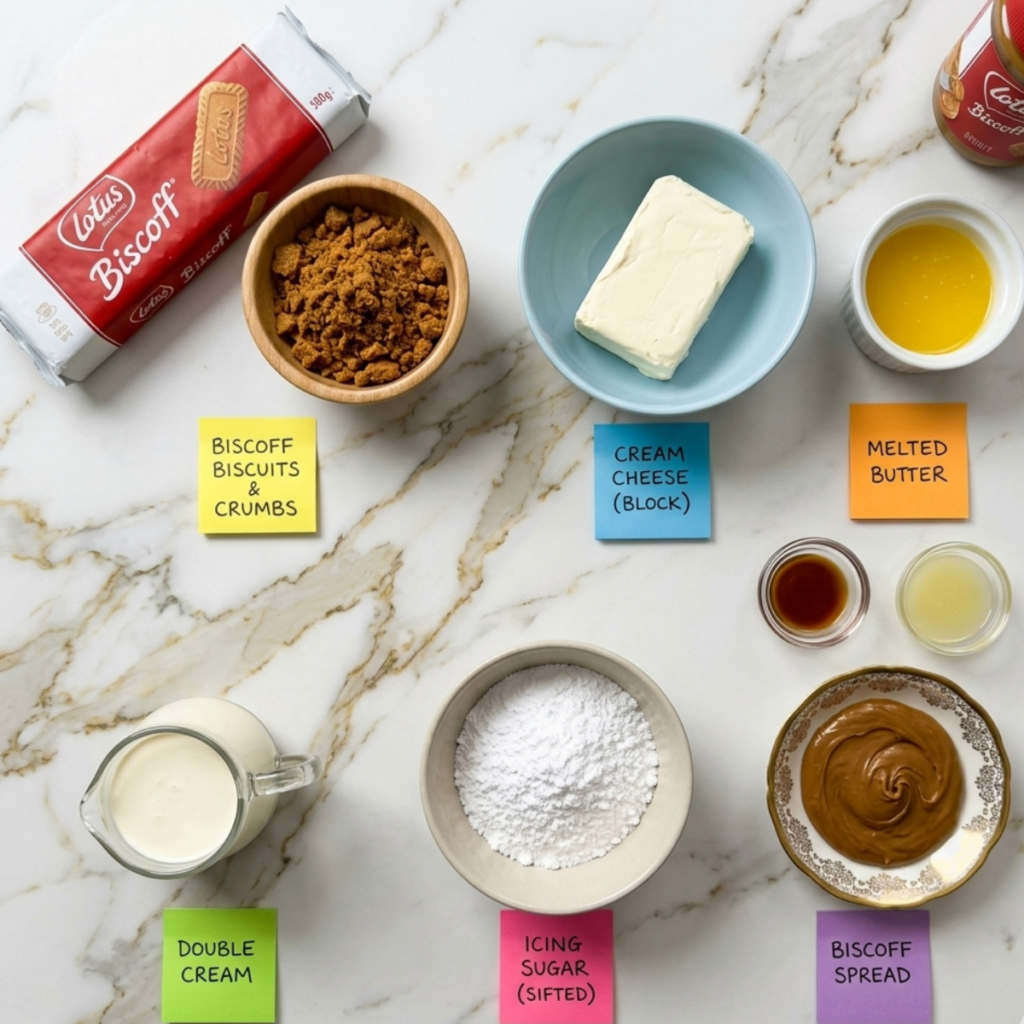
- 250g Lotus Biscoff biscuits (about 40 biscuits) – Crushed to fine crumbs; a zip-lock bag and a rolling pin work perfectly, and the kids love this job
- 80g unsalted butter, melted – Binds the crumbs into a firm, sliceable base; salted butter works fine if that is what you have
For the Cheesecake Filling
- 600g full-fat block cream cheese, room temperature – Block cream cheese only; spreadable tub cream cheese will not set properly in a no-bake recipe
- 100g icing sugar, sifted – Sweetens the filling and helps with structure; sift it to avoid lumps in the final texture
- 300ml double cream, cold – Whipped into the filling for volume and stability; must be cold to whip properly
- 150g Biscoff spread, room temperature – Folded into the filling for that signature caramelized cookie flavor throughout every bite
- 1 teaspoon vanilla extract – Rounds out the filling flavor and complements the Biscoff beautifully
- 1 tablespoon lemon juice – A small amount cuts through the richness and brightens the whole filling without tasting lemony
For the Biscoff Topping
- 150g Biscoff spread, warmed slightly – Poured over the set cheesecake for a smooth, glossy caramel-like topping that firms up in the fridge
- 50g Biscoff biscuits, roughly crushed – Scattered over the top for texture and that beautiful golden crumb finish visible in every slice
Step-by-Step Instructions
Step 1: Make the Biscoff Base
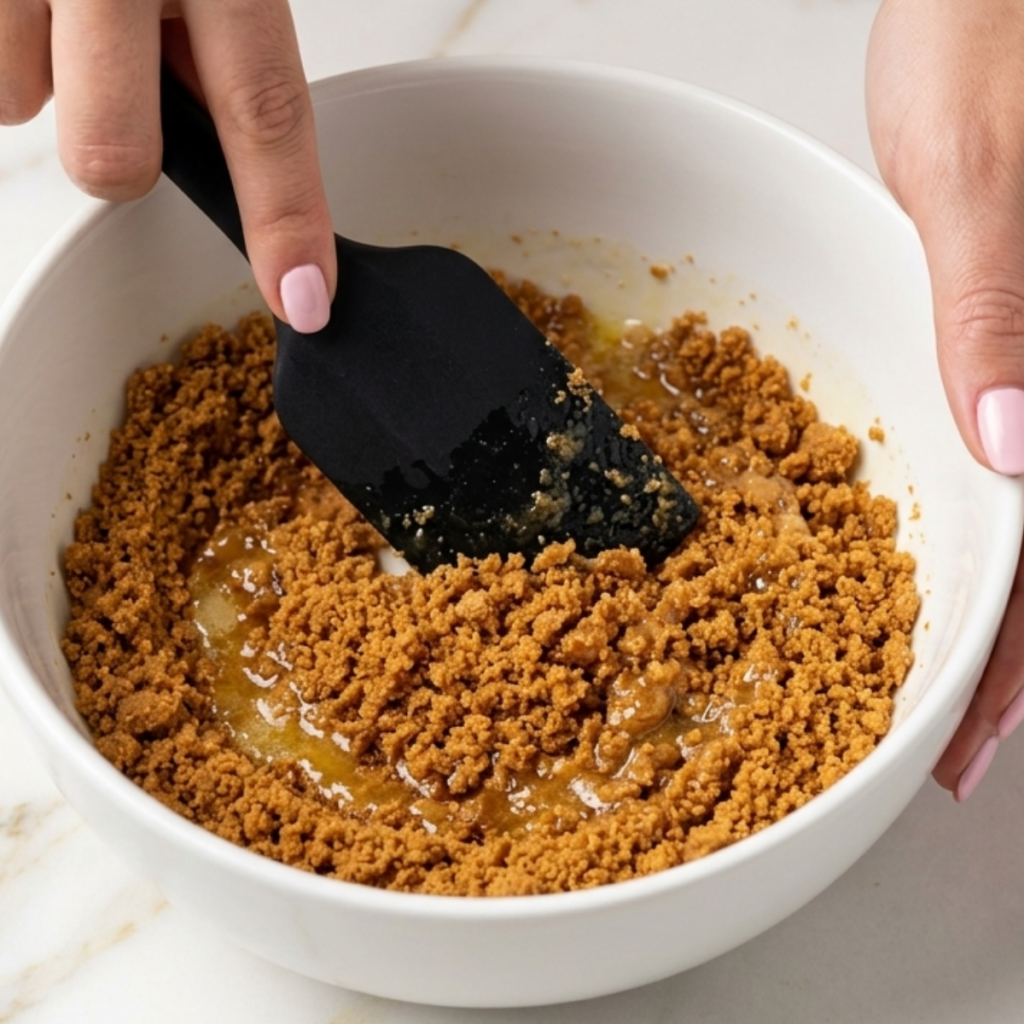
- Crush the Biscoff biscuits into fine crumbs using a food processor or a zip-lock bag and rolling pin until no large pieces remain
- Pour the melted butter over the crumbs and mix thoroughly until every crumb is coated and the mixture holds together when pressed between your fingers
- Press the mixture firmly and evenly into the base of a lined 8-inch springform pan using the back of a spoon or the bottom of a glass
- Refrigerate the base for at least 30 minutes while you prepare the filling so it is firm enough to hold the weight of the cheesecake
Step 2: Make the Cheesecake Filling
- Beat the room-temperature cream cheese with the sifted icing sugar and vanilla extract in a large bowl until completely smooth and lump-free, about 2 to 3 minutes
- Add the lemon juice and the Biscoff spread and beat again until fully combined and the mixture is glossy and uniform in color
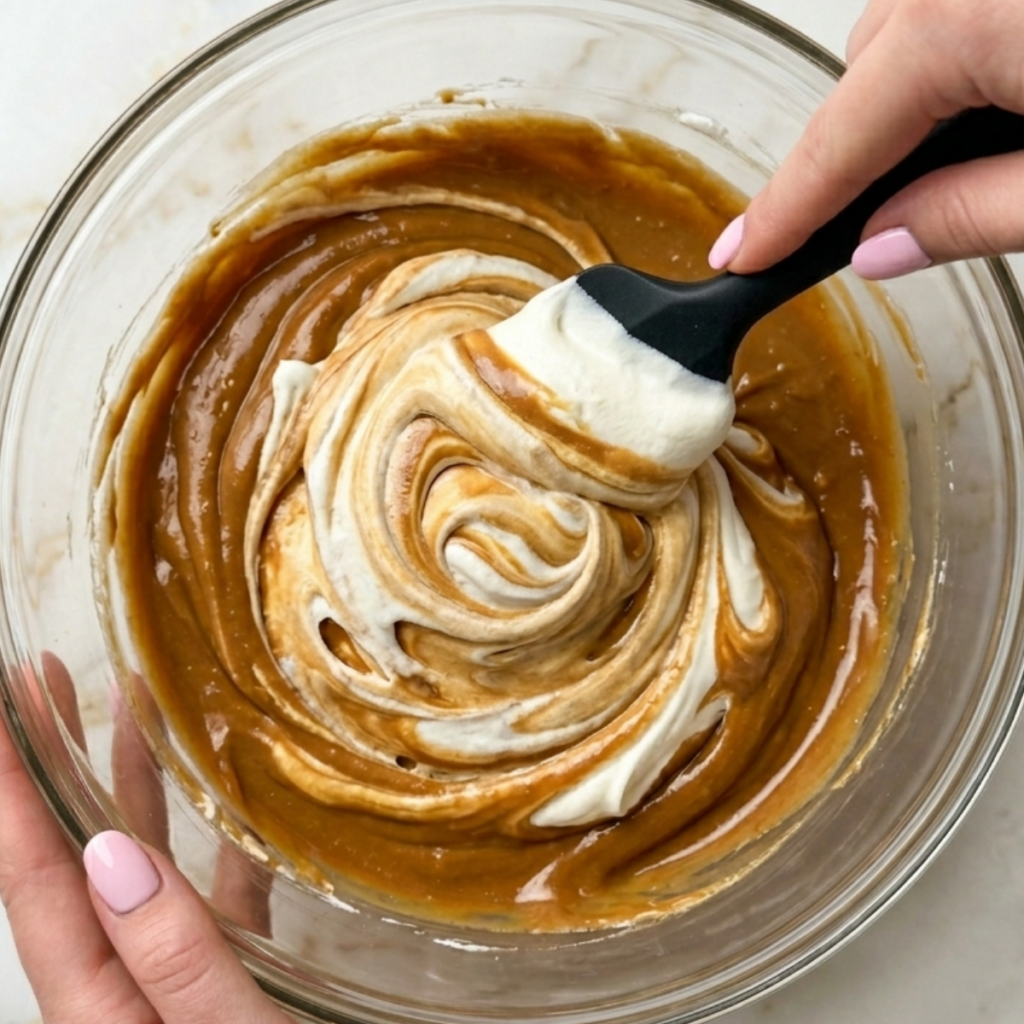
- In a separate chilled bowl, whip the cold double cream to soft peaks, then gently fold it into the cream cheese mixture using a spatula in slow strokes until just combined
- Do not overmix once the cream is folded in; stop as soon as no white streaks remain or the filling will lose its light, mousse-like texture
Step 3: Assemble and Chill
- Spoon the cheesecake filling over the chilled base and spread it evenly with an offset spatula, smoothing the top as flat as possible
- Tap the tin gently on the counter two or three times to release any air bubbles trapped in the filling
- Cover the tin loosely with plastic wrap and refrigerate for a minimum of 6 hours, but overnight is strongly preferred for a perfectly set, cleanly sliceable cheesecake
- Do not rush this step; the cheesecake will look set on the edges before the center is ready, and cutting too early is exactly how you end up with Biscoff soup
Step 4: Add the Topping and Serve
- Warm the Biscoff spread in the microwave for 20 to 30 seconds until just pourable but not hot, then pour it slowly and evenly over the fully set cheesecake
- Use the back of a spoon or a small offset spatula to gently spread the Biscoff topping to the edges, letting it drip slightly over the sides if desired
- Scatter the roughly crushed Biscoff biscuits generously over the top while the spread is still slightly warm so they stick in place
- Refrigerate for another 20 minutes until the topping is set, then carefully release the springform tin, slice with a hot clean knife, and serve
Biscoff Cheesecake Variations
Mia’s “Extra Crumble on Everything” Version
Mia’s relationship with the Biscoff crumble topping is deeply personal. She inspects every slice before anyone is served and redistributes the crumbs with a spoon if she feels the coverage is uneven. For her version, double the crushed biscuit topping to 100g and press half of it into the sides of the cheesecake filling before it sets, then scatter the rest on top after the Biscoff spread goes on. The result is a fully encrusted cheesecake that Mia describes as “how it is supposed to look,” and I have no arguments.
Ben’s “Drizzle Version” Version
Ben discovered that warming the Biscoff spread and drizzling it in lines over a slice looks exactly like what he sees on baking videos online. He now requests this specific presentation every single time. Instead of spreading the topping flat, warm the Biscoff spread slightly more so it is very pourable, then load it into a piping bag or a zip-lock bag with the corner snipped and pipe it in tight back-and-forth lines over each slice right before serving. Ben stands back, tilts his head slightly, and says “perfect” every time. It takes about forty-five seconds and makes him genuinely happy.
The Biscoff Cheesecake Bars Version
On the weekends when I want something easier to serve at a kids’ party or pack into a lunchbox, I make this as bars instead of a round cake. Press the base into a lined 9×13-inch baking dish, spread the filling evenly, chill for six hours, add the Biscoff topping, and slice into neat rectangles. They hold their shape beautifully, travel well, and the kids can pick them up without a plate. Ben called them “portable cheesecake,” and I thought that was a genuinely good product name.
Substitutions
Lotus Biscoff biscuits to digestive biscuits: Digestive biscuits make a more neutral, slightly less sweet base that still works beautifully with the Biscoff filling. The flavor will be less intensely spiced but the texture of the base is almost identical. Add a tablespoon of brown sugar to the crumb mixture to bring a little extra sweetness if you go this route.
Double cream to whipping cream: Whipping cream at 35 percent fat or above whips to the same volume as double cream and sets just as well in a no-bake cheesecake. Heavy whipping cream commonly found in the US works perfectly in place of UK double cream in exactly the same quantity.
Full-fat block cream cheese to mascarpone: Mascarpone gives a slightly richer, silkier texture and a more subtly sweet flavor that pairs beautifully with the Biscoff spread. Use the same quantity and treat it exactly the same way. The cheesecake will be a little denser and richer but absolutely delicious and still sets firmly overnight.
Biscoff spread to peanut butter: Smooth peanut butter in place of Biscoff spread makes a completely different but equally incredible no-bake cheesecake with a salty-sweet filling and peanut butter drizzle. It is not a biscoff cheesecake anymore, but it is genuinely one of the best accidents that can happen in this recipe.
Equipment
- 8-inch springform tin
- Parchment paper for lining the base and sides
- Food processor or zip-lock bag and rolling pin for the crumbs
- Large mixing bowl for the cream cheese filling
- Separate chilled bowl for whipping the double cream
- Hand mixer or stand mixer with whisk attachment
- Rubber spatula for folding
- Offset spatula for smoothing the filling and spreading the topping
- Microwave-safe bowl for warming the Biscoff spread
- Piping bag or zip-lock bag with corner snipped for the drizzle topping
- Hot clean knife for slicing; run it under hot water and wipe dry between each cut
Storage Tips
Make Ahead
- This cheesecake is ideal for making ahead; assemble the whole thing the night before, chill overnight, and add the Biscoff topping the morning of serving for the freshest finish
- The base can be made up to 2 days ahead and kept covered in the fridge so assembly day is even faster
- Make the filling up to 24 hours ahead and store it covered in the fridge before spreading over the base if you want to split the work across two days
Refrigerator
- Store the finished cheesecake covered in the fridge for up to 4 days; the texture actually improves on day two as everything firms up even further
- Cover any cut edges with plastic wrap pressed directly against the exposed filling to prevent the surface from drying out or absorbing fridge odors
- Keep the cheesecake in the springform tin until you are ready to serve the final slices for the best structural support
Freezing
- The cheesecake freezes beautifully for up to 2 months without the Biscoff topping; add the topping fresh after thawing for the best result
- Freeze individual slices on a lined tray until solid, then wrap each one in plastic wrap and store in a freezer bag for easy single-serve portions
- Thaw overnight in the fridge rather than at room temperature; slow thawing preserves the texture and prevents the filling from weeping
Reheating
- This cheesecake is served cold and does not need reheating; serve straight from the fridge for the firmest, cleanest slices
- Let slices sit at room temperature for 10 minutes before eating if you prefer a slightly softer, creamier texture
- If the Biscoff topping has hardened too much in the fridge, let the whole cheesecake sit at room temperature for 15 minutes and it will soften back to a glossy, pourable consistency
Family Secret Worth Sharing
The tip that nobody tells you about no-bake cheesecakes is that the knife you use to slice it matters almost as much as the recipe itself. My mom taught me to run the knife under very hot water, wipe it completely dry, and then make one clean, confident cut without sawing back and forth. Do this between every single slice, and the cheesecake comes out looking like the pictures every time. I showed Ben this technique once, and he watched with the concentration of someone learning a magic trick. He sliced the next piece himself, and it was genuinely perfect. He looked at it for a second and then said, “The hot knife is the secret. “It is. It really is.
Troubleshooting FAQs
My cheesecake is not setting and stays wobbly after chilling. What went wrong?
Almost always the culprit is the type of cream cheese. Spreadable cream cheese from a tub contains more water and stabilizers than block cream cheese and will never set firmly in a no-bake recipe. Make sure you used full-fat block cream cheese at room temperature. If it is still not setting after 8 hours, the filling may have been overmixed after the cream was added, which can break down the structure. Give it a full overnight chill and serve it cold.
The base is crumbling when I slice the cheesecake. How do I fix it?
A crumbly base usually means not enough butter or the base was not pressed firmly enough. The crumb mixture should feel like wet sand and hold together cleanly when you press a handful in your palm. If it is too dry, add an extra 10g of melted butter. Pressing it firmly with the flat bottom of a glass rather than a spoon gives a much more compact, sliceable base.
There are lumps in my filling. How do I avoid them?
Lumps come from cold cream cheese or cream cheese that was not beaten long enough before the other ingredients were added. The cream cheese must be genuinely room temperature, which means out of the fridge for at least an hour. Beat it alone for a full two minutes until it is completely smooth before adding anything else. Any lump in the cream cheese at that stage will still be a lump in the finished cheesecake.
The Biscoff topping is too thick to pour and tears the cheesecake surface. What do I do?
The spread needs to be a little warmer than you might think. Microwave it in 15-second bursts, stirring between each, until it is pourable and moves freely when you tip the bowl. It should be the consistency of warm honey. If it is still tearing the surface, let the cheesecake chill for another hour before adding the topping so the filling underneath is completely firm and can support the weight.
The Dessert That Made Everyone Go Quiet
There is a very specific kind of quiet that happens at a table when a dessert is genuinely good. This cheesecake creates that quiet every single time I serve it. Forks go in, eyes go wide, and nobody says anything for about thirty seconds. Ben eventually breaks it by asking if there is more. Mia is already checking the crumble ratio on her slice. This no-bake biscoff cheesecake sits beautifully alongside our brown butter brookies as one of the most requested things I make when someone needs a dessert that genuinely impresses, and the creamy no-bake format puts it right in the same league as our strawberry chocolate cake for showstopping celebration desserts that are secretly not that hard. For the weeks when the dessert table needs a full spread, this cheesecake next to our healthy brownie recipe covers every single craving in the room without a single complaint from anyone. Some recipes become part of your family’s story quietly and completely, and this one did exactly that for us.
Leave a Reply