Category: Dessert

Simple, indulgent desserts from around the world no-bake treats, quick chocolate fixes, and crowd-pleasing sweets the whole family will devour. Ready in under 30 minutes.

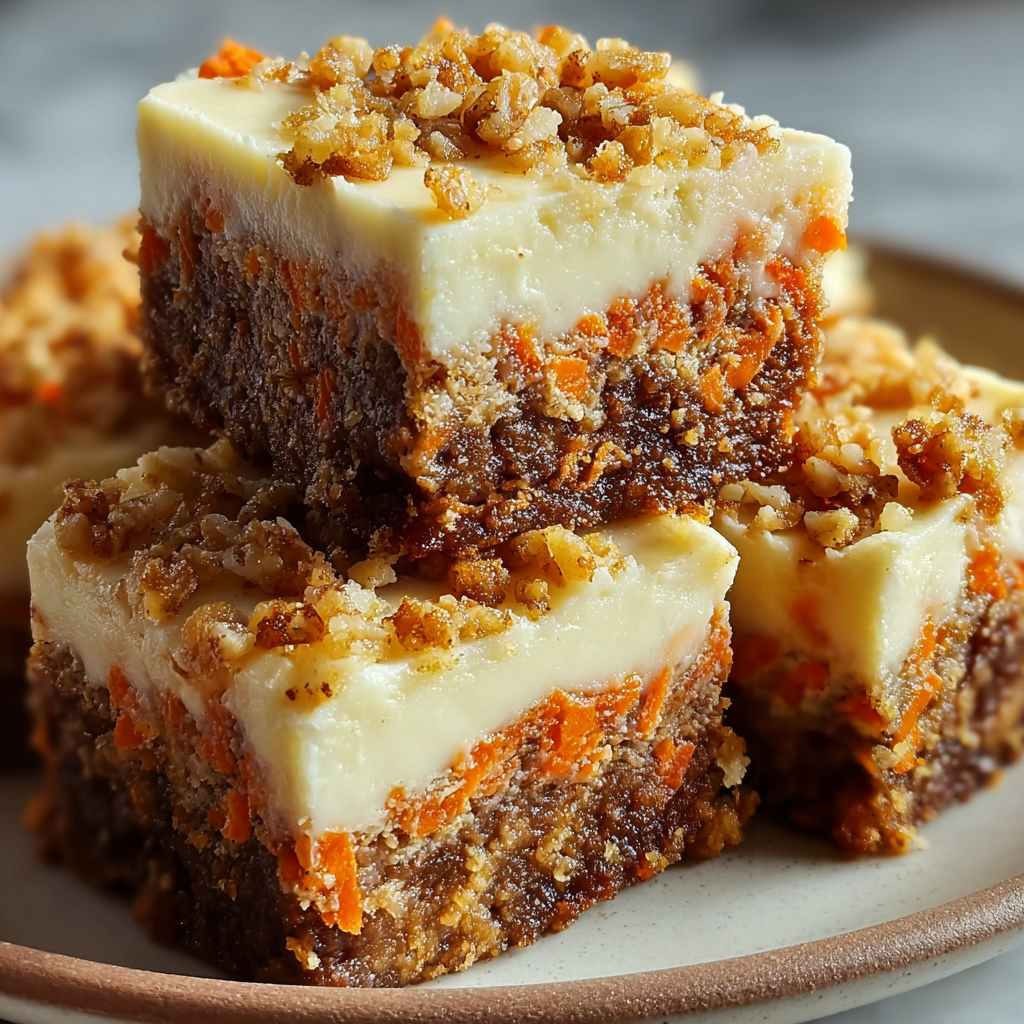
  • Best Carrot Cake Cream Cheese Bars

    Best Carrot Cake Cream Cheese Bars

    I flipped the pan to unmold them, and they landed upside down on the counter instead of the cutting board. Ben stared. Mia said “that still looks good,” before I could process what happened. She was right. I flipped them back, called it rustic, and cut them anyway. That accident is how I learned that great carrot cake cream cheese bars are impossible to ruin.

    Why This Recipe Is Special

    These bars have everything a carrot cake should have: warm spice, tender crumb, sweet shredded carrot, and the kind of cream cheese layer that makes you close your eyes for a second after the first bite. But they are cut into bars instead of sliced as a cake, which means they are easier to serve, easier to transport, and significantly easier to grab off the counter when you walk past. Mia calls them “carrot squares” and Ben calls them “basically cake,” and both of them are correct.

    How To Make Carrot Cake Cream Cheese Bars

    The successful batch happened on a Sunday afternoon when Mia had appointed herself official carrot grater, which she took so seriously she grated her knuckle on the third carrot and then bravely continued with a bandage and tremendous dignity. Ben was mixing the dry ingredients and announcing each spice as he added it like a very small cooking show host. When the batter came together and the cinnamon smell hit the kitchen, both of them stopped what they were doing and just stood there inhaling. I know exactly how they felt.

    The cream cheese layer is where this recipe separates itself from every other carrot cake situation. It goes on top of the batter before baking, which means it bakes into the top of the bar rather than sitting separately as a frosting. The result is a slightly dense, cheesecake-like surface that sets into something between frosting and filling and is frankly the best part of every single bar. Ben said after the first bite that it tasted like “the bakery but at home,” and I wrote that down because it is exactly right.

    Main Ingredients

    For the Carrot Cake Base

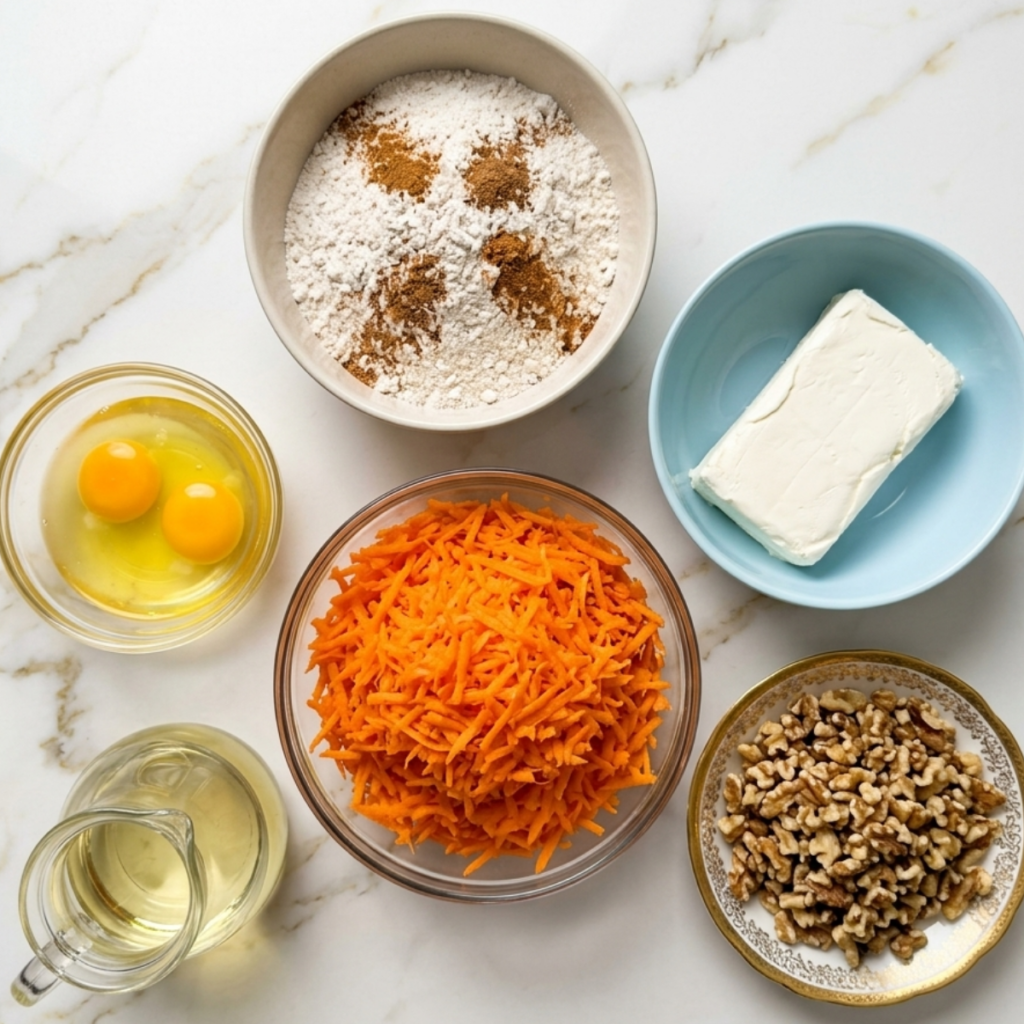
    • 2 cups all-purpose flour – Spoon and level; packed flour makes dense, dry bars
    • 1.5 cups granulated sugar – Sweetness and moisture in the crumb
    • 1 teaspoon baking soda – Gives the bars their lift; make sure yours is fresh
    • 1 teaspoon baking powder – Works alongside the baking soda for an even, tender crumb
    • 1.5 teaspoons cinnamon – The signature warm spice of every good carrot cake
    • 1/2 teaspoon nutmeg – Adds depth alongside the cinnamon; do not skip it
    • 1/4 teaspoon ginger – A small but important layer of warmth in the spice blend
    • 1/2 teaspoon salt – Enhances every other flavor; non-negotiable
    • 3 large eggs, room temperature – Room temperature eggs incorporate more evenly into the batter
    • 3/4 cup neutral oil – Keeps the bars moist for days; vegetable or avocado both work
    • 1 teaspoon vanilla extract – Rounds out all the warm spice notes
    • 1 tablespoon orange zest – The family secret; brightens the spices and lifts the sweetness of the carrots
    • 2 cups freshly grated carrots – Grate fresh from whole carrots; pre-shredded bagged carrots are too dry
    • 1/2 cup chopped walnuts or pecans – Optional but adds a wonderful crunch against the tender crumb

    For the Cream Cheese Layer

    • 8 oz full-fat block cream cheese, room temperature – Block only; spreadable tub cream cheese does not bake properly
    • 1/3 cup granulated sugar – Sweetens the cream cheese layer without making it cloying
    • 1 large egg – Helps the cream cheese layer set into that perfect cheesecake-like texture
    • 1 teaspoon vanilla extract – Essential in the cream cheese layer; brings the whole thing together

    Step-by-Step Instructions

    Step 1: Prepare the Pan and Mix the Dry Ingredients

    • Preheat your oven to 350 degrees F and line a 9×13 inch baking pan with parchment paper, leaving an overhang on the sides to lift the bars out cleanly after baking
    • Whisk together the flour, sugar, baking soda, baking powder, cinnamon, nutmeg, ginger, and salt in a large bowl until completely combined and no lumps remain
    • In a separate bowl, whisk together the eggs, oil, vanilla, and orange zest until smooth and slightly thickened, about 1 minute
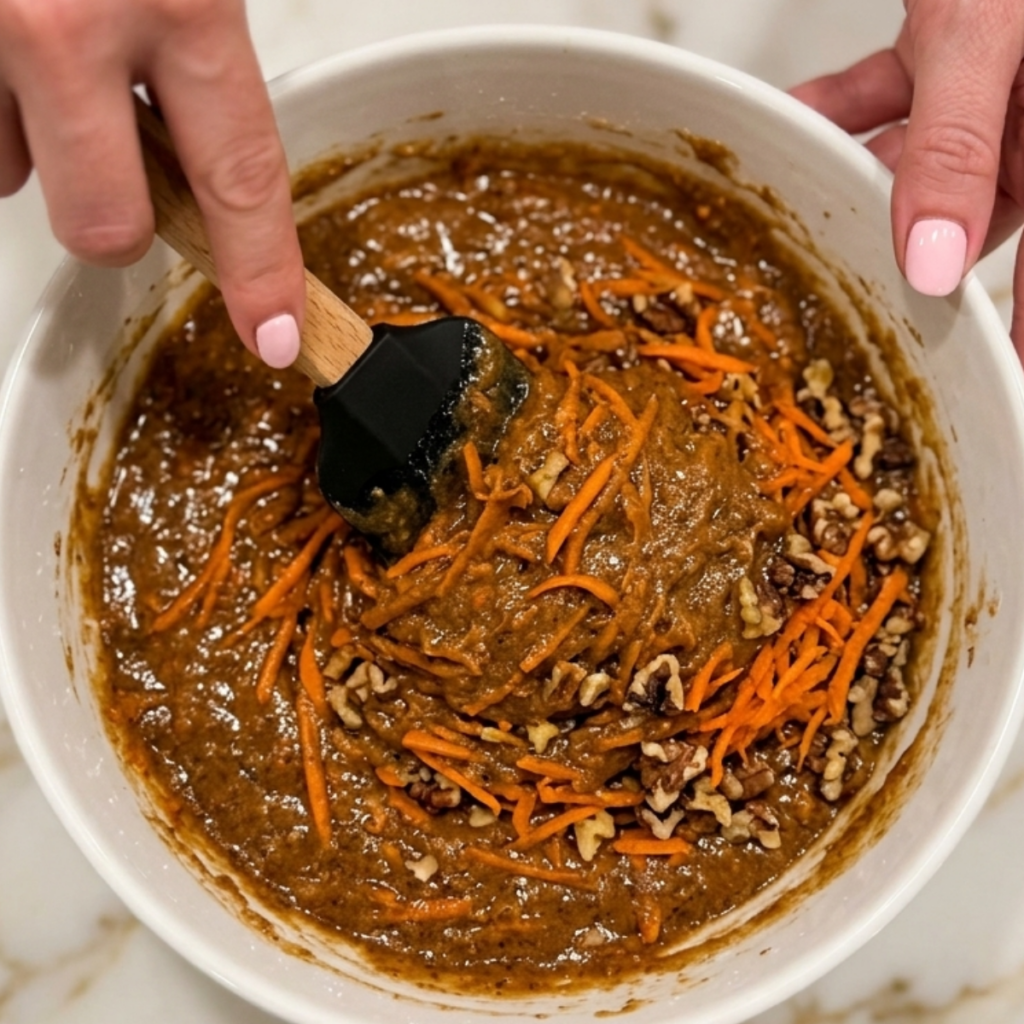
    • Pour the wet ingredients into the dry ingredients and stir until just combined, then fold in the freshly grated carrots and chopped walnuts until evenly distributed

    Step 2: Make the Cream Cheese Layer

    • Beat the room-temperature block cream cheese in a medium bowl with a hand mixer for 2 minutes until completely smooth with absolutely no lumps
    • Add the sugar and beat for another minute until fully incorporated and the mixture looks light and creamy
    • Add the egg and vanilla extract and beat until just combined; do not overbeat at this stage or the cream cheese layer will develop cracks during baking
    • The finished cream cheese mixture should be smooth, pourable, and just thick enough to spread without it sinking into the carrot batter

    Step 3: Layer and Bake

    • Spread the carrot cake batter evenly into the prepared pan, smoothing it all the way to the edges and corners with an offset spatula
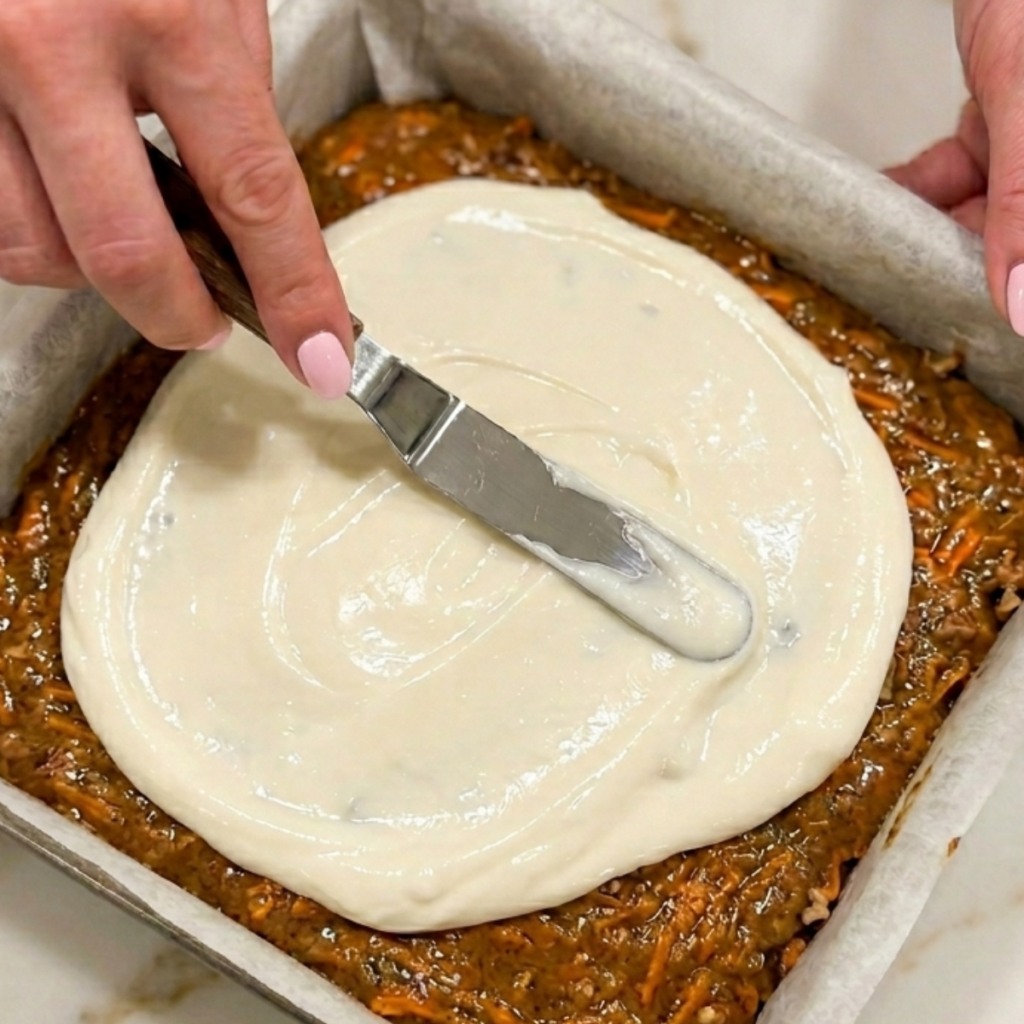
    • Pour the cream cheese mixture gently over the top of the carrot batter and spread it carefully into an even layer using the back of a spoon
    • For a swirled finish, drag a skewer or toothpick through the surface in slow figure-eight motions to marble the two layers slightly before baking
    • Bake for 30 to 35 minutes until the edges are set, the center has just a slight jiggle, and a toothpick inserted in the carrot cake portion comes out with just a few moist crumbs

    Step 4: Cool, Chill, and Cut

    • Let the bars cool completely in the pan at room temperature for at least one hour before transferring to the fridge
    • Refrigerate for at least 2 hours until the cream cheese layer is fully set and firm enough to cut cleanly; overnight chilling gives the best, sharpest slices
    • Lift the chilled slab out of the pan using the parchment overhang and place it on a cutting board
    • Cut into bars using a hot, clean knife wiped dry between each cut for clean, professional-looking edges that do not drag the cream cheese layer

    Carrot Cake Cream Cheese Bars Variations

    Mia’s “Extra Crumble On Top” Version

    After the upside-down counter incident, Mia decided that the bottom of the bars actually looked better than the top and that we should add something crunchy on the cream cheese side to make it more interesting. She was not wrong. For her version, mix together two tablespoons of brown sugar, two tablespoons of finely chopped walnuts, and a pinch of cinnamon, then scatter it over the cream cheese layer right before the pan goes into the oven. It bakes into a little caramelized crumble on the surface that makes every bar look and taste exactly like it came from a bakery case. Mia takes full credit for this and I let her have it completely.

    Ben’s “Raisin Included” Version

    Ben has very strong pro-raisin opinions that Mia finds deeply offensive. He asks for raisins in every carrot cake situation with the calm confidence of someone who knows they are right. For his version, fold half a cup of golden raisins into the carrot batter alongside the walnuts. The raisins plump up during baking and add little pockets of sweetness that Ben describes as “the best part.” Mia picks every single one out of her bar with surgical precision and puts them on Ben’s plate, and he eats them without comment. This is their arrangement.

    The Easter Celebration Version

    Every Easter these bars appear on our table decorated with a little extra love. Press mini candy-coated eggs or small decorative sugar carrots into the cream cheese layer right before it goes in the oven, and dust the finished chilled bars with a small amount of powdered sugar. Cut into smaller squares rather than large bars for a party platter presentation. They travel beautifully in a container layered between parchment, they hold up well at room temperature for a couple of hours, and they disappear from the table faster than anything else I bring.

    Substitutions

    All-purpose flour to a 1:1 gluten-free baking flour: A good quality 1:1 gluten-free baking blend works well here since the carrots and oil keep the bars moist regardless of the flour type. The texture will be very slightly denser, but the flavor is identical. Bob’s Red Mill 1:1 is the one I have tested, and it holds together cleanly when cut.

    Neutral oil to melted coconut oil: Refined coconut oil (the kind without a strong coconut flavor) substitutes in the same quantity with almost no difference in the finished bar. Unrefined coconut oil adds a subtle tropical note that actually works surprisingly well alongside the warm spices in the batter.

    Granulated sugar to brown sugar: Replacing the granulated sugar with brown sugar in the carrot base gives a deeper, more molasses-forward flavor and a slightly denser, moister crumb. The bars will be a shade darker in color and the spice flavors will be richer and more pronounced. This is my personal preference when I have the choice.

    Walnuts to raisins, pecans, or shredded coconut: Any mix-in works in the carrot base. Pecans are buttery and slightly sweeter than walnuts. Shredded sweetened coconut adds chewiness and tropical sweetness. Golden raisins add pockets of fruit sweetness throughout. Use whatever combination your family loves or leave the mix-ins out entirely for a cleaner bar.

    Equipment

    • 9×13 inch baking pan
    • Parchment paper with overhang on both sides for easy lifting
    • Large mixing bowl for the carrot batter
    • Medium mixing bowl for the cream cheese layer
    • Hand mixer or stand mixer for the cream cheese
    • Box grater for the fresh carrots
    • Offset spatula for spreading both layers evenly
    • Skewer or toothpick for the optional marble swirl
    • Whisk for the dry ingredients and the wet ingredients
    • Hot clean knife for slicing; wipe dry between every cut
    • Wire cooling rack for cooling the pan before refrigerating

    Storage Tips

    Make Ahead

    • These bars are genuinely better the next day once the cream cheese layer has fully set and the spices in the carrot base have had time to deepen overnight
    • Bake the day before serving, cool completely, refrigerate overnight uncut, and slice fresh the morning you plan to serve for the cleanest presentation
    • The grated carrots can be prepared a day ahead and stored in a sealed container in the fridge to save time on baking day

    Refrigerator

    • Store cut bars in an airtight container in the fridge for up to 5 days; the cream cheese layer makes refrigeration non-negotiable
    • Layer the bars between sheets of parchment paper to prevent the cream cheese tops from sticking together
    • Let bars sit at room temperature for 10 to 15 minutes before serving; the texture of both the cake layer and the cream cheese improves significantly at room temperature

    Freezing

    • Freeze individual cut bars wrapped tightly in plastic wrap and then place them in a freezer bag for up to 2 months
    • Thaw overnight in the fridge still wrapped; unwrap before serving so condensation does not collect on the cream cheese surface
    • Do not freeze the uncut slab, as the cream cheese layer can develop a slightly grainy texture when thawed in a large mass

    Reheating

    • These bars are served at room temperature or cold and do not need reheating
    • Remove from the fridge 15 minutes before serving for the best texture; cold cream cheese is firmer and the bar flavors open up beautifully at room temperature
    • A lightly chilled bar with a cup of tea on a Tuesday afternoon is one of the genuinely best things about having made a full batch of these

    Family Secret Worth Sharing

    My mom always added a tablespoon of orange zest to her carrot cake batter and I spent years thinking it was an optional flourish until I left it out one Easter and the whole family immediately noticed something was off. Nobody could name what was missing but everyone agreed something was. The orange zest does not make the bars taste like orange; it makes them taste more like themselves. It brightens the spices, lifts the sweetness of the carrots, and gives the whole thing a quality that is hard to describe but instantly recognizable when it is there. I add it every time now and I added it to this recipe without writing it in the main ingredients list because I wanted to tell you about it here instead, the way my mom would have told me. Add it. A whole tablespoon. You will know exactly what I mean after the first bite.

    Troubleshooting FAQs

    The cream cheese layer cracked during baking. What went wrong?
    Cracking in a baked cream cheese layer almost always comes from overmixing after the egg is added or from too high an oven temperature. Once the egg goes into the cream cheese mixture, mix only until just combined. Also make sure your oven is actually at 350 degrees F and not running hotter; an oven thermometer is worth having for any cream cheese baking. Small hairline cracks are normal and will not affect the flavor or texture at all.

    My bars are sinking in the middle after baking. What happened?
    A sunken center usually means the bars were underbaked or the oven door was opened too early. Do not open the oven until at least 25 minutes have passed. The cream cheese layer jiggles more than the carrot base when done, which can look alarming, but check the carrot portion with a toothpick rather than judging by the cream cheese. Let the bars cool completely before refrigerating; cutting into a warm or lukewarm bar will always look underdone in the center.

    The bars are crumbling when I try to cut them. How do I fix it?
    Two things cause crumbly bars: not chilling long enough before cutting and using a cold knife. The cream cheese layer needs to be completely firm before you make the first cut, which means at least 2 hours in the fridge and ideally overnight. Run your knife under hot water, wipe it completely dry, and cut with one clean downward press without sawing back and forth. Wipe and reheat the knife between every single cut.

    Can I use pre-shredded carrots from the bag?
    The short answer is technically yes but really no. Bagged pre-shredded carrots are much drier than freshly grated carrots and will make the bars noticeably denser and less moist. They are also cut thicker than a box grater produces, which means they do not soften as fully during baking. Freshly grated carrots take about three minutes and make a meaningful difference in the final texture. It is worth it.

    The Bars That Survived the Counter and Became a Family Tradition

    The upside-down counter incident is now a story we tell every time I make these, usually while Ben is reaching for his second bar and Mia is already planning which corner piece she wants. These carrot cake cream cheese bars have become one of our most beloved easy baked dessert recipes in the whole repertoire, sitting comfortably alongside our strawberry chocolate cake as a celebration dessert that feels genuinely special without being genuinely complicated. For the weeks when the dessert spread needs to cover every kind of craving, these bars next to our healthy brownie recipe give you something for everyone at the table with almost no overlap and absolutely no complaints. Some recipes arrive as accidents and stay as traditions, and this one has been both from the very first upside-down batch.

  • 3 Secrets to the Best Biscoff Cheesecake

    3 Secrets to the Best Biscoff Cheesecake

    I forgot to chill it long enough and served what was essentially Biscoff soup in a crust. Ben poked it with his spoon, and it rippled. Mia said, “I think it is still alive.” I put it back in the fridge, waited four more hours, and sliced it again. That second attempt is what taught me that a perfect biscoff cheesecake is entirely about patience.

    Why This Recipe Is Special

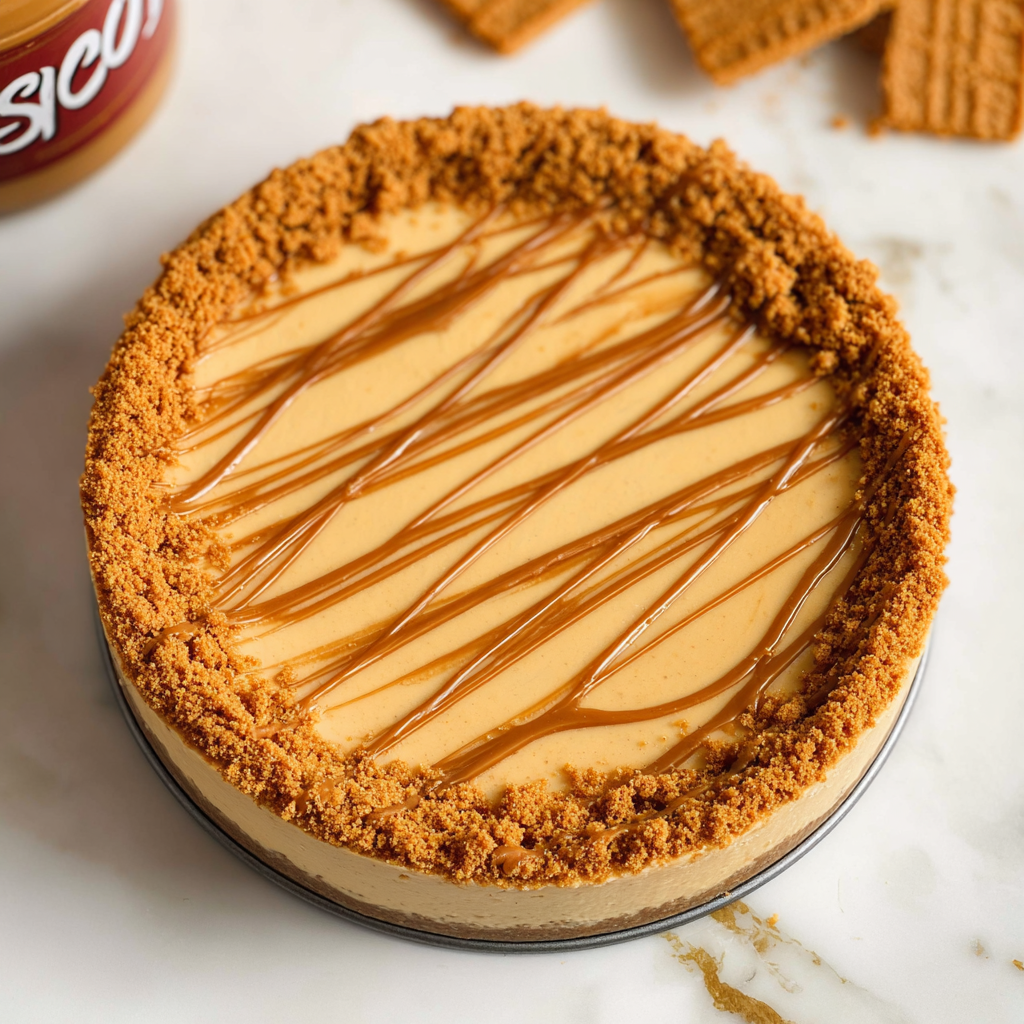
    No baking. No water bath. No oven anxiety. This no-bake biscoff cheesecake has a buttery Lotus Biscoff crumb base, a silky cream cheese filling swirled with Biscoff spread, and a glossy caramelized cookie butter layer on top that makes every single slice look like it came from a bakery. It is the dessert I bring to every gathering and the one people ask me for every time. Mia calls it “the brown one” and requests it for her birthday every year. I have stopped suggesting alternatives.

    How To Make Biscoff Cheesecake

    The version that finally worked happened on a Friday night when both kids were supposed to be in bed and were absolutely not in bed. Mia was sitting on the counter crushing Biscoff biscuits in a zip-lock bag with the enthusiasm of someone who had been waiting for this their whole life. Ben was reading the Biscoff spread jar like it was a novel, announcing the ingredients out loud in a very serious voice. When I pressed the base into the tin and the whole kitchen smelled like caramelized spiced cookies, both of them immediately asked if they could lick the spatula. There were two spatulas. I had planned ahead.

    The lesson that fixed everything was about the cream cheese. It has to be full-fat block cream cheese, completely at room temperature, beaten until smooth before anything else goes in. Cold or low-fat cream cheese never sets properly in a no-bake cheesecake. It stays soft, grainy, or wobbly no matter how long you chill it. Ben learned these lessons the hard way when he helped me with batch number two and accidentally used spreadable cream cheese from the tub. We waited six hours for that one to firm up. It did not. Full-fat block only, every single time.

    Main Ingredients

    For the Biscoff Base

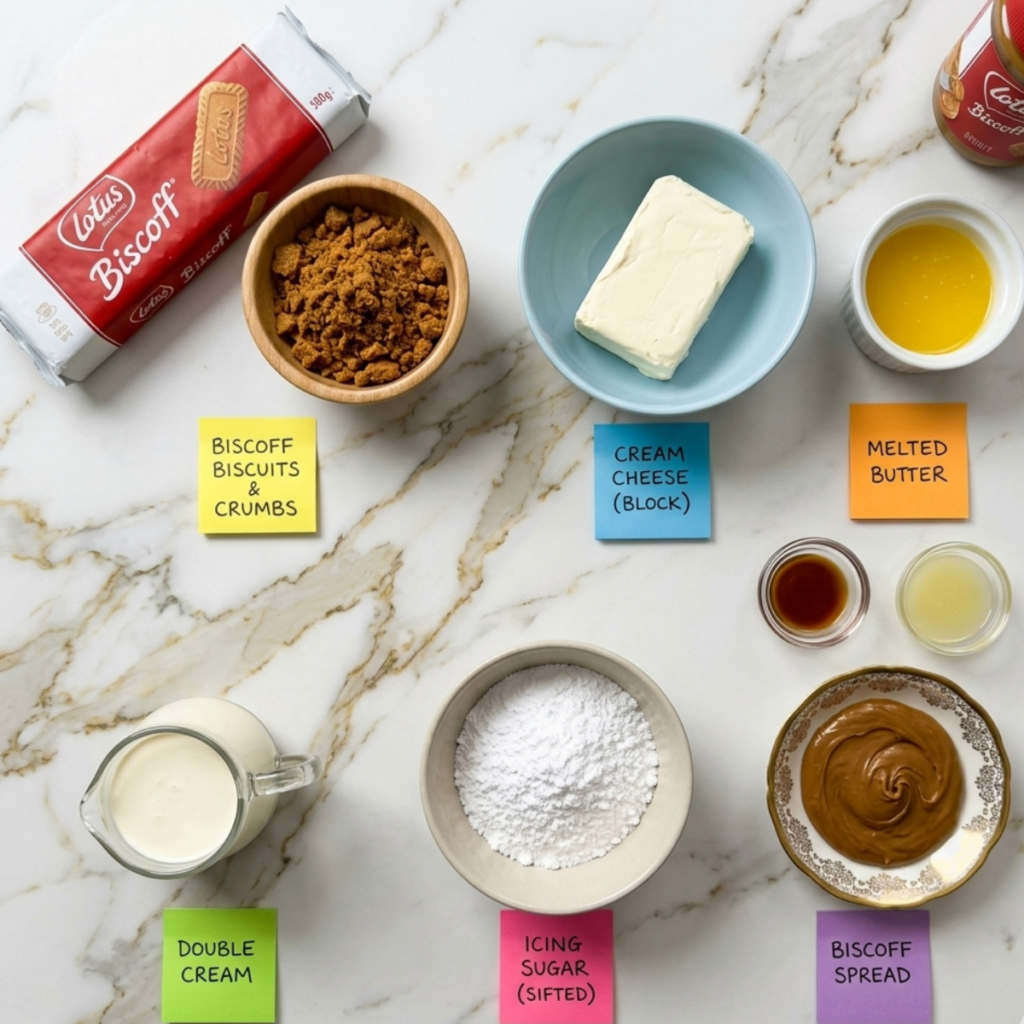
    • 250g Lotus Biscoff biscuits (about 40 biscuits) – Crushed to fine crumbs; a zip-lock bag and a rolling pin work perfectly, and the kids love this job
    • 80g unsalted butter, melted – Binds the crumbs into a firm, sliceable base; salted butter works fine if that is what you have

    For the Cheesecake Filling

    • 600g full-fat block cream cheese, room temperature – Block cream cheese only; spreadable tub cream cheese will not set properly in a no-bake recipe
    • 100g icing sugar, sifted – Sweetens the filling and helps with structure; sift it to avoid lumps in the final texture
    • 300ml double cream, cold – Whipped into the filling for volume and stability; must be cold to whip properly
    • 150g Biscoff spread, room temperature – Folded into the filling for that signature caramelized cookie flavor throughout every bite
    • 1 teaspoon vanilla extract – Rounds out the filling flavor and complements the Biscoff beautifully
    • 1 tablespoon lemon juice – A small amount cuts through the richness and brightens the whole filling without tasting lemony

    For the Biscoff Topping

    • 150g Biscoff spread, warmed slightly – Poured over the set cheesecake for a smooth, glossy caramel-like topping that firms up in the fridge
    • 50g Biscoff biscuits, roughly crushed – Scattered over the top for texture and that beautiful golden crumb finish visible in every slice

    Step-by-Step Instructions

    Step 1: Make the Biscoff Base

    • Crush the Biscoff biscuits into fine crumbs using a food processor or a zip-lock bag and rolling pin until no large pieces remain
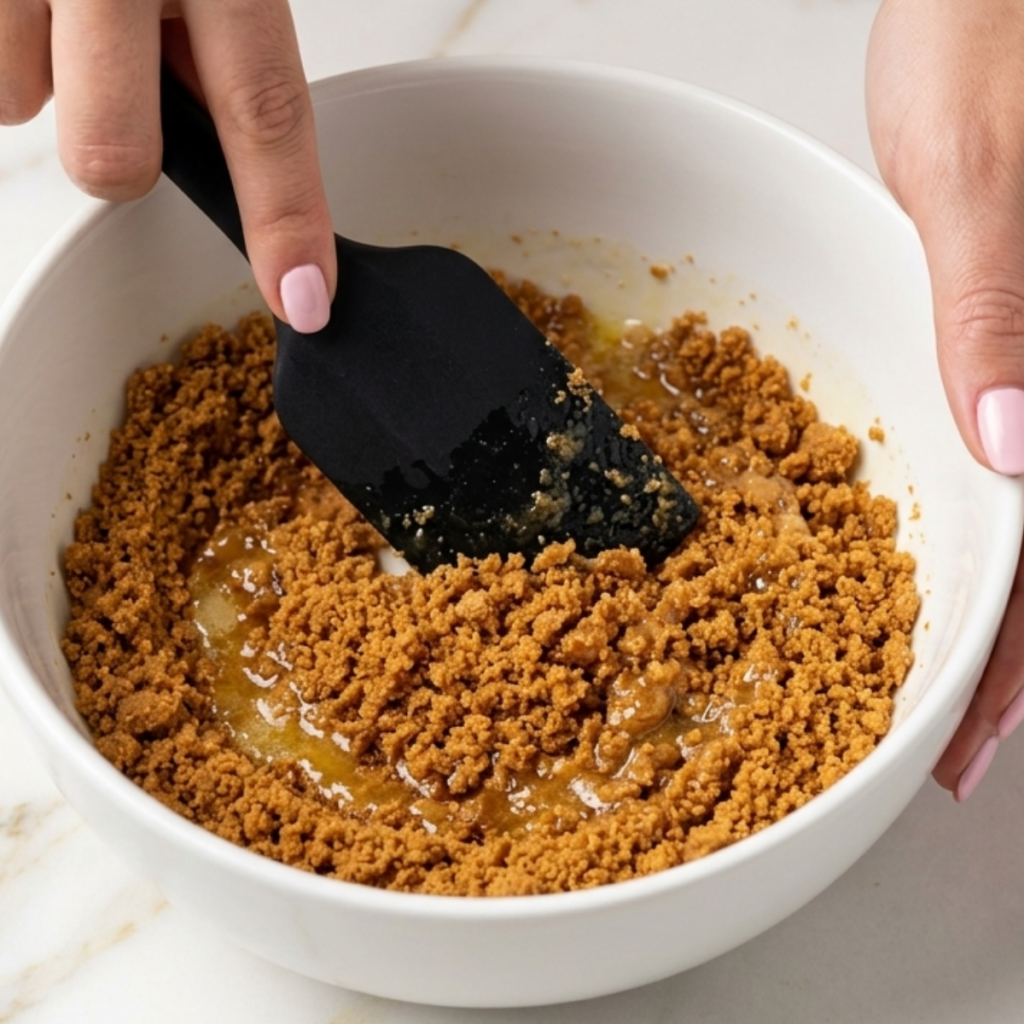
    • Pour the melted butter over the crumbs and mix thoroughly until every crumb is coated and the mixture holds together when pressed between your fingers
    • Press the mixture firmly and evenly into the base of a lined 8-inch springform pan using the back of a spoon or the bottom of a glass
    • Refrigerate the base for at least 30 minutes while you prepare the filling so it is firm enough to hold the weight of the cheesecake

    Step 2: Make the Cheesecake Filling

    • Beat the room-temperature cream cheese with the sifted icing sugar and vanilla extract in a large bowl until completely smooth and lump-free, about 2 to 3 minutes
    • Add the lemon juice and the Biscoff spread and beat again until fully combined and the mixture is glossy and uniform in color
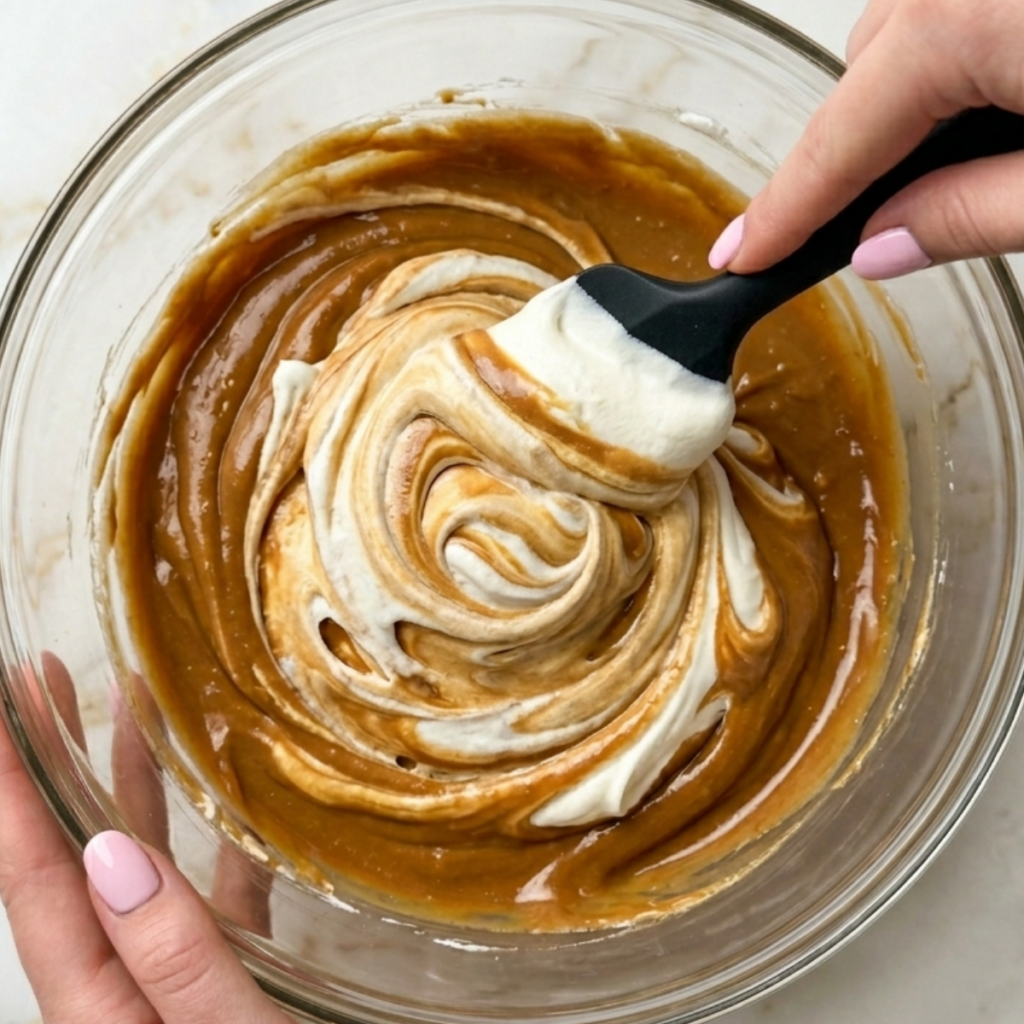
    • In a separate chilled bowl, whip the cold double cream to soft peaks, then gently fold it into the cream cheese mixture using a spatula in slow strokes until just combined
    • Do not overmix once the cream is folded in; stop as soon as no white streaks remain or the filling will lose its light, mousse-like texture

    Step 3: Assemble and Chill

    • Spoon the cheesecake filling over the chilled base and spread it evenly with an offset spatula, smoothing the top as flat as possible
    • Tap the tin gently on the counter two or three times to release any air bubbles trapped in the filling
    • Cover the tin loosely with plastic wrap and refrigerate for a minimum of 6 hours, but overnight is strongly preferred for a perfectly set, cleanly sliceable cheesecake
    • Do not rush this step; the cheesecake will look set on the edges before the center is ready, and cutting too early is exactly how you end up with Biscoff soup

    Step 4: Add the Topping and Serve

    • Warm the Biscoff spread in the microwave for 20 to 30 seconds until just pourable but not hot, then pour it slowly and evenly over the fully set cheesecake
    • Use the back of a spoon or a small offset spatula to gently spread the Biscoff topping to the edges, letting it drip slightly over the sides if desired
    • Scatter the roughly crushed Biscoff biscuits generously over the top while the spread is still slightly warm so they stick in place
    • Refrigerate for another 20 minutes until the topping is set, then carefully release the springform tin, slice with a hot clean knife, and serve

    Biscoff Cheesecake Variations

    Mia’s “Extra Crumble on Everything” Version

    Mia’s relationship with the Biscoff crumble topping is deeply personal. She inspects every slice before anyone is served and redistributes the crumbs with a spoon if she feels the coverage is uneven. For her version, double the crushed biscuit topping to 100g and press half of it into the sides of the cheesecake filling before it sets, then scatter the rest on top after the Biscoff spread goes on. The result is a fully encrusted cheesecake that Mia describes as “how it is supposed to look,” and I have no arguments.

    Ben’s “Drizzle Version” Version

    Ben discovered that warming the Biscoff spread and drizzling it in lines over a slice looks exactly like what he sees on baking videos online. He now requests this specific presentation every single time. Instead of spreading the topping flat, warm the Biscoff spread slightly more so it is very pourable, then load it into a piping bag or a zip-lock bag with the corner snipped and pipe it in tight back-and-forth lines over each slice right before serving. Ben stands back, tilts his head slightly, and says “perfect” every time. It takes about forty-five seconds and makes him genuinely happy.

    The Biscoff Cheesecake Bars Version

    On the weekends when I want something easier to serve at a kids’ party or pack into a lunchbox, I make this as bars instead of a round cake. Press the base into a lined 9×13-inch baking dish, spread the filling evenly, chill for six hours, add the Biscoff topping, and slice into neat rectangles. They hold their shape beautifully, travel well, and the kids can pick them up without a plate. Ben called them “portable cheesecake,” and I thought that was a genuinely good product name.

    Substitutions

    Lotus Biscoff biscuits to digestive biscuits: Digestive biscuits make a more neutral, slightly less sweet base that still works beautifully with the Biscoff filling. The flavor will be less intensely spiced but the texture of the base is almost identical. Add a tablespoon of brown sugar to the crumb mixture to bring a little extra sweetness if you go this route.

    Double cream to whipping cream: Whipping cream at 35 percent fat or above whips to the same volume as double cream and sets just as well in a no-bake cheesecake. Heavy whipping cream commonly found in the US works perfectly in place of UK double cream in exactly the same quantity.

    Full-fat block cream cheese to mascarpone: Mascarpone gives a slightly richer, silkier texture and a more subtly sweet flavor that pairs beautifully with the Biscoff spread. Use the same quantity and treat it exactly the same way. The cheesecake will be a little denser and richer but absolutely delicious and still sets firmly overnight.

    Biscoff spread to peanut butter: Smooth peanut butter in place of Biscoff spread makes a completely different but equally incredible no-bake cheesecake with a salty-sweet filling and peanut butter drizzle. It is not a biscoff cheesecake anymore, but it is genuinely one of the best accidents that can happen in this recipe.

    Equipment

    • 8-inch springform tin
    • Parchment paper for lining the base and sides
    • Food processor or zip-lock bag and rolling pin for the crumbs
    • Large mixing bowl for the cream cheese filling
    • Separate chilled bowl for whipping the double cream
    • Hand mixer or stand mixer with whisk attachment
    • Rubber spatula for folding
    • Offset spatula for smoothing the filling and spreading the topping
    • Microwave-safe bowl for warming the Biscoff spread
    • Piping bag or zip-lock bag with corner snipped for the drizzle topping
    • Hot clean knife for slicing; run it under hot water and wipe dry between each cut

    Storage Tips

    Make Ahead

    • This cheesecake is ideal for making ahead; assemble the whole thing the night before, chill overnight, and add the Biscoff topping the morning of serving for the freshest finish
    • The base can be made up to 2 days ahead and kept covered in the fridge so assembly day is even faster
    • Make the filling up to 24 hours ahead and store it covered in the fridge before spreading over the base if you want to split the work across two days

    Refrigerator

    • Store the finished cheesecake covered in the fridge for up to 4 days; the texture actually improves on day two as everything firms up even further
    • Cover any cut edges with plastic wrap pressed directly against the exposed filling to prevent the surface from drying out or absorbing fridge odors
    • Keep the cheesecake in the springform tin until you are ready to serve the final slices for the best structural support

    Freezing

    • The cheesecake freezes beautifully for up to 2 months without the Biscoff topping; add the topping fresh after thawing for the best result
    • Freeze individual slices on a lined tray until solid, then wrap each one in plastic wrap and store in a freezer bag for easy single-serve portions
    • Thaw overnight in the fridge rather than at room temperature; slow thawing preserves the texture and prevents the filling from weeping

    Reheating

    • This cheesecake is served cold and does not need reheating; serve straight from the fridge for the firmest, cleanest slices
    • Let slices sit at room temperature for 10 minutes before eating if you prefer a slightly softer, creamier texture
    • If the Biscoff topping has hardened too much in the fridge, let the whole cheesecake sit at room temperature for 15 minutes and it will soften back to a glossy, pourable consistency

    Family Secret Worth Sharing

    The tip that nobody tells you about no-bake cheesecakes is that the knife you use to slice it matters almost as much as the recipe itself. My mom taught me to run the knife under very hot water, wipe it completely dry, and then make one clean, confident cut without sawing back and forth. Do this between every single slice, and the cheesecake comes out looking like the pictures every time. I showed Ben this technique once, and he watched with the concentration of someone learning a magic trick. He sliced the next piece himself, and it was genuinely perfect. He looked at it for a second and then said, “The hot knife is the secret. “It is. It really is.

    Troubleshooting FAQs

    My cheesecake is not setting and stays wobbly after chilling. What went wrong?
    Almost always the culprit is the type of cream cheese. Spreadable cream cheese from a tub contains more water and stabilizers than block cream cheese and will never set firmly in a no-bake recipe. Make sure you used full-fat block cream cheese at room temperature. If it is still not setting after 8 hours, the filling may have been overmixed after the cream was added, which can break down the structure. Give it a full overnight chill and serve it cold.

    The base is crumbling when I slice the cheesecake. How do I fix it?
    A crumbly base usually means not enough butter or the base was not pressed firmly enough. The crumb mixture should feel like wet sand and hold together cleanly when you press a handful in your palm. If it is too dry, add an extra 10g of melted butter. Pressing it firmly with the flat bottom of a glass rather than a spoon gives a much more compact, sliceable base.

    There are lumps in my filling. How do I avoid them?
    Lumps come from cold cream cheese or cream cheese that was not beaten long enough before the other ingredients were added. The cream cheese must be genuinely room temperature, which means out of the fridge for at least an hour. Beat it alone for a full two minutes until it is completely smooth before adding anything else. Any lump in the cream cheese at that stage will still be a lump in the finished cheesecake.

    The Biscoff topping is too thick to pour and tears the cheesecake surface. What do I do?
    The spread needs to be a little warmer than you might think. Microwave it in 15-second bursts, stirring between each, until it is pourable and moves freely when you tip the bowl. It should be the consistency of warm honey. If it is still tearing the surface, let the cheesecake chill for another hour before adding the topping so the filling underneath is completely firm and can support the weight.

    The Dessert That Made Everyone Go Quiet

    There is a very specific kind of quiet that happens at a table when a dessert is genuinely good. This cheesecake creates that quiet every single time I serve it. Forks go in, eyes go wide, and nobody says anything for about thirty seconds. Ben eventually breaks it by asking if there is more. Mia is already checking the crumble ratio on her slice. This no-bake biscoff cheesecake sits beautifully alongside our brown butter brookies as one of the most requested things I make when someone needs a dessert that genuinely impresses, and the creamy no-bake format puts it right in the same league as our strawberry chocolate cake for showstopping celebration desserts that are secretly not that hard. For the weeks when the dessert table needs a full spread, this cheesecake next to our healthy brownie recipe covers every single craving in the room without a single complaint from anyone. Some recipes become part of your family’s story quietly and completely, and this one did exactly that for us.

  • 5-Minute Creamy Banana Chamomile Tea Smoothie

    5-Minute Creamy Banana Chamomile Tea Smoothie

    I steeped four tea bags instead of one because I misread my own handwriting, and both kids were asleep on the couch by six. Ben did not even finish his. Mia said it tasted “like a hug from a flower” right before her eyes closed. Once I dialed back the chamomile, this banana chamomile tea smoothie became the calmest, creamiest afternoon drink in our house.

    Why This Recipe Is Special

    Most smoothies are about energy. This one is about the opposite. Chamomile is naturally calming, banana adds a creamy sweetness that makes the whole drink feel like dessert, and a little honey pulls everything together into something that feels genuinely special rather than just healthy. It is the smoothie I make on school pickup days when the afternoon is loud and everyone needs ten minutes of quiet. Mia now calls it the “flower smoothie” and asks for it specifically when she has had a big-feelings kind of day.

    How To Make Banana Chamomile Tea Smoothie

    The version that worked was a Thursday afternoon situation that started with me trying to use up two very ripe bananas before they turned into banana bread, whether I wanted them to or not. Mia was drawing at the kitchen table, and Ben was doing that thing where he lies on the floor for no reason and stares at the ceiling. When I started brewing the chamomile and that soft floral smell filled the kitchen, Mia looked up from her drawing and said, “Are we having tea?” I told her we were having a smoothie. She considered this for a moment and then said, “That is better than tea.” High praise from a six-year-old.

    The thing that changed this from good to something genuinely special was brewing the tea strong but not bitter and then chilling it completely before it went into the blender. Warm liquid in a smoothie makes everything go thin and watery almost immediately. Cold-brewed chamomile keeps the texture thick, creamy, and properly cold all the way through. Ben figured this out when he made a batch himself one afternoon and used the tea still hot. He handed it to me, watched me take a sip, and before I could say anything, he said, “I know. It needs to be cold.” He was right. He always knows.

    Main Ingredients

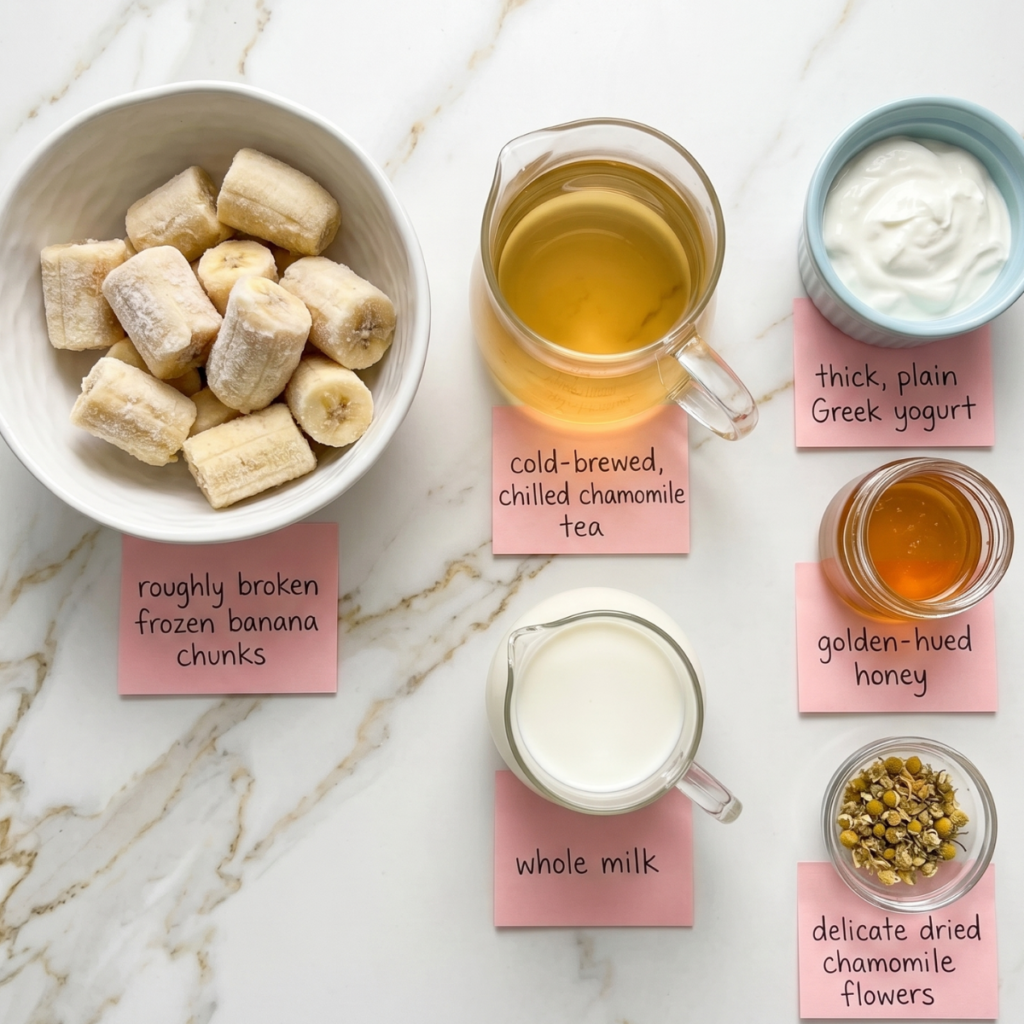
    • 2 ripe bananas, frozen – Frozen bananas are the key to a thick, creamy texture without needing ice cream; peel them before freezing
    • 1 cup brewed chamomile tea, chilled – Brew with 1 to 2 tea bags in 1 cup of hot water for 5 minutes, then cool completely before using
    • 1/2 cup whole milk or oat milk – Whole milk gives a richer, creamier result; oat milk adds a subtle sweetness that works beautifully with the chamomile
    • 2 tablespoons honey – Raw honey adds warmth and depth; adjust to your preferred sweetness level
    • 1/2 teaspoon vanilla extract – Rounds out the floral chamomile notes and adds a warm bakery quality to the whole drink
    • 1/4 teaspoon cinnamon – Just a pinch; adds warmth without competing with the chamomile
    • 1/2 cup plain Greek yogurt – Optional but adds creaminess, protein, and a slight tang that balances the sweetness
    • Pinch of salt – A tiny pinch enhances every other flavor in the smoothie; do not skip it
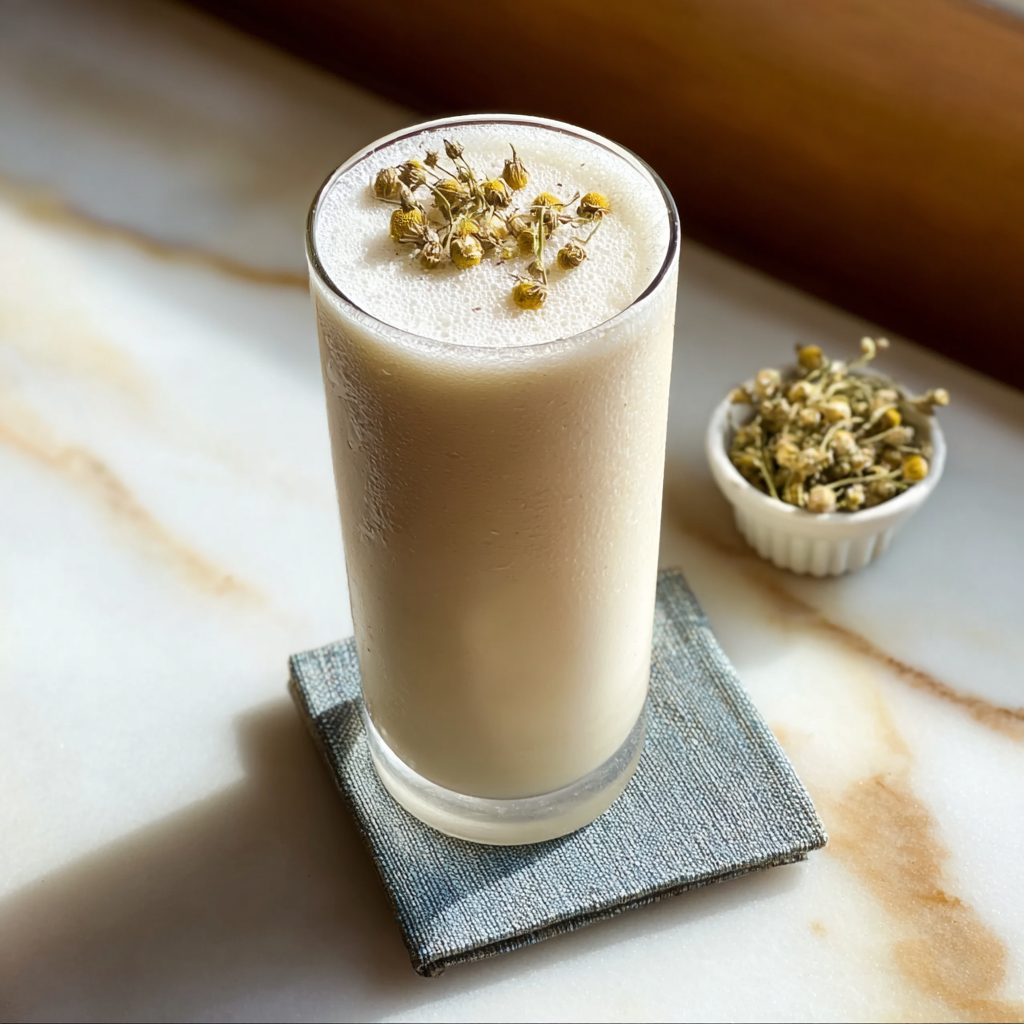
    • Dried chamomile flowers for garnish – Optional but makes the whole glass look beautiful and tells everyone exactly what they are about to drink

    Step-by-Step Instructions

    Step 1: Brew and Chill the Chamomile Tea

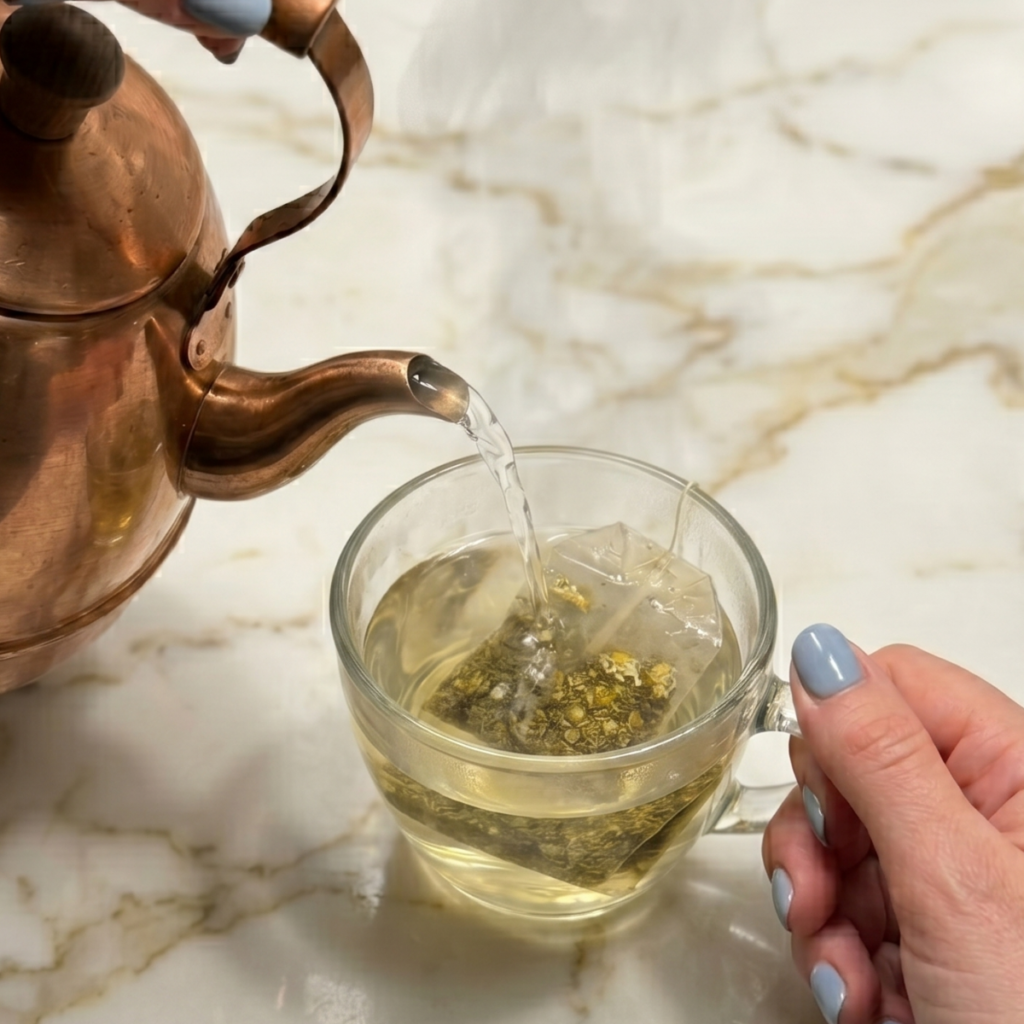
    • Bring 1 cup of water to just below boiling, around 200 degrees F, and steep 1 to 2 chamomile tea bags for exactly 5 minutes
    • Remove the tea bags without squeezing them to avoid any bitterness and stir in the honey while the tea is still warm so it dissolves completely
    • Let the tea cool to room temperature, then transfer it to the fridge for at least 30 minutes until fully cold before using
    • For a faster chill, pour the brewed tea over a small bowl of ice and stir for about 2 minutes until cold; do not add this ice to the blender as it will water down the smoothie

    Step 2: Prep the Bananas

    • If your bananas are not already frozen, peel them, break into chunks, place on a lined tray, and freeze for at least 2 hours before blending
    • Ripe bananas with plenty of brown spots give the best flavor and sweetness; under-ripe bananas make the smoothie taste starchy and flat
    • Frozen bananas straight from the freezer give the thickest, coldest, most ice-cream-like texture; do not thaw them before they go into the blender
    • If you do not have frozen bananas, add 4 to 5 ice cubes to the blender alongside fresh bananas, but the texture will be slightly thinner

    Step 3: Blend Until Smooth

    • Add the frozen banana chunks, chilled chamomile tea, milk, vanilla, cinnamon, Greek yogurt if using, and the pinch of salt to the blender
    • Blend on high speed for 45 to 60 seconds until completely smooth with no banana chunks remaining; scrape down the sides once if needed
    • Taste the smoothie and adjust with a little more honey if you want it sweeter or a splash more milk if it is too thick to pour easily
    • Blend for another 10 seconds after any additions to make sure everything is fully incorporated before pouring

    Step 4: Pour, Garnish, and Serve

    • Pour the smoothie immediately into chilled glasses for the best temperature and thickest texture right from the start
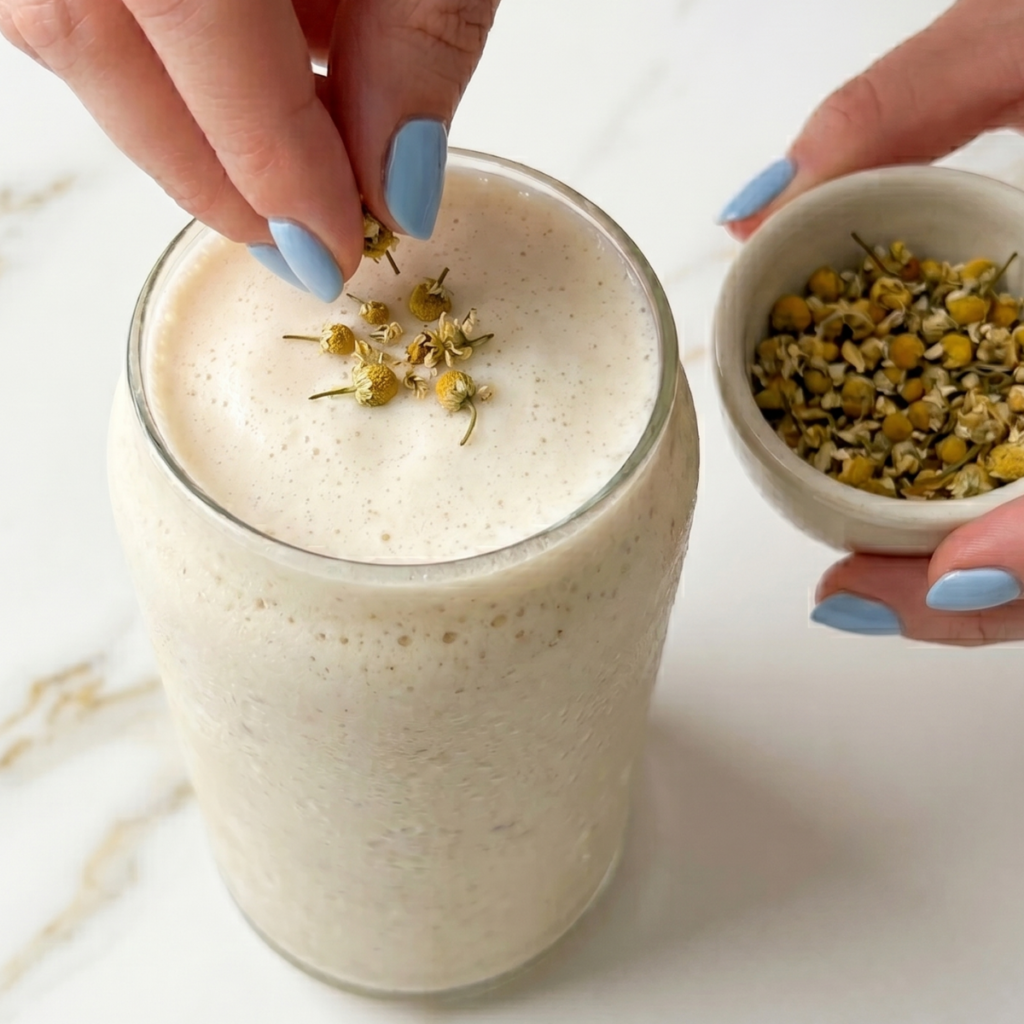
    • Top with a small pinch of dried chamomile flowers if you have them; even a tiny amount makes the presentation feel intentional and lovely
    • Serve right away while the smoothie is at its thickest and coldest; it will thin slightly as it sits at room temperature
    • For a creamier, more dessert-like version, pour into a bowl and top with sliced fresh banana, a drizzle of honey, and a light dusting of cinnamon

    Banana Chamomile Tea Smoothie Variations

    Mia’s “Flower Smoothie Bowl” Version

    Mia discovered smoothie bowls when she was five and has never fully recovered from the experience. The flower smoothie in bowl form is her current greatest joy. Use one extra frozen banana to make the blended mixture thick enough to hold toppings, pour it into her favorite bowl, and let her arrange the garnishes herself. She places the dried chamomile flowers with the concentration of someone decorating a cake, adds a drizzle of honey in a very specific pattern, and then stands back and says “perfect” before picking up her spoon. I take a picture every time.

    Ben’s “Protein Power” Version

    Ben went through a phase of asking whether everything we ate had enough protein in it after his class did a nutrition unit at school. He brings this up approximately once a week. For his version, add a scoop of vanilla protein powder alongside the Greek yogurt and blend as usual. The chamomile and banana flavors hold up beautifully against the vanilla protein, the texture stays thick and smooth, and Ben feels very satisfied with his nutritional choices. He also adds an extra drizzle of honey and calls it “the good one.”

    The Lavender Chamomile Version

    This one is for the afternoons when I want something that feels genuinely spa-like and the kids are at their dad’s and I have exactly fifteen quiet minutes to myself. Add one quarter teaspoon of culinary dried lavender to the chamomile tea while it steeps, then remove it along with the tea bags before chilling. The lavender adds a subtle floral layer that makes the whole smoothie taste like something you would order at a very calm and beautiful cafe. It is my personal favorite version, and I do not share it.

    Substitutions

    Chamomile tea bags to loose-leaf chamomile: Use one tablespoon of loose-leaf chamomile flowers steeped in a tea infuser or fine-mesh strainer for the same 5 minutes. Loose leaf chamomile is often more fragrant and flavorful than bagged tea and gives the smoothie a slightly more intense floral quality that is genuinely lovely.

    Honey to maple syrup or dates: Maple syrup is a seamless swap in equal amounts and gives a slightly earthier sweetness that works well with the banana. Two pitted Medjool dates blended directly into the smoothie add natural sweetness and extra creaminess and make the whole drink more filling without any added sugar.

    Whole milk to coconut milk: Full-fat canned coconut milk makes this smoothie incredibly rich and creamy with a subtle tropical note that pairs surprisingly well with the chamomile. Use half the amount since canned coconut milk is much thicker than regular milk and add the rest as needed to reach your preferred consistency.

    Greek yogurt to silken tofu: Silken tofu is a great dairy-free swap that adds the same creamy protein boost without any dairy flavor. Use the same quantity as the yogurt, add it straight from the fridge, and blend thoroughly. The tofu is completely undetectable in the finished smoothie, and both kids have never once noticed it.

    Equipment

    • High-powered blender (a standard blender works but a high-powered one gives a silkier texture)
    • Small saucepan or kettle for heating the water
    • Mug or heatproof cup for steeping the tea
    • Fine mesh strainer if using loose-leaf chamomile
    • Freezer-safe tray or plate for pre-freezing banana chunks
    • Measuring spoons
    • Tall glasses for serving
    • Small bowl of ice for rapid tea chilling if needed

    Storage Tips

    Make Ahead

    • Brew the chamomile tea up to 3 days ahead and store it in a sealed jar in the fridge so it is always ready when you want a smoothie quickly
    • Pre-freeze peeled banana chunks in a zip-lock bag so they are always ready to blend without any extra prep on busy afternoons
    • Measure and freeze individual smoothie packs: one bag with two banana chunks plus a pre-measured amount of frozen Greek yogurt so the whole smoothie comes together in under two minutes

    Refrigerator

    • Blended smoothie can be stored in a sealed jar or bottle in the fridge for up to 24 hours; shake or stir well before drinking as it will separate slightly
    • The texture will be thinner after refrigerating; re-blend with a small handful of ice for 15 seconds to restore the creamy thickness
    • Brewed chamomile tea keeps in the fridge for up to 3 days sealed; do not store it with the honey already mixed in as it can ferment slightly

    Freezing

    • Pour the blended smoothie into ice cube trays, freeze completely, then pop the cubes into a bag for up to 1 month
    • Blend the frozen smoothie cubes straight from the freezer with a splash of milk for a quick, thick version any time
    • Do not freeze the finished smoothie in a jar or sealed container, as it expands when frozen and can crack or overflow

    Reheating

    • This smoothie is served cold and does not need reheating; if it has warmed up too much, just give it a quick re-blend with a few ice cubes
    • For a warm version on cold evenings, blend all ingredients without the frozen banana, warm gently on the stovetop until just steaming, and serve as a chamomile banana tea latte instead
    • The warm latte version with a little extra honey and a pinch of nutmeg is one of the coziest things I make in the winter and both kids love it equally

    Family Secret Worth Sharing

    My mom used to make chamomile tea for me every time I could not sleep or had a hard day at school. She would sit at the kitchen table with me while I drank it and not say very much, just be there. I think about that every time I brew chamomile now. There is something about the smell of it that immediately makes me feel like things are going to settle down. I started making this smoothie on the hardest afternoons specifically because of that. Mia does not know any of this backstory. She just knows it is the flower smoothie and that it appears when she has had a big-feelings kind of day, and that is enough. Ben asked me once why I always smile when I make it. I told him it reminded me of Grandma. He nodded, took a long sip, and said, “Grandma had good ideas.” She really did.

    Troubleshooting FAQs

    My smoothie is too thin and watery. What went wrong?
    Almost always the tea was not cold enough when it went into the blender, or the bananas were not frozen solid. Both add warmth and liquid that thin the smoothie out quickly. Make sure the tea is fully chilled and the bananas are completely frozen before blending. If the smoothie is already too thin, add another half-frozen banana and blend again to bring the thickness back.

    The chamomile flavor is too strong and almost bitter. How do I fix it?
    Two things cause bitter chamomile tea: steeping too long or squeezing the tea bags when you remove them. Stick to exactly 5 minutes and lift the bags out gently without pressing. If the tea is already bitter, add an extra drizzle of honey and a splash more milk to the smoothie before blending. The sweetness and fat in the milk balance out the bitterness beautifully.

    I cannot taste the chamomile at all in the finished smoothie. What happened?
    Banana is a strong flavor and can easily dominate the drink if the tea is too diluted. Try brewing with 2 tea bags instead of 1 in the same amount of water for a more concentrated flavor. You can also reduce the amount of banana slightly to one and a half frozen bananas, and the chamomile will come through much more clearly.

    Can I make this smoothie without a high-powered blender?
    Yes, with one small adjustment. Let the frozen banana chunks sit at room temperature for 5 minutes before blending so they are slightly softened and easier for a standard blender to process. Blend in short pulses rather than one long run and scrape down the sides frequently. The result will be slightly less perfectly smooth but still very delicious and completely worth making.

    The Smoothie That Made Everyone Calm Down

    There is a specific kind of afternoon in our house where everyone is tired and a little bit loud and nobody can quite explain why. This smoothie is what I make on those days. Two glasses on the counter, the chamomile smell filling the kitchen, and within about ten minutes, everyone is sitting quietly, and the day feels manageable again. It sits right alongside our healthy carrot juice recipe as one of the most reach-for drinks in our afternoon routine, and on the days I want something warming instead of cold, our beet juice recipe is right there next to it as another one that makes me feel like I am genuinely taking care of everyone. And for the mornings when we need something sweet and comforting that doubles as breakfast, this smoothie pairs beautifully with a slice of our banana bread recipe that uses up the rest of those ripe bananas in the most satisfying way. Some recipes are just quietly good for you in every possible sense, and this one is exactly that.

    Don’t forget to snap a picture of your banana-chamomile tea smoothie before that… (trust me, it will disappear quickly!), and leave a rating below. We’d love to hear how this banana chamomile tea smoothie becomes part of your family afternoon story.

  • 4-Step Irresistible Fudgy Chewy Browkies

    4-Step Irresistible Fudgy Chewy Browkies

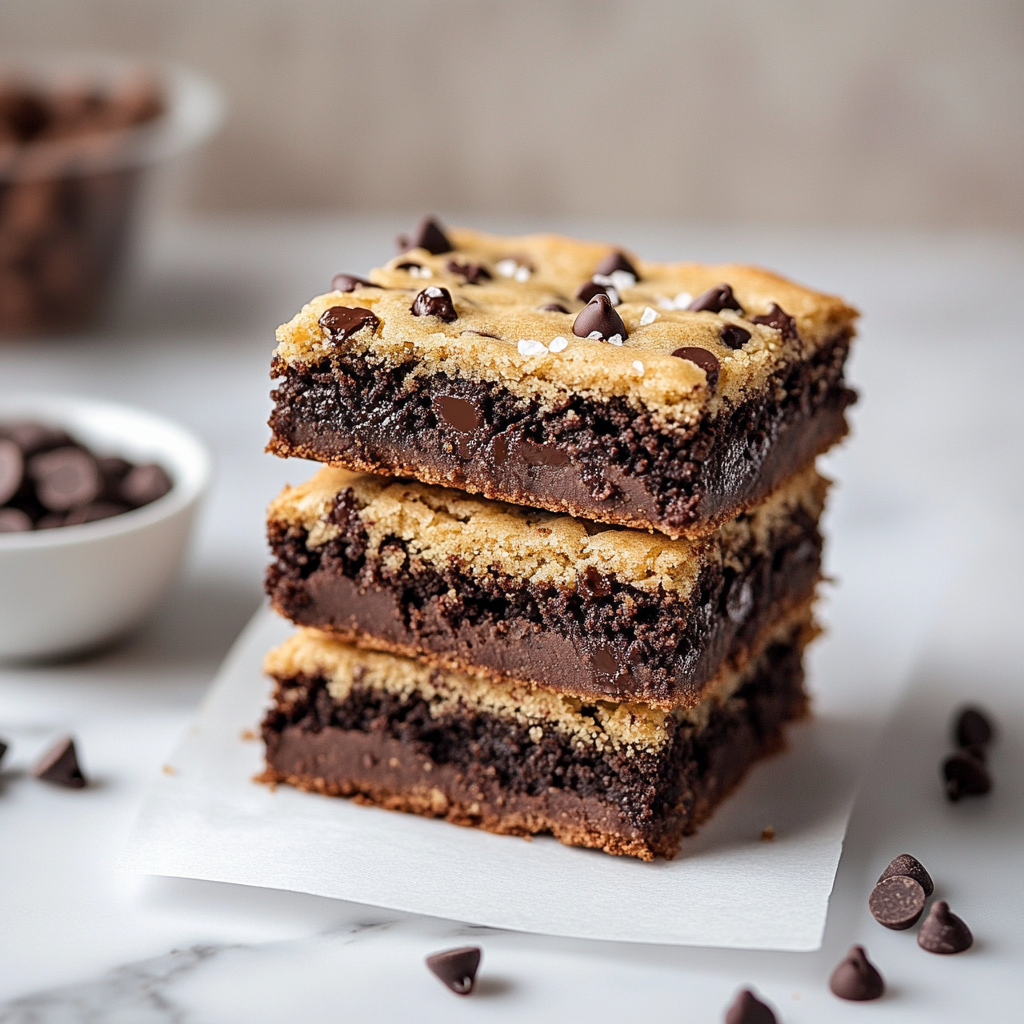
    I forgot the timer. Ben had asked a very long question about volcanoes, and I completely lost track. When I finally pulled the pan out, I was convinced I had ruined everything. But they had set into crinkle-topped, fudgy-centered, chewy-edged cookies that Mia ate in approximately four seconds. That happy accident is exactly how these fudgy chewy browkies became a permanent fixture in our house.

    Why This Recipe Is Special

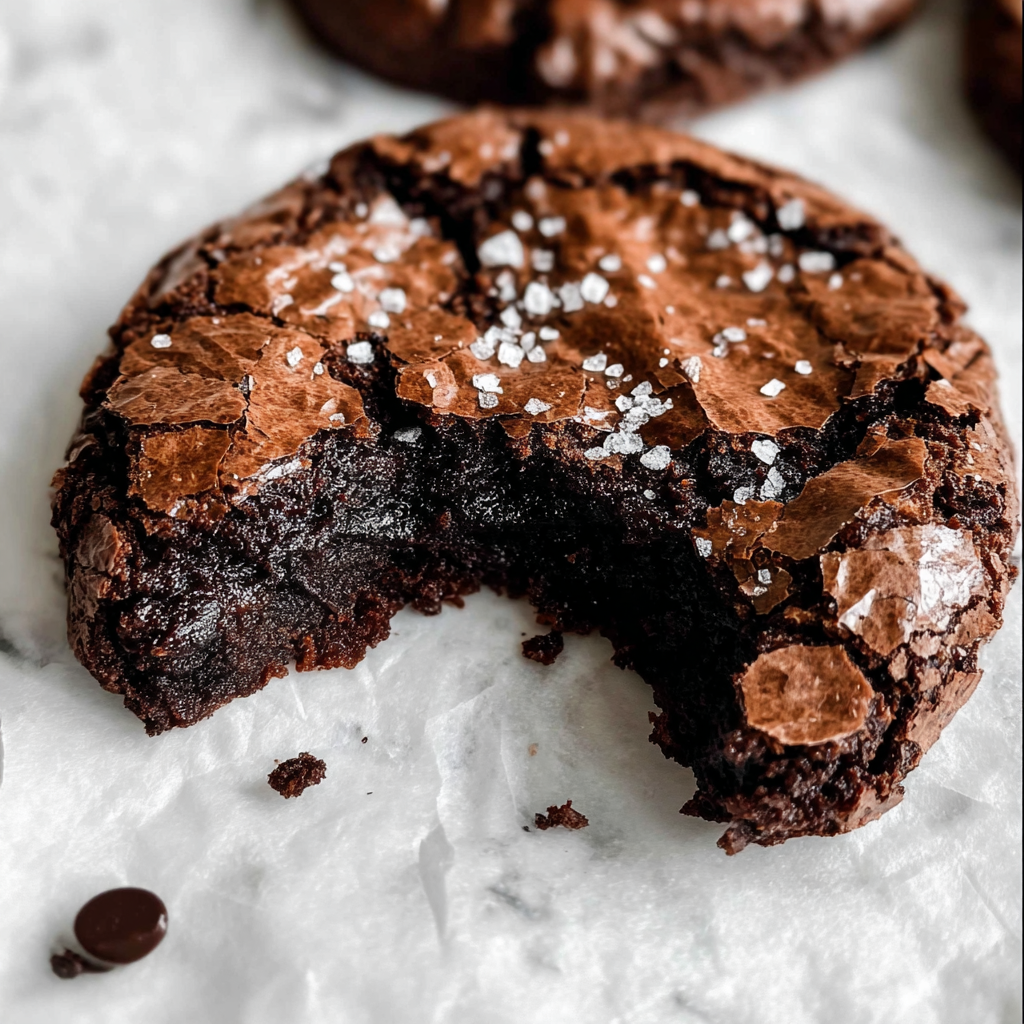
    The whole point of a brookie is that you cannot decide if you want a brownie or a cookie, so you simply refuse to choose. These have the shiny, crackled top of a brownie, the fudgy dark center that pulls apart in the most satisfying way, and just enough chew around the edges to remind you that yes, this is technically a cookie. They come together in one bowl with no mixer required, which means both kids can be involved from the very start. Mia thinks that makes them her invention. I have stopped correcting her.

    How To Make Fudgy Chewy Browkies

    The batch that actually worked was a Sunday afternoon situation where I had leftover chocolate from a baking project and two kids who were bored enough to be genuinely helpful. Mia was in charge of measuring the sugar, which she took so seriously she leveled it three times. Ben stirred the melted chocolate with the focused expression of someone doing surgery. When I folded the flour in and the batter went thick and glossy and deeply dark, he leaned over the bowl and said, very quietly, “That smells like the inside of a bakery.” He was not wrong.

    The thing that makes these browkies work every single time is whipping the eggs and sugar together properly before anything else goes in. That step creates the signature shiny crackled top that makes everyone at the table reach for the pan before it has properly cooled. It takes about three to four minutes with a hand mixer, and it is the single most important thing you can do for this recipe. Ben now considers himself the official egg whipper, which means he stands at the bowl with tremendous authority and announces when it looks “fluffy enough.”

    Main Ingredients

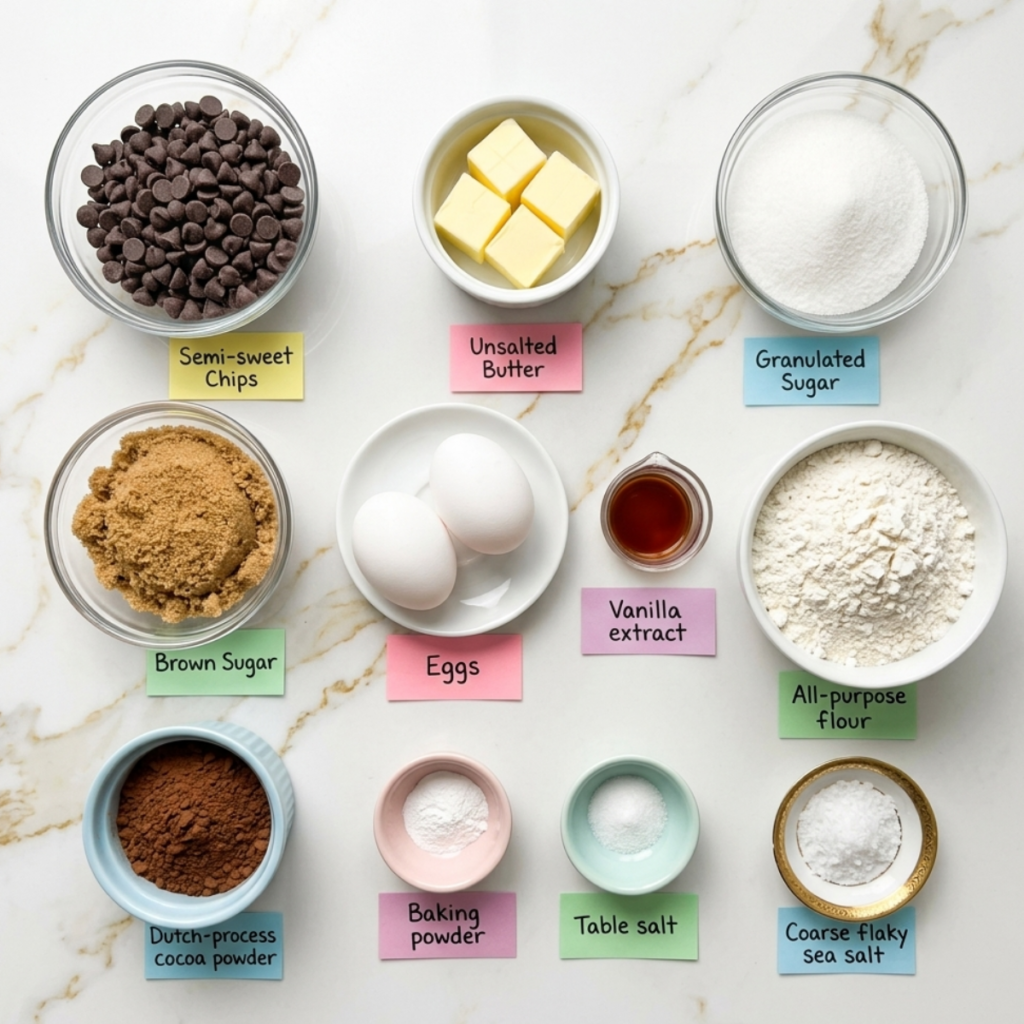
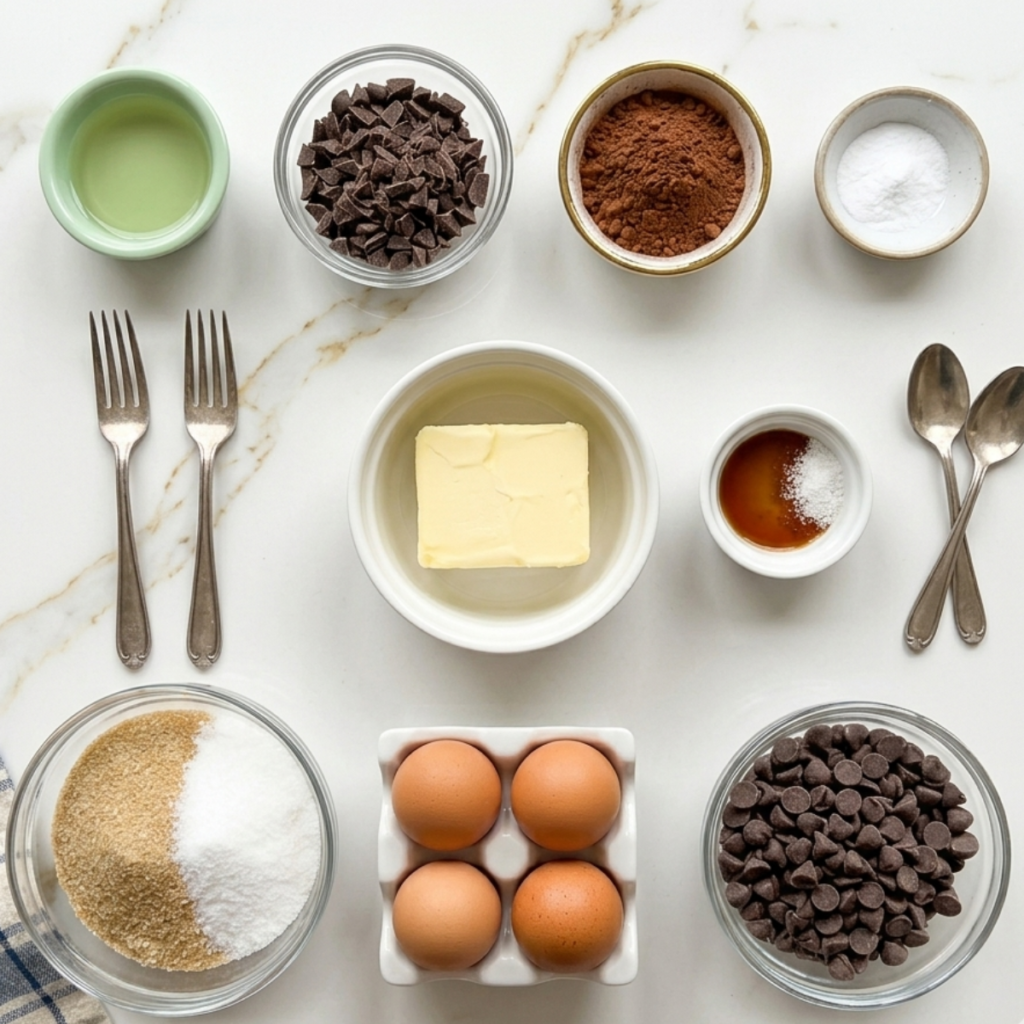
    • 1 cup semi-sweet chocolate chips or chopped dark chocolate – Use good quality chocolate here; it is the entire flavor foundation of the browkie
    • 1/2 cup unsalted butter, cut into pieces – Melted together with the chocolate for that rich, fudgy base
    • 3/4 cup granulated sugar – Gives sweetness and helps create the shiny crackled top
    • 1/4 cup brown sugar, packed – Adds moisture and that deep caramel chew around the edges
    • 2 large eggs, room temperature – Both eggs go in together and get whipped until pale and thick
    • 1 teaspoon vanilla extract – Rounds out the chocolate flavor beautifully
    • 1/2 cup all-purpose flour – Just enough to hold the cookies together without making them cakey
    • 1/4 cup Dutch-process cocoa powder – Deepens the chocolate flavor and gives that dark, almost black brownie color
    • 1/2 teaspoon baking powder – A small lift so the cookies spread just right without puffing up
    • 1/4 teaspoon salt – Enhances all the chocolate; do not leave it out
    • 1/2 cup chocolate chips, for folding in – Extra melty pockets of chocolate in every single bite
    • Flaky sea salt, for topping – Optional but genuinely transformative; the contrast against the sweet chocolate is everything

    Step-by-Step Instructions

    Step 1: Melt the Chocolate and Butter

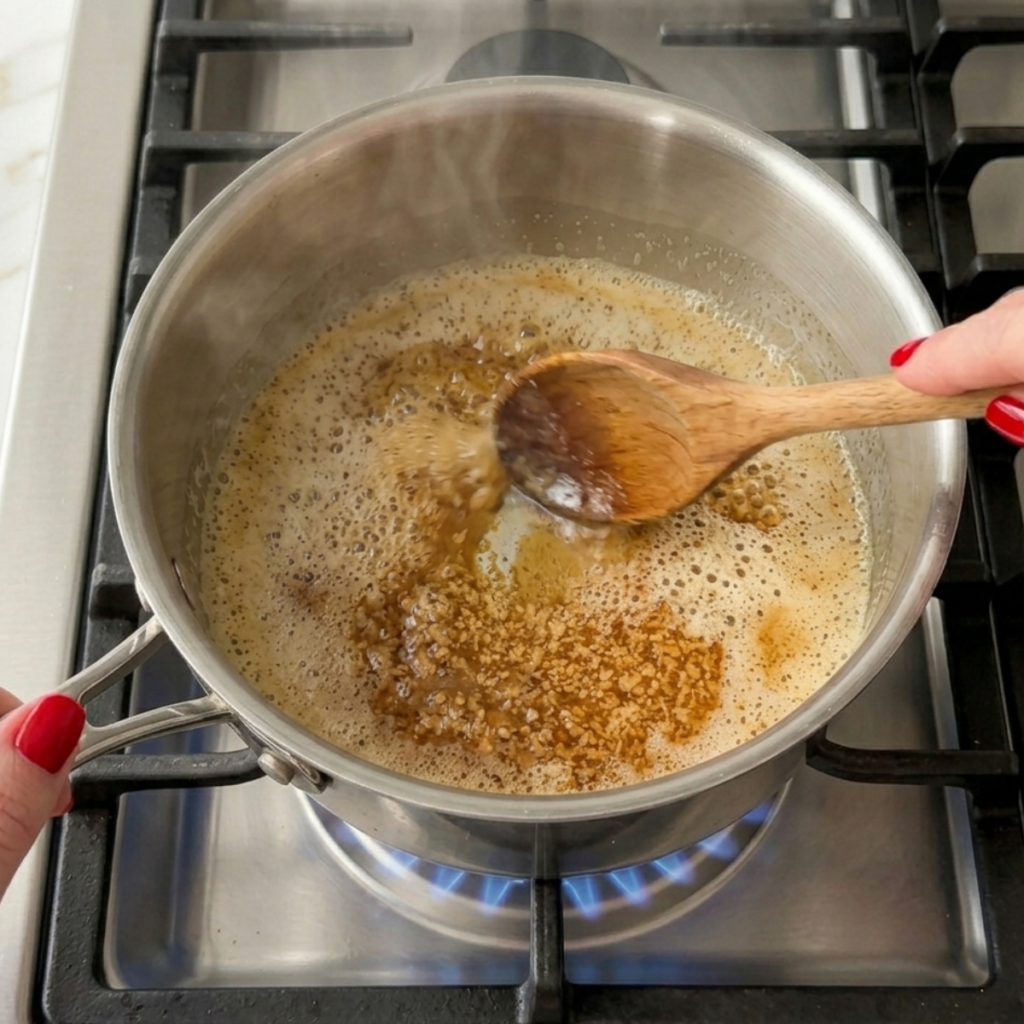
    • Combine the chocolate chips and butter in a heatproof bowl set over a saucepan of barely simmering water, making sure the bottom of the bowl does not touch the water
    • Stir gently and constantly until both are fully melted and the mixture is smooth, glossy, and completely combined
    • Remove from the heat and let the chocolate mixture cool for 8 to 10 minutes until it is warm but no longer hot to the touch
    • Alternatively, melt in the microwave in 30-second intervals, stirring between each, until just smooth; do not overheat or the chocolate will seize

    Step 2: Whip the Eggs and Sugar

    • Add both sugars to a large mixing bowl, then crack in the eggs and add the vanilla extract
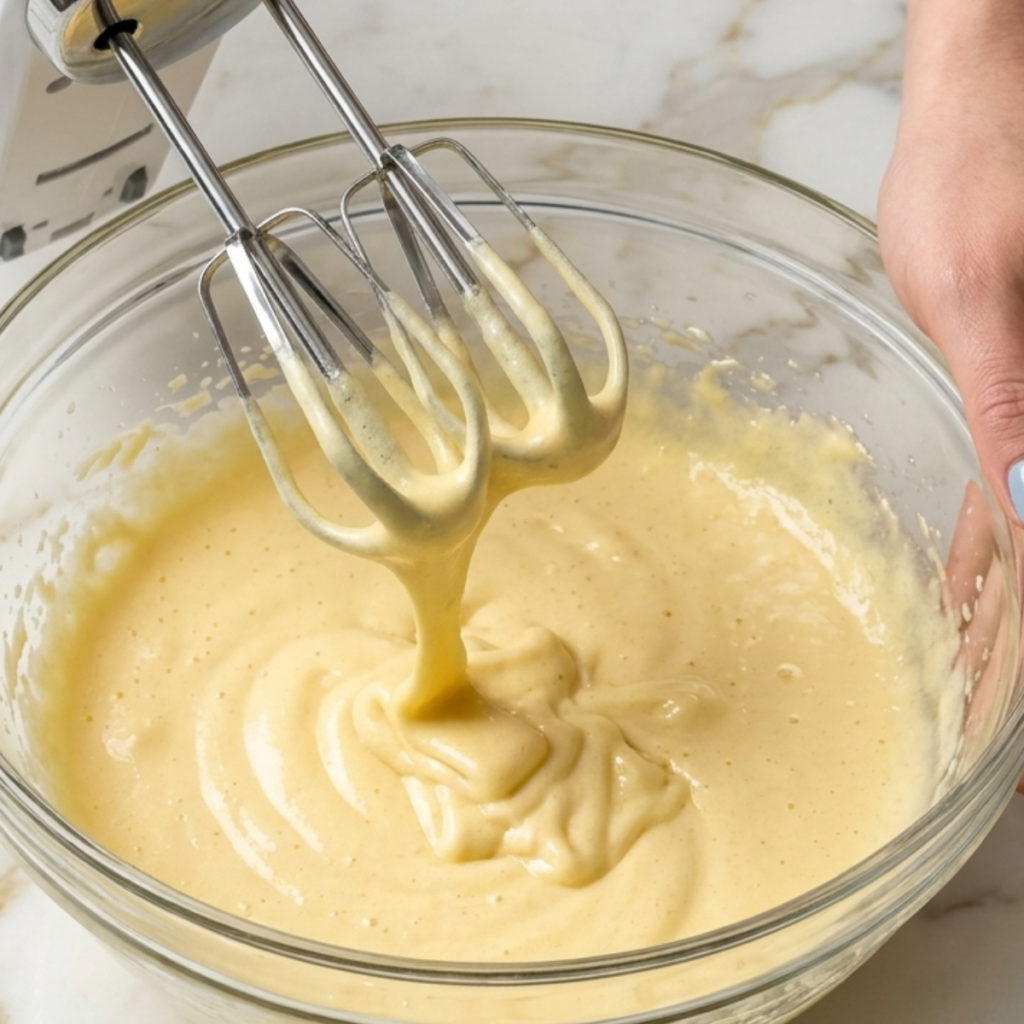
    • Beat with a hand mixer on medium-high speed for 3 to 4 minutes until the mixture is pale, thick, and has roughly doubled in volume
    • This step is not optional; the whipped eggs create the signature shiny crackled top that makes browkies look like browkies
    • Pour the cooled chocolate mixture into the egg mixture and fold gently with a spatula until just combined and no streaks remain

    Step 3: Fold in the Dry Ingredients

    • Sift the flour, cocoa powder, baking powder, and salt directly over the chocolate mixture in the bowl
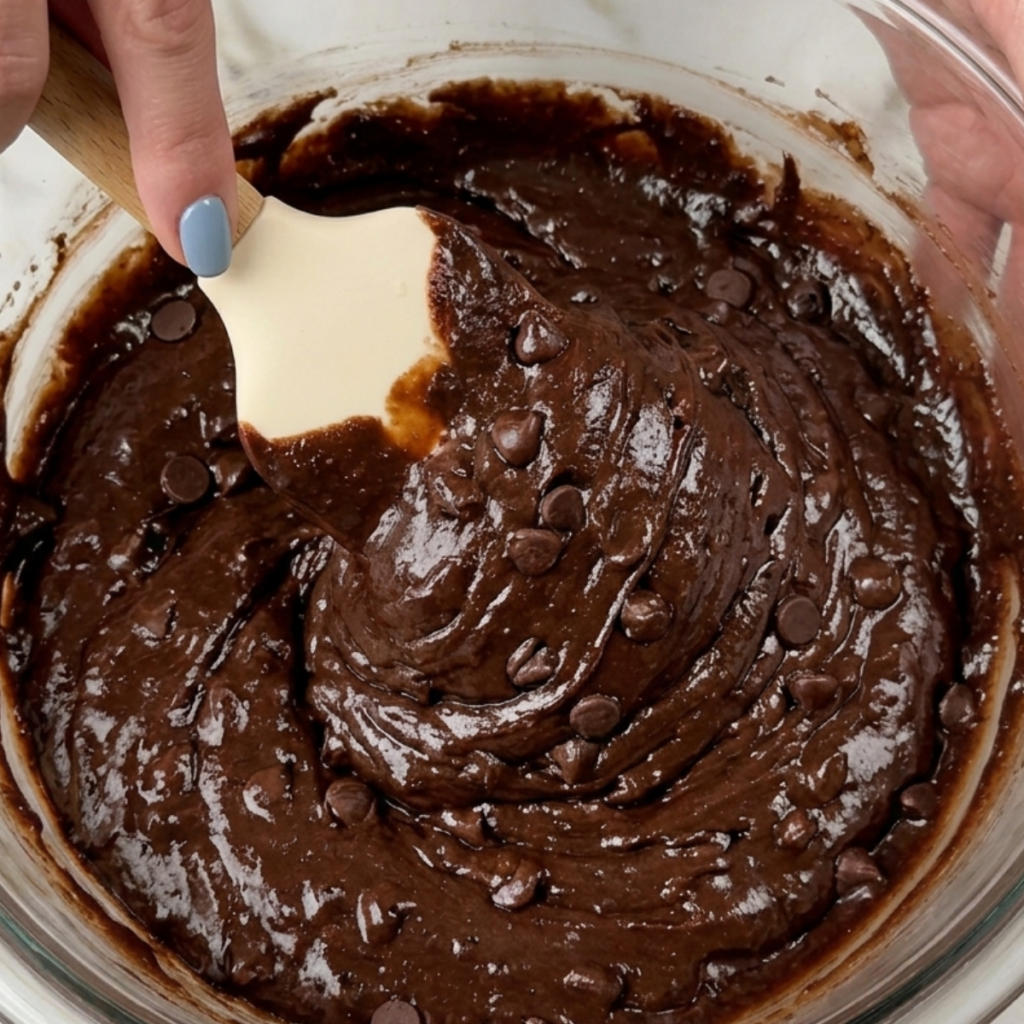
    • Fold with a spatula using slow, deliberate strokes from the bottom of the bowl upward until no dry streaks remain; do not overmix
    • Fold in the extra chocolate chips so they are evenly distributed throughout the thick, glossy batter
    • Let the batter rest for 10 minutes at room temperature; it will thicken slightly and become easier to scoop into neat rounds

    Step 4: Bake and Finish

    • Preheat your oven to 350 degrees F and line two baking sheets with parchment paper; scoop the batter into rounds about 2 tablespoons each, spacing them 3 inches apart
    • Sprinkle a small pinch of flaky sea salt over the top of each unbaked brownie before they go in the oven
    • Bake for 10 to 12 minutes until the tops are set and crinkled and the edges look firm but the centers still look slightly underdone
    • Let the browkies cool on the pan for at least 10 minutes before moving them; they firm up as they cool and the centers set into that perfect fudgy texture

    Fudgy Chewy Browkies Variations

    Mia’s “Extra Chocolate Chips” Version

    Mia has one position on chocolate chips in baked goods, and that position is “more.” Always more. She once told me very seriously that she could see “empty spots” in a batch of cookies and that it was a problem that needed solving. For Mia’s version, double the fold-in chocolate chips to a full cup and press a few extra chips on top of each scoop before baking. The browkies come out with visible pools of melted chocolate on top that she finds deeply satisfying. I find her deeply satisfying too, honestly.

    Ben’s “Sea Salt and Espresso” Version

    Ben discovered that espresso makes chocolate taste more like chocolate during the strawberry cake baking session, and he has been applying that information to every chocolate recipe ever since. For a more grown-up, intensely flavored brownie, stir one teaspoon of instant espresso powder into the warm melted chocolate before it goes into the batter. The espresso does not make them taste like coffee; it makes them taste like the best version of themselves. Then the flaky sea salt on top seals the whole thing, and Ben calls it “the fancy one.”

    The Peanut Butter Swirl Version

    This one happened by accident when Mia found the peanut butter jar and decided to “help” before I could redirect her. Drop half a teaspoon of creamy peanut butter on top of each brownie round right before they go into the oven, then use a toothpick to swirl it once through the top. It creates this beautiful marbled surface and the peanut butter bakes into a slightly nutty, salty layer that sits right underneath the crinkled chocolate crust. Both kids now request this version specifically, and I pretend it was planned all along.

    Substitutions

    Semi-sweet chocolate to dark chocolate: Dark chocolate at 70 percent or higher gives a less sweet, more intensely bitter chocolate brownie that is genuinely excellent for anyone who loves a bolder flavor. The texture stays exactly the same. Milk chocolate works too but makes a noticeably sweeter, softer result, and the crinkled top is less pronounced.

    Unsalted butter to coconut oil: Refined coconut oil (the kind without a strong coconut flavor) is a solid dairy-free swap here. Use the same quantity melted. The browkies will be very slightly less rich but still deeply fudgy, and the texture difference is minimal enough that most people will not notice.

    All-purpose flour to a 1:1 gluten-free flour blend: A good quality 1:1 gluten-free baking flour works well in this recipe since there is so little flour in the mix to begin with. The browkies may spread slightly more, so let them cool completely on the pan before lifting. Bob’s Red Mill 1:1 is the one I have tested, and it works beautifully.

    Dutch-process cocoa to natural cocoa powder: Natural cocoa will work here, but the color will be a lighter, more reddish brown, and the flavor will be slightly less deep. If using natural cocoa, add a small pinch of baking soda alongside the baking powder to help with the rise since natural cocoa is more acidic than Dutch-process.

    Equipment

    • Two large baking sheets
    • Parchment paper for lining the baking sheets
    • Heatproof bowl for melting the chocolate (or microwave-safe bowl)
    • Small saucepan for the double boiler method
    • Large mixing bowl for the egg and sugar mixture
    • Hand mixer or stand mixer with whisk attachment
    • Rubber spatula for folding
    • Fine mesh sieve or sifter for the dry ingredients
    • Cookie scoop or two tablespoons for portioning
    • Wire cooling rack
    • Kitchen timer (extremely non-negotiable after my volcano conversation incident)

    Storage Tips

    Make Ahead

    • The browkie batter can be made up to 24 hours ahead, covered tightly, and stored in the fridge; let it sit at room temperature for 20 minutes before scooping so it softens enough to portion
    • Scooped unbaked browkie rounds can be frozen on a baking sheet, then transferred to a freezer bag and baked straight from frozen; just add 2 to 3 extra minutes to the bake time
    • Baked browkies can be made a day ahead and stored covered at room temperature; they are arguably even better on day two when the centers have fully set

    Refrigerator

    • Store baked browkies in an airtight container at room temperature for up to 4 days; the refrigerator actually dries them out and is not recommended
    • If you live somewhere very warm and the browkies are softening too much, a brief spell in the fridge is fine but bring them back to room temperature before eating
    • Layer browkies between sheets of parchment paper if stacking in a container to prevent the sticky tops from bonding together

    Freezing

    • Baked browkies freeze beautifully for up to 2 months; wrap each one individually in plastic wrap and then store in a freezer-safe bag
    • Thaw at room temperature for about 30 minutes and they come back almost exactly as they were when freshly baked
    • Do not microwave to thaw unless you want a molten puddle; room temperature thawing is the only way that preserves the fudgy texture

    Reheating

    • A fully cooled browkie warmed in a 300 degree F oven for 4 to 5 minutes comes back to life in the most incredible way; the center goes gooey again and the top re-crisps slightly
    • Microwave reheating works at 50 percent power for 15 to 20 seconds; longer than that and the chocolate chips will overheat and the center will go dry
    • Serve a warm browkie with a cold scoop of vanilla ice cream and nobody in your house will be able to talk for approximately three minutes

    Family Secret Worth Sharing

    The real secret to the crinkled top that makes these browkies look like they came from a fancy bakery display case is something so simple that I almost did not believe it the first time I tried it. You have to let the batter rest. After everything is mixed together, just leave it alone for ten minutes. The batter thickens, the chocolate sets slightly, and when the cookies hit the hot oven, the surface cracks and crinkles in that perfect way while the inside stays dark and fudgy. Ben discovered this while he was waiting impatiently to lick the spatula and decided the ten minutes was “the most important part of the whole recipe.” He is not wrong. He is also not getting the spatula until the timer goes off.

    Troubleshooting FAQs

    My browkies spread into flat puddles instead of staying thick and round. What happened?
    This almost always comes down to one of three things: the chocolate mixture was still too warm when it went into the eggs, the batter was not rested before scooping, or the baking sheets were warm from a previous batch. Make sure the melted chocolate cools for a full 8 to 10 minutes, rest the batter for 10 minutes after mixing, and always use a cool baking sheet. A warm sheet makes the batter start spreading before it even hits the oven.

    Why do my browkies not have the shiny crinkled top?
    The crinkled top comes entirely from whipping the eggs and sugar long enough. Three to four minutes at medium-high speed is the minimum. If you rush this step or do it by hand, the batter will not trap enough air, and the surface will bake up flat and matte instead of shiny and crackled. It is the one step in this recipe that genuinely cannot be shortened.

    The centers are still gooey after the bake time. Are they done?
    Probably yes. The centers should look slightly underdone when they come out of the oven; that is exactly right. They will continue cooking from the residual heat of the pan for the first five minutes out of the oven and then firm up as they cool. If you bake them until the centers look fully set in the oven, they will be dry and cakey by the time they cool. Pull them early and trust the process.

    Can I double this recipe?
    Absolutely, and I do it regularly. Double everything exactly and bake in multiple batches on separate sheets rather than crowding two sheets worth of cookies into the oven at once. Crowded pans and uneven heat are the enemies of a good browkie. Rotate the sheets halfway through baking if your oven has any hot spots, which most home ovens do.

    One Bowl, Two Kids, Zero Leftovers

    Every time I make these, the same thing happens. The browkies come out of the oven looking absolutely perfect with their crinkled tops and glossy centers. I set them on the rack to cool, and then I turn around for approximately forty-five seconds and find Mia already holding one with a completely innocent expression. Ben waits exactly the full ten minutes with the self-control of someone who has been burned before, literally, and then eats three in a row. If you love a one-bowl beginner baking recipe that delivers maximum drama for minimum effort, this is the one to save right alongside our healthy brownie recipe for the days you want something a little lighter. For anyone who loves the brownie-cookie crossover world, our brown butter brookies are the next logical step, and they are just as impossible to stop eating. And on the weeks when I want to put together a full dessert spread that covers every base, these browkies land perfectly next to our banana bread recipe as a crowd-pleaser that disappears before anyone can ask what else is on the table.

    Don’t forget to snap a picture of your fudgy chewy browkies before that… (trust me, it will disappear quickly!), and leave a rating below. We’d love to hear how this fudgy chewy browkies recipe becomes part of your family baking story.

  • Strawberry Chocolate Cake With Fluffy Pink Frosting

    Strawberry Chocolate Cake With Fluffy Pink Frosting

    My first attempt leaned like it was trying to escape the cake stand. I had rushed the cooling, stacked the layers warm, and watched the whole thing tilt left while Ben said, “Mom, it’s moving.” It was moving. We ate it with spoons straight from the pan. But once I nailed it, this strawberry chocolate cake became the most celebrated thing I had ever baked.

    Why This Recipe Is Special

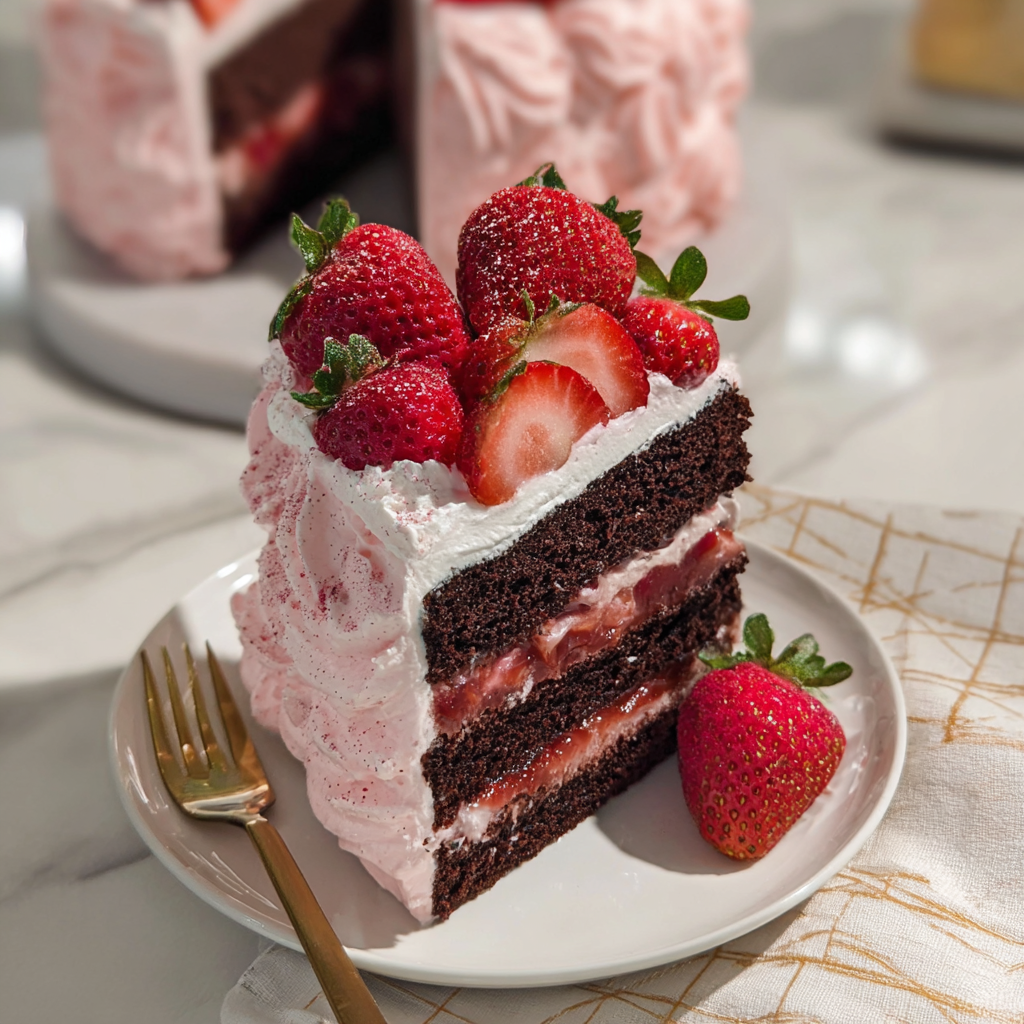
    There is a reason this cake comes out for every birthday, every celebration, and every Tuesday that needs rescuing. The chocolate layers are deeply dark and fudgy with that tender crumb that holds together when you slice it. The strawberry filling is jammy and bright, tucked between each layer like a little surprise. Furthermore, the strawberry whipped frosting is sufficiently light that the entire cake does not feel heavy. Mia calls it her birthday cake even when it is not her birthday, which tells you everything.

    How To Make Strawberry Chocolate Cake

    The cake that actually worked came together on a Saturday afternoon with both kids present and extremely invested. Mia had claimed the role of strawberry washer, which meant she was eating one for every three she put in the bowl. Ben was measuring ingredients with the focused intensity of a scientist, announcing each one out loud as he added it. When those chocolate layers came out of the oven and the whole kitchen filled with that warm, dark cocoa smell, both of them went completely quiet and stood at the oven door like it was a television.

    The lesson that fixed everything was simple: let the cake layers cool completely before you even think about stacking them. I mean completely. Not just warm, not just room temperature on the outside. All the way through. I now put mine on a wire rack for a full hour and then into the fridge for another thirty minutes. It feels like forever when you are excited to eat cake, and Ben will absolutely remind you every ten minutes how long it has been. But a cold, firm layer holds the filling and frosting without sliding, and your cake will stand perfectly straight. Mine does now.

    Main Ingredients

    For the Chocolate Cake Layers

    • 2 cups all-purpose flour – Spoon and level it; packed flour makes a dense, dry cake
    • 2 cups granulated sugar – Sweetness and structure; do not reduce this
    • 3/4 cup Dutch-process cocoa powder – Dutch-process gives a deeper, darker color and less bitter flavor than natural cocoa
    • 2 teaspoons baking soda – Gives the layers their rise; make sure yours is fresh
    • 1 teaspoon baking powder – Works alongside the baking soda for an even, tender crumb
    • 1 teaspoon salt – Enhances the chocolate flavor; do not skip it
    • 2 large eggs, room temperature – Room temperature eggs incorporate more evenly into the batter
    • 1 cup buttermilk, room temperature – Keeps the crumb tender and adds a subtle tang that deepens the chocolate flavor
    • 1 cup hot coffee or hot water – Hot liquid blooms the cocoa and intensifies the chocolate flavor dramatically
    • 1/2 cup neutral oil – Keeps the cake moist for days; vegetable or avocado both work
    • 2 teaspoons vanilla extract – Rounds out all the chocolate notes

    For the Strawberry Filling

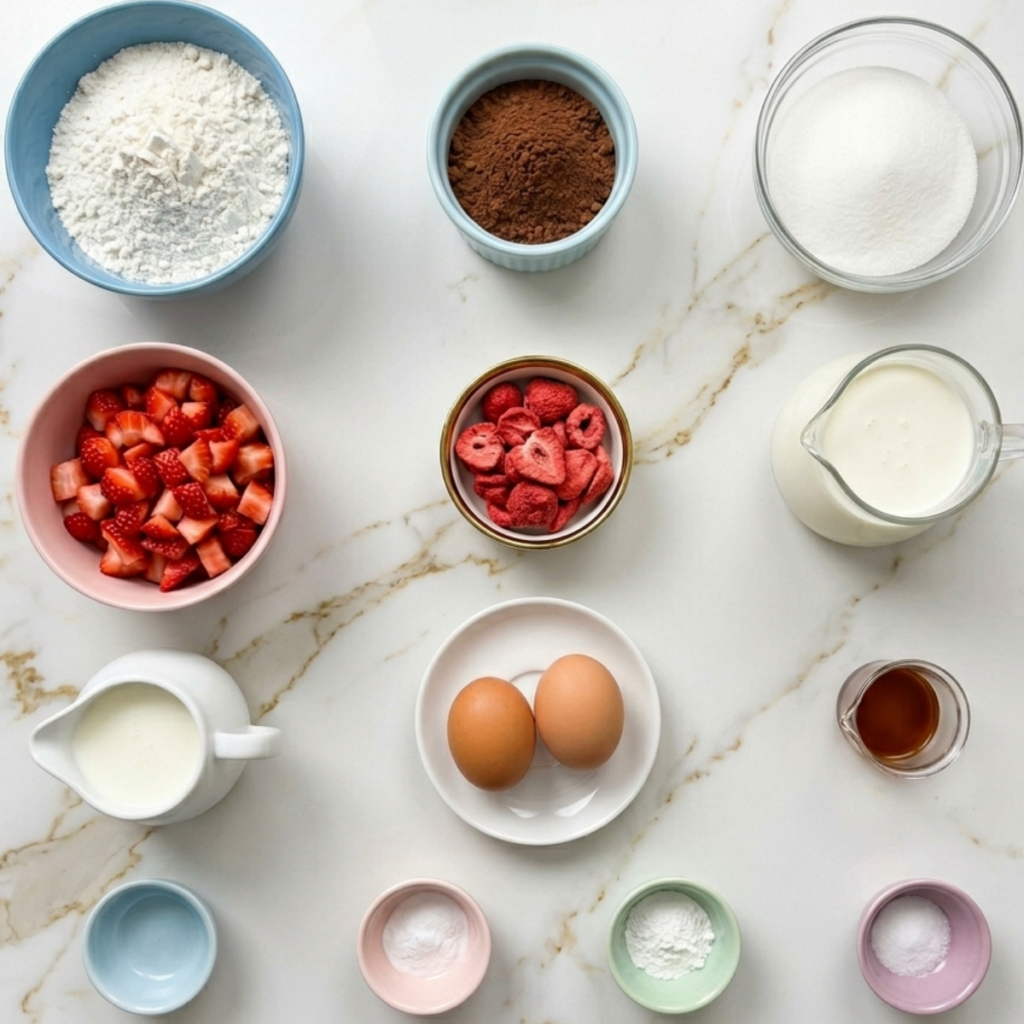
    • 2 cups fresh strawberries, hulled and diced – Fresh is best here; frozen releases too much liquid
    • 3 tablespoons granulated sugar – Draws out the juices and helps the filling thicken
    • 1 tablespoon lemon juice – Brightens the strawberry flavor and helps it set
    • 1 tablespoon cornstarch – Thickens the filling so it stays put between the layers

    For the Strawberry Whipped Frosting

    • 2 cups heavy whipping cream, cold – Must be very cold; warm cream will not whip properly
    • 1/2 cup freeze-dried strawberries, crushed to a powder – Gives the frosting its pink color and real strawberry flavor without adding liquid
    • 1/4 cup powdered sugar – Sweetens and stabilizes the whipped cream
    • 1 teaspoon vanilla extract – Rounds out the frosting flavor

    Step-by-Step Instructions

    Step 1: Bake the Chocolate Cake Layers

    • Preheat your oven to 350 degrees F, grease and flour two 9-inch round cake pans, and line the bottoms with parchment paper circles
    • Whisk together the flour, sugar, cocoa powder, baking soda, baking powder, and salt in a large bowl, then add the eggs, buttermilk, oil, and vanilla and mix until just combined
    • Pour in the hot coffee and stir gently until the batter is smooth and glossy; it will be quite thin and that is completely correct
    • Divide the batter evenly between the two pans and bake for 30 to 35 minutes until a toothpick inserted in the center comes out with just a few moist crumbs

    Step 2: Make the Strawberry Filling

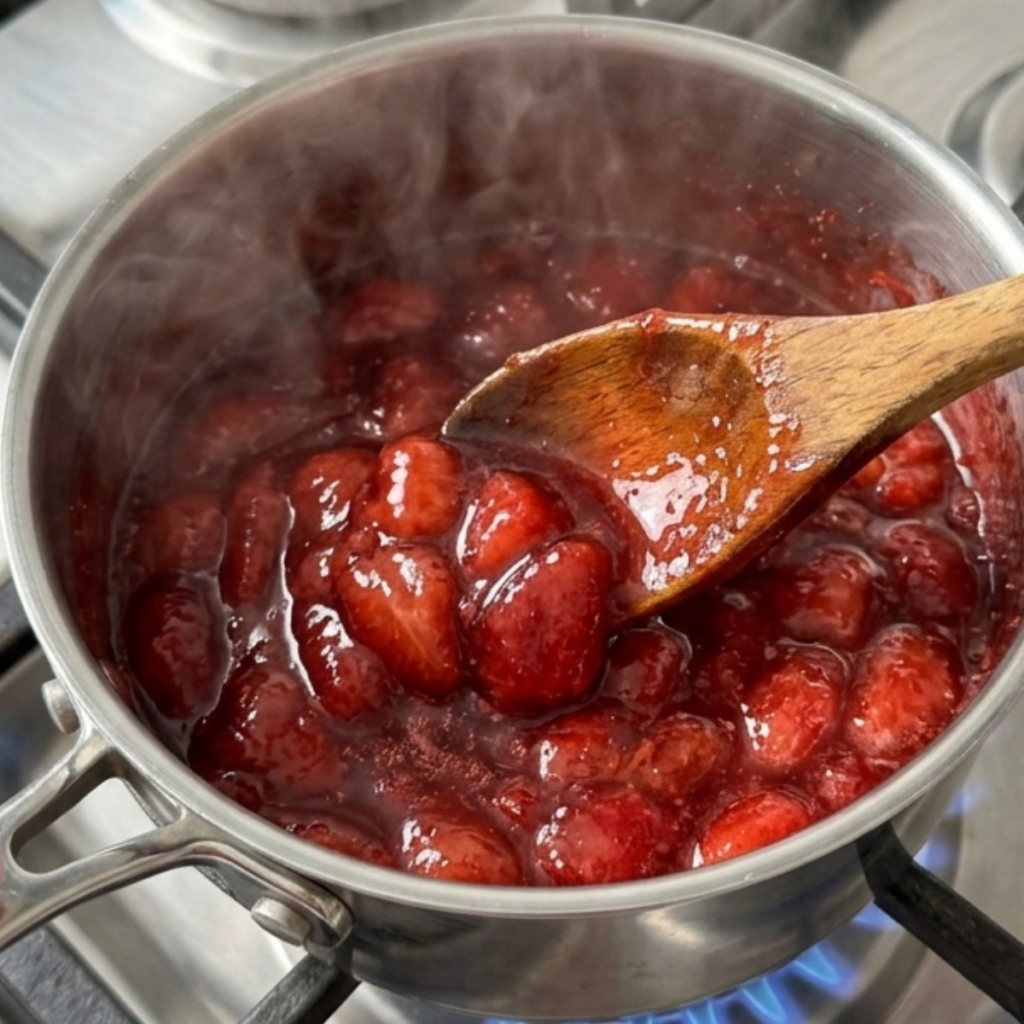
    • Combine the diced strawberries, sugar, and lemon juice in a small saucepan over medium heat and stir until the sugar dissolves and the strawberries begin to release their juices
    • Mix the cornstarch with one tablespoon of cold water in a separate small bowl until smooth, then stir it into the simmering strawberry mixture
    • Cook for another 3 to 4 minutes, stirring constantly, until the filling thickens enough to coat the back of a spoon
    • Remove from heat, transfer to a bowl, and let it cool completely to room temperature before using; a warm filling will melt the frosting and slide right out

    Step 3: Make the Strawberry Whipped Frosting

    • Crush the freeze-dried strawberries into a fine powder using a food processor or a zip-lock bag and a rolling pin; the finer the powder, the smoother your frosting will be
    • Combine the cold heavy cream, powdered sugar, crushed freeze-dried strawberries, and vanilla in a large chilled bowl
    • Whip on medium-high speed until stiff peaks form, about 3 to 4 minutes; stop as soon as the peaks hold their shape or the frosting will become grainy
    • Keep the frosting in the fridge until you are ready to assemble so it stays firm and cold

    Step 4: Assemble and Frost the Cake

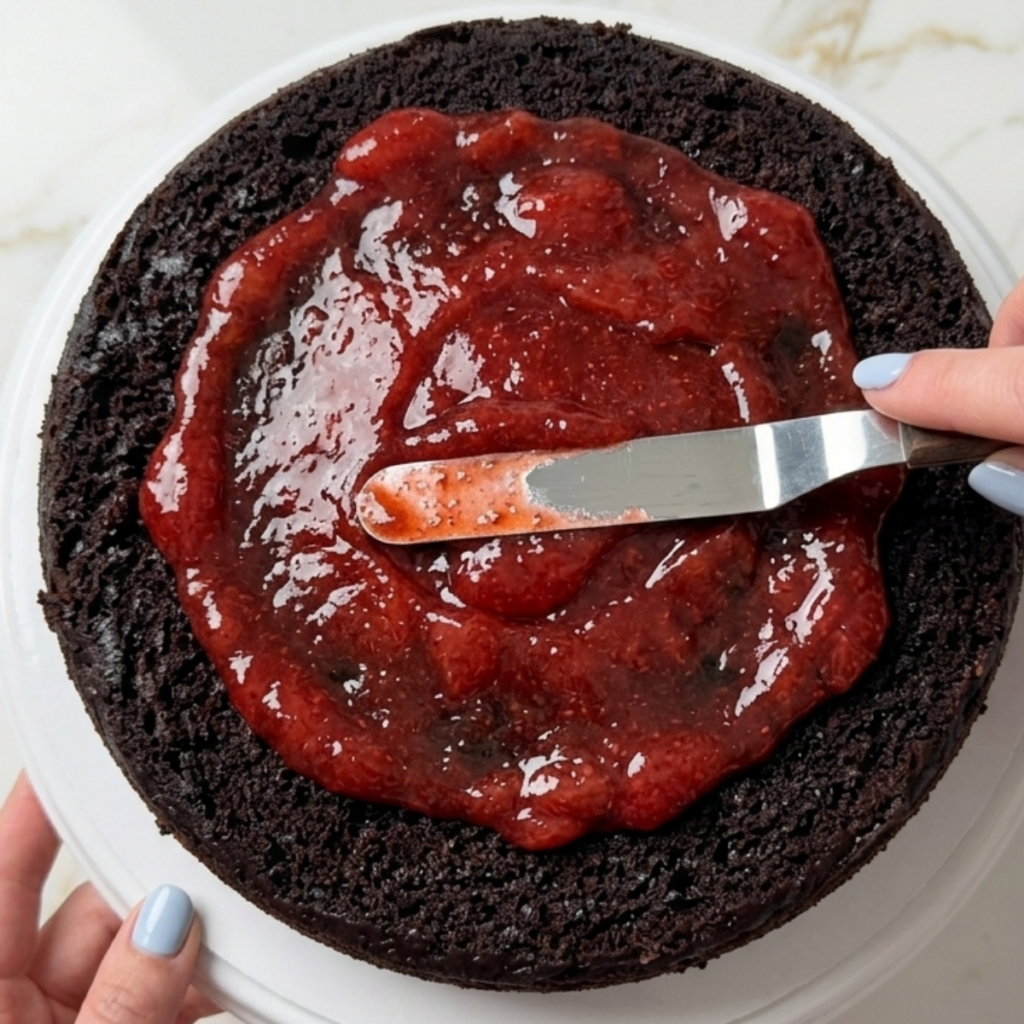
    • Place one fully cooled cake layer on your cake stand or plate and spread a generous layer of strawberry filling across the top, leaving a half-inch border around the edge
    • Place the second cake layer on top, press down very gently to level it, and apply a thin crumb coat of strawberry frosting all over the outside of the cake
    • Refrigerate the crumb-coated cake for 20 minutes until the first layer of frosting is firm, then apply the final generous layer of frosting using a spatula in loose, swooping strokes
    • Decorate with fresh whole strawberries on top, refrigerate for at least 30 minutes before slicing, and serve cold for the cleanest, most beautiful slices

    Strawberry Chocolate Cake Variations

    Mia’s “More Strawberries Please” Birthday Version

    Mia’s birthday request never changes. She wants extra strawberry filling between every single layer, extra fresh strawberries on top, and what she calls “the pink frosting all the way down the sides so you can see it from across the room.” For her version, I make one and a half batches of the filling and use three cake layers instead of two by slicing one layer in half horizontally. It is a tall, dramatic, unmistakably Mia kind of cake, and she has asked for it every year since she was four.

    Ben’s “Make It a Sheet Cake” Version

    Ben has very practical opinions about cake. He thinks round layer cakes are “too complicated to cut” and once asked if we could “just make it flat.” He is not wrong that a sheet cake version of this recipe is significantly less stressful to assemble. Pour the batter into a greased 9×13 inch pan; bake for 35 to 38 minutes; cool completely; spread the strawberry filling across the top; and pile on the whipped frosting. It tastes identical, and nobody has to worry about anything leaning.

    The Dark Chocolate Strawberry Celebration Version

    For the times when this cake needs to show up to a dinner party or a birthday that deserves something extra, I add a simple dark chocolate ganache drip around the top edge before the fresh strawberries go on. Heat equal parts heavy cream and finely chopped dark chocolate until smooth; let it cool for ten minutes until slightly thickened, then spoon it slowly around the edge of the frosted cake and let it drip naturally down the sides. It looks like it came from a bakery and takes about five minutes.

    Substitutions

    Buttermilk to regular milk plus vinegar: If you do not have buttermilk, add one tablespoon of white vinegar or lemon juice to a measuring cup and fill to the one-cup line with regular whole milk. Let it sit for five minutes until it curdles slightly. It works exactly the same way in the batter and gives you the same tender crumb.

    Hot coffee to hot water: The coffee does not make the cake taste like coffee; it deepens and intensifies the chocolate flavor. If you prefer to skip it entirely, hot water works fine and still blooms the cocoa beautifully. The flavor will be slightly less complex but still deeply chocolatey and delicious.

    Freeze-dried strawberries to strawberry jam: If you cannot find freeze-dried strawberries, you can fold two tablespoons of good-quality strawberry jam into the whipped cream instead. The frosting will be slightly less stable and a paler pink, but the flavor is lovely. Add the jam after the cream has started to thicken so it does not deflate the whole batch.

    Fresh strawberry filling to store-bought jam: On the days when making the filling from scratch feels like one step too many, a good quality strawberry preserve spread straight from the jar works perfectly well between the layers. Warm it slightly so it spreads easily and let it cool back down before stacking. Nobody at your table will know the difference.

    Equipment

    • Two 9-inch round cake pans
    • Parchment paper circles for lining the pans
    • Stand mixer or hand mixer with whisk attachment
    • Large mixing bowl for the cake batter
    • Small saucepan for the strawberry filling
    • Small mixing bowl for the cornstarch slurry
    • Chilled large bowl for whipping the frosting
    • Wire cooling rack
    • Offset spatula for frosting
    • Cake stand or flat serving plate
    • Food processor or zip-lock bag and rolling pin for the freeze-dried strawberries
    • Toothpick for testing doneness
    • Kitchen scale (optional but helpful for even layers)

    Storage Tips

    Make Ahead

    • The chocolate cake layers can be baked up to 2 days ahead, wrapped tightly in plastic wrap, and stored at room temperature or in the fridge until you are ready to assemble
    • The strawberry filling can be made up to 3 days ahead and stored in a sealed jar in the fridge; bring it to room temperature and stir well before using
    • Make the strawberry whipped frosting the same day you plan to frost and serve the cake for the best texture and stability

    Refrigerator

    • Store the assembled cake covered loosely in the fridge for up to 3 days; the frosting holds its shape beautifully when kept cold
    • Slice only what you plan to serve and leave the rest of the cake whole in the fridge with the cut side pressed against a piece of plastic wrap to prevent it from drying out
    • Let refrigerated slices sit at room temperature for 10 minutes before serving so the cake layers soften slightly back to that perfect fudgy texture

    Freezing

    • The unfrosted cake layers freeze beautifully for up to 2 months; wrap each layer individually in plastic wrap and then in foil before freezing
    • Thaw frozen cake layers overnight in the fridge still wrapped, then bring to room temperature before assembling and frosting
    • Do not freeze the assembled cake with the whipped frosting, as it will weep and lose its texture when thawed

    Reheating

    • This cake is served cold or at room temperature and does not need reheating
    • If a slice has been in the fridge, let it sit out for 10 to 15 minutes before eating for the best texture
    • A cold slice with a warm cup of coffee is honestly the only way to eat leftover chocolate cake and I will not be taking questions on that

    Family Secret Worth Sharing

    My mom never used anything other than hot coffee in her chocolate cake batter, and I spent years thinking it was just a quirk of hers until I tried making it with hot water one day and understood immediately. The coffee version tasted like it had a third dimension the water version simply did not have. She always said good chocolate cake should taste like it is trying very hard to be chocolate, and coffee is what makes it try that hard. I told Ben this while we were baking one afternoon, and he thought about it for a moment and then said, “So the cake is secretly a coffee cake?” I told him that was close enough. He seemed satisfied. Mia, who had been listening from the counter, announced that she does not drink coffee and asked if her slice would still be okay. It was more than okay. It always is.

    Troubleshooting FAQs

    Why did my cake layers dome up in the middle instead of baking flat?
    This happens when the oven is too hot or the batter is overmixed. Make sure your oven temperature is accurate with an oven thermometer, and mix the batter only until the ingredients are just combined. You can also use baking strips soaked in water wrapped around the outside of the pans to help the layers bake more evenly and come out flat from the start.

    My strawberry filling is too runny and keeps sliding out from between the layers. What do I do?
    The filling needs to be completely cool and thick before it goes between the layers. If it is still runny after cooling, return it to the saucepan and cook for another two minutes with an extra half teaspoon of cornstarch dissolved in cold water. A thick, jammy filling that holds its shape on a spoon is what you are after. Never use a warm filling on a cake.

    The whipped frosting deflated and turned soupy when I was spreading it. What went wrong?
    Three things cause this: cream that was not cold enough, a bowl that was not chilled, or overworking the frosting after it was whipped. The cream and the bowl both need to be very cold before you start. Once the frosting reaches stiff peaks, stop the mixer immediately and use it right away or keep it in the fridge. Do not try to re-whip deflated cream frosting, as it will not recover.

    Can I make this cake without a stand mixer?
    Absolutely. The cake batter is thin enough to mix by hand with a whisk with no trouble at all. For the whipped frosting, a hand mixer works just as well as a stand mixer; just make sure your bowl and beaters are very cold before you start. Whipping cream by hand is technically possible but takes about ten minutes of serious effort, so the hand mixer is worth it here.

    The Cake That Fixed Everything

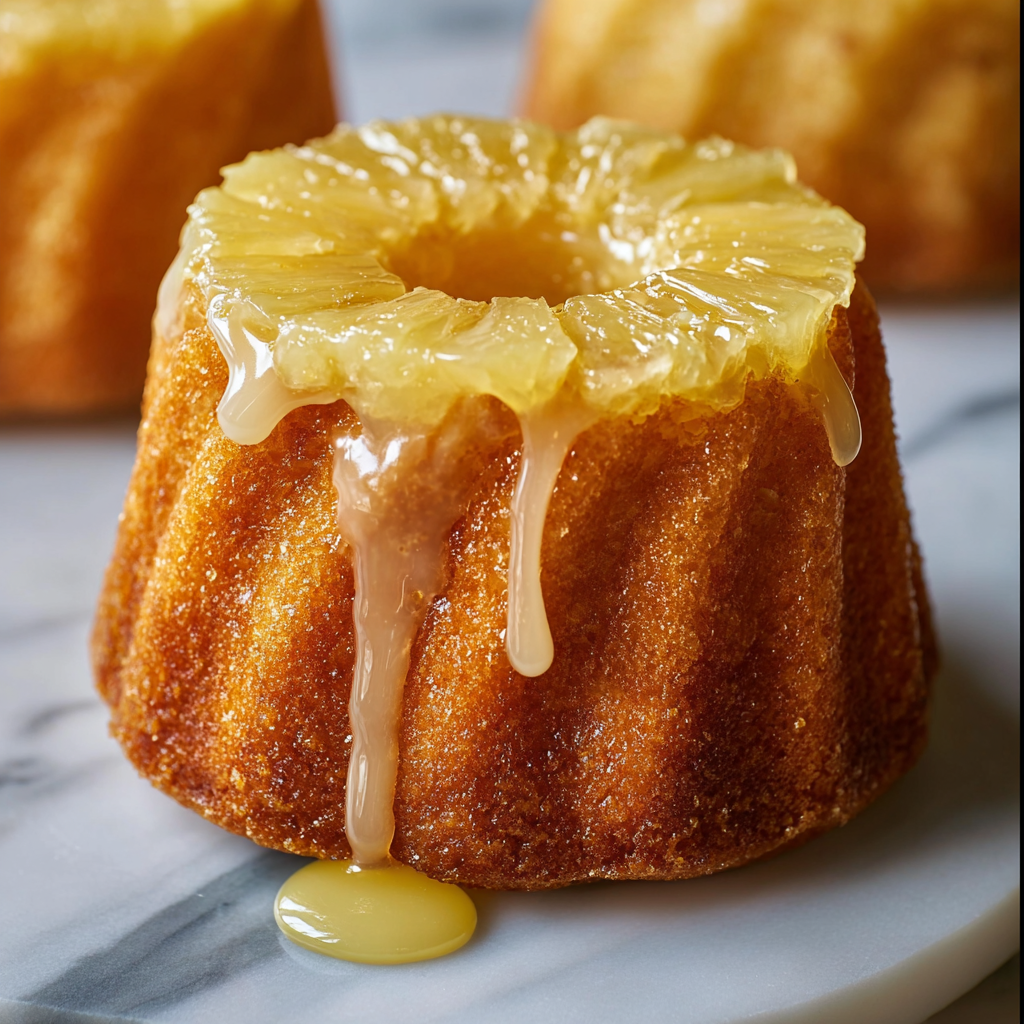
    The leaning tower of chocolate cake that started this whole journey is now a family story we tell at every birthday. Ben brings it up every single time I make this, usually while reaching for his second slice. Mia just stands next to the cake stand with a fork, waiting. This strawberry chocolate cake has become the most requested thing I bake, and if you love a showstopping dessert that is equally at home on a celebration table or a random Wednesday, this is absolutely the recipe to save. It sits beautifully alongside our brown butter brookies as a go-to for anyone who wants a dessert that genuinely impresses, and the strawberry-chocolate combination is every bit as classic and crowd-pleasing as our beloved mini pineapple cakes that disappear just as fast. If you are on a baking streak and want something equally beautiful but a little more unexpected, our rhubarb cake recipe is the next one to bookmark. For the days when you want something rich, fudgy, and just a little bit celebratory, this cake is the answer, and it pairs beautifully with a quiet kitchen, a good cup of coffee, and the very satisfying knowledge that it is standing perfectly straight on the stand. I checked. Twice.

    Don’t forget to snap a picture of your strawberry chocolate cake before that… (trust me, it will disappear quickly) and leave a rating below. We’d love to hear how this strawberry chocolate cake becomes part of your family celebration story.

  • 4-Step Easy Pineapple Cakes: The Tropical Bundt!

    4-Step Easy Pineapple Cakes: The Tropical Bundt!

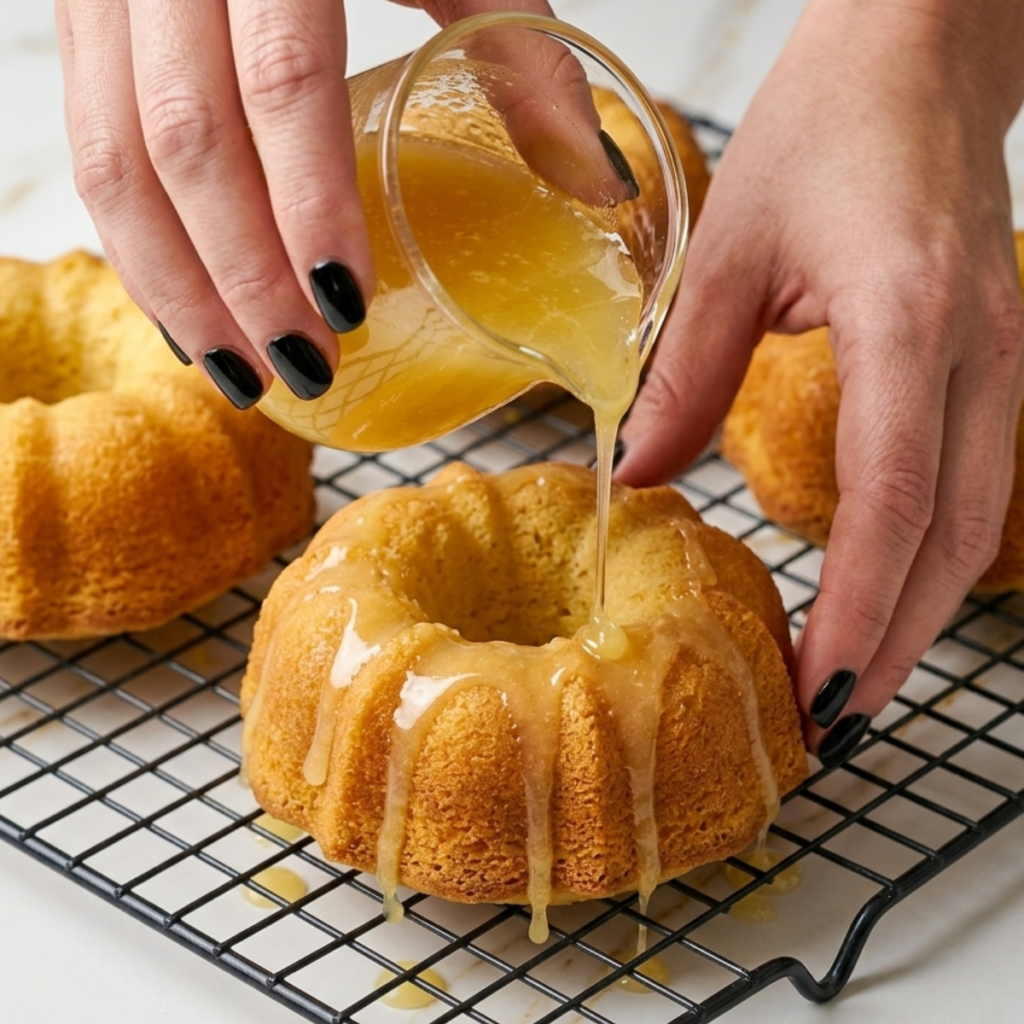
    I drizzled the glaze on while my Pineapple Cakes were still steaming hot from the oven. It disappeared immediately. Mia watched and said it was like magic but sadder. Leo tasted one, shrugged, and said he could not tell the difference. I could. I stood there with an empty jug and nothing to show for it. Cool the cakes first. Always cool the cakes first.

    Why This Recipe Is Special

    There is something about a mini cake that makes people unreasonably happy. Something about the individual size, the fact that it is entirely yours, and no sharing required makes Mia pick them up and examine them like she is appraising something valuable. These mini pineapple cakes are moist in a way that feels almost impossible given how simple the batter is. The pineapple juice works directly into the crumb, giving every bite a bright tropical sweetness that doesn’t taste artificial or overworked. And the pineapple juice glaze on top once you learn to apply it at the right temperature, which I now know sets into a sticky, glossy coat that makes each little cake look like it belongs in a bakery window.

    How To Make Pineapple Cakes

    After the glaze disaster I already told you about, I made three more batches in the same week trying to perfect the texture. Batch two was too dense; I had overmixed the batter and developed too much gluten. Leo ate it politely and said nothing, which is actually a worse sign than a face. Batch three was underbaked in the center, and Mia detected this immediately with her fork, the way she always does, and held it up to the light like forensic evidence. Batch four was the one. Light crumb, clear pineapple flavor all the way through, and a glaze that actually sat on top and did its job.

    Main Ingredients

    • 1 cup plain all-purpose flour: spooned and levelled, not scooped; too much flour makes the crumb dense
    • ½ cup pineapple juice (from a can of crushed pineapple): the flavour carrier for the entire cake; use juice from the tin, not bottled
    • ½ cup crushed pineapple, well drained: drain thoroughly or the batter becomes too wet; reserve the juice for the glaze
    • ½ cup granulated sugar: the pineapple is already sweet so this doesn’t need to be heavy
    • ¼ cup unsalted butter, melted and cooled: melted butter gives a denser, moister crumb; cool it before using or it cooks the eggs
    • 2 large eggs, room temperature: room-temp eggs mix more evenly; cold eggs can make melted butter seize
    • ¼ cup whole milk: full-fat only; lower-fat milk makes these noticeably drier
    • 1½ tsp baking powder: check it is not expired; small batters need every bit of lift
    • 1 tsp pure vanilla extract: rounds the pineapple flavour; don’t skip it
    • ¼ tsp fine salt: sharpens the sweetness; always in a sweet bake

    For the Pineapple Juice Glaze

    • 1 cup icing sugar, sifted: sifting prevents lumps from forming in the glaze
    • 3 to 4 tbsp pineapple juice: add gradually until you reach a thick but pourable consistency
    • Pinch of salt: cuts through the sweetness and makes the pineapple flavour brighter

    Step-by-Step Instructions

    Step 1: Prep the Pan and Preheat

    • Preheat oven to 175°C (350°F) and generously grease a 12-cup mini bundt or muffin pan.
    • Drain the crushed pineapple thoroughly through a fine sieve, pressing gently; reserve all the juice.
    • Measure out ½ cup of the reserved juice for the batter and set the rest aside for the glaze.
    • Melt butter and let it cool to room temperature before using; warm butter can cook the eggs.

    Step 2: Mix the Batter

    • Whisk together flour, baking powder, and salt in a large bowl; make a well in the center.
    • In a separate bowl, whisk eggs, sugar, melted butter, milk, pineapple juice, and vanilla until smooth.
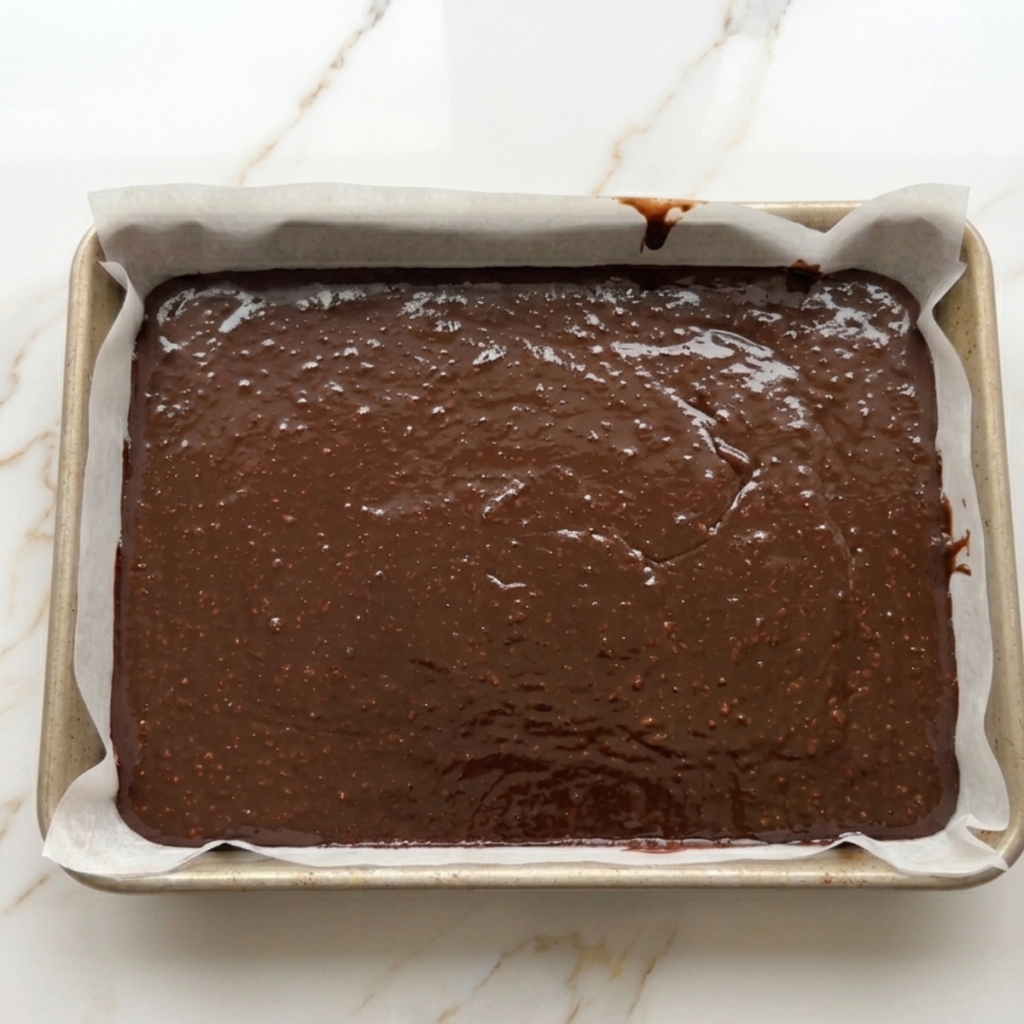
    • Pour wet ingredients into the dry ingredients and stir gently until just combined: stop the moment the flour disappears.
    • Fold in the drained crushed pineapple with a spatula; the batter will be slightly thick, and that is correct.

    Step 3: Fill and Bake

    • Fill each cup of the prepared pan no more than halfway; these cakes rise considerably.
    • Tap the pan firmly on the counter twice to release any air pockets in the batter.
    • Bake for 22 to 25 minutes until a skewer inserted in the center comes out clean and tops are golden.
    • Cool in the pan for 8 minutes before turning out onto a wire rack to cool completely.

    Step 4: Make the Glaze and Finish

    • Whisk sifted icing sugar with 3 tablespoons of pineapple juice and a pinch of salt until smooth and pourable.
    • Add the fourth tablespoon of juice only if needed; the glaze should coat a spoon, not run off it.
    • Wait until cakes are completely cool to room temperature, not warm, not barely warm, but completely cool.
    • Spoon glaze slowly over each cake and let it drip naturally down the sides; do not rush this step.

    Pineapple Cakes Variations

    Pineapple Bundt Cake with Coconut Glaze

    Make the batter as written, but pour it into a single greased 9-inch bundt pan instead of the mini cups. Bake for 45 to 50 minutes. For the glaze, replace 1 tablespoon of pineapple juice with coconut cream and scatter toasted coconut flakes over the top before the glaze sets. Leo called this version “the fancy one” and requested it for his birthday, which I am taking as a permanent mandate.

    Mia’s Pineapple Upside-Down Mini Cakes

    Place a small pineapple ring and a maraschino cherry in the bottom of each greased muffin cup before pouring in the batter. Bake as directed and invert immediately while still warm. Mia discovered this variation by accident when she put decorations in the tin “to make them prettier” before I poured the batter. She was not wrong. They are significantly prettier and they taste even better, and she has not let me forget her role in inventing them.

    Pineapple Juice Cake With Pudding

    Add one small packet (3.4 oz) of instant vanilla pudding mix directly to the dry ingredients before mixing. The pudding adds moisture, density, and a faint creaminess that makes these feel like a pineapple juice cake with pudding from a box but genuinely better because everything else is from scratch. The texture becomes almost custard-like at the center, ideal for serving warm with a scoop of vanilla ice cream.

    Substitutions

    Fresh pineapple juice → Canned pineapple juice: Canned is actually preferred; the acidity is more consistent. Fresh pineapple juice contains bromelain, an enzyme that can interfere with the batter’s structure if used in large quantities.

    Whole milk → Coconut milk: Full-fat coconut milk works as a direct 1:1 swap and adds a faint coconut note that pairs beautifully with pineapple. It also makes the crumb slightly more tender.

    Plain flour → Gluten-free 1:1 baking flour: Works well with no other adjustments. The crumb is slightly more delicate, so handle the cakes gently when turning out. The glaze works identically.

    Butter → Refined coconut oil: Use refined, not virgin, melted and cooled in the same quantity. The flavor is neutral, and the texture is nearly identical. Makes the recipe dairy-free if you also swap the milk.

    Equipment

    • 12-cup mini bundt pan or standard muffin tin
    • Two large mixing bowls
    • Fine mesh sieve (for draining pineapple and sifting icing sugar)
    • Whisk
    • Rubber spatula
    • Skewer or toothpick for testing
    • Wire cooling rack non-negotiable for the glaze step
    • Small jug or spouted bowl for pouring glaze

    Storage Tips

    Make Ahead

    • Bake cakes up to 1 day ahead; store unglazed at room temperature covered.
    • Make the glaze fresh on the day you serve it; it thickens in the fridge.

    Room Temperature

    • Glazed cakes keep at room temperature for up to 2 days loosely covered.
    • The glaze softens slightly by day 2, and is still delicious.

    Refrigerator

    • Airtight container up to 4 days; bring to room temperature before serving.
    • Cold cakes lose their tropical freshness; always serve at room temperature.

    Freezing

    • Freeze unglazed cakes individually wrapped for up to 2 months.
    • Thaw at room temperature, then glaze fresh before serving.

    Family Secret Worth Sharing

    The temperature of the glaze meeting the cake is the whole game with these. I learned this the hard way a hot cake is too porous and too warm to hold any kind of glaze; it just absorbs it and disappears, exactly the way mine did on the first attempt. But there is also a window going the other direction: if the glaze itself is too thick when you pour it, it sits in a clump on top instead of draping naturally down the ridges of the bundt shape. The perfect moment is a completely cooled cake and a glaze that is just barely thick enough to coat the back of a spoon. Mia now tests the glaze consistency before every batch by running a spoon through it and watching how it falls. She calls this quality control. She does it with the solemnity of a professional. Leo stands nearby and waits for the leftover glaze in the jug, which is always his job and which he takes very seriously.

    Troubleshooting FAQs

    Why did my glaze disappear into the cake?
    The cake was not fully cooled. This is the exact mistake I made on batch one. A warm cake is essentially a sponge; it pulls the glaze straight in. Give the cakes a full 30 minutes on the wire rack at room temperature before you go anywhere near the glaze jug. Patience is the only fix here.

    My cakes are dense and heavy what went wrong?
    Almost certainly overmixing. Once the wet and dry ingredients meet, stir only until the flour disappears. Every extra stir after that develops gluten and compresses the crumb. Also check that your baking powder isn’t expired; old baking powder and a small batter like this don’t get on well.

    Can I use a blender to mix the batter?
    Yes, briefly, this is effectively a pineapple cake made with a blender, and it works well. Blend the wet ingredients, including the pineapple, first until smooth, then fold in the dry ingredients by hand with a spatula. Do not blend the full batter; the gluten development will make the cakes tough.

    Can I make this as one large pineapple cake instead of mini cakes?
    Absolutely. Pour the batter into a greased 8-inch round or square tin and bake at 175°C for 30 to 35 minutes. The same glaze works perfectly. Check at 30 minutes with a skewer; the center should come out clean. The glaze rule is the same: completely cool before you pour.

    Twelve Little Cakes and Zero Left by Morning

    I make these on Friday afternoons now, when the week is winding down and both kids can sit at the counter and watch without being rushed somewhere. Leo does the spoon-tapping on the counter to release the air. Mia does the glaze quality control with enormous seriousness. And then we wait properly this time, the full thirty minutes, and the cakes come out golden and sticky and smelling like every good tropical thing at once. The cooling rack is always empty by the time we wake up on Saturday. That is the only review I need.

    If you are building your collection of easy dessert recipes that actually deliver something special, these mini pineapple cakes belong on that list. They sit right alongside our healthy brownie recipe as a bake that looks more impressive than the effort involved. And if you want more sweet baking ideas worth trying, the banana bread world is just one click away for another delightful fruit-forward bake.

    Don’t forget to snap a picture of your pineapple cakes before that golden glaze disappears along with the cakes themselves (trust me, it will disappear quickly!), and leave a rating below. We’d love to hear how these pineapple cakes become part of your weekend baking story.

  • 5 Secrets to the Best Rhubarb Cake Recipe

    5 Secrets to the Best Rhubarb Cake Recipe

    Mia walked in while I was pulling the cake from the oven and said, “Mom, why does it smell like homework?” I had forgotten the sugar. One full Rhubarb Cake Recipe attempt baked, golden, completely inedible. Leo tried a corner piece, made a face I have never seen before, and asked if I was okay. I was not. Second attempt was extraordinary. Here we are.

    Why This Recipe Is Special

    Rhubarb is the most underrated thing you can put in a cake. It’s tart and fibrous and looks alarming when raw. Leo spent a full five minutes convinced I was putting celery in a dessert, but when it bakes into a buttery sponge with a generous layer of cinnamon sugar on top, something genuinely magical happens. The rhubarb softens into jammy pink pockets, the sugar crust crackles when you press a fork through it, and the whole thing smells like the best version of spring you have ever walked into. It keeps well, it travels well, and it turns into a genuinely excellent mid-morning snack if you hide a square before the kids find the tin.

    How To Make Rhubarb Cake Recipe

    After the sugarless catastrophe, I rebuilt the recipe completely from scratch. The second lesson learned in batch three was that rhubarb releases liquid when it bakes, and if you don’t compensate in the batter, you end up with a sunken, soggy middle. Leo called that one a pink swamp. Mia tried to rescue it with icing sugar, which was both unhelpful and extremely endearing. The fix is straightforward: toss the rhubarb in a spoonful of flour before folding it in. It absorbs the released moisture, holds the pieces in place, and gives you clean, distinct pockets of fruit in every single slice.

    Main Ingredients

    • 2 cups fresh rhubarb, trimmed and chopped into 1cm pieces: the shorter the pieces, the better distributed through the cake; avoid anything thicker than your thumb
    • 1½ cups plain all-purpose flour, divided: 1 tbsp goes to coat the rhubarb; the rest goes into the batter
    • 1 cup granulated white sugar, divided: ¾ cup into the batter, ¼ cup mixed with cinnamon for the topping
    • ½ cup unsalted butter, softened room temperature is non-negotiable; cold butter will not cream properly
    • 1 large egg, room temperature: room-temp eggs incorporate more evenly than cold ones
    • ½ cup whole milk: full-fat gives the crumb its softness; lower-fat milks make it a little drier
    • 1½ tsp baking powder: the lift that keeps this from being dense; check it isn’t expired
    • 1 tsp pure vanilla extract: rounds out the tartness beautifully
    • ½ tsp ground cinnamon: for the topping; it pairs with rhubarb in a way that feels like it was always meant to happen
    • ¼ tsp fine salt: sharpens every other flavour in the batter; don’t skip it (ask me how I know)

    Step-by-Step Instructions

    Step 1: Prep the Rhubarb and Tin

    • Preheat oven to 175°C (350°F) and grease a 20cm (8-inch) square baking tin.
    • Wash, dry, and chop rhubarb into 1cm pieces uniform size means even baking.
    • Toss rhubarb with 1 tablespoon of flour in a small bowl until lightly coated; set aside.
    • Mix the remaining ¼ cup sugar with cinnamon in a separate small bowl for the topping.

    Step 2: Cream the Butter and Sugar

    • Beat softened butter and ¾ cup sugar together until pale and fluffy, about 3 minutes.
    • Add the egg and vanilla extract and beat again until fully combined and smooth.
    • Scrape down the sides of the bowl: there are always pockets of unmixed butter hiding at the bottom.
    • The mixture should look light and slightly increased in volume at this stage.

    Step 3: Fold in Flour and Rhubarb

    • Whisk together the remaining flour, baking powder, and salt in a separate bowl.
    • Add the flour mixture and milk to the butter mixture in alternating additions, starting and ending with flour.
    • Fold the flour-coated rhubarb pieces through the batter gently until just distributed.
    • Do not overmix; a few small lumps in the batter are completely fine and expected.

    Step 4: Bake and Cool

    • Pour batter into the prepared tin and spread evenly with a spatula.
    • Scatter the cinnamon sugar mixture evenly over the entire surface of the batter.
    • Bake for 38 to 42 minutes until a skewer inserted in the center comes out clean.
    • Cool in the tin for 15 minutes before cutting into squares; it slices much more cleanly when slightly cooled.

    Rhubarb Cake Recipe Variations

    Rhubarb and Strawberry Spring Bake

    Replace half the rhubarb with fresh hulled strawberries, halved. Mia discovered this version entirely by accident when she added strawberries to the bowl while I was answering the door, and it became the best thing she has ever done in this kitchen. The strawberries soften into pools of jammy sweetness that balance the rhubarb’s tartness beautifully. Increase the bake time by 3 to 4 minutes since strawberries release more liquid.

    Leo’s Brown Butter Rhubarb Version

    Brown the butter in a saucepan over medium heat until it smells nutty and the milk solids turn golden, then cool it completely before creaming. Leo asked if we could “make it taste more interesting”; this was what I came back with. The brown butter adds a deep, almost caramel warmth underneath the tartness that makes the whole cake taste considerably more sophisticated than a simple spring bake has any right to.

    Rhubarb Crumble Cake

    Swap the cinnamon sugar topping for a simple crumble made from 4 tablespoons butter, 4 tablespoons flour, 3 tablespoons sugar, and a pinch of cinnamon rubbed together into coarse crumbs. Scatter generously before baking. The crumble bakes into a crunchy, buttery layer that makes this cake feel like a baked fruit dessert and a crumble had a very successful baby. Serve warm with a spoon of thick cream.

    Substitutions

    Fresh rhubarb → Frozen rhubarb, not thawed: Use straight from frozen; do not thaw first or it releases too much water. Toss in flour as directed and add 5 extra minutes to the bake time. The flavor is nearly identical to fresh.

    Whole milk → Soured milk or buttermilk: Add a teaspoon of white vinegar or lemon juice to regular milk and let it sit for 5 minutes. The slight acidity tenderizes the crumb and gives the cake a faint tang that actually complements the rhubarb wonderfully.

    Unsalted butter → Coconut oil: Use refined coconut oil in the same quantity, melted and cooled. The crumb is slightly denser but still delicious, and this makes the recipe dairy-free if you also swap the milk.

    Plain flour → Gluten-free 1:1 baking flour: A direct swap with no other changes needed. The texture is very slightly more crumbly but holds together well when cooled. Use the same tablespoon to coat the rhubarb.

    Equipment

    • 20cm (8-inch) square baking tin
    • Stand mixer or hand mixer
    • Two large mixing bowls
    • Small bowl for rhubarb prep and topping
    • Rubber spatula
    • Whisk
    • Skewer or toothpick for testing
    • Cooling rack

    Storage Tips

    Make Ahead

    • Chop and flour-coat rhubarb up to 1 day ahead; refrigerate covered.
    • Mix dry ingredients the night before and store in a sealed bowl.

    Room Temperature

    • Keeps well covered at room temperature for up to 2 days.
    • The cinnamon sugar topping softens slightly by day 2 but is still delicious.

    Refrigerator

    • Store in an airtight container for up to 5 days.
    • Bring to room temperature before serving for best texture.
    • A 10-second microwave warm brings it back to a fresh-baked feel.

    Freezing

    • Freeze individual squares wrapped in plastic then foil for up to 2 months.
    • Thaw at room temperature for 1 to 2 hours; do not microwave from frozen.

    Family Secret Worth Sharing

    The flour-coating trick for the rhubarb is the one thing I wish someone had told me at the very beginning. Raw rhubarb is about 94% water, and when it hits heat, all of that liquid has to go somewhere. Without anything to absorb it, it migrates to the bottom of the cake, and you end up with a wet, dense, collapsed middle, which is precisely what Leo called the pink swamp. A single tablespoon of flour tossed through the chopped pieces before they go into the batter is all it takes. The flour swells as the rhubarb releases moisture, holds the pieces in place, and keeps your crumb clean and even from edge to center. Mia now insists on doing the tossing herself every single time, with great ceremony, using her smallest bowl. It is completely unnecessary to use a separate bowl for this. I have never told her that.

    Troubleshooting FAQs

    Why did my rhubarb cake sink in the middle?
    Almost always one of three things: the rhubarb wasn’t coated in flour before going in (releasing too much liquid), the oven wasn’t fully preheated, or the cake was taken out too early. Test with a skewer right to the center; it should come out clean with no wet batter. If in doubt, give it another 3 to 5 minutes.

    My rhubarb is very thick and tough should I peel it?
    Yes, if the stalks are very mature and fibrous, run a vegetable peeler lightly along the outside. Young, thin rhubarb from early spring doesn’t need this at all. The stalks should be firm and slightly glossy; avoid anything that looks dried out or hollow at the cut end.

    Can I make this into a loaf instead of a square tin?
    Absolutely. Pour the batter into a greased 9×5 inch loaf tin and increase bake time to 50 to 55 minutes. Check at 50 minutes with a skewer. The loaf shape slices beautifully for lunchboxes and holds together slightly better for transport than squares do.

    Can I use frozen rhubarb from the shops?
    You can, and it works well. The key is to not thaw it first. Add it straight from frozen, already tossed in flour, and give the cake an extra 4 to 5 minutes in the oven. Thawed frozen rhubarb dumps too much water into the batter, and you end up back in pink swamp territory.

    Pink, Tart, and Already Gone by Teatime

    There is something about a rhubarb cake that feels specifically like spring decided to show up in your kitchen and make itself comfortable. The color, the smell, and the way the cinnamon sugar topping crackles when you press the first fork through it are some of those bakes that ask very little of you and give you back considerably more than you expected. Leo has stopped asking if I’m putting celery in the cake. Mia still insists on doing the flour toss. The tin rarely makes it to the next morning.

    If you’re building your collection of easy weeknight dinners and want a bake that earns the same level of reliability, this one belongs on that shortlist. For more sweet baking ideas that actually work, have a look through the dessert collection. And if you loved the honey glaze approach in our honey garlic shrimp, that same balance of sweet and sharp is exactly what makes this cake work too.

    Don’t forget to snap a picture of your rhubarb cake before those pink squares disappear off the cooling rack (trust me, it will disappear quickly!), and leave a rating below. We’d love to hear how this rhubarb cake recipe becomes part of your spring baking story.

  • 5 Secrets to the Creamiest Homemade Mango Ice Cream

    5 Secrets to the Creamiest Homemade Mango Ice Cream

    “Mom. This is just cold mango.” Leo handed his bowl back to me like a tiny restaurant critic returning a dish. Mia hadn’t even tried hers. I had spent forty minutes on what I was certain would be perfect Mango Ice Cream and produced something the children described, generously, as weird. Two more batches, one actual breakthrough, and now nobody hands bowls back anymore.

    Why This Recipe Is Special

    This mango ice cream is the kind of dessert that stops everyone mid-conversation. There are no eggs, no ice cream maker, and no complicated technique—just ripe mango, a handful of pantry staples, and a freezer doing all the heavy lifting while you go about your evening. For me, it’s the dessert I pull out when summer starts to drag and the kids are bored and sticky and need something genuinely exciting. It’s also the one Mia requests for every single birthday, which for a six-year-old is basically the highest honor a recipe can receive.

    How To Make Mango Ice Cream

    After the orange gravel incident, I went back to basics. The problem was obvious in hindsight. I’d been treating frozen mango like it would cooperate without being blended first. It does not. The second disaster involved not whipping the cream long enough, so the whole thing turned into a dense, icy slab that Leo described as “a mango brick.” He wasn’t wrong. The third attempt, Mia stood next to me on her step stool, and we blended everything carefully together. She narrated the whole process like a cooking show host. The ice cream came out silky, golden, and completely perfect. Leo declared it better than any shop-bought version. That is the only review that matters in this kitchen.

    Main Ingredients

    • 3 cups ripe mango, peeled and cubed (about 2 large mangoes). Ripeness is everything; the sweeter the mango, the more intense the flavor. Alphonso or Ataulfo varieties are exceptional
    • 1 cup heavy whipping cream, very cold (cold cream whips faster and holds volume; chill your bowl too)
    • 1 cup sweetened condensed milk: sweetener and creaminess in one; keeps ice cream scoopable instead of icy
    • 2 tbsp fresh lime juice brightens the mango and stops it tasting flat Mia calls this the “secret sparkle.”
    • 1 tsp pure vanilla extract rounds out the tropical flavour without overpowering it
    • Pinch of salt makes all the sweetness pop; never skip salt in a dessert
    • Fresh mango chunks and mint for topping (optional) makes it look like a million dollars with zero extra effort

    Step-by-Step Instructions

    Step 1: Blend the Mango Base

    • Add mango cubes, lime juice, vanilla, and salt to a blender or food processor.
    • Blend until completely smooth with absolutely no chunks remaining; this is the lesson I learned the hard way.
    • Taste the puree and adjust lime juice if needed; it should be bright and intensely fruity.
    • Pour into a bowl and set aside while you prepare the cream.

    Step 2: Whip the Cream to Soft Peaks

    • Pour very cold heavy cream into a large chilled bowl.
    • Beat with a hand mixer on medium-high until soft peaks form, about 3 to 4 minutes.
    • Soft peaks hold their shape, but the tip gently folds over—not stiff, not liquid.
    • Stop here; over-whipped cream turns grainy once frozen.

    Step 3: Fold Everything Together

    • Stir condensed milk into the mango puree until fully combined and uniform in color.
    • Add the mango mixture to the whipped cream in two additions, folding gently with a spatula.
    • Use a slow sweeping fold from the bottom up; do not stir, or you will deflate the cream.
    • Stop folding when the mixture is uniformly golden with no white streaks remaining.

    Step 4: Freeze and Serve

    • Pour into a freezer-safe container and smooth the top with a spatula.
    • Press plastic wrap directly onto the surface so it touches the ice cream with no air gaps.
    • Freeze for a minimum of 6 hours, or overnight for the cleanest scoops.
    • Remove from the freezer 5 minutes before serving; top with fresh mango and mint.

    Mango Ice Cream Variations

    Mango Coconut Sorbet-Style Swirl

    Replace half the heavy cream with full-fat coconut cream for a dairy-light version that leans deep into tropical territory. Mia says it “tastes like a holiday.” Swirl in toasted coconut flakes right before freezing for a little crunch that disappears between bites in the most satisfying way. This works beautifully as a sorbet recipe alternative for dairy-free guests too.

    Leo’s Chilli Mango Version

    Add a quarter teaspoon of Tajin or a tiny pinch of cayenne to the mango puree before blending. Leo suggested the idea entirely unprompted after eating mango with chili at a school fair. I was skeptical. I was wrong. The heat arrives right at the end of each bite, after all the cold sweetness, and it is genuinely wonderful. This one is for the adults and adventurous nine-year-olds who think they invented everything.

    Mango Ice Cream Sandwich Bars

    Pour the mixture into a parchment-lined square baking tin and freeze flat. Once solid, cut into rectangles and sandwich between two thin graham crackers or digestive biscuits. Wrap each one individually in plastic wrap and store in the freezer. I bring these to birthday parties and playdates, and every single parent asks for the recipe before they leave. Devastatingly easy and completely impressive.

    Substitutions

    Heavy cream → Full-fat coconut cream: Best dairy-free swap that keeps the ice cream scoopable and creamy rather than icy. Chill the can overnight and use only the solid cream at the top. Pairs brilliantly with mango.

    Condensed milk → Sweetened condensed coconut milk: Found in most health food stores; makes the whole recipe vegan with no other changes needed. Sweetness level is nearly identical.

    Fresh mango → Frozen mango chunks, fully thawed: Works just as well and is more economical year-round. Thaw completely, drain excess liquid, then blend as directed. Often picked at peak ripeness so the flavor is surprisingly excellent.

    Lime juice → Lemon juice or orange juice: Lemon works equally well. Orange juice gives a mellower sweet-tart note rather than a bright citrus. Use the same 2 tablespoons either way.

    Equipment

    • Blender or food processor
    • Large mixing bowl (chilled if possible)
    • Hand mixer or stand mixer
    • Rubber spatula
    • Freezer-safe loaf pan or container with lid (9×5 inch ideal)
    • Plastic wrap
    • Ice cream scoop for serving

    Storage Tips

    Make Ahead

    • Make the mango puree up to 2 days in advance and refrigerate covered.
    • Fold and freeze the day before for best next-day scoops.

    Freezer

    • Keeps beautifully for up to 3 weeks in a sealed container.
    • Keep plastic wrap pressed directly on the surface to prevent freezer burn.
    • Store away from strong-smelling foods.

    Scooping

    • Remove from the freezer 5 minutes before serving to soften slightly.
    • Dip the scoop in warm water between each ball for cleaner scoops.
    • Do not refreeze if the ice cream has fully melted.

    Toppings

    • Add fresh mango chunks and mint at serving time only never before freezing.
    • Toasted coconut flakes and a drizzle of honey store well in the pantry.

    Family Secret Worth Sharing

    The real secret to this recipe has nothing to do with the ingredients. It’s the plastic wrap trick, and I resisted it for an embarrassingly long time because it felt fussy and unnecessary. I was wrong. Ice crystals form on the surface of homemade ice cream when air hits it, and they turn even the creamiest mixture into something that feels more like a snow cone than a proper scoop. Press the wrap directly onto the mixture before the lid goes on, like, actually touching the surface, and those crystals never form. My mom never told me this trick. I found it scribbled in the margin of an old recipe card she gave me years ago, and it entirely changed everything. Mia now does it herself every single time, cautiously, like she’s tucking it in for the night. It is the most endearing thing I have ever seen in this kitchen.

    Troubleshooting FAQs

    Why did my mango ice cream turn out icy instead of creamy?
    Two likely culprits: the cream wasn’t whipped to proper soft peaks, or you skipped pressing plastic wrap directly on the surface before freezing. Both let air and ice crystals in. Also check that condensed milk was fully mixed into the mango puree before folding; unmixed pockets cause uneven freezing.

    Can I make the sorbet without a blender?
    You can if your mango is very ripe and soft. Mash it thoroughly with a fork until completely smooth, then press it through a fine mesh sieve to remove any fibers. It takes about ten extra minutes, but it works. A hand blender is even faster if you have one.

    My ice cream won’t scoop; it’s rock solid. What went wrong?
    Nothing went wrong; it just needs time. Leave it on the counter for 5 to 8 minutes before scooping. If your freezer runs very cold, give it a little longer. Running your scoop under warm water between each one also helps a lot.

    How do I know when the mango is ripe enough?
    A ripe mango gives slightly when pressed at the stem end, smells sweet and fragrant near the base, and has some give in its skin. If it smells like nothing, it will taste like nothing wait another day or two. Ripeness is not optional in this recipe.

    The Scoop That Started It All

    These days the mango ice cream is a whole event in our kitchen. Leo reads the recipe card out loud like he wrote it himself. Mia presses the plastic wrap onto the surface with the focused seriousness of someone defusing something. They both stand at the freezer door approximately every forty-five minutes asking if it’s ready. And when it finally comes out golden and cold and smelling like the best version of summer, they go completely quiet for about three spoonfuls. That silence is the most honest food review I will ever get.

    If you’re looking to grow your collection of easy weeknight dinners with something sweet the whole family will love, this mango ice cream earns its place. It’s one of those recipe dinner party tricks that looks far harder than it is. And any time you need a crowd-pleasing addition to your easy weeknight dinner spread, summer gatherings, birthday treats, or a Tuesday in May when everyone just needs something good—this is the one.

    Please remember to snap a picture of your mango ice cream before those golden scoops disappear into happy little mouths (trust me, they will disappear quickly!), and leave a rating below. We’d love to hear how this mango ice cream becomes part of your family’s summer story.

  • Easy Brown Butter Brookies Recipe

    Easy Brown Butter Brookies Recipe

    The first time I made brown butter brookies, I burned the butter so badly Jake came running in yelling, “MOM IS IT A FIRE?” Emma stood in the doorway holding her stuffed rabbit, looking genuinely concerned. I started over and burned it again during a homework argument. Third try? The most extraordinary thing I have ever pulled from our oven. The smoke alarms were honestly worth it.

    Why This Recipe Is Special

    A brookie is exactly what it sounds like: a brownie and a cookie baked into one impossibly delicious bar. But this version is not just any brookie. The butter gets browned first, filling the kitchen with that warm, nutty, almost caramel smell that makes both kids materialize at the counter without being asked. The layers are built in a specific order so neither one overbakes you get a genuinely fudgy brownie bottom and a genuinely chewy cookie top in the same bite. It is a completely unreasonable amount of joy in one pan.

    How To Make Brown Butter Brookies

    By my third attempt, I had both kids stationed at the stove with me. Jake was on official brown-butter watch; his job was to tell me the moment the foam settled and he could see the golden bits forming at the bottom. He took this responsibility extremely seriously. Emma pressed the first layer of cookie dough into the pan and kept sneaking chips from the bowl. “That is a tax,” she told me, completely straight-faced. Nine years old, going on forty-five. The whole kitchen smelled like a bakery, and even the process was worth it.

    Main Ingredients Brownie Batter

    • 10 tbsp salted butter: Browned in a light-colored pan until nutty and golden. The whole flavor foundation.
    • 3 tbsp vegetable oil: Keeps the brownie fudgy even after cooling. Do not skip.
    • 4 oz semi-sweet chocolate, finely chopped: Melted directly into the warm brown butter.
    • 1/4 cup cocoa powder: Used alongside the melted chocolate for extra depth.
    • 3 large eggs, room temperature: Whisked with sugar until fully dissolved for that shiny crust.
    • 1 cup granulated + 1/4 cup powdered sugar: The combo creates the gorgeous, paper-thin, shiny brownie top.
    • 2 tsp vanilla extract + 1/2 tsp salt: Real vanilla only.
    • 1 cup all-purpose flour Spooned and leveled, never scooped.

    Main Ingredients Cookie Dough

    • 3/4 cup salted butter, melted: Melted, not browned; this is what makes the cookies chewy.
    • 3/4 cup each of granulated and brown sugar: Brown sugar keeps them soft and chewy for days.
    • 2 large eggs + 2 tsp vanilla, room temperature: Room-temp eggs mix in smoothly.
    • 2 1/4 cups flour + 1 tsp baking soda + 1/2 tsp salt: Fold until just combined.
    • 2 cups semi-sweet chocolate chips: 1.5 cups in dough, rest scattered on top before baking.

    Step-by-Step Instructions

    Step 1: Make the Cookie Dough

    • Melt the butter, then whisk in both sugars, both eggs, and vanilla until smooth.
    • Stir in the flour, baking soda, and salt until just combined; do not overwork.
    • Fold in 1 1/2 cups of chocolate chips, keeping the rest for topping.
    • Divide the dough in half, press one half into a parchment-lined 9×13 to form a sheet, carefully lift it out intact, and set it aside; this is your middle layer.

    Step 2: Brown the Butter and Build the Brownie Batter

    • Melt 10 tbsp butter in a light-colored saucepan over medium heat, stirring constantly, until it foams, the foam settles, and golden-brown specks form on the bottom with a nutty caramel aroma; then pull off heat immediately.
    • Whisk in chopped chocolate, vegetable oil, and cocoa powder until smooth, then cool 5 minutes.
    • In a separate large bowl, vigorously whisk eggs and granulated sugar for 2 full minutes until sugar dissolves, then whisk in powdered sugar, vanilla, and salt.
    • Fold the chocolate mixture into the egg bowl, then gently fold in the flour until no dry streaks remain.

    Step 3: Layer and Assemble

    • Preheat oven to 350°F (175°C) and line a fresh 9×13 pan with parchment, leaving an overhang on both long sides.
    • Spread half the brownie batter in an even layer across the bottom of the pan.
    • Lay the pre-formed cookie dough sheet directly on top of the brownie layer.
    • Spread the remaining brownie batter over the cookie layer, then drop the remaining cookie dough in small discs across the surface and scatter the reserved chocolate chips.

    Step 4: Bake, Rest, and Slice

    • Bake for 26 to 30 minutes: edges set, top matte not shiny, toothpick has moist crumbs, not wet batter.
    • Do not overbake; they finish setting as they cool and will look slightly underdone when right.
    • Cool in the pan for at least 30 minutes before lifting out using the parchment handles.
    • For the cleanest slices, cool fully and wipe the knife between cuts or cut warm and embrace the glorious mess.

    Brown Butter Brookies Variations

    The Salted Caramel Drizzle (Emma’s “Make It Pretty” Edition)

    Emma’s position is that everything is improved by being drizzled on. She is mostly correct. Drizzle the cooled brookies with salted caramel sauce and a scatter of flaky sea salt before slicing. The caramel soaks into the top cookie layer, and the salt cuts through all that chocolate richness in a way that makes your eyes close involuntarily. Emma presents these with the energy of someone accepting an award.

    The Peanut Butter Swirl (Jake’s Non-Negotiable Request)

    Jake decided that all chocolate things are better with peanut butter, and he is simply not wrong. After pouring the top brownie layer, drop five or six large spoonfuls of peanut butter across the surface and drag a butter knife through in slow, lazy swirls. The peanut butter bakes in and creates rich, salty ribbons through the fudgy layer. Jake calls this “the best thing in our house,” and I choose not to take that personally.

    The White Chocolate and Raspberry (My Quiet Afternoon Version)

    When I get the kitchen to myself, rare and precious, I swap half the semi-sweet chips for white chocolate and press eight or ten fresh raspberries into the top layer before baking. They create little jewel-like pockets of tart fruit against the dark chocolate richness. The fanciest thing this kitchen has produced, and it takes no extra effort at all.

    Substitutions

    • Salted butter → Unsalted works in both layers; add an extra pinch of salt to each. The brown butter flavor comes from the browning process, not the salt.
    • Semi-sweet chocolate → Dark chocolate (60 to 70% cacao) gives a more intense, less sweet brownie. Milk chocolate makes the whole bar sweeter.
    • Vegetable oil → Any neutral oil works: sunflower, canola, or light coconut. Avoid olive oil. Do not leave it out; it keeps the brownie fudgy rather than cakey.
    • All-purpose flour → A 1:1 gluten-free baking flour works in both layers with no other changes. Tested for a friend, the brookies disappeared in under an hour.

    Equipment

    • 9×13 inch baking pan
    • Parchment paper
    • Light-coloured saucepan (essential for browning butter)
    • Two large mixing bowls
    • Whisk
    • Rubber spatula
    • Kitchen scale (highly recommended)
    • Oven thermometer
    • Cooling rack
    • Sharp knife for slicing

    Storage Tips

    Make Ahead

    • Make both batters and the pre-formed cookie sheet up to 24 hours ahead, cover, and refrigerate.
    • Let everything come to room temperature for 20 minutes before assembling and baking.
    • The fully assembled unbaked pan can be refrigerated overnight and baked fresh the next day.

    Refrigerator

    • Store cooled sliced bars in an airtight container at room temperature for 3 to 4 days.
    • If your kitchen runs warm, the fridge extends freshness to 5 to 6 days; bring it to room temperature before eating.
    • A 10 to 15 second microwave warm-up restores that just-baked fudgy texture beautifully.

    Freezing

    • Freeze fully cooled individual bars on a baking sheet first, then transfer to a zip-lock freezer bag.
    • Keeps well for up to 2 months; the brownie layer freezes particularly well.
    • Thaw at room temperature for an hour or warm gently in the microwave from frozen.

    Reheating

    • Microwave a single bar for 15 to 20 seconds; it comes back to life spectacularly.
    • Oven: place bars at 300°F for 6 to 8 minutes, covered loosely with foil.
    • Serve warm with vanilla ice cream if you want to cause a scene in your own kitchen.

    Family Secret Worth Sharing

    Brown butter terrified me for years. It goes from perfect to ruined so fast that the first two times I made these, I either pulled it too early or went two seconds too far into a smoky kitchen and two alarmed children. The fix my mom finally showed me: use a light-colored pan so you can actually see the color change. Dark nonstick hides everything, and that is how you end up overcooking it every time.

    Watch for three stages: first it foams, then the foam settles, then tiny golden-brown specks appear on the bottom, and it smells like warm hazelnuts and caramel. That third-stage moment five seconds after the smell hits you is when you pull it off the heat. Jake now does brown-butter watch for me every single time and has not let it burn once. A nine-year-old can be a better brown-butter guardian than you would ever expect.

    Troubleshooting FAQs

    My brookies came out cakey instead of fudgy. What happened?
    Almost certainly overbaked. The centers should look barely set when you pull them; they finish cooking from residual heat. A toothpick with wet batter is too much; moist crumbs are exactly right. Set a timer for 26 minutes and check from there.

    The layers mixed together when I assembled. How do I keep them separate?
    The key is the pre-formed middle cookie layer. Press it into parchment first, lift the whole sheet out, and lay it on top of the brownie batter. Also let the butter mixture cool 5 minutes before folding in the flour so the batter is not too warm at assembly.

    My brown butter keeps burning before I reach the nutty stage. Any tips?
    Medium heat and a light-colored saucepan. Stir or swirl constantly. Once you smell hazelnut-caramel, you are either there or one second away; pull the pan immediately.

    Can I make these in a smaller pan?
    Yes, halve the entire recipe and bake in a 9×9 inch pan. Layers will be thicker, so check at 28 minutes. The smaller batch disappears at exactly the same speed, just so you know.

    The Bake That Made the Whole Burnt Butter Saga Worth It

    Last weekend I pulled a fresh pan of brownies from the oven and set it on the counter to cool. I turned around for four minutes to answer the door. When I came back, Jake had removed a corner piece, the whole corner, clean, and was eating it standing at the counter, looking like he had done absolutely nothing wrong. Emma was watching from the doorway. “He said it was quality control,” she reported, very helpfully.

    This is what easy family meals look like in this house: batter-covered counters, a brown-butter guardian who eats the evidence, and a kitchen that smells like the best possible version of a Saturday. If you are looking for comfort food recipes that feel genuinely special, something that makes even a regular Tuesday feel worth the effort, this is the pan right here.

    Whether you bake these as a bake sale hero, a birthday treat, a school-night cheer-up, or just as your new favorite breakfast ideas that nobody in the family will technically argue with, these brown butter brookies will earn a permanent place in your life. I have no doubt about that whatsoever.

    Don’t forget to snap a picture of your brown butter brookies before that first bar disappears (trust me, it will disappear quickly!), and leave a rating below. We’d love to hear how these brown butter brookies become part of your family baking story.

    Star rate this recipe and join our cozy home baking family.