Author: Sarah Mitchell

  • Best Carrot Cake Cream Cheese Bars

    Best Carrot Cake Cream Cheese Bars

    I flipped the pan to unmold them, and they landed upside down on the counter instead of the cutting board. Ben stared. Mia said “that still looks good,” before I could process what happened. She was right. I flipped them back, called it rustic, and cut them anyway. That accident is how I learned that great carrot cake cream cheese bars are impossible to ruin.

    Why This Recipe Is Special

    These bars have everything a carrot cake should have: warm spice, tender crumb, sweet shredded carrot, and the kind of cream cheese layer that makes you close your eyes for a second after the first bite. But they are cut into bars instead of sliced as a cake, which means they are easier to serve, easier to transport, and significantly easier to grab off the counter when you walk past. Mia calls them “carrot squares” and Ben calls them “basically cake,” and both of them are correct.

    How To Make Carrot Cake Cream Cheese Bars

    The successful batch happened on a Sunday afternoon when Mia had appointed herself official carrot grater, which she took so seriously she grated her knuckle on the third carrot and then bravely continued with a bandage and tremendous dignity. Ben was mixing the dry ingredients and announcing each spice as he added it like a very small cooking show host. When the batter came together and the cinnamon smell hit the kitchen, both of them stopped what they were doing and just stood there inhaling. I know exactly how they felt.

    The cream cheese layer is where this recipe separates itself from every other carrot cake situation. It goes on top of the batter before baking, which means it bakes into the top of the bar rather than sitting separately as a frosting. The result is a slightly dense, cheesecake-like surface that sets into something between frosting and filling and is frankly the best part of every single bar. Ben said after the first bite that it tasted like “the bakery but at home,” and I wrote that down because it is exactly right.

    Main Ingredients

    For the Carrot Cake Base

    • 2 cups all-purpose flour – Spoon and level; packed flour makes dense, dry bars
    • 1.5 cups granulated sugar – Sweetness and moisture in the crumb
    • 1 teaspoon baking soda – Gives the bars their lift; make sure yours is fresh
    • 1 teaspoon baking powder – Works alongside the baking soda for an even, tender crumb
    • 1.5 teaspoons cinnamon – The signature warm spice of every good carrot cake
    • 1/2 teaspoon nutmeg – Adds depth alongside the cinnamon; do not skip it
    • 1/4 teaspoon ginger – A small but important layer of warmth in the spice blend
    • 1/2 teaspoon salt – Enhances every other flavor; non-negotiable
    • 3 large eggs, room temperature – Room temperature eggs incorporate more evenly into the batter
    • 3/4 cup neutral oil – Keeps the bars moist for days; vegetable or avocado both work
    • 1 teaspoon vanilla extract – Rounds out all the warm spice notes
    • 1 tablespoon orange zest – The family secret; brightens the spices and lifts the sweetness of the carrots
    • 2 cups freshly grated carrots – Grate fresh from whole carrots; pre-shredded bagged carrots are too dry
    • 1/2 cup chopped walnuts or pecans – Optional but adds a wonderful crunch against the tender crumb

    For the Cream Cheese Layer

    • 8 oz full-fat block cream cheese, room temperature – Block only; spreadable tub cream cheese does not bake properly
    • 1/3 cup granulated sugar – Sweetens the cream cheese layer without making it cloying
    • 1 large egg – Helps the cream cheese layer set into that perfect cheesecake-like texture
    • 1 teaspoon vanilla extract – Essential in the cream cheese layer; brings the whole thing together

    Step-by-Step Instructions

    Step 1: Prepare the Pan and Mix the Dry Ingredients

    • Preheat your oven to 350 degrees F and line a 9×13 inch baking pan with parchment paper, leaving an overhang on the sides to lift the bars out cleanly after baking
    • Whisk together the flour, sugar, baking soda, baking powder, cinnamon, nutmeg, ginger, and salt in a large bowl until completely combined and no lumps remain
    • In a separate bowl, whisk together the eggs, oil, vanilla, and orange zest until smooth and slightly thickened, about 1 minute
    • Pour the wet ingredients into the dry ingredients and stir until just combined, then fold in the freshly grated carrots and chopped walnuts until evenly distributed

    Step 2: Make the Cream Cheese Layer

    • Beat the room-temperature block cream cheese in a medium bowl with a hand mixer for 2 minutes until completely smooth with absolutely no lumps
    • Add the sugar and beat for another minute until fully incorporated and the mixture looks light and creamy
    • Add the egg and vanilla extract and beat until just combined; do not overbeat at this stage or the cream cheese layer will develop cracks during baking
    • The finished cream cheese mixture should be smooth, pourable, and just thick enough to spread without it sinking into the carrot batter

    Step 3: Layer and Bake

    • Spread the carrot cake batter evenly into the prepared pan, smoothing it all the way to the edges and corners with an offset spatula
    • Pour the cream cheese mixture gently over the top of the carrot batter and spread it carefully into an even layer using the back of a spoon
    • For a swirled finish, drag a skewer or toothpick through the surface in slow figure-eight motions to marble the two layers slightly before baking
    • Bake for 30 to 35 minutes until the edges are set, the center has just a slight jiggle, and a toothpick inserted in the carrot cake portion comes out with just a few moist crumbs

    Step 4: Cool, Chill, and Cut

    • Let the bars cool completely in the pan at room temperature for at least one hour before transferring to the fridge
    • Refrigerate for at least 2 hours until the cream cheese layer is fully set and firm enough to cut cleanly; overnight chilling gives the best, sharpest slices
    • Lift the chilled slab out of the pan using the parchment overhang and place it on a cutting board
    • Cut into bars using a hot, clean knife wiped dry between each cut for clean, professional-looking edges that do not drag the cream cheese layer

    Carrot Cake Cream Cheese Bars Variations

    Mia’s “Extra Crumble On Top” Version

    After the upside-down counter incident, Mia decided that the bottom of the bars actually looked better than the top and that we should add something crunchy on the cream cheese side to make it more interesting. She was not wrong. For her version, mix together two tablespoons of brown sugar, two tablespoons of finely chopped walnuts, and a pinch of cinnamon, then scatter it over the cream cheese layer right before the pan goes into the oven. It bakes into a little caramelized crumble on the surface that makes every bar look and taste exactly like it came from a bakery case. Mia takes full credit for this and I let her have it completely.

    Ben’s “Raisin Included” Version

    Ben has very strong pro-raisin opinions that Mia finds deeply offensive. He asks for raisins in every carrot cake situation with the calm confidence of someone who knows they are right. For his version, fold half a cup of golden raisins into the carrot batter alongside the walnuts. The raisins plump up during baking and add little pockets of sweetness that Ben describes as “the best part.” Mia picks every single one out of her bar with surgical precision and puts them on Ben’s plate, and he eats them without comment. This is their arrangement.

    The Easter Celebration Version

    Every Easter these bars appear on our table decorated with a little extra love. Press mini candy-coated eggs or small decorative sugar carrots into the cream cheese layer right before it goes in the oven, and dust the finished chilled bars with a small amount of powdered sugar. Cut into smaller squares rather than large bars for a party platter presentation. They travel beautifully in a container layered between parchment, they hold up well at room temperature for a couple of hours, and they disappear from the table faster than anything else I bring.

    Substitutions

    All-purpose flour to a 1:1 gluten-free baking flour: A good quality 1:1 gluten-free baking blend works well here since the carrots and oil keep the bars moist regardless of the flour type. The texture will be very slightly denser, but the flavor is identical. Bob’s Red Mill 1:1 is the one I have tested, and it holds together cleanly when cut.

    Neutral oil to melted coconut oil: Refined coconut oil (the kind without a strong coconut flavor) substitutes in the same quantity with almost no difference in the finished bar. Unrefined coconut oil adds a subtle tropical note that actually works surprisingly well alongside the warm spices in the batter.

    Granulated sugar to brown sugar: Replacing the granulated sugar with brown sugar in the carrot base gives a deeper, more molasses-forward flavor and a slightly denser, moister crumb. The bars will be a shade darker in color and the spice flavors will be richer and more pronounced. This is my personal preference when I have the choice.

    Walnuts to raisins, pecans, or shredded coconut: Any mix-in works in the carrot base. Pecans are buttery and slightly sweeter than walnuts. Shredded sweetened coconut adds chewiness and tropical sweetness. Golden raisins add pockets of fruit sweetness throughout. Use whatever combination your family loves or leave the mix-ins out entirely for a cleaner bar.

    Equipment

    • 9×13 inch baking pan
    • Parchment paper with overhang on both sides for easy lifting
    • Large mixing bowl for the carrot batter
    • Medium mixing bowl for the cream cheese layer
    • Hand mixer or stand mixer for the cream cheese
    • Box grater for the fresh carrots
    • Offset spatula for spreading both layers evenly
    • Skewer or toothpick for the optional marble swirl
    • Whisk for the dry ingredients and the wet ingredients
    • Hot clean knife for slicing; wipe dry between every cut
    • Wire cooling rack for cooling the pan before refrigerating

    Storage Tips

    Make Ahead

    • These bars are genuinely better the next day once the cream cheese layer has fully set and the spices in the carrot base have had time to deepen overnight
    • Bake the day before serving, cool completely, refrigerate overnight uncut, and slice fresh the morning you plan to serve for the cleanest presentation
    • The grated carrots can be prepared a day ahead and stored in a sealed container in the fridge to save time on baking day

    Refrigerator

    • Store cut bars in an airtight container in the fridge for up to 5 days; the cream cheese layer makes refrigeration non-negotiable
    • Layer the bars between sheets of parchment paper to prevent the cream cheese tops from sticking together
    • Let bars sit at room temperature for 10 to 15 minutes before serving; the texture of both the cake layer and the cream cheese improves significantly at room temperature

    Freezing

    • Freeze individual cut bars wrapped tightly in plastic wrap and then place them in a freezer bag for up to 2 months
    • Thaw overnight in the fridge still wrapped; unwrap before serving so condensation does not collect on the cream cheese surface
    • Do not freeze the uncut slab, as the cream cheese layer can develop a slightly grainy texture when thawed in a large mass

    Reheating

    • These bars are served at room temperature or cold and do not need reheating
    • Remove from the fridge 15 minutes before serving for the best texture; cold cream cheese is firmer and the bar flavors open up beautifully at room temperature
    • A lightly chilled bar with a cup of tea on a Tuesday afternoon is one of the genuinely best things about having made a full batch of these

    Family Secret Worth Sharing

    My mom always added a tablespoon of orange zest to her carrot cake batter and I spent years thinking it was an optional flourish until I left it out one Easter and the whole family immediately noticed something was off. Nobody could name what was missing but everyone agreed something was. The orange zest does not make the bars taste like orange; it makes them taste more like themselves. It brightens the spices, lifts the sweetness of the carrots, and gives the whole thing a quality that is hard to describe but instantly recognizable when it is there. I add it every time now and I added it to this recipe without writing it in the main ingredients list because I wanted to tell you about it here instead, the way my mom would have told me. Add it. A whole tablespoon. You will know exactly what I mean after the first bite.

    Troubleshooting FAQs

    The cream cheese layer cracked during baking. What went wrong?
    Cracking in a baked cream cheese layer almost always comes from overmixing after the egg is added or from too high an oven temperature. Once the egg goes into the cream cheese mixture, mix only until just combined. Also make sure your oven is actually at 350 degrees F and not running hotter; an oven thermometer is worth having for any cream cheese baking. Small hairline cracks are normal and will not affect the flavor or texture at all.

    My bars are sinking in the middle after baking. What happened?
    A sunken center usually means the bars were underbaked or the oven door was opened too early. Do not open the oven until at least 25 minutes have passed. The cream cheese layer jiggles more than the carrot base when done, which can look alarming, but check the carrot portion with a toothpick rather than judging by the cream cheese. Let the bars cool completely before refrigerating; cutting into a warm or lukewarm bar will always look underdone in the center.

    The bars are crumbling when I try to cut them. How do I fix it?
    Two things cause crumbly bars: not chilling long enough before cutting and using a cold knife. The cream cheese layer needs to be completely firm before you make the first cut, which means at least 2 hours in the fridge and ideally overnight. Run your knife under hot water, wipe it completely dry, and cut with one clean downward press without sawing back and forth. Wipe and reheat the knife between every single cut.

    Can I use pre-shredded carrots from the bag?
    The short answer is technically yes but really no. Bagged pre-shredded carrots are much drier than freshly grated carrots and will make the bars noticeably denser and less moist. They are also cut thicker than a box grater produces, which means they do not soften as fully during baking. Freshly grated carrots take about three minutes and make a meaningful difference in the final texture. It is worth it.

    The Bars That Survived the Counter and Became a Family Tradition

    The upside-down counter incident is now a story we tell every time I make these, usually while Ben is reaching for his second bar and Mia is already planning which corner piece she wants. These carrot cake cream cheese bars have become one of our most beloved easy baked dessert recipes in the whole repertoire, sitting comfortably alongside our strawberry chocolate cake as a celebration dessert that feels genuinely special without being genuinely complicated. For the weeks when the dessert spread needs to cover every kind of craving, these bars next to our healthy brownie recipe give you something for everyone at the table with almost no overlap and absolutely no complaints. Some recipes arrive as accidents and stay as traditions, and this one has been both from the very first upside-down batch.

  • 3 Secrets to Perfect Crispy Ground Beef Tacos

    3 Secrets to Perfect Crispy Ground Beef Tacos

    I got the pan too hot, walked away for ninety seconds, and came back to one side completely charred. Mia took a bite of the burnt side and said, “Still good.” Ben had already eaten two before I could plate them. That first burnt batch is what taught me the technique, and these crispy ground beef tacos have been our Friday night staple ever since.

    Why This Recipe Is Special

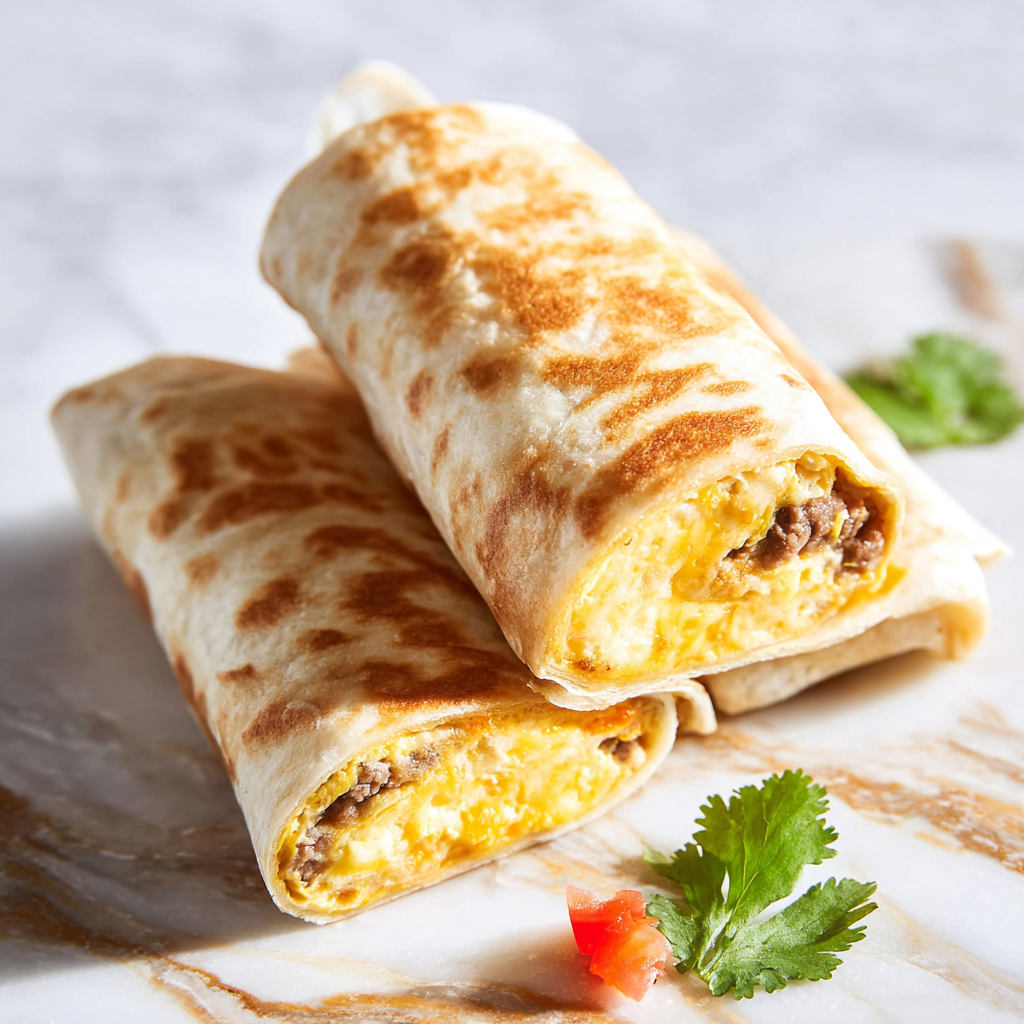
    These are not the soft taco Tuesday situations most people picture. These are pan-fried, golden, and shatteringly crispy on the outside, with seasoned ground beef and melted cheese sealed inside so every single bite has that crunch and that pull at the same time. They come together in under 30 minutes with ingredients most people already have, and they make the whole kitchen smell like the kind of Mexican restaurant you drive across town for. Mia calls them “crunch tacos” and refuses to call them anything else.

    How To Make Crispy Ground Beef Tacos

    The version that actually worked was a Saturday lunch situation where both kids were home and extremely invested in the process. Mia had taken it upon herself to be the cheese distributor, which mostly meant she was eating handfuls of shredded cheese directly from the bowl between each taco. Ben was standing at the stove watching the first taco fry with the focused intensity of someone expecting something to go wrong. When that first one came out golden and blistered and perfect, he said, “That sounds right,” referring to the crunch when I pressed it down. He was absolutely right.

    The lesson from the burnt batch was about heat management. You want the pan hot enough to get that immediate sizzle when the tortilla hits the oil, but medium rather than high so the cheese has time to melt completely before the outside burns. The combination of pre-cooking the beef, loading the taco, and folding it before it hits the pan is what creates that sealed, crispy pocket with no steam escaping and no filling falling out. Ben now monitors the heat with a dedication that would impress a professional cook.

    Main Ingredients

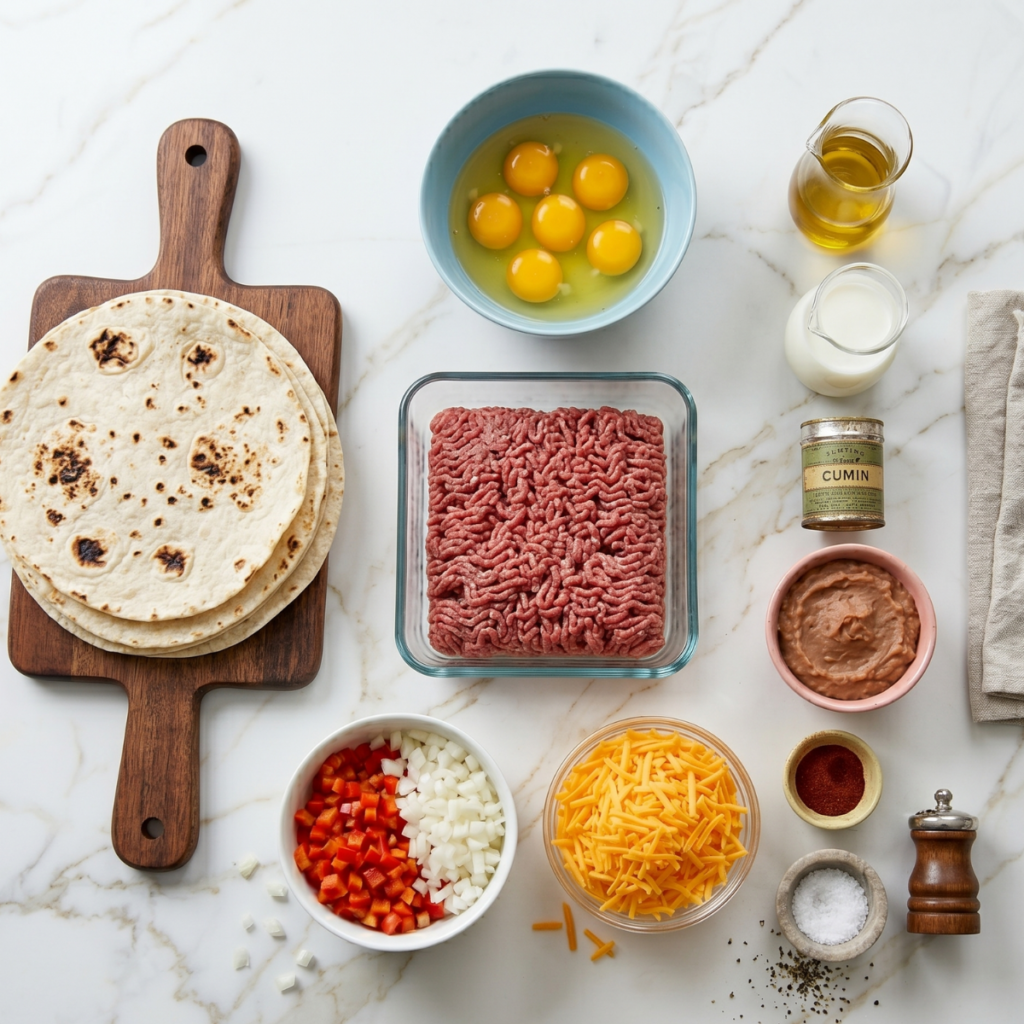
    • 1 lb ground beef (80/20) – The fat content gives the beef flavor and keeps it juicy inside the crispy taco shell
    • 8 small flour tortillas – Small flour tortillas fry up crispier and more evenly than large ones; corn tortillas also work beautifully
    • 1.5 cups shredded Monterey Jack or mozzarella cheese – Melts fast and creates that irresistible cheese pull; cheddar works too but melts slightly slower
    • 1 teaspoon cumin – The warm earthy backbone of the taco seasoning
    • 1 teaspoon chili powder – Depth and color in the beef; reduce to half for the kids’ version
    • 1 teaspoon smoked paprika – Adds a subtle smokiness that makes the filling taste deeply seasoned
    • 1/2 teaspoon garlic powder – Layered savory flavor throughout the beef
    • 1/2 teaspoon onion powder – Sweetness and depth without having to dice an onion
    • Salt and black pepper to taste – Season the beef generously while it cooks
    • 2 to 3 tablespoons neutral oil – For pan-frying; vegetable or avocado oil both work well
    • Fresh cilantro or parsley, chopped – For garnish; adds brightness against the rich golden crust
    • Lime wedges for serving – A squeeze of lime over the finished tacos is genuinely transformative
    • Avocado green sauce or salsa for dipping – The creamy dipping sauce in the image is what takes these to another level entirely

    Step-by-Step Instructions

    Step 1: Cook the Ground Beef

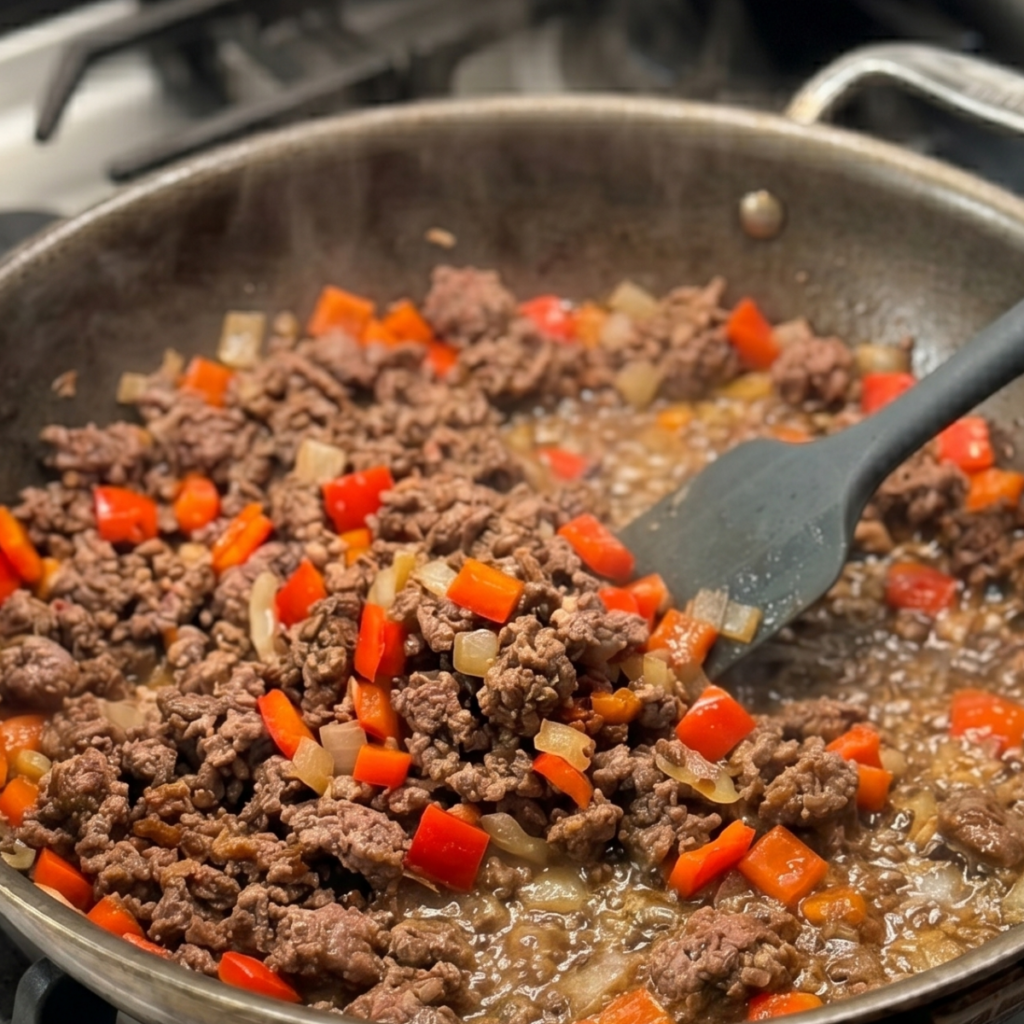
    • Heat a large skillet over medium-high heat, add the ground beef, and cook undisturbed for 2 minutes before breaking it up so it gets some browning instead of just steaming
    • Break the beef into small crumbles and cook until deeply browned with no pink remaining, about 5 to 6 minutes total
    • Drain any excess fat from the pan, leaving about one tablespoon behind, then add the cumin, chili powder, smoked paprika, garlic powder, onion powder, salt, and pepper
    • Stir the spices into the beef for 1 minute over medium heat until everything is deeply coated and fragrant, then remove from heat and set aside

    Step 2: Assemble the Tacos

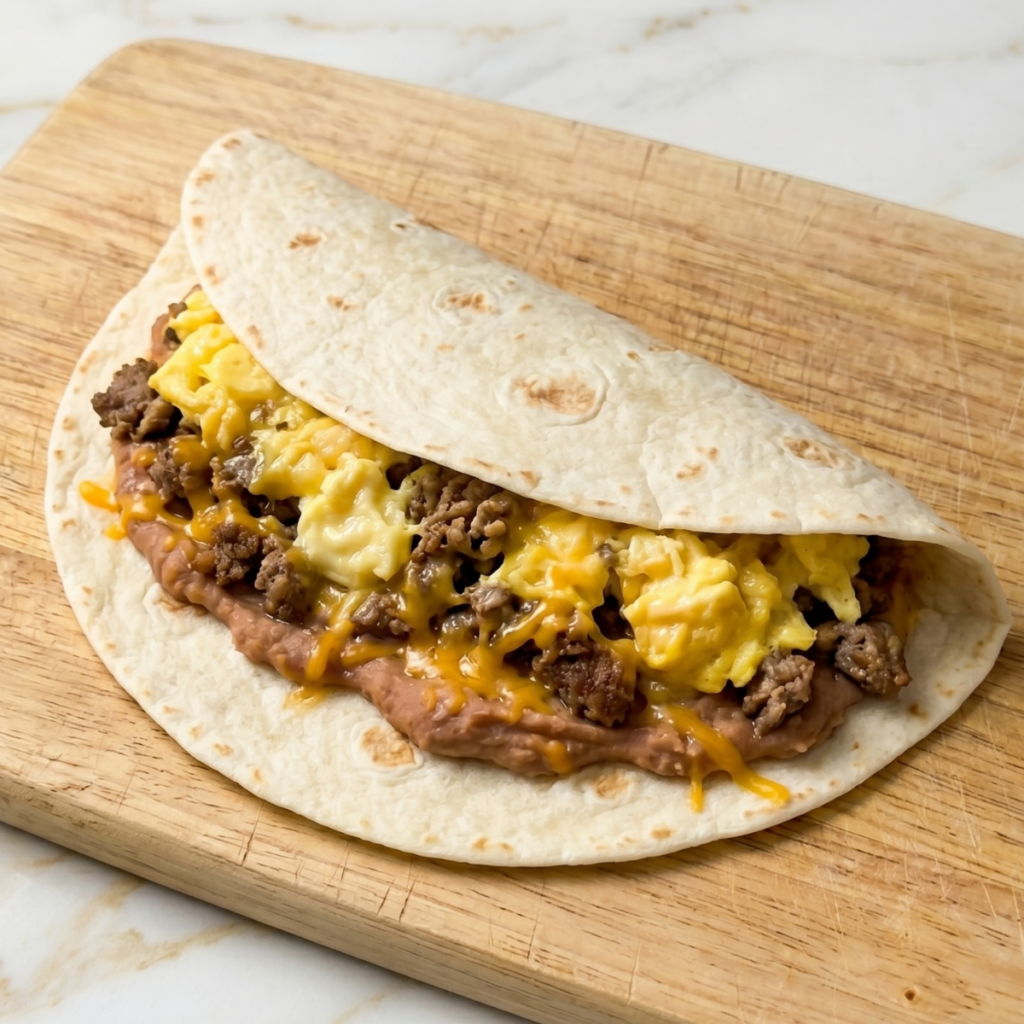
    • Lay the flour tortillas flat on a clean surface and place a generous spoonful of seasoned beef on one half of each tortilla, leaving a small border at the edge
    • Scatter a good pinch of shredded cheese over the beef on each tortilla; the cheese goes between the beef and the fold so it melts directly against the hot filling
    • Fold each tortilla in half firmly, pressing down gently so the filling is compact and the taco holds its shape without splitting open during frying
    • Work quickly once you start assembling so the tortillas do not have time to absorb moisture from the filling and go soft before they hit the pan

    Step 3: Fry Until Crispy

    • Heat the neutral oil in a large skillet over medium heat until shimmering; the oil should sizzle immediately when the taco edge touches it
    • Place 2 to 3 assembled tacos in the pan at a time without crowding; work in batches so the temperature stays consistent
    • Cook for 2 to 3 minutes on the first side without moving until deep golden and blistered, then flip carefully with tongs and cook for another 2 minutes on the second side
    • Press down gently on each taco with a spatula during the last 30 seconds of cooking to maximize the contact between the tortilla and the hot oil for an even, all-over crunch

    Step 4: Drain, Garnish, and Serve

    • Transfer the fried tacos to a wire rack or a plate lined with paper towels to drain for about 60 seconds; a rack keeps the underside crispy while a paper towel can make it steam
    • Sprinkle freshly chopped cilantro or parsley over the top of each taco immediately while the surface is still slightly oily so the herbs stick
    • Serve right away with lime wedges on the side and a bowl of creamy avocado green sauce or your favorite salsa for dipping
    • These tacos are at their absolute best in the first five minutes out of the pan; the crunch is loudest and the cheese is at peak meltiness right from the start

    Crispy Ground Beef Tacos Variations

    Mia’s “Extra Cheese Inside” Version

    Mia has never once in her life felt that any dish contained enough cheese. She conducted a formal inspection of the first assembled taco, looked at me very seriously, and said there was not enough cheese. There was plenty of cheese. For her version, double the cheese inside each taco and add a small extra pinch right at the fold line so it melts into a crispy cheese crust right at the edge of the tortilla. That little seam of blistered cheese that forms is so good I now do it for everyone and just call it Mia’s method.

    Ben’s “Spicy Crunch” Version

    Ben went through a spicy food phase that is now apparently permanent. He adds a thin swipe of chipotle hot sauce directly onto the tortilla before the beef goes on, which creates a little heat layer that builds slowly under all that crispy golden shell. He also requests extra smoked paprika in the beef seasoning and finishes his plate with a very aggressive squeeze of lime. The result is genuinely one of the best versions of these tacos, and I have started making it this way for myself on the nights the kids are not watching.

    The Sheet Pan Oven Version

    On the nights when I have eight or more tacos to make and standing over the stove in batches sounds exhausting, I do the whole thing in the oven. Brush both sides of the assembled tacos lightly with oil, place them on a lined baking sheet, and bake at 425 degrees F for 12 to 14 minutes, flipping once at the halfway point. They come out golden, crispy, and remarkably close to the stovetop version. The whole batch is done at once, cleanup is minimal, and Ben calls it “the lazy version,” which he means as a compliment.

    Substitutions

    Ground beef to ground turkey or chicken: Ground turkey or chicken works well here and keeps things slightly leaner. Since both are lower in fat than 80/20 beef, add an extra half tablespoon of oil to the pan when cooking the meat and season a little more generously since leaner meat holds seasoning slightly differently than beef.

    Flour tortillas to corn tortillas: Corn tortillas give a more traditional flavor and a slightly different crunch that is thinner and crispier than flour. Warm them briefly in a dry skillet before assembling so they are pliable enough to fold without cracking. They are also naturally gluten-free, which makes this recipe work for more people at the table.

    Monterey Jack to pepper jack: Pepper jack adds a subtle heat from the jalapeño pieces inside the cheese and melts just as beautifully as Monterey Jack. It is Ben’s preferred cheese for obvious reasons, and it pairs incredibly well with the smoked paprika in the beef seasoning. A half-and-half mix of Monterey Jack and pepper jack is the version I make most often now.

    Fresh lime to bottled lime juice: Fresh lime is genuinely worth squeezing here because the brightness and the aroma from the zest do something that bottled lime juice simply cannot replicate. If fresh is not available, a small splash of bottled works and is still better than nothing, but if you have fresh limes on hand, this is one of those recipes where it really makes a difference at the end.

    Equipment

    • Large skillet for cooking the ground beef
    • Separate large skillet or the same skillet wiped clean for frying the tacos
    • Tongs for flipping the tacos safely without breaking them
    • Wide spatula for pressing down during frying
    • Wire rack or paper towel-lined plate for draining
    • Sharp knife and cutting board for the cilantro and lime
    • Small bowl for the dipping sauce
    • Measuring spoons for the spice blend
    • Paper towels for patting the beef dry if needed and for draining the fried tacos

    Storage Tips

    Make Ahead

    • The seasoned ground beef can be cooked up to 3 days ahead and stored in an airtight container in the fridge; reheat in a skillet before assembling and frying the tacos
    • Assemble the tacos up to 30 minutes before frying and keep them covered at room temperature; do not assemble too far ahead or the tortilla will absorb moisture and go soft
    • The spice blend can be mixed in a small jar and stored for up to 3 months so taco night is even faster next time

    Refrigerator

    • Store leftover cooked tacos in an airtight container in the fridge for up to 3 days; they will lose their crunch but the flavor is still excellent
    • Store the cooked beef and the fried tortilla shells separately if possible for the best texture when reheating
    • Keep any leftover dipping sauce in a sealed jar in the fridge for up to 2 days; stir well before serving

    Freezing

    • The cooked and seasoned ground beef freezes well for up to 2 months; thaw overnight in the fridge and reheat in a skillet before assembling
    • Do not freeze assembled or fried tacos, as the tortilla texture changes completely after thawing
    • Freeze the beef in individual portion bags so you can pull out exactly what you need for a quick weeknight taco night without thawing the whole batch

    Reheating

    • Reheat leftover fried tacos in a dry skillet over medium heat for 2 to 3 minutes per side to restore as much crunch as possible; avoid the microwave, which makes them soggy
    • The oven at 375 degrees F for 8 to 10 minutes on a wire rack also works well and brings back a good amount of the original crispiness
    • A splash of fresh lime juice and a sprinkle of fresh cilantro after reheating makes leftovers taste almost as good as the original batch

    Family Secret Worth Sharing

    My mom always added a tiny splash of Worcestershire sauce to her ground beef while it was cooking, and I spent years thinking it was unnecessary until I tried leaving it out one night and immediately noticed the difference. It adds this deep, slightly savory, almost caramelized quality to the meat that is impossible to pin down but remarkably to miss when it is gone. I add it immediately after the spices are added, using just a small splash, perhaps a teaspoon. Ben caught me doing it once and asked what it was. I told him it was my mom’s secret. He stirred it in himself the next time without saying anything. That is precisely how recipes pass between people.

    Troubleshooting FAQs

    My tacos are burning on the outside, but the cheese is not melting inside. What went wrong?
    The pan is too hot. This is exactly what happened to my first batch. Medium heat gives the cheese enough time to melt completely before the outside gets too dark. If the cheese is still not melting fast enough, cover the pan with a lid for the first minute of frying on each side; the trapped steam melts the cheese without adding moisture to the outside of the tortilla.

    The tortilla keeps splitting open when I try to fold it. How do I fix it?
    Cold or dry tortillas crack instead of fold. Warm each tortilla for 20 to 30 seconds in a dry skillet or in the microwave under a damp paper towel before assembling. This makes them pliable enough to fold cleanly without any cracking. Flour tortillas are more forgiving than corn for this reason, but both work well once they are properly warmed.

    My tacos are greasy and soggy instead of crispy. What happened?
    Too much oil in the pan or the oil was not hot enough before the taco went in. The oil should shimmer, and the taco edge should sizzle immediately on contact. Drain the tacos on a wire rack rather than paper towels for the first minute; a rack lets air circulate underneath and prevents the bottom from steaming against a flat surface. Also make sure not to overcrowd the pan.

    Can I make these without frying in oil?
    Yes. A dry non-stick skillet over medium heat works if you want a lighter result. The tortilla will still crisp up from the dry heat and the cheese will still melt, but the color will be paler and more toasted than golden and the texture will be slightly drier than the oil-fried version. Brushing the outside of the assembled taco with a very light coat of oil spray before it goes into the dry pan is a good middle ground that many people prefer.

    Friday Night Just Got a Whole Lot Crunchier

    Friday nights in our house used to mean whatever was easiest. Now they mean tacos, the sound of that first crunch coming from the pan, Mia stationed at the cheese bowl, and Ben standing at the stove with a timer and more opinions than I was ready for. These crispy ground beef tacos have quietly become one of our most beloved easy weeknight dinner recipes in the whole rotation, right there alongside the other ground beef dinner recipes I reach for when I need something fast and genuinely satisfying. For the weeks when the whole table needs to feel like taco night done properly, these pair perfectly with our healthy chicken enchiladas for a spread that covers every craving and leaves absolutely nothing on the table. Some dinners just become the ones your family builds a whole evening around, and this one did exactly that for us.

  • 3 Secrets to the Best Biscoff Cheesecake

    3 Secrets to the Best Biscoff Cheesecake

    I forgot to chill it long enough and served what was essentially Biscoff soup in a crust. Ben poked it with his spoon, and it rippled. Mia said, “I think it is still alive.” I put it back in the fridge, waited four more hours, and sliced it again. That second attempt is what taught me that a perfect biscoff cheesecake is entirely about patience.

    Why This Recipe Is Special

    No baking. No water bath. No oven anxiety. This no-bake biscoff cheesecake has a buttery Lotus Biscoff crumb base, a silky cream cheese filling swirled with Biscoff spread, and a glossy caramelized cookie butter layer on top that makes every single slice look like it came from a bakery. It is the dessert I bring to every gathering and the one people ask me for every time. Mia calls it “the brown one” and requests it for her birthday every year. I have stopped suggesting alternatives.

    How To Make Biscoff Cheesecake

    The version that finally worked happened on a Friday night when both kids were supposed to be in bed and were absolutely not in bed. Mia was sitting on the counter crushing Biscoff biscuits in a zip-lock bag with the enthusiasm of someone who had been waiting for this their whole life. Ben was reading the Biscoff spread jar like it was a novel, announcing the ingredients out loud in a very serious voice. When I pressed the base into the tin and the whole kitchen smelled like caramelized spiced cookies, both of them immediately asked if they could lick the spatula. There were two spatulas. I had planned ahead.

    The lesson that fixed everything was about the cream cheese. It has to be full-fat block cream cheese, completely at room temperature, beaten until smooth before anything else goes in. Cold or low-fat cream cheese never sets properly in a no-bake cheesecake. It stays soft, grainy, or wobbly no matter how long you chill it. Ben learned these lessons the hard way when he helped me with batch number two and accidentally used spreadable cream cheese from the tub. We waited six hours for that one to firm up. It did not. Full-fat block only, every single time.

    Main Ingredients

    For the Biscoff Base

    • 250g Lotus Biscoff biscuits (about 40 biscuits) – Crushed to fine crumbs; a zip-lock bag and a rolling pin work perfectly, and the kids love this job
    • 80g unsalted butter, melted – Binds the crumbs into a firm, sliceable base; salted butter works fine if that is what you have

    For the Cheesecake Filling

    • 600g full-fat block cream cheese, room temperature – Block cream cheese only; spreadable tub cream cheese will not set properly in a no-bake recipe
    • 100g icing sugar, sifted – Sweetens the filling and helps with structure; sift it to avoid lumps in the final texture
    • 300ml double cream, cold – Whipped into the filling for volume and stability; must be cold to whip properly
    • 150g Biscoff spread, room temperature – Folded into the filling for that signature caramelized cookie flavor throughout every bite
    • 1 teaspoon vanilla extract – Rounds out the filling flavor and complements the Biscoff beautifully
    • 1 tablespoon lemon juice – A small amount cuts through the richness and brightens the whole filling without tasting lemony

    For the Biscoff Topping

    • 150g Biscoff spread, warmed slightly – Poured over the set cheesecake for a smooth, glossy caramel-like topping that firms up in the fridge
    • 50g Biscoff biscuits, roughly crushed – Scattered over the top for texture and that beautiful golden crumb finish visible in every slice

    Step-by-Step Instructions

    Step 1: Make the Biscoff Base

    • Crush the Biscoff biscuits into fine crumbs using a food processor or a zip-lock bag and rolling pin until no large pieces remain
    • Pour the melted butter over the crumbs and mix thoroughly until every crumb is coated and the mixture holds together when pressed between your fingers
    • Press the mixture firmly and evenly into the base of a lined 8-inch springform pan using the back of a spoon or the bottom of a glass
    • Refrigerate the base for at least 30 minutes while you prepare the filling so it is firm enough to hold the weight of the cheesecake

    Step 2: Make the Cheesecake Filling

    • Beat the room-temperature cream cheese with the sifted icing sugar and vanilla extract in a large bowl until completely smooth and lump-free, about 2 to 3 minutes
    • Add the lemon juice and the Biscoff spread and beat again until fully combined and the mixture is glossy and uniform in color
    • In a separate chilled bowl, whip the cold double cream to soft peaks, then gently fold it into the cream cheese mixture using a spatula in slow strokes until just combined
    • Do not overmix once the cream is folded in; stop as soon as no white streaks remain or the filling will lose its light, mousse-like texture

    Step 3: Assemble and Chill

    • Spoon the cheesecake filling over the chilled base and spread it evenly with an offset spatula, smoothing the top as flat as possible
    • Tap the tin gently on the counter two or three times to release any air bubbles trapped in the filling
    • Cover the tin loosely with plastic wrap and refrigerate for a minimum of 6 hours, but overnight is strongly preferred for a perfectly set, cleanly sliceable cheesecake
    • Do not rush this step; the cheesecake will look set on the edges before the center is ready, and cutting too early is exactly how you end up with Biscoff soup

    Step 4: Add the Topping and Serve

    • Warm the Biscoff spread in the microwave for 20 to 30 seconds until just pourable but not hot, then pour it slowly and evenly over the fully set cheesecake
    • Use the back of a spoon or a small offset spatula to gently spread the Biscoff topping to the edges, letting it drip slightly over the sides if desired
    • Scatter the roughly crushed Biscoff biscuits generously over the top while the spread is still slightly warm so they stick in place
    • Refrigerate for another 20 minutes until the topping is set, then carefully release the springform tin, slice with a hot clean knife, and serve

    Biscoff Cheesecake Variations

    Mia’s “Extra Crumble on Everything” Version

    Mia’s relationship with the Biscoff crumble topping is deeply personal. She inspects every slice before anyone is served and redistributes the crumbs with a spoon if she feels the coverage is uneven. For her version, double the crushed biscuit topping to 100g and press half of it into the sides of the cheesecake filling before it sets, then scatter the rest on top after the Biscoff spread goes on. The result is a fully encrusted cheesecake that Mia describes as “how it is supposed to look,” and I have no arguments.

    Ben’s “Drizzle Version” Version

    Ben discovered that warming the Biscoff spread and drizzling it in lines over a slice looks exactly like what he sees on baking videos online. He now requests this specific presentation every single time. Instead of spreading the topping flat, warm the Biscoff spread slightly more so it is very pourable, then load it into a piping bag or a zip-lock bag with the corner snipped and pipe it in tight back-and-forth lines over each slice right before serving. Ben stands back, tilts his head slightly, and says “perfect” every time. It takes about forty-five seconds and makes him genuinely happy.

    The Biscoff Cheesecake Bars Version

    On the weekends when I want something easier to serve at a kids’ party or pack into a lunchbox, I make this as bars instead of a round cake. Press the base into a lined 9×13-inch baking dish, spread the filling evenly, chill for six hours, add the Biscoff topping, and slice into neat rectangles. They hold their shape beautifully, travel well, and the kids can pick them up without a plate. Ben called them “portable cheesecake,” and I thought that was a genuinely good product name.

    Substitutions

    Lotus Biscoff biscuits to digestive biscuits: Digestive biscuits make a more neutral, slightly less sweet base that still works beautifully with the Biscoff filling. The flavor will be less intensely spiced but the texture of the base is almost identical. Add a tablespoon of brown sugar to the crumb mixture to bring a little extra sweetness if you go this route.

    Double cream to whipping cream: Whipping cream at 35 percent fat or above whips to the same volume as double cream and sets just as well in a no-bake cheesecake. Heavy whipping cream commonly found in the US works perfectly in place of UK double cream in exactly the same quantity.

    Full-fat block cream cheese to mascarpone: Mascarpone gives a slightly richer, silkier texture and a more subtly sweet flavor that pairs beautifully with the Biscoff spread. Use the same quantity and treat it exactly the same way. The cheesecake will be a little denser and richer but absolutely delicious and still sets firmly overnight.

    Biscoff spread to peanut butter: Smooth peanut butter in place of Biscoff spread makes a completely different but equally incredible no-bake cheesecake with a salty-sweet filling and peanut butter drizzle. It is not a biscoff cheesecake anymore, but it is genuinely one of the best accidents that can happen in this recipe.

    Equipment

    • 8-inch springform tin
    • Parchment paper for lining the base and sides
    • Food processor or zip-lock bag and rolling pin for the crumbs
    • Large mixing bowl for the cream cheese filling
    • Separate chilled bowl for whipping the double cream
    • Hand mixer or stand mixer with whisk attachment
    • Rubber spatula for folding
    • Offset spatula for smoothing the filling and spreading the topping
    • Microwave-safe bowl for warming the Biscoff spread
    • Piping bag or zip-lock bag with corner snipped for the drizzle topping
    • Hot clean knife for slicing; run it under hot water and wipe dry between each cut

    Storage Tips

    Make Ahead

    • This cheesecake is ideal for making ahead; assemble the whole thing the night before, chill overnight, and add the Biscoff topping the morning of serving for the freshest finish
    • The base can be made up to 2 days ahead and kept covered in the fridge so assembly day is even faster
    • Make the filling up to 24 hours ahead and store it covered in the fridge before spreading over the base if you want to split the work across two days

    Refrigerator

    • Store the finished cheesecake covered in the fridge for up to 4 days; the texture actually improves on day two as everything firms up even further
    • Cover any cut edges with plastic wrap pressed directly against the exposed filling to prevent the surface from drying out or absorbing fridge odors
    • Keep the cheesecake in the springform tin until you are ready to serve the final slices for the best structural support

    Freezing

    • The cheesecake freezes beautifully for up to 2 months without the Biscoff topping; add the topping fresh after thawing for the best result
    • Freeze individual slices on a lined tray until solid, then wrap each one in plastic wrap and store in a freezer bag for easy single-serve portions
    • Thaw overnight in the fridge rather than at room temperature; slow thawing preserves the texture and prevents the filling from weeping

    Reheating

    • This cheesecake is served cold and does not need reheating; serve straight from the fridge for the firmest, cleanest slices
    • Let slices sit at room temperature for 10 minutes before eating if you prefer a slightly softer, creamier texture
    • If the Biscoff topping has hardened too much in the fridge, let the whole cheesecake sit at room temperature for 15 minutes and it will soften back to a glossy, pourable consistency

    Family Secret Worth Sharing

    The tip that nobody tells you about no-bake cheesecakes is that the knife you use to slice it matters almost as much as the recipe itself. My mom taught me to run the knife under very hot water, wipe it completely dry, and then make one clean, confident cut without sawing back and forth. Do this between every single slice, and the cheesecake comes out looking like the pictures every time. I showed Ben this technique once, and he watched with the concentration of someone learning a magic trick. He sliced the next piece himself, and it was genuinely perfect. He looked at it for a second and then said, “The hot knife is the secret. “It is. It really is.

    Troubleshooting FAQs

    My cheesecake is not setting and stays wobbly after chilling. What went wrong?
    Almost always the culprit is the type of cream cheese. Spreadable cream cheese from a tub contains more water and stabilizers than block cream cheese and will never set firmly in a no-bake recipe. Make sure you used full-fat block cream cheese at room temperature. If it is still not setting after 8 hours, the filling may have been overmixed after the cream was added, which can break down the structure. Give it a full overnight chill and serve it cold.

    The base is crumbling when I slice the cheesecake. How do I fix it?
    A crumbly base usually means not enough butter or the base was not pressed firmly enough. The crumb mixture should feel like wet sand and hold together cleanly when you press a handful in your palm. If it is too dry, add an extra 10g of melted butter. Pressing it firmly with the flat bottom of a glass rather than a spoon gives a much more compact, sliceable base.

    There are lumps in my filling. How do I avoid them?
    Lumps come from cold cream cheese or cream cheese that was not beaten long enough before the other ingredients were added. The cream cheese must be genuinely room temperature, which means out of the fridge for at least an hour. Beat it alone for a full two minutes until it is completely smooth before adding anything else. Any lump in the cream cheese at that stage will still be a lump in the finished cheesecake.

    The Biscoff topping is too thick to pour and tears the cheesecake surface. What do I do?
    The spread needs to be a little warmer than you might think. Microwave it in 15-second bursts, stirring between each, until it is pourable and moves freely when you tip the bowl. It should be the consistency of warm honey. If it is still tearing the surface, let the cheesecake chill for another hour before adding the topping so the filling underneath is completely firm and can support the weight.

    The Dessert That Made Everyone Go Quiet

    There is a very specific kind of quiet that happens at a table when a dessert is genuinely good. This cheesecake creates that quiet every single time I serve it. Forks go in, eyes go wide, and nobody says anything for about thirty seconds. Ben eventually breaks it by asking if there is more. Mia is already checking the crumble ratio on her slice. This no-bake biscoff cheesecake sits beautifully alongside our brown butter brookies as one of the most requested things I make when someone needs a dessert that genuinely impresses, and the creamy no-bake format puts it right in the same league as our strawberry chocolate cake for showstopping celebration desserts that are secretly not that hard. For the weeks when the dessert table needs a full spread, this cheesecake next to our healthy brownie recipe covers every single craving in the room without a single complaint from anyone. Some recipes become part of your family’s story quietly and completely, and this one did exactly that for us.

  • 5-Minute Creamy Banana Chamomile Tea Smoothie

    5-Minute Creamy Banana Chamomile Tea Smoothie

    I steeped four tea bags instead of one because I misread my own handwriting, and both kids were asleep on the couch by six. Ben did not even finish his. Mia said it tasted “like a hug from a flower” right before her eyes closed. Once I dialed back the chamomile, this banana chamomile tea smoothie became the calmest, creamiest afternoon drink in our house.

    Why This Recipe Is Special

    Most smoothies are about energy. This one is about the opposite. Chamomile is naturally calming, banana adds a creamy sweetness that makes the whole drink feel like dessert, and a little honey pulls everything together into something that feels genuinely special rather than just healthy. It is the smoothie I make on school pickup days when the afternoon is loud and everyone needs ten minutes of quiet. Mia now calls it the “flower smoothie” and asks for it specifically when she has had a big-feelings kind of day.

    How To Make Banana Chamomile Tea Smoothie

    The version that worked was a Thursday afternoon situation that started with me trying to use up two very ripe bananas before they turned into banana bread, whether I wanted them to or not. Mia was drawing at the kitchen table, and Ben was doing that thing where he lies on the floor for no reason and stares at the ceiling. When I started brewing the chamomile and that soft floral smell filled the kitchen, Mia looked up from her drawing and said, “Are we having tea?” I told her we were having a smoothie. She considered this for a moment and then said, “That is better than tea.” High praise from a six-year-old.

    The thing that changed this from good to something genuinely special was brewing the tea strong but not bitter and then chilling it completely before it went into the blender. Warm liquid in a smoothie makes everything go thin and watery almost immediately. Cold-brewed chamomile keeps the texture thick, creamy, and properly cold all the way through. Ben figured this out when he made a batch himself one afternoon and used the tea still hot. He handed it to me, watched me take a sip, and before I could say anything, he said, “I know. It needs to be cold.” He was right. He always knows.

    Main Ingredients

    • 2 ripe bananas, frozen – Frozen bananas are the key to a thick, creamy texture without needing ice cream; peel them before freezing
    • 1 cup brewed chamomile tea, chilled – Brew with 1 to 2 tea bags in 1 cup of hot water for 5 minutes, then cool completely before using
    • 1/2 cup whole milk or oat milk – Whole milk gives a richer, creamier result; oat milk adds a subtle sweetness that works beautifully with the chamomile
    • 2 tablespoons honey – Raw honey adds warmth and depth; adjust to your preferred sweetness level
    • 1/2 teaspoon vanilla extract – Rounds out the floral chamomile notes and adds a warm bakery quality to the whole drink
    • 1/4 teaspoon cinnamon – Just a pinch; adds warmth without competing with the chamomile
    • 1/2 cup plain Greek yogurt – Optional but adds creaminess, protein, and a slight tang that balances the sweetness
    • Pinch of salt – A tiny pinch enhances every other flavor in the smoothie; do not skip it
    • Dried chamomile flowers for garnish – Optional but makes the whole glass look beautiful and tells everyone exactly what they are about to drink

    Step-by-Step Instructions

    Step 1: Brew and Chill the Chamomile Tea

    • Bring 1 cup of water to just below boiling, around 200 degrees F, and steep 1 to 2 chamomile tea bags for exactly 5 minutes
    • Remove the tea bags without squeezing them to avoid any bitterness and stir in the honey while the tea is still warm so it dissolves completely
    • Let the tea cool to room temperature, then transfer it to the fridge for at least 30 minutes until fully cold before using
    • For a faster chill, pour the brewed tea over a small bowl of ice and stir for about 2 minutes until cold; do not add this ice to the blender as it will water down the smoothie

    Step 2: Prep the Bananas

    • If your bananas are not already frozen, peel them, break into chunks, place on a lined tray, and freeze for at least 2 hours before blending
    • Ripe bananas with plenty of brown spots give the best flavor and sweetness; under-ripe bananas make the smoothie taste starchy and flat
    • Frozen bananas straight from the freezer give the thickest, coldest, most ice-cream-like texture; do not thaw them before they go into the blender
    • If you do not have frozen bananas, add 4 to 5 ice cubes to the blender alongside fresh bananas, but the texture will be slightly thinner

    Step 3: Blend Until Smooth

    • Add the frozen banana chunks, chilled chamomile tea, milk, vanilla, cinnamon, Greek yogurt if using, and the pinch of salt to the blender
    • Blend on high speed for 45 to 60 seconds until completely smooth with no banana chunks remaining; scrape down the sides once if needed
    • Taste the smoothie and adjust with a little more honey if you want it sweeter or a splash more milk if it is too thick to pour easily
    • Blend for another 10 seconds after any additions to make sure everything is fully incorporated before pouring

    Step 4: Pour, Garnish, and Serve

    • Pour the smoothie immediately into chilled glasses for the best temperature and thickest texture right from the start
    • Top with a small pinch of dried chamomile flowers if you have them; even a tiny amount makes the presentation feel intentional and lovely
    • Serve right away while the smoothie is at its thickest and coldest; it will thin slightly as it sits at room temperature
    • For a creamier, more dessert-like version, pour into a bowl and top with sliced fresh banana, a drizzle of honey, and a light dusting of cinnamon

    Banana Chamomile Tea Smoothie Variations

    Mia’s “Flower Smoothie Bowl” Version

    Mia discovered smoothie bowls when she was five and has never fully recovered from the experience. The flower smoothie in bowl form is her current greatest joy. Use one extra frozen banana to make the blended mixture thick enough to hold toppings, pour it into her favorite bowl, and let her arrange the garnishes herself. She places the dried chamomile flowers with the concentration of someone decorating a cake, adds a drizzle of honey in a very specific pattern, and then stands back and says “perfect” before picking up her spoon. I take a picture every time.

    Ben’s “Protein Power” Version

    Ben went through a phase of asking whether everything we ate had enough protein in it after his class did a nutrition unit at school. He brings this up approximately once a week. For his version, add a scoop of vanilla protein powder alongside the Greek yogurt and blend as usual. The chamomile and banana flavors hold up beautifully against the vanilla protein, the texture stays thick and smooth, and Ben feels very satisfied with his nutritional choices. He also adds an extra drizzle of honey and calls it “the good one.”

    The Lavender Chamomile Version

    This one is for the afternoons when I want something that feels genuinely spa-like and the kids are at their dad’s and I have exactly fifteen quiet minutes to myself. Add one quarter teaspoon of culinary dried lavender to the chamomile tea while it steeps, then remove it along with the tea bags before chilling. The lavender adds a subtle floral layer that makes the whole smoothie taste like something you would order at a very calm and beautiful cafe. It is my personal favorite version, and I do not share it.

    Substitutions

    Chamomile tea bags to loose-leaf chamomile: Use one tablespoon of loose-leaf chamomile flowers steeped in a tea infuser or fine-mesh strainer for the same 5 minutes. Loose leaf chamomile is often more fragrant and flavorful than bagged tea and gives the smoothie a slightly more intense floral quality that is genuinely lovely.

    Honey to maple syrup or dates: Maple syrup is a seamless swap in equal amounts and gives a slightly earthier sweetness that works well with the banana. Two pitted Medjool dates blended directly into the smoothie add natural sweetness and extra creaminess and make the whole drink more filling without any added sugar.

    Whole milk to coconut milk: Full-fat canned coconut milk makes this smoothie incredibly rich and creamy with a subtle tropical note that pairs surprisingly well with the chamomile. Use half the amount since canned coconut milk is much thicker than regular milk and add the rest as needed to reach your preferred consistency.

    Greek yogurt to silken tofu: Silken tofu is a great dairy-free swap that adds the same creamy protein boost without any dairy flavor. Use the same quantity as the yogurt, add it straight from the fridge, and blend thoroughly. The tofu is completely undetectable in the finished smoothie, and both kids have never once noticed it.

    Equipment

    • High-powered blender (a standard blender works but a high-powered one gives a silkier texture)
    • Small saucepan or kettle for heating the water
    • Mug or heatproof cup for steeping the tea
    • Fine mesh strainer if using loose-leaf chamomile
    • Freezer-safe tray or plate for pre-freezing banana chunks
    • Measuring spoons
    • Tall glasses for serving
    • Small bowl of ice for rapid tea chilling if needed

    Storage Tips

    Make Ahead

    • Brew the chamomile tea up to 3 days ahead and store it in a sealed jar in the fridge so it is always ready when you want a smoothie quickly
    • Pre-freeze peeled banana chunks in a zip-lock bag so they are always ready to blend without any extra prep on busy afternoons
    • Measure and freeze individual smoothie packs: one bag with two banana chunks plus a pre-measured amount of frozen Greek yogurt so the whole smoothie comes together in under two minutes

    Refrigerator

    • Blended smoothie can be stored in a sealed jar or bottle in the fridge for up to 24 hours; shake or stir well before drinking as it will separate slightly
    • The texture will be thinner after refrigerating; re-blend with a small handful of ice for 15 seconds to restore the creamy thickness
    • Brewed chamomile tea keeps in the fridge for up to 3 days sealed; do not store it with the honey already mixed in as it can ferment slightly

    Freezing

    • Pour the blended smoothie into ice cube trays, freeze completely, then pop the cubes into a bag for up to 1 month
    • Blend the frozen smoothie cubes straight from the freezer with a splash of milk for a quick, thick version any time
    • Do not freeze the finished smoothie in a jar or sealed container, as it expands when frozen and can crack or overflow

    Reheating

    • This smoothie is served cold and does not need reheating; if it has warmed up too much, just give it a quick re-blend with a few ice cubes
    • For a warm version on cold evenings, blend all ingredients without the frozen banana, warm gently on the stovetop until just steaming, and serve as a chamomile banana tea latte instead
    • The warm latte version with a little extra honey and a pinch of nutmeg is one of the coziest things I make in the winter and both kids love it equally

    Family Secret Worth Sharing

    My mom used to make chamomile tea for me every time I could not sleep or had a hard day at school. She would sit at the kitchen table with me while I drank it and not say very much, just be there. I think about that every time I brew chamomile now. There is something about the smell of it that immediately makes me feel like things are going to settle down. I started making this smoothie on the hardest afternoons specifically because of that. Mia does not know any of this backstory. She just knows it is the flower smoothie and that it appears when she has had a big-feelings kind of day, and that is enough. Ben asked me once why I always smile when I make it. I told him it reminded me of Grandma. He nodded, took a long sip, and said, “Grandma had good ideas.” She really did.

    Troubleshooting FAQs

    My smoothie is too thin and watery. What went wrong?
    Almost always the tea was not cold enough when it went into the blender, or the bananas were not frozen solid. Both add warmth and liquid that thin the smoothie out quickly. Make sure the tea is fully chilled and the bananas are completely frozen before blending. If the smoothie is already too thin, add another half-frozen banana and blend again to bring the thickness back.

    The chamomile flavor is too strong and almost bitter. How do I fix it?
    Two things cause bitter chamomile tea: steeping too long or squeezing the tea bags when you remove them. Stick to exactly 5 minutes and lift the bags out gently without pressing. If the tea is already bitter, add an extra drizzle of honey and a splash more milk to the smoothie before blending. The sweetness and fat in the milk balance out the bitterness beautifully.

    I cannot taste the chamomile at all in the finished smoothie. What happened?
    Banana is a strong flavor and can easily dominate the drink if the tea is too diluted. Try brewing with 2 tea bags instead of 1 in the same amount of water for a more concentrated flavor. You can also reduce the amount of banana slightly to one and a half frozen bananas, and the chamomile will come through much more clearly.

    Can I make this smoothie without a high-powered blender?
    Yes, with one small adjustment. Let the frozen banana chunks sit at room temperature for 5 minutes before blending so they are slightly softened and easier for a standard blender to process. Blend in short pulses rather than one long run and scrape down the sides frequently. The result will be slightly less perfectly smooth but still very delicious and completely worth making.

    The Smoothie That Made Everyone Calm Down

    There is a specific kind of afternoon in our house where everyone is tired and a little bit loud and nobody can quite explain why. This smoothie is what I make on those days. Two glasses on the counter, the chamomile smell filling the kitchen, and within about ten minutes, everyone is sitting quietly, and the day feels manageable again. It sits right alongside our healthy carrot juice recipe as one of the most reach-for drinks in our afternoon routine, and on the days I want something warming instead of cold, our beet juice recipe is right there next to it as another one that makes me feel like I am genuinely taking care of everyone. And for the mornings when we need something sweet and comforting that doubles as breakfast, this smoothie pairs beautifully with a slice of our banana bread recipe that uses up the rest of those ripe bananas in the most satisfying way. Some recipes are just quietly good for you in every possible sense, and this one is exactly that.

    Don’t forget to snap a picture of your banana-chamomile tea smoothie before that… (trust me, it will disappear quickly!), and leave a rating below. We’d love to hear how this banana chamomile tea smoothie becomes part of your family afternoon story.

  • Perfect Healthy Chicken Enchiladas

    Perfect Healthy Chicken Enchiladas

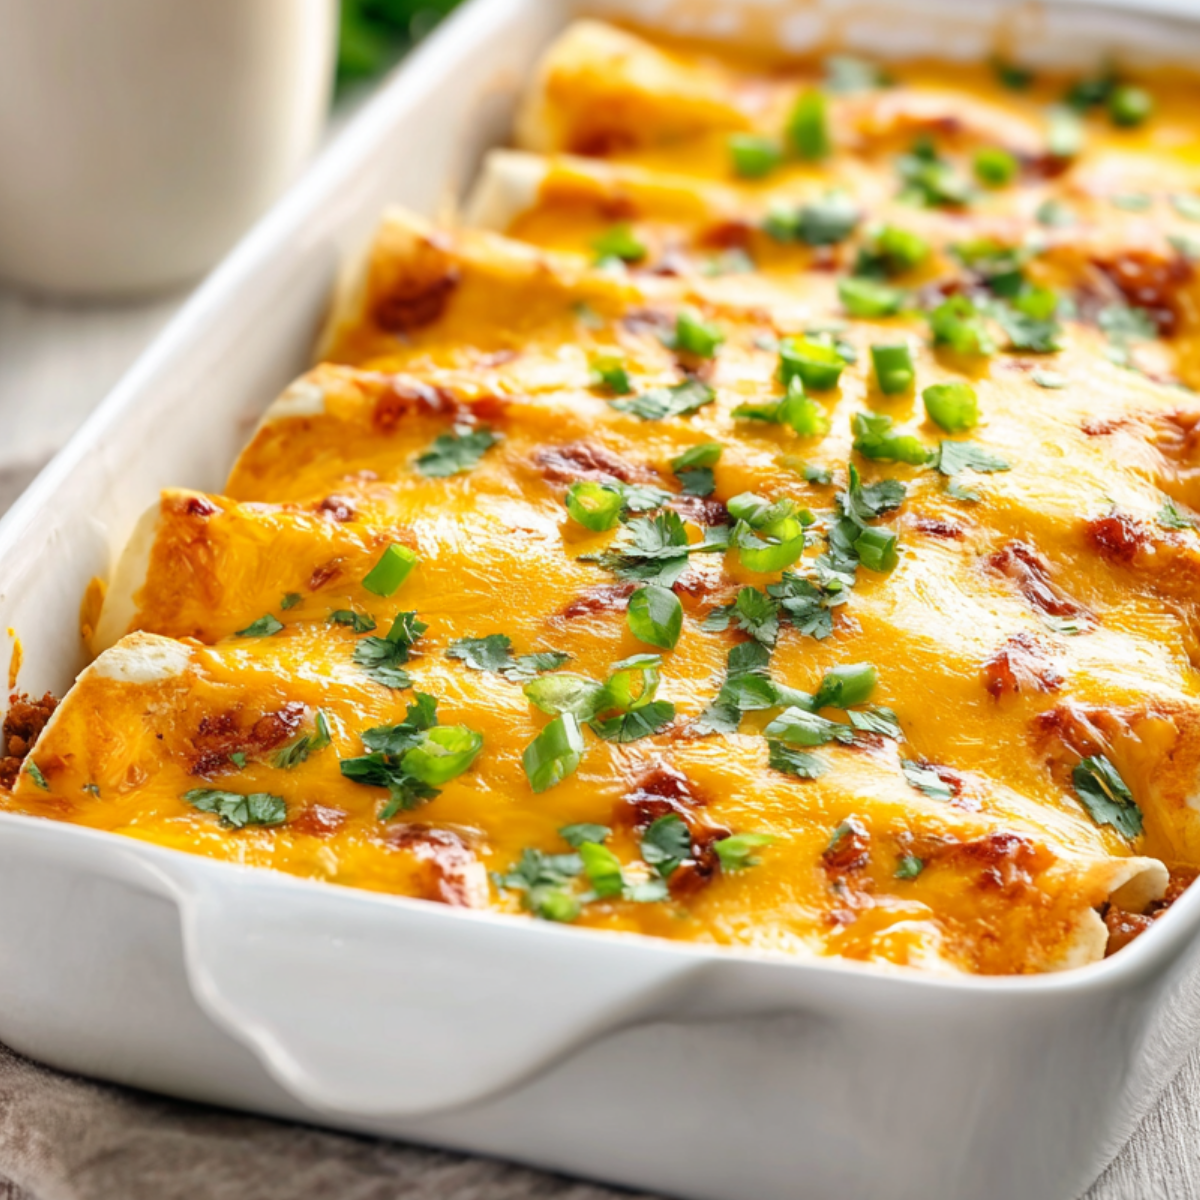
    I overfilled every single one. They burst open in the oven like little cheese volcanoes, and the whole dish looked like a complete disaster. Ben said it looked “exploded.” Mia asked if we could eat it anyway. We absolutely did. But once I figured out the rolling technique, these healthy chicken enchiladas became the cheesy, high-protein weeknight dinner our whole family actually looks forward to.

    Why This Recipe Is Special

    Most enchilada recipes feel heavy and leave you regretting the second helping. These do not. Lean shredded chicken, a light but deeply flavorful homemade enchilada sauce, and just enough cheese to make the whole dish feel genuinely indulgent without going overboard. Each serving packs over 35 grams of protein, which means even Ben stops asking for a snack an hour after dinner. That alone is worth every minute in the kitchen. Mia calls them “the fancy burritos,” and I have decided not to correct her.

    How To Make Healthy Chicken Enchiladas

    The version that finally worked came together on a Wednesday when I had leftover rotisserie chicken, a can of tomatoes, and two children who kept sneaking shredded cheese from the bowl. Mia had cheese on her chin before a single enchilada had been rolled. Ben was attempting to fold a tortilla using what he described as “the burrito method” and absolutely refused to switch techniques even when I showed him mine. When the pan came out of the oven with that golden, bubbling cheese on top and the whole kitchen smelling like cumin and garlic and something warm and good, both of them went very still. That kind of quiet is the best review a recipe can get.

    The thing that transformed this recipe was warming the tortillas before rolling. Cold tortillas crack and split the second you try to bend them, which is exactly what caused my first cheese volcano situation. Thirty seconds per tortilla in a dry skillet makes them pliable, cooperative, and completely rollable without drama. Ben now handles this step entirely and takes it extremely seriously, timing each one with the kitchen timer and announcing “ready” before handing it to me. It is the most efficient we have ever been as a kitchen team.

    Main Ingredients

    • 3 cups cooked shredded chicken breast – Rotisserie chicken saves significant time; about 2 large breasts shredded gives the right amount
    • 8 medium whole wheat tortillas – Whole wheat adds fiber and holds up better in the oven than regular flour tortillas
    • 1 can (15 oz) crushed tomatoes – The base of the enchilada sauce; fire-roasted crushed tomatoes add extra depth
    • 1 cup low-sodium chicken broth – Thins the sauce to the right consistency without adding unnecessary sodium
    • 2 tablespoons olive oil – For sauteing the aromatics and building the sauce base
    • 3 cloves garlic, minced – Essential flavor base for the sauce; do not reduce this
    • 1 small onion, finely diced – Adds sweetness and body to the enchilada sauce
    • 2 teaspoons cumin – The warm, earthy backbone of the whole dish
    • 1 teaspoon smoked paprika – Adds subtle smokiness that makes the sauce taste slow-cooked
    • 1 teaspoon chili powder – Warmth and depth; reduce to half a teaspoon for the kids’ version
    • 1/2 teaspoon oregano – A small but important layer of savory flavor in the sauce
    • Salt and black pepper to taste – Season at every stage for the best result
    • 1 cup plain Greek yogurt – Stirred into the chicken filling for creaminess and a serious protein boost
    • 1.5 cups shredded mozzarella or Monterey Jack – Half goes in the filling, half goes on top for that golden bubbly finish
    • Fresh parsley or cilantro, chopped – For garnish; adds freshness and color against the golden cheese

    Step-by-Step Instructions

    Step 1: Make the Enchilada Sauce

    • Heat the olive oil in a medium saucepan over medium heat, add the diced onion, and cook for 4 to 5 minutes until softened and translucent
    • Add the minced garlic, cumin, smoked paprika, chili powder, and oregano and stir for 30 seconds until the spices bloom and the kitchen smells incredible
    • Pour in the crushed tomatoes and chicken broth, stir to combine, and let the sauce simmer uncovered for 10 to 12 minutes until slightly thickened
    • Season with salt and pepper, taste, and adjust the spices to your preference; the sauce should be bold, slightly smoky, and deeply savory

    Step 2: Prepare the Chicken Filling

    • Combine the shredded chicken, Greek yogurt, half the shredded cheese, and 3 to 4 tablespoons of the enchilada sauce in a large bowl and mix until everything is well coated
    • Taste the filling and adjust salt and pepper; it should be creamy, well seasoned, and packed with flavor before it ever touches the tortilla
    • Warm each tortilla in a dry skillet over medium heat for about 30 seconds per side until pliable and soft; this step prevents cracking and splitting during rolling
    • Spoon about 3 tablespoons of filling down the center of each tortilla, leaving a one-inch border at each end, then roll firmly but not too tightly and place seam-side down in a baking dish

    Step 3: Assemble and Bake

    • Preheat your oven to 375 degrees F and spread a thin layer of enchilada sauce across the bottom of a 9×13 inch baking dish before placing the rolled enchiladas inside
    • Pour the remaining enchilada sauce evenly over the top of all the rolled enchiladas, making sure every tortilla is well coated so nothing dries out in the oven
    • Scatter the remaining shredded cheese generously over the top and cover the dish loosely with foil
    • Bake covered for 20 minutes, then remove the foil and bake for another 10 minutes until the cheese is golden and bubbling and the edges are slightly crisp

    Step 4: Rest and Serve

    • Let the enchiladas rest in the pan for 5 minutes after coming out of the oven so the filling firms up slightly and they are easier to lift and serve cleanly
    • Use a wide spatula to lift each enchilada carefully onto serving plates, keeping them seam-side down so they hold their shape
    • Garnish with freshly chopped parsley or cilantro and serve with a dollop of Greek yogurt on the side in place of sour cream for extra protein
    • Serve immediately while the cheese is still melty and the sauce is warm and glossy on top

    Healthy Chicken Enchiladas Variations

    Ben’s “Extra Cheese on Top” Version

    Ben has a deeply held belief that the cheese-to-everything-else ratio on baked dishes is always improvable. He inspects the pan before it goes in the oven and adds a second handful of cheese every single time with the calm authority of someone who has thought about this a lot. For the extra cheese version that makes this feel like a full comfort food moment without losing the protein punch, increase the topping cheese to 2 full cups and add it in two layers: half before the foil goes on and half after the foil comes off in the last ten minutes. The result is a deeply golden, extra melty top that Ben considers correct.

    Mia’s “No Spicy” Version

    Mia operates a strict no-heat policy that has been in effect since she was approximately three years old and accidentally ate a pepperoncini. For her version, omit the chili powder entirely and reduce the cumin to one teaspoon. Add a pinch of garlic powder to the filling to make up for the depth, and stir a tablespoon of honey into the sauce for a slightly sweeter, more mild flavor that she actually describes as “better.” It is not better. But it is genuinely delicious, and she eats the whole thing without negotiation, which is its own kind of win.

    The Meal Prep Double Batch Version

    This is the version I make every other Sunday when I want four days of easy lunches handled in one shot. Double the entire recipe, fill two 9×13 dishes, bake one for dinner that night, and assemble the second one without baking it. Cover the unbaked dish tightly with foil and refrigerate for up to two days or freeze for up to one month. When you are ready to eat it, bake it straight from the fridge at 375 degrees F for 30 minutes covered, then uncover it for 10 more minutes. It comes out just as good as freshly made, and Wednesday-night dinner practically handles itself.

    Substitutions

    Shredded chicken breast to canned chicken: Canned chicken works well here in a time crunch, and the filling still tastes great once it is mixed with the sauce and Greek yogurt. Drain it very well and break up any large chunks before mixing. The texture is slightly softer than freshly cooked chicken, but once it is baked inside the enchilada, nobody notices.

    Greek yogurt to light cream cheese: If Greek yogurt is not something you keep on hand, softened light cream cheese mixed with a tablespoon of milk gives a similar creamy texture to the filling. The protein count will be slightly lower, but the flavor is rich and smooth and holds together beautifully in the oven.

    Whole wheat tortillas to corn tortillas: Corn tortillas are the more traditional choice and make this recipe naturally gluten-free. They are smaller and more delicate, so warm them especially well before rolling and use two if needed to prevent splitting. The flavor is earthier and pairs beautifully with the smoky enchilada sauce.

    Mozzarella to reduced-fat cheddar: Reduced-fat cheddar gives a sharper, more classic enchilada flavor and melts just as well as mozzarella. Sharp cheddar specifically brings a boldness to the top layer that makes the dish taste more traditionally enchilada-style for anyone who finds mozzarella a little mild.

    Equipment

    • 9×13 inch baking dish
    • Medium saucepan for the enchilada sauce
    • Large mixing bowl for the chicken filling
    • Small skillet for warming the tortillas
    • Wide spatula for serving
    • Ladle or large spoon for pouring the sauce
    • Sharp knife and cutting board for the onion and garlic
    • Two forks for shredding the chicken if not using rotisserie
    • Aluminum foil for covering the dish during the first bake
    • Measuring spoons for the spices

    Storage Tips

    Make Ahead

    • Assemble the full dish up to 2 days ahead, cover tightly with foil, and refrigerate unbaked until you are ready to cook
    • The enchilada sauce can be made up to 4 days ahead and stored in a sealed jar in the fridge; it actually deepens in flavor as it sits
    • Shred and season the chicken filling up to 2 days ahead and keep it covered in the fridge so assembly on dinner night takes under 10 minutes

    Refrigerator

    • Store leftover baked enchiladas in an airtight container in the fridge for up to 4 days
    • Keep the enchiladas whole rather than cutting them before storing so the filling stays moist and does not dry out
    • Store any extra enchilada sauce separately and spoon it over the enchiladas when reheating to refresh the moisture

    Freezing

    • Freeze the assembled but unbaked dish tightly wrapped for up to 1 month for the best texture result
    • Baked enchiladas can also be frozen individually wrapped for up to 2 months; thaw overnight in the fridge before reheating
    • Do not freeze with Greek yogurt-based filling that has not been baked as the yogurt can separate when thawed; always freeze after assembling with the sauce on top

    Reheating

    • Reheat covered in a 350 degree F oven for 15 to 20 minutes until warmed through and the cheese is melty again; add a splash of broth over the top before covering to prevent drying
    • Microwave individual enchiladas on 70 percent power for 90 seconds, covered with a damp paper towel, then check and add 30 seconds if needed
    • A splash of extra enchilada sauce over the top before reheating makes leftovers taste almost identical to the freshly baked version

    Family Secret Worth Sharing

    My mom made enchiladas every time someone in the family had a hard week. It was her version of a hug on a plate. She always stirred a small spoonful of honey into her enchilada sauce right at the end, just before it came off the heat. Not enough to make it sweet, just enough to round off the edge of the acidity and make the whole sauce taste warmer and more settled. I do the same thing now, but I can’t tell you the exact amount because she never measured it. She just kept adding it until it tasted like something you wanted more of. That is still the instruction I follow. Ben caught me doing it once and asked what I was adding. I told him it was the secret. He nodded like that was a completely satisfying answer and went back to taming the tortillas.

    Troubleshooting FAQs

    My enchiladas keep bursting open during baking. How do I stop that?
    Two things cause this almost every time: overfilling and cold tortillas. Use no more than 3 tablespoons of filling per tortilla and leave a one-inch border at each end before rolling. Warm each tortilla in a dry skillet for 30 seconds per side before filling so it is pliable enough to roll without cracking. Place them seam-side down immediately in the sauced dish so they are held closed from the moment they go in.

    The sauce tastes too acidic and sharp. How do I fix it?
    A small spoonful of honey stirred in at the end is the quickest fix and the one my mom swore by. A pinch of sugar works too. If the acidity is very strong, add a little more chicken broth to dilute it and let the sauce simmer for another five minutes uncovered so the flavors have time to come together properly.

    My filling is watery, and the tortillas are going soggy. What went wrong?
    The most common cause is chicken that was not drained well enough, especially if using canned or poached chicken. Pat the shredded chicken dry with paper towels before mixing the filling. Also make sure the Greek yogurt is full-fat or at least 2 percent; lower-fat yogurt releases more liquid when heated and makes the filling wet. A thin layer of sauce on the bottom of the dish rather than a thick pool also helps the bases stay firm.

    Can I make this recipe dairy-free?
    Yes. Replace the Greek yogurt with a plain unsweetened coconut yogurt or a dairy-free cream cheese alternative, and use a dairy-free shredded cheese on top. The texture of the filling will be slightly different, but the flavor is still very good. Make sure whatever dairy-free cheese you use is labeled as “meltable” since some brands do not melt well in the oven.

    The Dinner That Ended the Snack-After-Dinner Habit

    Wednesday nights used to be the hardest dinner night in our house. The week was tiring, the kids were tired, and I was very tired. Now Wednesday means enchiladas, tortilla-warming duty for Ben, cheese quality control for Mia, and a kitchen that smells warm and good before anyone even sits down. These have become one of our most reliable easy weeknight chicken dinners in the whole rotation, right alongside the other healthy high-protein chicken recipes I come back to when I want something that fills everyone up without the post-dinner slump. And for the weeks when I want a full spread of comfort food that covers every craving, these enchiladas sit beautifully next to our garlic parmesan chicken meatloaf as two of the most requested things I make. Some dinners just quietly become the ones your family asks for by name, and this one did exactly that for us.

    Don’t forget to snap a picture of your healthy chicken enchiladas before they… (trust me, they will disappear quickly!), and leave a rating below. We’d love to hear how this healthy chicken enchiladas recipe becomes part of your family dinner story.

  • 4-Step Irresistible Fudgy Chewy Browkies

    4-Step Irresistible Fudgy Chewy Browkies

    I forgot the timer. Ben had asked a very long question about volcanoes, and I completely lost track. When I finally pulled the pan out, I was convinced I had ruined everything. But they had set into crinkle-topped, fudgy-centered, chewy-edged cookies that Mia ate in approximately four seconds. That happy accident is exactly how these fudgy chewy browkies became a permanent fixture in our house.

    Why This Recipe Is Special

    The whole point of a brookie is that you cannot decide if you want a brownie or a cookie, so you simply refuse to choose. These have the shiny, crackled top of a brownie, the fudgy dark center that pulls apart in the most satisfying way, and just enough chew around the edges to remind you that yes, this is technically a cookie. They come together in one bowl with no mixer required, which means both kids can be involved from the very start. Mia thinks that makes them her invention. I have stopped correcting her.

    How To Make Fudgy Chewy Browkies

    The batch that actually worked was a Sunday afternoon situation where I had leftover chocolate from a baking project and two kids who were bored enough to be genuinely helpful. Mia was in charge of measuring the sugar, which she took so seriously she leveled it three times. Ben stirred the melted chocolate with the focused expression of someone doing surgery. When I folded the flour in and the batter went thick and glossy and deeply dark, he leaned over the bowl and said, very quietly, “That smells like the inside of a bakery.” He was not wrong.

    The thing that makes these browkies work every single time is whipping the eggs and sugar together properly before anything else goes in. That step creates the signature shiny crackled top that makes everyone at the table reach for the pan before it has properly cooled. It takes about three to four minutes with a hand mixer, and it is the single most important thing you can do for this recipe. Ben now considers himself the official egg whipper, which means he stands at the bowl with tremendous authority and announces when it looks “fluffy enough.”

    Main Ingredients

    • 1 cup semi-sweet chocolate chips or chopped dark chocolate – Use good quality chocolate here; it is the entire flavor foundation of the browkie
    • 1/2 cup unsalted butter, cut into pieces – Melted together with the chocolate for that rich, fudgy base
    • 3/4 cup granulated sugar – Gives sweetness and helps create the shiny crackled top
    • 1/4 cup brown sugar, packed – Adds moisture and that deep caramel chew around the edges
    • 2 large eggs, room temperature – Both eggs go in together and get whipped until pale and thick
    • 1 teaspoon vanilla extract – Rounds out the chocolate flavor beautifully
    • 1/2 cup all-purpose flour – Just enough to hold the cookies together without making them cakey
    • 1/4 cup Dutch-process cocoa powder – Deepens the chocolate flavor and gives that dark, almost black brownie color
    • 1/2 teaspoon baking powder – A small lift so the cookies spread just right without puffing up
    • 1/4 teaspoon salt – Enhances all the chocolate; do not leave it out
    • 1/2 cup chocolate chips, for folding in – Extra melty pockets of chocolate in every single bite
    • Flaky sea salt, for topping – Optional but genuinely transformative; the contrast against the sweet chocolate is everything

    Step-by-Step Instructions

    Step 1: Melt the Chocolate and Butter

    • Combine the chocolate chips and butter in a heatproof bowl set over a saucepan of barely simmering water, making sure the bottom of the bowl does not touch the water
    • Stir gently and constantly until both are fully melted and the mixture is smooth, glossy, and completely combined
    • Remove from the heat and let the chocolate mixture cool for 8 to 10 minutes until it is warm but no longer hot to the touch
    • Alternatively, melt in the microwave in 30-second intervals, stirring between each, until just smooth; do not overheat or the chocolate will seize

    Step 2: Whip the Eggs and Sugar

    • Add both sugars to a large mixing bowl, then crack in the eggs and add the vanilla extract
    • Beat with a hand mixer on medium-high speed for 3 to 4 minutes until the mixture is pale, thick, and has roughly doubled in volume
    • This step is not optional; the whipped eggs create the signature shiny crackled top that makes browkies look like browkies
    • Pour the cooled chocolate mixture into the egg mixture and fold gently with a spatula until just combined and no streaks remain

    Step 3: Fold in the Dry Ingredients

    • Sift the flour, cocoa powder, baking powder, and salt directly over the chocolate mixture in the bowl
    • Fold with a spatula using slow, deliberate strokes from the bottom of the bowl upward until no dry streaks remain; do not overmix
    • Fold in the extra chocolate chips so they are evenly distributed throughout the thick, glossy batter
    • Let the batter rest for 10 minutes at room temperature; it will thicken slightly and become easier to scoop into neat rounds

    Step 4: Bake and Finish

    • Preheat your oven to 350 degrees F and line two baking sheets with parchment paper; scoop the batter into rounds about 2 tablespoons each, spacing them 3 inches apart
    • Sprinkle a small pinch of flaky sea salt over the top of each unbaked brownie before they go in the oven
    • Bake for 10 to 12 minutes until the tops are set and crinkled and the edges look firm but the centers still look slightly underdone
    • Let the browkies cool on the pan for at least 10 minutes before moving them; they firm up as they cool and the centers set into that perfect fudgy texture

    Fudgy Chewy Browkies Variations

    Mia’s “Extra Chocolate Chips” Version

    Mia has one position on chocolate chips in baked goods, and that position is “more.” Always more. She once told me very seriously that she could see “empty spots” in a batch of cookies and that it was a problem that needed solving. For Mia’s version, double the fold-in chocolate chips to a full cup and press a few extra chips on top of each scoop before baking. The browkies come out with visible pools of melted chocolate on top that she finds deeply satisfying. I find her deeply satisfying too, honestly.

    Ben’s “Sea Salt and Espresso” Version

    Ben discovered that espresso makes chocolate taste more like chocolate during the strawberry cake baking session, and he has been applying that information to every chocolate recipe ever since. For a more grown-up, intensely flavored brownie, stir one teaspoon of instant espresso powder into the warm melted chocolate before it goes into the batter. The espresso does not make them taste like coffee; it makes them taste like the best version of themselves. Then the flaky sea salt on top seals the whole thing, and Ben calls it “the fancy one.”

    The Peanut Butter Swirl Version

    This one happened by accident when Mia found the peanut butter jar and decided to “help” before I could redirect her. Drop half a teaspoon of creamy peanut butter on top of each brownie round right before they go into the oven, then use a toothpick to swirl it once through the top. It creates this beautiful marbled surface and the peanut butter bakes into a slightly nutty, salty layer that sits right underneath the crinkled chocolate crust. Both kids now request this version specifically, and I pretend it was planned all along.

    Substitutions

    Semi-sweet chocolate to dark chocolate: Dark chocolate at 70 percent or higher gives a less sweet, more intensely bitter chocolate brownie that is genuinely excellent for anyone who loves a bolder flavor. The texture stays exactly the same. Milk chocolate works too but makes a noticeably sweeter, softer result, and the crinkled top is less pronounced.

    Unsalted butter to coconut oil: Refined coconut oil (the kind without a strong coconut flavor) is a solid dairy-free swap here. Use the same quantity melted. The browkies will be very slightly less rich but still deeply fudgy, and the texture difference is minimal enough that most people will not notice.

    All-purpose flour to a 1:1 gluten-free flour blend: A good quality 1:1 gluten-free baking flour works well in this recipe since there is so little flour in the mix to begin with. The browkies may spread slightly more, so let them cool completely on the pan before lifting. Bob’s Red Mill 1:1 is the one I have tested, and it works beautifully.

    Dutch-process cocoa to natural cocoa powder: Natural cocoa will work here, but the color will be a lighter, more reddish brown, and the flavor will be slightly less deep. If using natural cocoa, add a small pinch of baking soda alongside the baking powder to help with the rise since natural cocoa is more acidic than Dutch-process.

    Equipment

    • Two large baking sheets
    • Parchment paper for lining the baking sheets
    • Heatproof bowl for melting the chocolate (or microwave-safe bowl)
    • Small saucepan for the double boiler method
    • Large mixing bowl for the egg and sugar mixture
    • Hand mixer or stand mixer with whisk attachment
    • Rubber spatula for folding
    • Fine mesh sieve or sifter for the dry ingredients
    • Cookie scoop or two tablespoons for portioning
    • Wire cooling rack
    • Kitchen timer (extremely non-negotiable after my volcano conversation incident)

    Storage Tips

    Make Ahead

    • The browkie batter can be made up to 24 hours ahead, covered tightly, and stored in the fridge; let it sit at room temperature for 20 minutes before scooping so it softens enough to portion
    • Scooped unbaked browkie rounds can be frozen on a baking sheet, then transferred to a freezer bag and baked straight from frozen; just add 2 to 3 extra minutes to the bake time
    • Baked browkies can be made a day ahead and stored covered at room temperature; they are arguably even better on day two when the centers have fully set

    Refrigerator

    • Store baked browkies in an airtight container at room temperature for up to 4 days; the refrigerator actually dries them out and is not recommended
    • If you live somewhere very warm and the browkies are softening too much, a brief spell in the fridge is fine but bring them back to room temperature before eating
    • Layer browkies between sheets of parchment paper if stacking in a container to prevent the sticky tops from bonding together

    Freezing

    • Baked browkies freeze beautifully for up to 2 months; wrap each one individually in plastic wrap and then store in a freezer-safe bag
    • Thaw at room temperature for about 30 minutes and they come back almost exactly as they were when freshly baked
    • Do not microwave to thaw unless you want a molten puddle; room temperature thawing is the only way that preserves the fudgy texture

    Reheating

    • A fully cooled browkie warmed in a 300 degree F oven for 4 to 5 minutes comes back to life in the most incredible way; the center goes gooey again and the top re-crisps slightly
    • Microwave reheating works at 50 percent power for 15 to 20 seconds; longer than that and the chocolate chips will overheat and the center will go dry
    • Serve a warm browkie with a cold scoop of vanilla ice cream and nobody in your house will be able to talk for approximately three minutes

    Family Secret Worth Sharing

    The real secret to the crinkled top that makes these browkies look like they came from a fancy bakery display case is something so simple that I almost did not believe it the first time I tried it. You have to let the batter rest. After everything is mixed together, just leave it alone for ten minutes. The batter thickens, the chocolate sets slightly, and when the cookies hit the hot oven, the surface cracks and crinkles in that perfect way while the inside stays dark and fudgy. Ben discovered this while he was waiting impatiently to lick the spatula and decided the ten minutes was “the most important part of the whole recipe.” He is not wrong. He is also not getting the spatula until the timer goes off.

    Troubleshooting FAQs

    My browkies spread into flat puddles instead of staying thick and round. What happened?
    This almost always comes down to one of three things: the chocolate mixture was still too warm when it went into the eggs, the batter was not rested before scooping, or the baking sheets were warm from a previous batch. Make sure the melted chocolate cools for a full 8 to 10 minutes, rest the batter for 10 minutes after mixing, and always use a cool baking sheet. A warm sheet makes the batter start spreading before it even hits the oven.

    Why do my browkies not have the shiny crinkled top?
    The crinkled top comes entirely from whipping the eggs and sugar long enough. Three to four minutes at medium-high speed is the minimum. If you rush this step or do it by hand, the batter will not trap enough air, and the surface will bake up flat and matte instead of shiny and crackled. It is the one step in this recipe that genuinely cannot be shortened.

    The centers are still gooey after the bake time. Are they done?
    Probably yes. The centers should look slightly underdone when they come out of the oven; that is exactly right. They will continue cooking from the residual heat of the pan for the first five minutes out of the oven and then firm up as they cool. If you bake them until the centers look fully set in the oven, they will be dry and cakey by the time they cool. Pull them early and trust the process.

    Can I double this recipe?
    Absolutely, and I do it regularly. Double everything exactly and bake in multiple batches on separate sheets rather than crowding two sheets worth of cookies into the oven at once. Crowded pans and uneven heat are the enemies of a good browkie. Rotate the sheets halfway through baking if your oven has any hot spots, which most home ovens do.

    One Bowl, Two Kids, Zero Leftovers

    Every time I make these, the same thing happens. The browkies come out of the oven looking absolutely perfect with their crinkled tops and glossy centers. I set them on the rack to cool, and then I turn around for approximately forty-five seconds and find Mia already holding one with a completely innocent expression. Ben waits exactly the full ten minutes with the self-control of someone who has been burned before, literally, and then eats three in a row. If you love a one-bowl beginner baking recipe that delivers maximum drama for minimum effort, this is the one to save right alongside our healthy brownie recipe for the days you want something a little lighter. For anyone who loves the brownie-cookie crossover world, our brown butter brookies are the next logical step, and they are just as impossible to stop eating. And on the weeks when I want to put together a full dessert spread that covers every base, these browkies land perfectly next to our banana bread recipe as a crowd-pleaser that disappears before anyone can ask what else is on the table.

    Don’t forget to snap a picture of your fudgy chewy browkies before that… (trust me, it will disappear quickly!), and leave a rating below. We’d love to hear how this fudgy chewy browkies recipe becomes part of your family baking story.
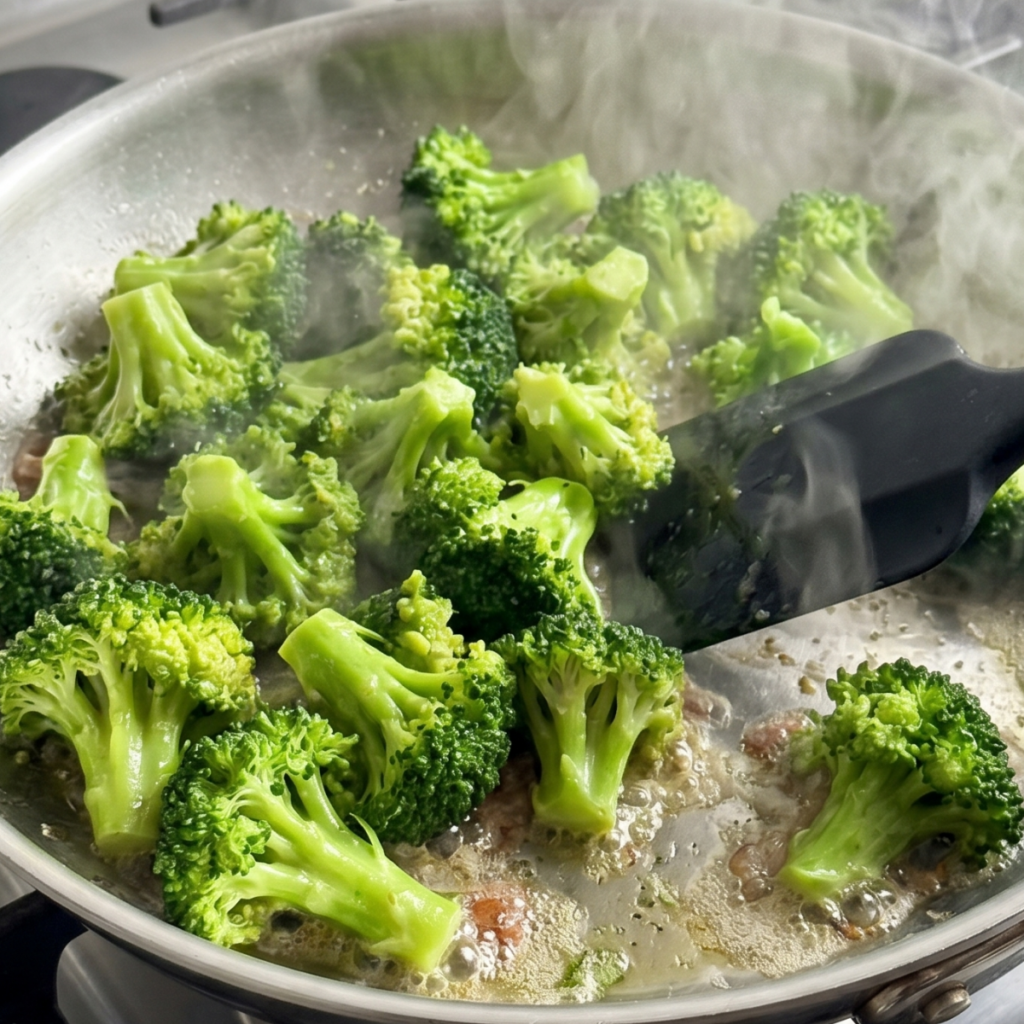
  • Strawberry Chocolate Cake With Fluffy Pink Frosting

    Strawberry Chocolate Cake With Fluffy Pink Frosting

    My first attempt leaned like it was trying to escape the cake stand. I had rushed the cooling, stacked the layers warm, and watched the whole thing tilt left while Ben said, “Mom, it’s moving.” It was moving. We ate it with spoons straight from the pan. But once I nailed it, this strawberry chocolate cake became the most celebrated thing I had ever baked.

    Why This Recipe Is Special

    There is a reason this cake comes out for every birthday, every celebration, and every Tuesday that needs rescuing. The chocolate layers are deeply dark and fudgy with that tender crumb that holds together when you slice it. The strawberry filling is jammy and bright, tucked between each layer like a little surprise. Furthermore, the strawberry whipped frosting is sufficiently light that the entire cake does not feel heavy. Mia calls it her birthday cake even when it is not her birthday, which tells you everything.

    How To Make Strawberry Chocolate Cake

    The cake that actually worked came together on a Saturday afternoon with both kids present and extremely invested. Mia had claimed the role of strawberry washer, which meant she was eating one for every three she put in the bowl. Ben was measuring ingredients with the focused intensity of a scientist, announcing each one out loud as he added it. When those chocolate layers came out of the oven and the whole kitchen filled with that warm, dark cocoa smell, both of them went completely quiet and stood at the oven door like it was a television.

    The lesson that fixed everything was simple: let the cake layers cool completely before you even think about stacking them. I mean completely. Not just warm, not just room temperature on the outside. All the way through. I now put mine on a wire rack for a full hour and then into the fridge for another thirty minutes. It feels like forever when you are excited to eat cake, and Ben will absolutely remind you every ten minutes how long it has been. But a cold, firm layer holds the filling and frosting without sliding, and your cake will stand perfectly straight. Mine does now.

    Main Ingredients

    For the Chocolate Cake Layers

    • 2 cups all-purpose flour – Spoon and level it; packed flour makes a dense, dry cake
    • 2 cups granulated sugar – Sweetness and structure; do not reduce this
    • 3/4 cup Dutch-process cocoa powder – Dutch-process gives a deeper, darker color and less bitter flavor than natural cocoa
    • 2 teaspoons baking soda – Gives the layers their rise; make sure yours is fresh
    • 1 teaspoon baking powder – Works alongside the baking soda for an even, tender crumb
    • 1 teaspoon salt – Enhances the chocolate flavor; do not skip it
    • 2 large eggs, room temperature – Room temperature eggs incorporate more evenly into the batter
    • 1 cup buttermilk, room temperature – Keeps the crumb tender and adds a subtle tang that deepens the chocolate flavor
    • 1 cup hot coffee or hot water – Hot liquid blooms the cocoa and intensifies the chocolate flavor dramatically
    • 1/2 cup neutral oil – Keeps the cake moist for days; vegetable or avocado both work
    • 2 teaspoons vanilla extract – Rounds out all the chocolate notes

    For the Strawberry Filling

    • 2 cups fresh strawberries, hulled and diced – Fresh is best here; frozen releases too much liquid
    • 3 tablespoons granulated sugar – Draws out the juices and helps the filling thicken
    • 1 tablespoon lemon juice – Brightens the strawberry flavor and helps it set
    • 1 tablespoon cornstarch – Thickens the filling so it stays put between the layers

    For the Strawberry Whipped Frosting

    • 2 cups heavy whipping cream, cold – Must be very cold; warm cream will not whip properly
    • 1/2 cup freeze-dried strawberries, crushed to a powder – Gives the frosting its pink color and real strawberry flavor without adding liquid
    • 1/4 cup powdered sugar – Sweetens and stabilizes the whipped cream
    • 1 teaspoon vanilla extract – Rounds out the frosting flavor

    Step-by-Step Instructions

    Step 1: Bake the Chocolate Cake Layers

    • Preheat your oven to 350 degrees F, grease and flour two 9-inch round cake pans, and line the bottoms with parchment paper circles
    • Whisk together the flour, sugar, cocoa powder, baking soda, baking powder, and salt in a large bowl, then add the eggs, buttermilk, oil, and vanilla and mix until just combined
    • Pour in the hot coffee and stir gently until the batter is smooth and glossy; it will be quite thin and that is completely correct
    • Divide the batter evenly between the two pans and bake for 30 to 35 minutes until a toothpick inserted in the center comes out with just a few moist crumbs

    Step 2: Make the Strawberry Filling

    • Combine the diced strawberries, sugar, and lemon juice in a small saucepan over medium heat and stir until the sugar dissolves and the strawberries begin to release their juices
    • Mix the cornstarch with one tablespoon of cold water in a separate small bowl until smooth, then stir it into the simmering strawberry mixture
    • Cook for another 3 to 4 minutes, stirring constantly, until the filling thickens enough to coat the back of a spoon
    • Remove from heat, transfer to a bowl, and let it cool completely to room temperature before using; a warm filling will melt the frosting and slide right out

    Step 3: Make the Strawberry Whipped Frosting

    • Crush the freeze-dried strawberries into a fine powder using a food processor or a zip-lock bag and a rolling pin; the finer the powder, the smoother your frosting will be
    • Combine the cold heavy cream, powdered sugar, crushed freeze-dried strawberries, and vanilla in a large chilled bowl
    • Whip on medium-high speed until stiff peaks form, about 3 to 4 minutes; stop as soon as the peaks hold their shape or the frosting will become grainy
    • Keep the frosting in the fridge until you are ready to assemble so it stays firm and cold

    Step 4: Assemble and Frost the Cake

    • Place one fully cooled cake layer on your cake stand or plate and spread a generous layer of strawberry filling across the top, leaving a half-inch border around the edge
    • Place the second cake layer on top, press down very gently to level it, and apply a thin crumb coat of strawberry frosting all over the outside of the cake
    • Refrigerate the crumb-coated cake for 20 minutes until the first layer of frosting is firm, then apply the final generous layer of frosting using a spatula in loose, swooping strokes
    • Decorate with fresh whole strawberries on top, refrigerate for at least 30 minutes before slicing, and serve cold for the cleanest, most beautiful slices

    Strawberry Chocolate Cake Variations

    Mia’s “More Strawberries Please” Birthday Version

    Mia’s birthday request never changes. She wants extra strawberry filling between every single layer, extra fresh strawberries on top, and what she calls “the pink frosting all the way down the sides so you can see it from across the room.” For her version, I make one and a half batches of the filling and use three cake layers instead of two by slicing one layer in half horizontally. It is a tall, dramatic, unmistakably Mia kind of cake, and she has asked for it every year since she was four.

    Ben’s “Make It a Sheet Cake” Version

    Ben has very practical opinions about cake. He thinks round layer cakes are “too complicated to cut” and once asked if we could “just make it flat.” He is not wrong that a sheet cake version of this recipe is significantly less stressful to assemble. Pour the batter into a greased 9×13 inch pan; bake for 35 to 38 minutes; cool completely; spread the strawberry filling across the top; and pile on the whipped frosting. It tastes identical, and nobody has to worry about anything leaning.

    The Dark Chocolate Strawberry Celebration Version

    For the times when this cake needs to show up to a dinner party or a birthday that deserves something extra, I add a simple dark chocolate ganache drip around the top edge before the fresh strawberries go on. Heat equal parts heavy cream and finely chopped dark chocolate until smooth; let it cool for ten minutes until slightly thickened, then spoon it slowly around the edge of the frosted cake and let it drip naturally down the sides. It looks like it came from a bakery and takes about five minutes.

    Substitutions

    Buttermilk to regular milk plus vinegar: If you do not have buttermilk, add one tablespoon of white vinegar or lemon juice to a measuring cup and fill to the one-cup line with regular whole milk. Let it sit for five minutes until it curdles slightly. It works exactly the same way in the batter and gives you the same tender crumb.

    Hot coffee to hot water: The coffee does not make the cake taste like coffee; it deepens and intensifies the chocolate flavor. If you prefer to skip it entirely, hot water works fine and still blooms the cocoa beautifully. The flavor will be slightly less complex but still deeply chocolatey and delicious.

    Freeze-dried strawberries to strawberry jam: If you cannot find freeze-dried strawberries, you can fold two tablespoons of good-quality strawberry jam into the whipped cream instead. The frosting will be slightly less stable and a paler pink, but the flavor is lovely. Add the jam after the cream has started to thicken so it does not deflate the whole batch.

    Fresh strawberry filling to store-bought jam: On the days when making the filling from scratch feels like one step too many, a good quality strawberry preserve spread straight from the jar works perfectly well between the layers. Warm it slightly so it spreads easily and let it cool back down before stacking. Nobody at your table will know the difference.

    Equipment

    • Two 9-inch round cake pans
    • Parchment paper circles for lining the pans
    • Stand mixer or hand mixer with whisk attachment
    • Large mixing bowl for the cake batter
    • Small saucepan for the strawberry filling
    • Small mixing bowl for the cornstarch slurry
    • Chilled large bowl for whipping the frosting
    • Wire cooling rack
    • Offset spatula for frosting
    • Cake stand or flat serving plate
    • Food processor or zip-lock bag and rolling pin for the freeze-dried strawberries
    • Toothpick for testing doneness
    • Kitchen scale (optional but helpful for even layers)

    Storage Tips

    Make Ahead

    • The chocolate cake layers can be baked up to 2 days ahead, wrapped tightly in plastic wrap, and stored at room temperature or in the fridge until you are ready to assemble
    • The strawberry filling can be made up to 3 days ahead and stored in a sealed jar in the fridge; bring it to room temperature and stir well before using
    • Make the strawberry whipped frosting the same day you plan to frost and serve the cake for the best texture and stability

    Refrigerator

    • Store the assembled cake covered loosely in the fridge for up to 3 days; the frosting holds its shape beautifully when kept cold
    • Slice only what you plan to serve and leave the rest of the cake whole in the fridge with the cut side pressed against a piece of plastic wrap to prevent it from drying out
    • Let refrigerated slices sit at room temperature for 10 minutes before serving so the cake layers soften slightly back to that perfect fudgy texture

    Freezing

    • The unfrosted cake layers freeze beautifully for up to 2 months; wrap each layer individually in plastic wrap and then in foil before freezing
    • Thaw frozen cake layers overnight in the fridge still wrapped, then bring to room temperature before assembling and frosting
    • Do not freeze the assembled cake with the whipped frosting, as it will weep and lose its texture when thawed

    Reheating

    • This cake is served cold or at room temperature and does not need reheating
    • If a slice has been in the fridge, let it sit out for 10 to 15 minutes before eating for the best texture
    • A cold slice with a warm cup of coffee is honestly the only way to eat leftover chocolate cake and I will not be taking questions on that

    Family Secret Worth Sharing

    My mom never used anything other than hot coffee in her chocolate cake batter, and I spent years thinking it was just a quirk of hers until I tried making it with hot water one day and understood immediately. The coffee version tasted like it had a third dimension the water version simply did not have. She always said good chocolate cake should taste like it is trying very hard to be chocolate, and coffee is what makes it try that hard. I told Ben this while we were baking one afternoon, and he thought about it for a moment and then said, “So the cake is secretly a coffee cake?” I told him that was close enough. He seemed satisfied. Mia, who had been listening from the counter, announced that she does not drink coffee and asked if her slice would still be okay. It was more than okay. It always is.

    Troubleshooting FAQs

    Why did my cake layers dome up in the middle instead of baking flat?
    This happens when the oven is too hot or the batter is overmixed. Make sure your oven temperature is accurate with an oven thermometer, and mix the batter only until the ingredients are just combined. You can also use baking strips soaked in water wrapped around the outside of the pans to help the layers bake more evenly and come out flat from the start.

    My strawberry filling is too runny and keeps sliding out from between the layers. What do I do?
    The filling needs to be completely cool and thick before it goes between the layers. If it is still runny after cooling, return it to the saucepan and cook for another two minutes with an extra half teaspoon of cornstarch dissolved in cold water. A thick, jammy filling that holds its shape on a spoon is what you are after. Never use a warm filling on a cake.

    The whipped frosting deflated and turned soupy when I was spreading it. What went wrong?
    Three things cause this: cream that was not cold enough, a bowl that was not chilled, or overworking the frosting after it was whipped. The cream and the bowl both need to be very cold before you start. Once the frosting reaches stiff peaks, stop the mixer immediately and use it right away or keep it in the fridge. Do not try to re-whip deflated cream frosting, as it will not recover.

    Can I make this cake without a stand mixer?
    Absolutely. The cake batter is thin enough to mix by hand with a whisk with no trouble at all. For the whipped frosting, a hand mixer works just as well as a stand mixer; just make sure your bowl and beaters are very cold before you start. Whipping cream by hand is technically possible but takes about ten minutes of serious effort, so the hand mixer is worth it here.

    The Cake That Fixed Everything

    The leaning tower of chocolate cake that started this whole journey is now a family story we tell at every birthday. Ben brings it up every single time I make this, usually while reaching for his second slice. Mia just stands next to the cake stand with a fork, waiting. This strawberry chocolate cake has become the most requested thing I bake, and if you love a showstopping dessert that is equally at home on a celebration table or a random Wednesday, this is absolutely the recipe to save. It sits beautifully alongside our brown butter brookies as a go-to for anyone who wants a dessert that genuinely impresses, and the strawberry-chocolate combination is every bit as classic and crowd-pleasing as our beloved mini pineapple cakes that disappear just as fast. If you are on a baking streak and want something equally beautiful but a little more unexpected, our rhubarb cake recipe is the next one to bookmark. For the days when you want something rich, fudgy, and just a little bit celebratory, this cake is the answer, and it pairs beautifully with a quiet kitchen, a good cup of coffee, and the very satisfying knowledge that it is standing perfectly straight on the stand. I checked. Twice.

    Don’t forget to snap a picture of your strawberry chocolate cake before that… (trust me, it will disappear quickly) and leave a rating below. We’d love to hear how this strawberry chocolate cake becomes part of your family celebration story.
  • Best Asian Pasta Dish With Savory Ground Beef and Glossy Noodle Sauce

    Best Asian Pasta Dish With Savory Ground Beef and Glossy Noodle Sauce

    I dumped in twice as many chili flakes because Mia was asking me seventeen questions about butterflies at the exact wrong moment. Ben took one bite, put his fork down, and said, very calmly, “Mom. I can literally feel my ears”. We ate cereal that night. But once I got the heat right, this Asian pasta dish became the most requested dinner in our entire house.

    Why This Recipe Is Special

    Here is what I love most about this recipe: it looks like something you would order at a restaurant and costs about six dollars to make at home. The sauce is this deep, glossy, savory situation built from pantry staples that come together in the time it takes to boil the pasta. Ground beef soaks up every bit of that garlicky, soy-sesame sauce and clings to the noodles in the most satisfying way. Both kids slurp the noodles completely without shame, and honestly, so do I.

    How To Make Asian Pasta Dish

    The successful version came together on a rainy Thursday when I had exactly one pound of ground beef, a box of spaghetti, and a strong opinion that we were not ordering pizza again. Mia sat on the counter eating green onion slices straight out of the cutting board pile like they were candy. Ben was testing the chopsticks I had set out for serving, which mostly meant he was flicking them at the counter until I gave him a look. When the sauce hit the pan and the garlic and ginger started doing their thing, the whole kitchen transformed. Mia stopped eating the green onions and just sat there sniffing the air with her eyes closed.

    The thing that took this from good to genuinely great was reserving a cup of pasta water before draining. I used to skip this step completely and wonder why my sauce felt a little tight and sticky instead of silky and glossy. The starchy pasta water loosens everything up and helps the sauce coat every single strand evenly. Ben now reminds me every single time I am at the stove. “Did you get the pasta water, Mom?” Yes, buddy. Every time now.

    Main Ingredients

    • 12 oz spaghetti – Regular spaghetti works beautifully here; the long strands catch all that glossy sauce perfectly
    • 1 lb ground beef (80/20) – The fat in 80/20 carries the flavor; leaner beef works but the sauce will be slightly less rich
    • 4 cloves garlic, minced – The backbone of the whole sauce; do not reduce this
    • 1 teaspoon fresh ginger, grated – Adds warmth and that unmistakable Asian flavor depth
    • 3 tablespoons soy sauce – Saltiness and deep umami; low-sodium works fine
    • 2 tablespoons oyster sauce – Thick, sweet, savory and the secret to that glossy restaurant-style coating
    • 1 tablespoon sesame oil – Toasted sesame oil only; it goes in at the end for maximum fragrance
    • 1 tablespoon hoisin sauce – A little sweet, a little tangy; adds complexity without any extra effort
    • 1 teaspoon chili flakes – Start here; add more carefully and not while being asked about butterflies
    • 2 tablespoons neutral oil – For browning the beef; vegetable or avocado oil both work
    • 1 tablespoon brown sugar – Balances the saltiness and helps the sauce develop that glossy caramelized finish
    • 2 tablespoons rice vinegar – Brightens the whole sauce and cuts through the richness
    • 3 green onions, sliced – For finishing and garnish; the fresh bite balances the richness of the sauce
    • 1 teaspoon sesame seeds – Optional but adds a lovely nutty crunch on top
    • 1 cup reserved pasta water – The most important ingredient most people forget; makes the sauce silky

    Step-by-Step Instructions

    Step 1: Cook the Pasta and Make the Sauce

    • Cook the spaghetti in well-salted boiling water until just al dente according to package directions, then scoop out 1 cup of pasta water before draining
    • Whisk together the soy sauce, oyster sauce, hoisin sauce, brown sugar, rice vinegar, and chili flakes in a small bowl until fully combined
    • Set the sauce bowl and reserved pasta water right next to the stove before you start cooking the beef
    • Drain the pasta and toss it with a tiny drizzle of neutral oil to keep it from clumping while you finish the beef

    Step 2: Brown the Beef

    • Heat the neutral oil in a large skillet or wok over medium-high heat until shimmering
    • Add the ground beef and spread it out in a single layer; let it cook undisturbed for 2 minutes before breaking it up so it browns instead of steams
    • Break the beef into small crumbles and cook until deeply browned with no pink remaining, about 5 to 6 minutes total
    • Drain any excess fat from the pan if needed, leaving about 1 tablespoon behind for flavor

    Step 3: Build the Sauce

    • Push the browned beef to one side of the pan and add the garlic and ginger to the cleared space; stir for 30 seconds until golden and fragrant
    • Pour the sauce mixture over the beef and garlic and toss everything together to combine
    • Add the drained pasta directly to the pan and toss vigorously to coat every strand in the sauce
    • Pour in the reserved pasta water a little at a time, tossing as you go, until the sauce turns glossy and clings to the noodles without pooling at the bottom

    Step 4: Finish and Serve

    • Remove the pan from the heat and drizzle the sesame oil over everything, then toss once more to distribute it evenly
    • Taste the noodles and adjust with a splash more soy sauce for salt or a drop more rice vinegar for brightness
    • Divide into bowls and top generously with sliced green onions and a sprinkle of sesame seeds
    • Serve immediately while the noodles are still glossy and the sauce is at its silkiest

    Asian Pasta Dish Variations

    Ben’s “Extra Sauce” Bowl

    Ben has one standard for all noodle dishes: there must be enough sauce to pool slightly at the bottom of the bowl so he can dip each forkful into it before eating. For an extra saucy version that fully satisfies the sauce enthusiasts in your family, double the sauce mixture and add an extra half cup of pasta water. The noodles swim in that glossy, savory coating, and every single bite is completely equal in flavor. Ben considers this the correct way to eat noodles, and I have stopped arguing with him.

    Mia’s “No Spicy Please” Version

    Mia operates a strict no-heat policy in her bowl. She will eat everything else in this dish without complaint, which for a six-year-old is basically a miracle, but the chili flakes are completely non-negotiable. For the spice-free version, simply leave out the chili flakes entirely and add an extra half tablespoon of hoisin sauce to make up for the depth. The dish is still deeply savory and satisfying, and Mia eats the whole bowl without a single negotiation. That alone is worth the small adjustment.

    The Pork and Cabbage Upgrade

    On the weeks when I want to stretch this into something that feels a little more substantial, I swap the ground beef for ground pork and throw in two cups of thinly shredded cabbage with the garlic and ginger. The cabbage wilts down beautifully and adds a slight sweetness that works incredibly well against the salty, savory sauce. It also makes this one of the best easy Asian pasta recipes for feeding a crowd because the whole pot suddenly goes a lot further without feeling thin or skimped on.

    Substitutions

    Ground beef to ground pork or chicken: Ground pork is actually the most traditional choice for this style of noodle dish and gives a slightly sweeter, more delicate flavor. Ground chicken works well too but is leaner, so add an extra teaspoon of sesame oil at the end to keep the richness up.

    Spaghetti to lo mein noodles or udon: If you can find fresh lo mein or udon at your grocery store, absolutely use them here. They have a chewier texture that makes the whole dish feel more authentically Asian-inspired. Cook them according to package directions and treat them exactly the same as the spaghetti.

    Oyster sauce to hoisin sauce: If oyster sauce is not something you keep on hand, use an equal amount of hoisin in its place. The flavor will be slightly sweeter and less briny, so add a small splash of soy sauce to compensate, and the sauce will still be deeply flavorful and glossy.

    Fresh ginger to ground ginger: Fresh ginger is worth it here, but in a pinch, use one quarter teaspoon of ground ginger in place of the full teaspoon of fresh. Ground ginger is more concentrated and will deliver the warmth without the bright, sharp bite of fresh ginger, which is a fair trade on a busy weeknight.

    Equipment

    • Large pot for boiling pasta
    • Large skillet or wok (12-inch minimum; wok preferred for tossing noodles)
    • Small mixing bowl for the sauce
    • Whisk or fork for combining the sauce
    • Ladle or heatproof measuring cup for scooping pasta water
    • Colander for draining pasta
    • Tongs or chopsticks for tossing the noodles
    • Microplane or box grater for fresh ginger
    • Sharp knife and cutting board for green onions and garlic
    • Measuring spoons

    Storage Tips

    Make Ahead

    • The sauce mixture can be whisked together and stored in a sealed jar in the fridge for up to 4 days before you need it
    • Brown the beef a day ahead, store it covered in the fridge, and the whole dish comes together in the time it takes to boil the pasta
    • Cook the spaghetti slightly under al dente if making ahead since it will absorb more sauce and continue softening as it sits

    Refrigerator

    • Store leftover noodles in an airtight container in the fridge for up to 4 days
    • The noodles will absorb the sauce as they sit in the fridge so the leftovers will be less saucy than when freshly made
    • Keep a small splash of soy sauce and water mixed together in a separate container to loosen the noodles back up when reheating

    Freezing

    • The cooked beef with sauce freezes well for up to 2 months in a freezer-safe container
    • Do not freeze the assembled noodles as the pasta texture changes significantly after thawing
    • Freeze the beef component separately and cook fresh noodles when you are ready to serve for the best result

    Reheating

    • Reheat noodles in a skillet over medium heat with a splash of water or soy sauce, tossing constantly until warmed through and glossy again
    • Microwave works in a pinch; cover with a damp paper towel and heat in 60-second intervals, tossing between each round
    • Add a fresh drizzle of sesame oil right before serving reheated leftovers to bring the fragrance back to life

    Family Secret Worth Sharing

    My mom always told me that the secret to good noodles is knowing when to take the pan off the heat. She said most people leave it on too long and the sauce tightens up and loses that silky quality that makes noodle dishes genuinely great. The moment the sauce looks just barely glossy and clings to the noodles without feeling dry, that is the exact second to pull it. I think about that every single time I stand at this pan. Mia asked me once why I always stare at the noodles so seriously right before serving. I told her I was listening to them. She looked at me for a long moment and then said “okay” and went back to eating. That felt like the right answer.

    Troubleshooting FAQs

    Why are my noodles clumping together instead of staying separate?
    This almost always happens when the pasta sits too long after draining without anything to keep it moving. Toss the drained pasta immediately with a tiny drizzle of neutral oil, and get it into the pan with the sauce as quickly as possible. Working fast is the real trick with noodle dishes; the sauce separates the strands and keeps everything loose once everything comes together.

    My sauce is too salty. How do I fix it?
    Add a teaspoon of rice vinegar and a pinch of brown sugar to balance it out. A squeeze of fresh lime juice also works beautifully. If it is still too salty, add a small splash of plain water and toss the noodles well so the dilution distributes evenly through the whole pan.

    The beef came out gray and steamed instead of browned. What went wrong?
    The pan was not hot enough or the beef was too crowded. Ground beef releases a lot of moisture as it cooks, and if the pan is not hot enough to evaporate that moisture quickly, the beef ends up steaming in its own liquid. Make sure the oil is shimmering before the beef goes in, and leave it undisturbed for the first 2 minutes so a proper crust can form before you break it up.

    Can I make this dish without oyster sauce?
    Absolutely. Replace it with an equal amount of hoisin sauce plus a small splash of soy sauce to add back the salty depth. The flavor will be slightly sweeter and less complex but still deeply satisfying. Worcestershire sauce is also a surprising substitute in a pinch, adding a similar savory, slightly sweet depth that works well with the rest of the sauce components.

    Noodle Night Is Now a Thing in Our House

    Thursday nights used to mean scrambled eggs or cereal when I ran out of dinner ideas. Now they mean noodles, chopsticks that Ben still cannot quite figure out, and Mia insisting on eating hers in the biggest bowl we own. This has become one of our favorite easy weeknight dinners right alongside our pineapple chicken and rice that gets just as many requests on a Friday. On the nights when I want something equally fast but with ground beef doing the heavy lifting, our hobo casserole ground beef recipe is always there for me. And if you are on a one-pan weeknight kick like we are, you absolutely cannot miss this easy one pot chicken and rice recipe that has saved us more Thursdays than I can count. Some recipes just quietly become part of your family without you even planning it, and this one did exactly that for us.

    Don’t forget to snap a picture of your Asian pasta dish before that… (trust me, it will disappear quickly!), and leave a rating below. We’d love to hear how this Asian pasta dish becomes part of your family dinner story.
  • 3 Secrets to Perfect Brown Sugar Glazed Salmon

    3 Secrets to Perfect Brown Sugar Glazed Salmon

    The first time I made this, I flipped the salmon too early and left the entire golden crust stuck to my skillet. Ben stared at his plate and said, “Is it supposed to look like that?” It was definitely not. But after a little trial and a lot of butter, this brown sugar glazed salmon came out sticky, caramelized, and absolutely worth every previous failure.

    Why This Recipe Is Special

    Salmon is one of those things that sounds impressive but is genuinely one of the fastest dinners you can pull off on a weeknight. The brown sugar and soy glaze does something almost magical in the oven: it caramelizes into this sticky, lacquered coating that looks like you spent hours in the kitchen when really you spent about thirty minutes including the part where Mia reorganized your spice drawer without being asked. This is the recipe I make when I want dinner to feel like a little event without it actually being one.

    How To Make Brown Sugar Glazed Salmon

    My successful version happened on a Friday night when both kids were hovering at the kitchen counter like little vultures. Mia had appointed herself the official glaze taster and kept dipping her finger into the sauce bowl every time I turned around. Ben was reading the back of the brown sugar bag out loud. This behavior is not helpful, but it is very characteristic of him. When that first wave of caramelized sugar and garlic hit the oven air, they both went completely silent. That kind of quiet only happens when something smells really, really excellent

    The lessons that changed everything were patience and health. I used to rush the sear, moving the fish around before it was ready to be released. Salmon tells you when it is done on the bottom: it will lift cleanly from the pan without any resistance. The moment you have to force it, it is not ready. Once I stopped poking and prodding, the crust formed perfectly, and the glaze had something solid to cling to. Ben now calls himself the “official timer keeper,” which means he stands at the oven door, counting down with tremendous authority.

    Main Ingredients

    • 4 salmon fillets (6 oz each), skin-on – Skin-on keeps the fish together during cooking and crisps up beautifully underneath
    • 3 tablespoons brown sugar, packed – The star of the glaze; dark brown sugar gives a deeper, more molasses-rich flavor than light
    • 2 tablespoons soy sauce – Brings saltiness and umami that balances the sweetness perfectly
    • 1 tablespoon honey – Adds shine and helps the glaze stick and caramelize without burning
    • 3 cloves garlic, minced – Non-negotiable; the garlic blooms in the glaze and gives the whole dish its savory backbone
    • 1 tablespoon olive oil – For searing; gets the pan hot enough for a proper crust
    • 1 tablespoon butter – Added at the end for richness and that glossy restaurant finish
    • 1 teaspoon smoked paprika – Warm, subtle smokiness that complements the sweet glaze beautifully
    • 1/2 teaspoon garlic powder – Layered garlic flavor alongside the fresh; makes the seasoning more complex
    • 1/4 teaspoon black pepper – Freshly ground; a little heat to cut through the sweetness
    • 1/4 teaspoon salt – Season the fish itself before the glaze goes on
    • 1 teaspoon apple cider vinegar – Brightens the glaze and stops it from being one-dimensionally sweet
    • Fresh parsley, chopped – For garnish; adds a clean green finish against that deep caramel color

    Step-by-Step Instructions

    Step 1: Make the Glaze and Season the Salmon

    • Whisk together the brown sugar, soy sauce, honey, minced garlic, and apple cider vinegar in a small bowl until the sugar is mostly dissolved
    • Pat the salmon fillets completely dry on both sides with paper towels; dry fish sears instead of steams
    • Season the flesh side of each fillet with smoked paprika, garlic powder, salt, and black pepper
    • Set the glaze and seasoned salmon side by side near the stove so everything is ready when the pan gets hot

    Step 2: Sear the Salmon

    • Heat the olive oil in an oven-safe skillet over medium-high heat until the oil is shimmering and just beginning to smoke
    • Place the salmon fillets flesh-side down in the pan and cook for 3 minutes without moving them at all
    • Flip the fillets gently once they release cleanly from the pan; if they resist, give them another 30 seconds
    • Cook for another 2 minutes on the skin side until the skin is golden and beginning to crisp

    Step 3: Glaze and Bake

    • Spoon the brown sugar glaze generously over each fillet while the skillet is still on the stovetop, coating the tops and sides well
    • Transfer the whole skillet directly into a preheated 400 degree F oven and bake for 3 to 4 minutes
    • Pull the pan out halfway and spoon the remaining glaze over each fillet for that second caramelized layer
    • Return to the oven for another 3 to 4 minutes until the glaze is bubbling, sticky, and deeply caramelized

    Step 4: Rest and Serve

    • Let the salmon rest in the pan for 2 minutes before serving so the juices redistribute and the glaze sets slightly
    • Use a wide spatula to lift each fillet carefully and transfer to serving plates with the caramelized side facing up
    • Spoon any remaining pan glaze over the top of each piece for maximum flavor and shine
    • Finish with freshly chopped parsley and serve immediately while the glaze is still warm and glossy

    Brown Sugar Glazed Salmon Variations

    Mia’s “Make It Sweeter” Version

    Mia has a serious sweet tooth, and the moment she tasted the original glaze, she asked if we could add more honey. We could, and we did. For a sweeter, more dessert-adjacent glaze that kids absolutely lose their minds over, increase the honey to 2 tablespoons and add a small pinch of cinnamon to the mix. It gives the whole thing a warmth that Mia describes as “cozy salmon,” which is genuinely the best product description I have ever heard. Serve it over white rice and watch it disappear.

    Ben’s “Spicy Brown Sugar” Version

    Ben went through his spicy phase at age eight and never fully came out of it. For those who like a little heat against that sweet glaze, add half a teaspoon of sriracha and a pinch of red pepper flakes directly into the glaze mixture before spooning it over the salmon. The heat builds slowly underneath all that sweetness and turns this into a genuinely grown-up version of the dish. Ben adds extra red pepper flakes to his own plate, always, and then immediately reaches for his water glass.

    The Sheet Pan Sunday Version

    On the Sundays when I do not want to deal with a hot skillet and oven transfer, I skip the sear entirely and go straight to a lined sheet pan. Brush the fillets with a little oil, season them, spoon the glaze over the top, and bake at 425 degrees F for 12 to 14 minutes. You lose a little of that deep stovetop crust, but the glaze still caramelizes beautifully, and the cleanup takes about forty-five seconds. Both kids can help line the pan and spoon the glaze, which means dinner becomes a group project.

    Substitutions

    Brown sugar to maple syrup: Pure maple syrup makes a genuinely beautiful swap here. Use 2 tablespoons in place of the 3 tablespoons of brown sugar since maple syrup is slightly sweeter and more liquid. The flavor is a little earthier and less molasses-forward, but the caramelization is just as gorgeous in the oven.

    Soy sauce to tamari or coconut aminos: Tamari is the easiest gluten-free swap with an almost identical flavor. Coconut aminos are sweeter and less salty, so reduce the honey by half a teaspoon if you go that route. Both work beautifully in the glaze without changing the overall balance much.

    Fresh garlic to garlic powder: If you are out of fresh garlic, use 1 teaspoon of garlic powder in the glaze instead of the 3 minced cloves. The flavor is less sharp and more mellow, which actually works well for kids who find raw garlic a little strong. The dish still tastes deeply savory and completely intentional.

    Salmon to trout or arctic char: Both trout and arctic char have a similar fat content and mild flavor to salmon and respond beautifully to this glaze. Trout fillets tend to be thinner, so reduce the oven time to 4 to 5 minutes and watch closely. The brown sugar glaze works on any rich, fatty fish that can handle high heat without drying out.

    Equipment

    • Oven-safe skillet (cast iron or stainless steel, 12-inch)
    • Small mixing bowl for the glaze
    • Whisk or fork for mixing the glaze
    • Paper towels for drying the salmon
    • Wide fish spatula for flipping and serving
    • Tongs (optional but helpful for positioning fillets)
    • Measuring spoons
    • Oven mitts (the skillet handle will be extremely hot coming out of the oven)
    • Basting spoon or pastry brush for applying the glaze
    • Instant-read thermometer (salmon is done at 125 to 130 degrees F for medium)

    Storage Tips

    Make Ahead

    • The brown sugar glaze can be made up to 3 days in advance and stored in a sealed jar in the fridge; give it a good stir before using since the sugar may settle
    • Season the salmon fillets the night before and keep them covered in the fridge for up to 24 hours before cooking
    • Do not glaze the salmon ahead of cooking; the sugar draws moisture out of the fish and can make the texture soft before it even hits the pan

    Refrigerator

    • Store leftover cooked salmon in an airtight container in the fridge for up to 3 days
    • The glaze firms up when cold and turns into a beautiful sticky coating on the fish; it is honestly delicious cold over a salad the next day
    • Keep leftover pan sauce in a separate small container and drizzle it over the reheated salmon before serving

    Freezing

    • Cooked glazed salmon can be frozen for up to 1 month wrapped tightly in plastic wrap and then placed in a freezer bag
    • The texture changes slightly after freezing but the flavor holds up remarkably well, especially flaked into pasta or rice bowls
    • Raw salmon fillets freeze beautifully for up to 3 months; thaw overnight in the fridge before seasoning and cooking

    Reheating

    • Reheat leftover salmon gently in a covered skillet over low heat with a splash of water to prevent the glaze from burning
    • Oven reheating at 275 degrees F for 10 to 12 minutes keeps the fish moist and warms it through without overcooking
    • Microwave reheating works in a pinch on 50 percent power in 60-second intervals; cover with a damp paper towel to hold in moisture

    Family Secret Worth Sharing

    My mom taught me something about glazed fish that I thought was fussy until it changed every recipe I made after: always add your glaze in two rounds. Put half on before it goes in the oven, then pull the pan out halfway through cooking and spoon the second half over the top. The first layer soaks into the fish and seasons it all the way through. The second layer stays on the surface and caramelizes into that glossy, sticky coating you see in all the pictures. Mia watched me do it once and asked why I was “painting the fish.” I told her Grandma taught me. She nodded like that explained everything, which, honestly, it did.

    Troubleshooting FAQs

    Why is my glaze burning in the oven instead of caramelizing?
    Two things usually cause this: oven temperature too high or too much sugar in the glaze without enough liquid to balance it. Make sure your oven is at 400 degrees F and not higher for the finishing bake. If the glaze is darkening too fast, tent the pan loosely with foil for the last few minutes. A little char on the very edges is normal and delicious; black and bitter means it went too far.

    My salmon is sticking to the pan when I try to flip it. What do I do?
    Do not force it. This is the single most important salmon rule I know. If the fish is sticking, it is not ready to flip yet. Give it another 30 to 60 seconds and try again with a thin fish spatula. Properly seared salmon releases on its own when the crust has fully formed. A well-seasoned cast iron skillet or a hot stainless steel pan with enough oil also makes a big difference.

    How do I know when the salmon is cooked through without cutting into it?
    The most reliable way is an instant-read thermometer. Pull the salmon at 125 to 130 degrees F for medium, which is slightly translucent in the very center, or 145 degrees F for fully cooked. Visually, the flesh should change from deep pink to a lighter, opaque pink from the outside in. When you press the thickest part gently with your finger, it should feel firm but with a little give.

    Can I make this without an oven-safe skillet?
    Absolutely. Sear the salmon in any skillet you have, then transfer the fillets to a parchment-lined baking sheet, spoon the glaze over the top, and finish in the oven from there. You lose the easy pan sauce that forms in a single-skillet method, but the glazed salmon comes out just as beautiful, and the cleanup is actually easier.

    Sticky Fingers, Happy Table

    Friday nights in our kitchen have a new look now. Ben picks off every piece of parsley with surgical precision. Mia drags her rice through the leftover pan glaze like it is the best thing she has ever tasted, which some weeks it genuinely is. This brown sugar-glazed salmon has quietly become one of our most loved baked salmon recipes in the whole dinner rotation, sitting right alongside the other easy salmon glaze recipes we reach for when we need something that feels special on a Tuesday. If you are looking for a reliable, crowd-pleasing honey garlic brown sugar salmon that comes together in under thirty minutes and makes the whole house smell incredible, this is absolutely the one to save. Some dinners are just worth the sticky pan.

    Don’t forget to snap a picture of your brown sugar-glazed salmon before that… (trust me, it will disappear quickly!), and leave a rating below. We’d love to hear how this brown sugar glazed salmon becomes part of your family dinner story.
    Star rate this recipe and join our warm kitchen family.

  • 3 Secrets to the Best Roasted Vegetable Bowls Healthy

    3 Secrets to the Best Roasted Vegetable Bowls Healthy

    I set off the smoke alarm twice while trying to roast the vegetables. Twice. I forgot about both pans while helping Ben with his spelling words and walked back to a pure kitchen disaster. Mia wandered in, sniffed the smoky air, and announced, “Something smells like school lunch. ” That was not a compliment. Once I figured it out, these roasted vegetable bowls healthy enough for any weeknight, became everything.

    Why This Recipe Is Special

    Here is the thing nobody tells you about roasted vegetables: when you get them right, even the kids who make dramatic gagging sounds at the word “broccoli” will eat them without complaint. Ben, my nine-year-old, once described these bowls as “actually pretty good for something healthy,” which in our house is a standing ovation. This recipe is filling, flexible, and genuinely one of the best ways I know to get a real vegetable-focused dinner on the table without spending an hour in the kitchen.

    How To Make Roasted Vegetable Bowls Healthy

    My first real successful attempt happened on a Tuesday in January when I was determined to stop ordering delivery. I had Mia sitting on the counter eating a handful of raw chickpeas straight from the can (she does this; I have accepted it) and Ben reading the ingredient list over my shoulder like a tiny food critic. When the first tray came out of the oven smelling like golden caramelized edges and warm spices, Mia slid off the counter and pressed her nose up to the pan. “Can I eat just the potatoes?” she asked. Reader, she ate the broccoli too.

    The big lesson from my burnt-vegetable disaster days was simple: do not crowd the pan. I used to pile everything onto one baking sheet thinking it would save time, and what I got instead was sad, steamed vegetables sitting in their liquid. Spread them out, give them space, and let the oven do its job. Two sheet pans, side by side, changed everything. Ben now calls himself the “spreader,” which mostly means he arranges the vegetables with the focused intensity of someone doing surgery.

    Main Ingredients

    • 2 cups broccoli florets – Gets beautifully crispy at the edges; cut them similar in size so they roast evenly
    • 2 cups baby potatoes, halved – The golden, crispy base of the bowl; creamy inside, caramelized outside
    • 1.5 cups butternut squash, cubed – Adds natural sweetness and gorgeous color; cut into 3/4-inch pieces
    • 1 cup chickpeas, drained and dried – Your protein hero: they turn irresistibly crunchy in the oven
    • 3 tablespoons olive oil – Coats everything evenly and helps achieve that golden roast
    • 1 teaspoon garlic powder – Warm, savory backbone for the whole bowl
    • 1 teaspoon smoked paprika – Gives everything that deep, slightly smoky color and flavor
    • 1/2 teaspoon cumin – Earthy warmth that ties all the vegetables together
    • Salt and black pepper to taste – Season generously; vegetables need more salt than you think
    • For the tahini drizzle: 3 tablespoons tahini – Nutty, creamy, and the sauce that makes this bowl feel complete
    • 2 tablespoons lemon juice – Brightens the tahini and cuts through the richness
    • 1 tablespoon olive oil – Loosens the sauce to a drizzleable consistency
    • 2 to 3 tablespoons warm water – Thins the tahini sauce to just the right pourable texture
    • Fresh parsley, chopped – For garnish; adds color and a clean, fresh finish
    • Red pepper flakes – Optional, for a little heat on top

    Step-by-Step Instructions

    Step 1: Prep and Season the Vegetables

    • Preheat your oven to 425 degrees F and line two large baking sheets with parchment paper
    • Pat the chickpeas completely dry with paper towels; moisture is the enemy of crunch
    • Toss the broccoli, potatoes, squash, and chickpeas separately with olive oil, garlic powder, smoked paprika, cumin, salt, and pepper
    • Keep the chickpeas on their own section of the pan since they roast faster than the root vegetables

    Step 2: Roast the Vegetables

    • Spread everything across two baking sheets in a single layer with space between each piece
    • Place potatoes and squash on one pan, broccoli and chickpeas on the second pan
    • Roast at 425 degrees F for 25 to 30 minutes, flipping everything once halfway through
    • Remove the broccoli and chickpeas at 20 to 22 minutes if they are browning faster than the root vegetables

    Step 3: Make the Tahini Sauce

    • Whisk together the tahini, lemon juice, and olive oil in a small bowl until smooth
    • Add warm water one tablespoon at a time, whisking between each addition until the sauce is pourable but not thin
    • Taste and adjust with a pinch of salt or extra lemon juice to your preference
    • Set aside at room temperature; the sauce will thicken slightly as it sits so keep the warm water nearby

    Step 4: Assemble the Bowls

    • Start with a base of your choice: cooked grains, leafy greens, or simply the roasted potatoes as the foundation
    • Layer the roasted broccoli, squash, and crispy chickpeas over the top
    • Drizzle the tahini sauce generously across everything in a slow zigzag
    • Finish with fresh parsley and a pinch of red pepper flakes, and serve immediately while everything is still warm

    Roasted Vegetable Bowls Healthy Variations

    Ben’s “Make It a Grain Bowl” Version

    Ben went through a phase where everything had to have quinoa in it after he learned it was a “complete protein” from a school project. He told me the news very seriously while pointing at the bag like a tiny nutritionist. For a heartier bowl that keeps hungry kids full through homework and after-school activities, serve everything over a cup of cooked quinoa or brown rice. The grains soak up the tahini sauce in the most satisfying way and turn this into a real meal-prep-with-lots-of-veggies situation for the week ahead.

    Mia’s “Everything Crispy” Bowl

    Mia has one rule in life: texture matters. She will reject anything soft, mushy, or what she calls “too wet.” For the crunch-obsessed members of your household, double the chickpeas, add a handful of pumpkin seeds to the pan in the last five minutes of roasting, and swap the tahini drizzle for a lemon-herb yogurt sauce instead. Everything gets that satisfying crunch that makes Mia eat her vegetables without a single negotiation.

    The “Clean Out the Fridge” Sunday Version

    This is honestly how the recipe started. I had half a head of cauliflower, some sad carrots, and a sweet potato that was on its last good day. Everything got tossed with the same spice mix and roasted together. The rule is simple: any vegetable that can survive 425 degrees F for 25 minutes is fair game. Zucchini, bell peppers, red onion, Brussels sprouts, and green beans all work beautifully. This dish is my favorite kind of hearty vegetable meal because the recipe changes every single week.

    Substitutions

    Butternut squash to sweet potato: Sweet potato is actually my go-to swap when I cannot find squash. It roasts in almost the same time and has a similar natural sweetness, and Mia cannot tell the difference. Cut it into the same size cubes for even cooking.

    Tahini sauce to hummus drizzle: If tahini is not something you keep on hand, thin out two tablespoons of store-bought hummus with a little lemon juice and olive oil until it is pourable. It gives you a similar creamy, savory finish with zero extra effort.

    Chickpeas to white beans: White beans roast up beautifully and give you a slightly softer, creamier bite compared to the crunch of chickpeas. They are also a wonderful option if someone in your house has a texture preference. Dry them well before roasting, just like you would chickpeas.

    Smoked paprika to regular paprika plus a pinch of cayenne: If you only have sweet paprika in your spice rack, add just a tiny pinch of cayenne alongside it to recreate that subtle smoky warmth. Start small since cayenne is much hotter than smoked paprika and builds quickly.

    Equipment

    • Two large rimmed baking sheets (half sheet pans are ideal)
    • Parchment paper or silicone baking mats
    • Large mixing bowl for tossing the vegetables
    • Small mixing bowl for the tahini sauce
    • Whisk
    • Sharp chef’s knife and cutting board
    • Vegetable peeler for the squash
    • Paper towels for drying the chickpeas
    • Measuring spoons
    • Tongs or a wide spatula for flipping
    • Timer (non-negotiable after my two-pan smoke alarm situation)

    Storage Tips

    Make Ahead

    • Chop all your vegetables up to two days ahead and store them in separate airtight containers in the fridge
    • The tahini sauce can be made three days in advance; store it in a sealed jar and whisk in a splash of warm water before serving to loosen it back up
    • This recipe is one of the best veggie food prep options out there; roast a double batch on Sunday and you have four days of easy lunches sorted

    Refrigerator

    • Store roasted vegetables in an airtight container in the fridge for up to 4 days
    • Keep the tahini sauce in a separate container so it does not make the vegetables soggy
    • The chickpeas will soften over time in the fridge, so re-crisp them in a dry skillet for two minutes before serving if you want that crunch back

    Freezing

    • Roasted potatoes and squash freeze reasonably well for up to 6 weeks in a freezer-safe bag
    • Broccoli and chickpeas do not freeze well after roasting because they lose their texture completely, so freeze those components raw instead
    • Do not freeze the tahini sauce; make it fresh each time since it takes less than three minutes

    Reheating

    • The best way to reheat roasted vegetables is back in the oven at 400 degrees F for 8 to 10 minutes so they crisp back up
    • Microwave reheating works in a pinch but the vegetables will be softer; spread them on a plate in a single layer and heat in 60-second bursts
    • A hot skillet with a tiny drizzle of olive oil for two to three minutes brings back a lot of the original roasted texture and flavor

    Family Secret Worth Sharing

    My mom always said the difference between good roasted vegetables and great ones is what you do in the last five minutes. She would pull the pan out just before everything was done, drizzle a tiny bit of honey over the squash and carrots, and slide it back in for one final burst. The sugars caramelize just enough to turn those last few minutes into something magical. I tried it once on a whim while Ben was watching, and he grabbed a piece of squash straight off the hot pan, burned his fingers, and said it was “worth it.” My mom would have loved that kid.

    Troubleshooting FAQs

    Why are my roasted vegetables coming out soggy instead of crispy?
    Three things cause soggy vegetables every time: a crowded pan, too much oil, or vegetables that were not dried properly. Make sure every piece has space around it, use just enough oil to lightly coat each piece, and if you washed the vegetables before roasting, dry them thoroughly. Even a little surface moisture steams the vegetables instead of letting them roast.

    My chickpeas are not getting crunchy. What am I doing wrong?
    The number one culprit is moisture. Canned chickpeas need to be drained, rinsed, and then patted aggressively dry with paper towels. Spread them on the pan with space around each one and do not stir them too often; let them sit and develop a crust. Some brands of canned chickpeas are waterlogged and may need an extra five minutes in the oven.

    Can I use frozen vegetables instead of fresh?
    You can, but they need one extra step. Spread the frozen vegetables on a baking sheet and let them thaw at room temperature for 20 minutes, then blot dry with paper towels before tossing with oil and spices. Frozen vegetables carry a lot of extra moisture that will steam everything if you put them in the oven straight from the bag.

    The tahini sauce seized up and turned into a paste. How do I fix it?
    This happens to everyone the first time, and it is completely normal. Tahini thickens dramatically when it first meets acid like lemon juice. Keep whisking and add warm water one tablespoon at a time, whisking between each addition. It will loosen up into a smooth, creamy sauce. Cold water makes it seize even more, so always use warm.

    A Bowl Full of Good and a Kitchen Full of Noise

    These days, Tuesday night in our kitchen smells like smoked paprika and toasted chickpeas, and I genuinely could not be happier about it. Mia picks out the squash and eats it first. Ben arranges his bowl in sections so nothing touches, which tells you everything you need to know about him. This has become one of our favorite low fat veggie recipes that actually satisfies everyone at the table, right alongside the other roasted vegetables dinner meals we rotate through the week. Whenever someone asks me what to eat with roasted vegetables, I always say: make it a bowl, add a good sauce, and do not underestimate how much a little crunch changes everything. These are the kinds of hearty vegetable meals that make you feel like you are genuinely taking care of your family, one messy, noisy, wonderful Tuesday at a time.

    Don’t forget to snap a picture of your roasted vegetable bowls healthy before that… (trust me, it will disappear quickly!), and leave a rating below. We’d love to hear how this roasted vegetable bowls healthy recipe becomes part of your family dinner story.

    Star rate this recipe and join our warm kitchen family.