Category: Dinner

Easy weeknight dinner recipes the whole family will love. Quick global flavors from Thai stir-fries to Mexican bowls and Indian curries, all ready in 30 minutes or less.

  • 1-Pan Creamy Keto Chicken Broccoli Casserole

    1-Pan Creamy Keto Chicken Broccoli Casserole

    The first time I made keto chicken broccoli casserole, I dropped cold cream cheese straight into the warm pan without softening it first. Just the whole brick, unmelted. Jake poked it with a spoon and said, “Is that supposed to be like that?” It was not. I scraped it out, microwaved the cream cheese for thirty seconds, started again, and never made that mistake twice.

    Why This Recipe Is Special

    Low-carb keto dinner recipes often sacrifice the one thing that makes dinner actually feel like dinner: the comfort. This one does not. The sauce is built from cream cheese, cream, and garlic, which means it is genuinely rich and creamy without a gram of flour or any starchy thickener. The chicken gets seared first so it stays juicy and golden inside the casserole rather than turning pale and sad. The broccoli holds its color and its slight bite. And on top of that, the bubbly, blistered cheddar and mozzarella crust is the reason everyone is at the table before you even call them.

    How To Make Keto Chicken Broccoli Casserole

    After the cream cheese incident, my second attempt had a proper audience. Emma had been reading about keto with the very serious energy she brings to anything she considers a “project,” and she wanted to help make a recipe that was actually engaging rather than, in her words, “just salad without the fun parts.” Jake’s position on anything keto had been suspicious until the moment he saw the amount of cheese going on top. He went very quiet, watched me scatter the second handful, and said, “Okay, I think I understand keto now.” That is the most nutritional insight he has offered to date, and I choose to take it as a win.
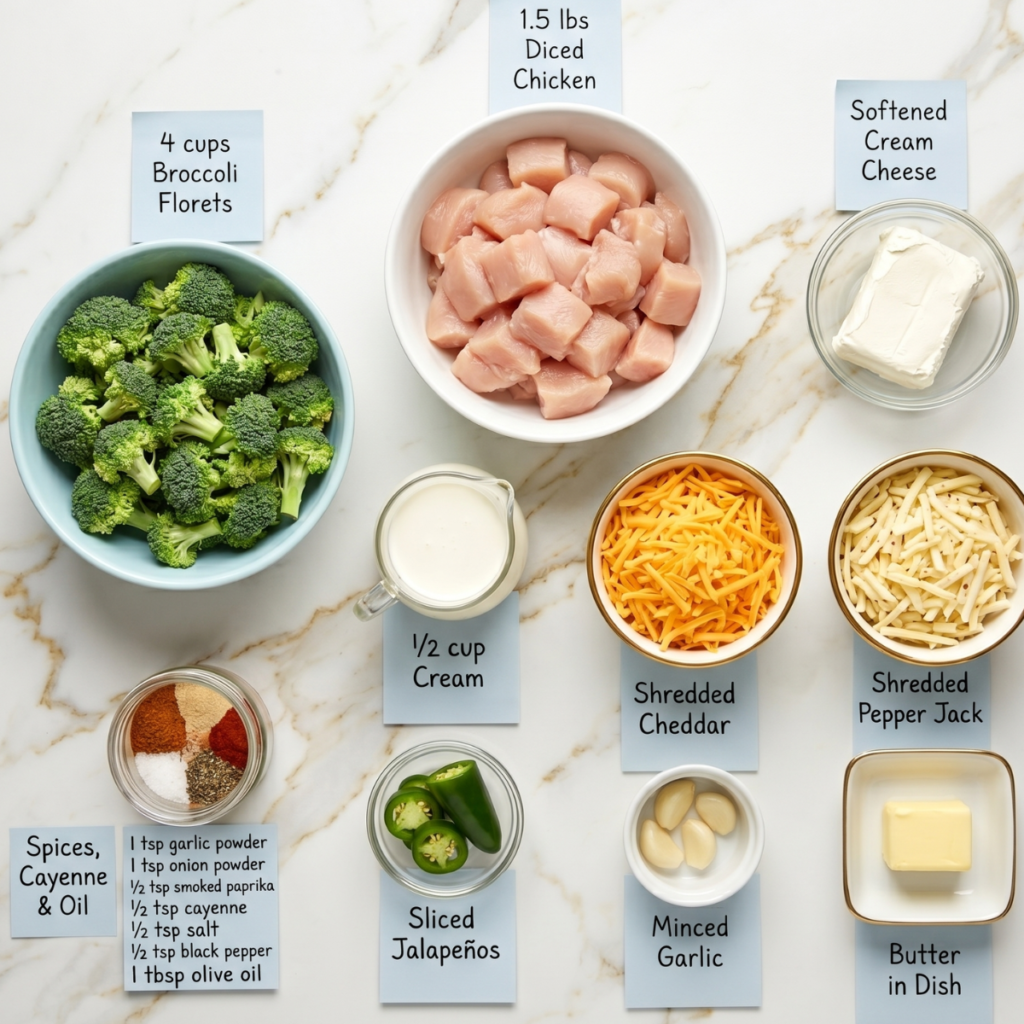
    Main Ingredients

    • 1.5 lbs boneless skinless chicken breast or thighs: Cut into bite-sized pieces. Thighs stay juicier; breasts work well too.
    • 4 cups broccoli florets: About 1 large head. Cut small and uniform so they steam through in the oven.
    • 8oz full-fat cream cheese, softened: Room temperature or 30 seconds in the microwave. Cold cream cheese will not blend smoothly ask me how I know.
    • 1/2 cup heavy cream: Thins the cream cheese into a pourable sauce. Do not substitute with milk.
    • 1 cup shredded cheddar, divided: Half goes into the sauce, half on top for that golden bubbly crust.
    • 1 cup shredded mozzarella: The stretch and pull. Scattered on top alongside the cheddar.
    • 4 cloves garlic, minced: Sautéed in butter before the sauce goes in. The whole dish rests on this flavor.
    • 2 tbsp butter + 1 tbsp olive oil: Butter for the sauce base, oil for searing the chicken without burning.
    • 1 tsp garlic powder + 1 tsp onion powder: For seasoning the chicken before searing. Layer the garlic flavor throughout.
    • 1/2 tsp smoked paprika, salt, and pepper: Season generously. The cream sauce is rich and needs the chicken well seasoned to match it.

    Step-by-Step Instructions

    Step 1: Season and Sear the Chicken
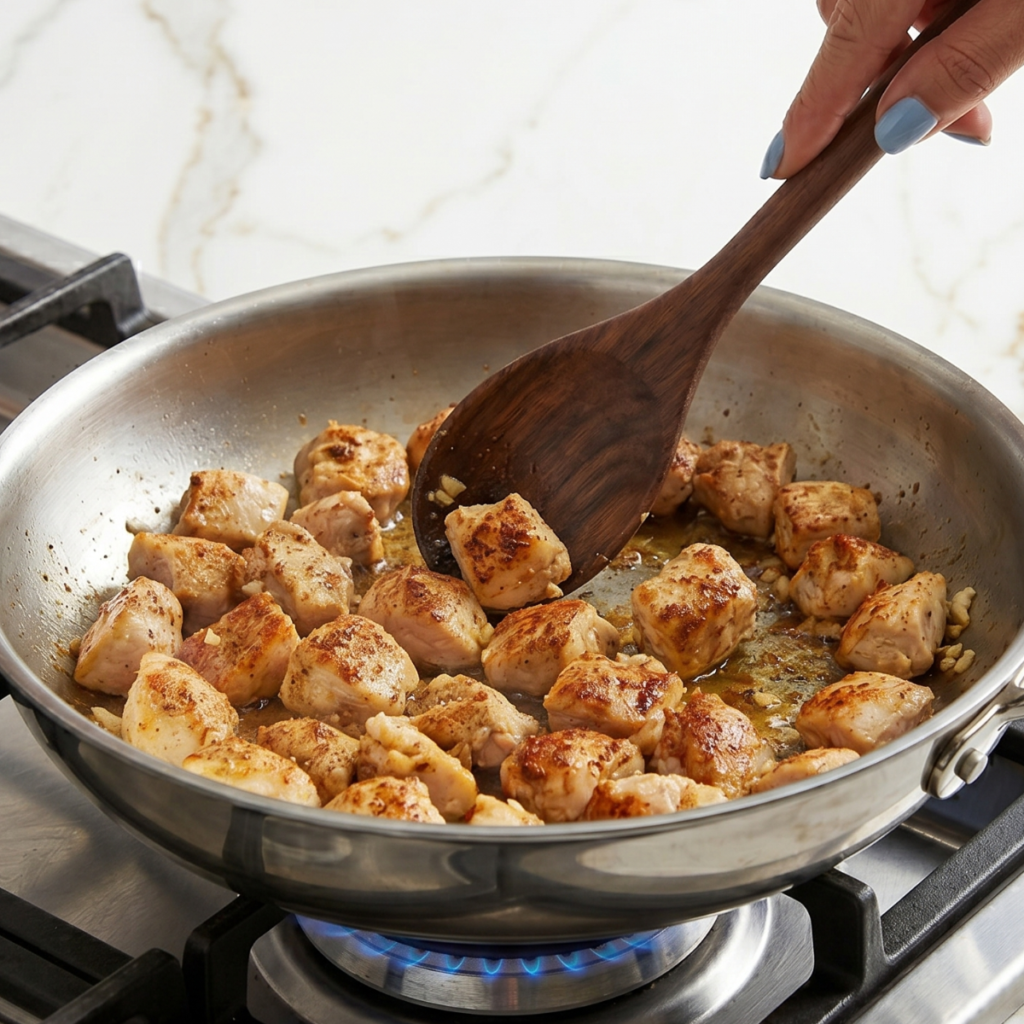
    • Pat chicken pieces dry and toss with garlic powder, onion powder, smoked paprika, salt, and pepper.
    • Heat olive oil in a large oven-safe skillet over medium-high heat until shimmering.
    • Sear the chicken in a single layer for 3 to 4 minutes per side, until golden. Work in batches so the pan stays hot and the chicken sears rather than steams.
    • Remove the seared chicken to a plate; it does not need to be cooked through yet; it will finish in the oven.

    Step 2: Build the Cream Sauce
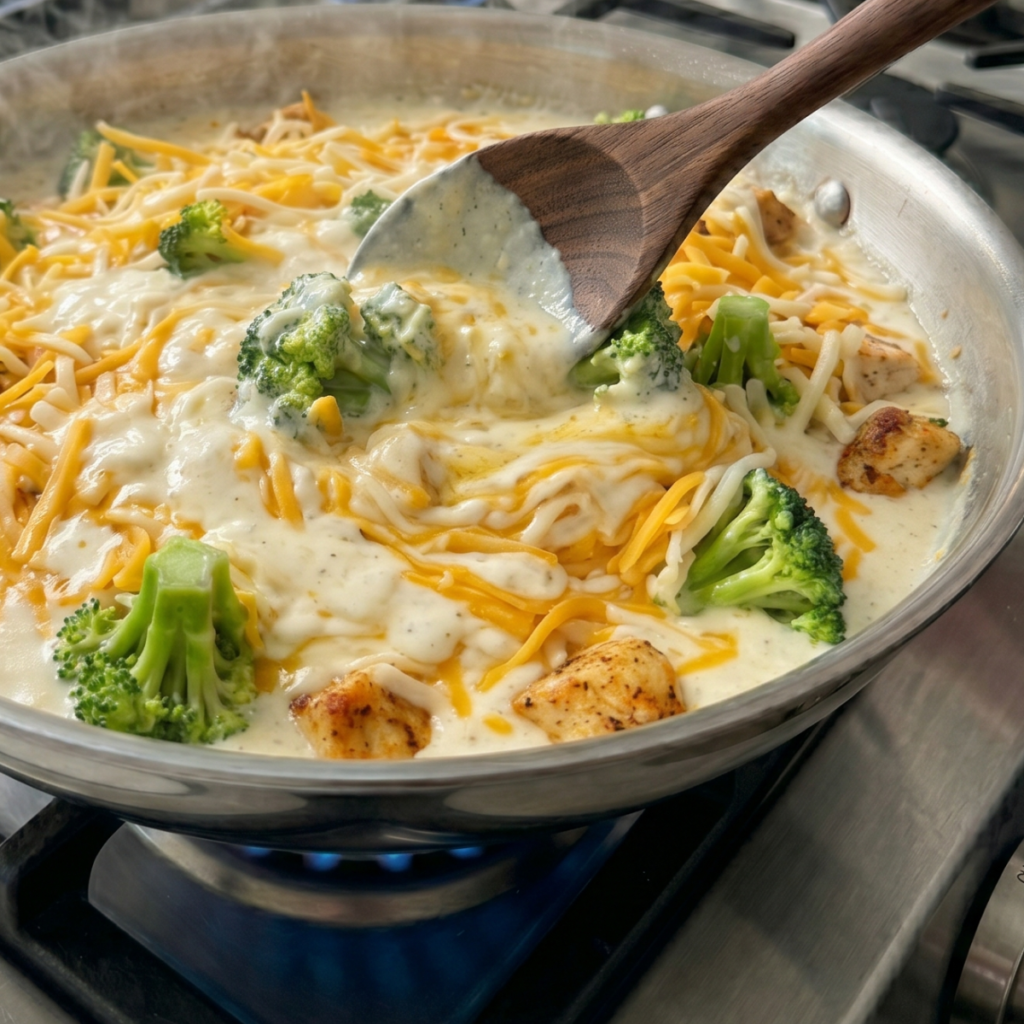
    • Reduce heat to medium, add butter to the same pan, and sauté minced garlic for 60 seconds until fragrant scrape up any golden bits from the chicken.
    • Add the softened cream cheese and heavy cream, stirring constantly until the cream cheese is fully melted into a smooth, silky sauce.
    • Stir in half the cheddar until it melts into the sauce, then taste and adjust salt and pepper.
    • Remove from heat; the sauce should be thick, creamy, and pourable. If it looks too thick, add a splash more cream.

    Step 3: Assemble and Top

    • Preheat oven to 375°F (190°C) and lightly grease a 9×13 inch baking dish if not using the oven-safe skillet.
    • Add the broccoli florets to the cream sauce in the pan and stir to coat every piece thoroughly.
    • Add the seared chicken back in and fold everything together gently so the broccoli and chicken are evenly distributed through the sauce.
    • Scatter the remaining cheddar and all the mozzarella evenly over the top; do not be shy with either.

    Step 4: Bake and Rest

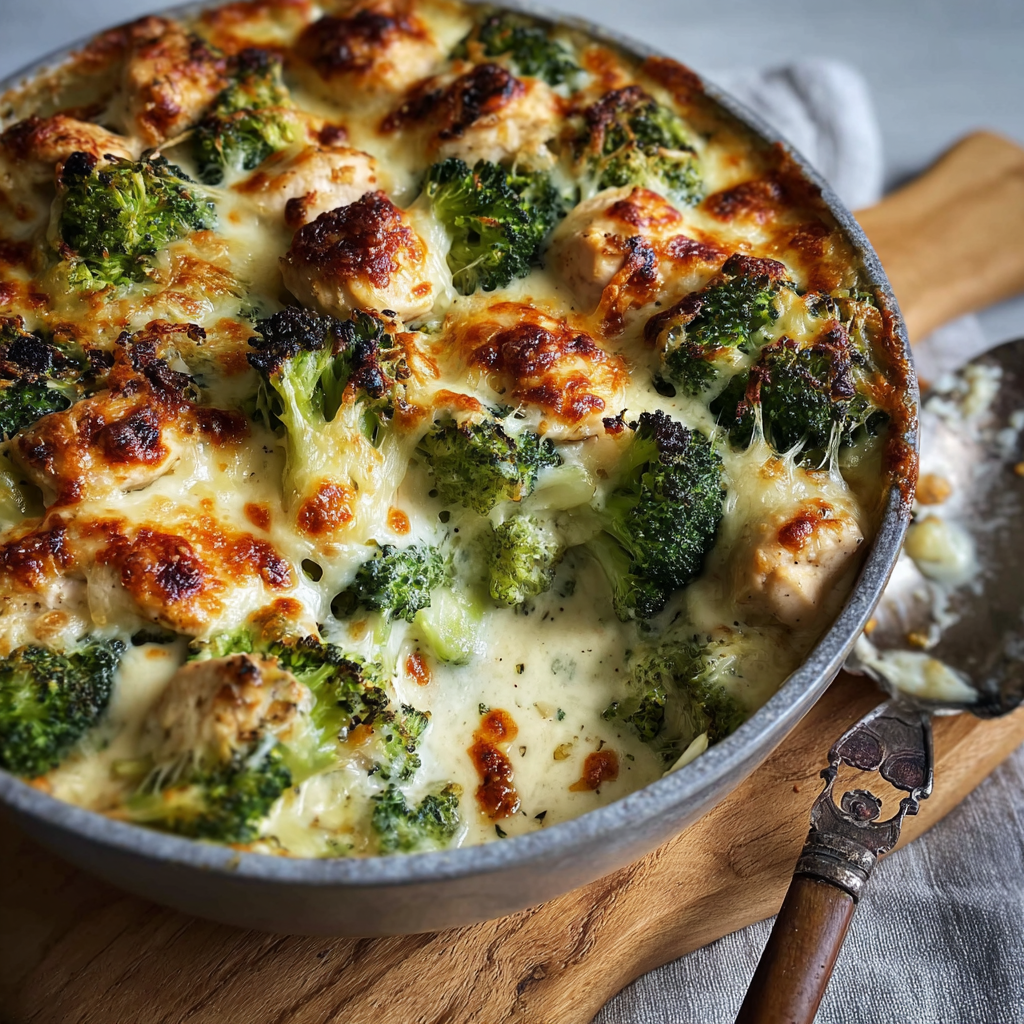
    • Bake uncovered for 25 to 30 minutes until the cheese is deeply golden and bubbly at the edges and the broccoli is just tender when pierced with a fork.
    • If the cheese is bubbling but not golden after 25 minutes, switch to the broiler for 2 to 3 minutes and watch it closely; it goes from perfect to too dark very fast.
    • Remove from the oven and allow to rest for 5 minutes; the sauce thickens slightly and the portions come out much cleaner.
    • Serve directly from the dish with a large spoon, pulling up that glorious cheese pull every single time.

    Keto Chicken Broccoli Casserole Variations

    The Bacon and Ranch Version (Jake’s Crowning Contribution)

    Jake’s interest in this casserole went from polite to passionate the day I added bacon. Fry six rashers until crispy, crumble them over the top along with the cheese before baking, and stir one tablespoon of dried ranch seasoning into the cream sauce instead of the garlic powder and onion powder. The ranch flavor runs all the way through the sauce, and the bacon adds crunch and smoke to every single bite. Jake calls this “the good version.” I remind him the original is also excellent. He nods, unconvinced.

    Emma’s Spinach and Sun-Dried Tomato Upgrade

    Emma’s version is the one she makes when she wants to explain to her friends that keto food is actually excellent. Stir two large handfuls of fresh spinach into the sauce with the broccoli; it wilts down to almost nothing but adds color and iron. Add a quarter cup of roughly chopped oil-packed sun-dried tomatoes at the same stage. The tomatoes add an intense, jammy burst of flavor against the richness of the cream cheese sauce and make the whole dish look considerably more impressive than a Tuesday night dinner has any right to look.

    The Spicy Jalapeño and Pepper Jack Version (My Friday Night Treat)

    When both kids are happy with their food and I get to make a version just for me, this is it. Swap the mozzarella for shredded pepper jack, add two thinly sliced fresh jalapeños scattered over the top before baking, and stir half a teaspoon of cayenne into the cream sauce. The heat builds slowly through the cream, and the jalapeños blister beautifully under the broiler. Serve with a dollop of full-fat sour cream on the side. This is one of those very low-carb recipes that feels like a proper indulgence rather than a restriction.

    Substitutions

    • Heavy cream → Full-fat coconut cream works for a dairy-free version with a slightly different flavor, but the sauce still comes together. Do not use low-fat milk or half-and-half; they are too thin, and the sauce will be watery.
    • Cream cheese → Full-fat mascarpone is a richer, slightly less tangy substitute in the exact same quantity. For dairy-free, a full-fat cashew cream cheese works; check the carb count on the label, as it varies significantly by brand.
    • Broccoli → Cauliflower florets are an excellent keto-friendly swap. Zucchini cut into half-moons also works but releases water pat it dry first and reduce the cream by two tablespoons to compensate.
    • Cheddar and mozzarella → Any good melting cheese works here. Gruyère gives a nuttier flavor. A smoky gouda on top is extraordinary and worth trying when you want something different from your usual keto-friendly meal prep rotation.

    Equipment

    • Large oven-safe skillet or sauté pan (at least 12-inch)
    • 9×13-inch baking dish (only if skillet is not oven-safe)
    • Sharp knife and cutting board
    • Wooden spoon or silicone spatula
    • Tongs
    • Measuring cups and spoons
    • Instant-read thermometer
    • Cheese grater (freshly grated melts far better than pre-shredded)

    Storage Tips

    Make Ahead

    • Assemble the full casserole up to 24 hours ahead, cover tightly, and refrigerate unbaked.
    • Add 8 to 10 extra minutes of bake time if going straight from fridge to oven.
    • The cream sauce actually deepens in flavor overnight; make-ahead is genuinely better here.

    Refrigerator

    • Store cooled leftovers in an airtight container for up to 4 days.
    • This recipe is one of those keto-friendly meal prep dishes that is just as good on day three as day one.
    • The cream sauce firms up when cold; it loosens back to creamy with a splash of cream when reheating.

    Freezing

    • Freeze in individual portions in airtight freezer containers for up to 3 months.
    • Cream-based sauces can separate slightly after freezing; stir gently when reheating to bring them back together.
    • Thaw overnight in the fridge; do not microwave from completely frozen, as the sauce will separate.

    Reheating

    • Oven at 325°F for 15 to 18 minutes covered with foil is the best method; the sauce stays creamy.
    • Microwave individual portions covered loosely for 2 to 3 minutes at 70% power, stirring halfway.
    • Add a tablespoon of heavy cream per portion before reheating to restore the sauce consistency.

    Family Secret Worth Sharing

    The biggest flavor difference between a good keto chicken broccoli casserole and a great one comes down to a step most people skip entirely: searing the chicken. I know it feels like an extra pan and extra time when you could just throw everything in raw, and yes, technically it will cook through either way. But raw chicken dumped directly into a cream sauce comes out pale, soft, and flavorless; it tastes steamed because it is steamed.

    Those golden, caramelized edges on each chicken piece carry flavor that the cream sauce cannot replicate on its own. Three minutes per side in a hot pan, and the whole casserole tastes like it came from a restaurant rather than a weeknight kitchen. Jake noticed the difference without being told he took his first bite, looked up, and said “this one’s better than last time.” I did not tell him the only change was the searing step. Some secrets are better kept until they are old enough to appreciate them.

    Troubleshooting FAQs

    My sauce came out grainy or lumpy. What went wrong?
    Almost certainly the cream cheese was too cold. It needs to be genuinely soft, either left out at room temperature for an hour or microwaved for 25 to 30 seconds. The other cause is heat that is too high when you add the cream; keep it at medium and stir constantly. If the sauce does look grainy, take the pan off the heat entirely and stir vigorously; it usually comes back together with patience.

    The broccoli came out mushy. How do I keep it with more bite?
    Cut the florets on the larger side rather than very small pieces, which overcook quickly. Make sure the broccoli goes in raw rather than pre-steamed; it will cook perfectly in the baking time from raw. If you prefer it with more crunch, fold it into the sauce and then bake for the last 10 minutes only rather than the full time.

    The sauce seems too thin and watery after baking. What happened?
    This usually means the broccoli or chicken released water during baking. Pat the broccoli florets dry before adding them to the sauce, and make sure the seared chicken has rested and drained before folding it in. If using frozen broccoli, it must be completely thawed and very thoroughly dried. Next time reduce the cream by two tablespoons as a buffer.

    Can I make the dish without searing the chicken first?
    You can, but please read the Family Secret section above before deciding to. If you are genuinely short on time, season the raw chicken pieces well, fold them into the sauce with the broccoli, and increase the covered bake time to 35 minutes, then uncover for 10. The texture will be softer and the flavor less complex, but it will still be a very respectable easy low-carb recipe that the whole table will eat without complaint.

    The Casserole That Made Keto Feel Like Something to Look Forward To

    I did not go into keto cooking expecting to find something that would make both kids genuinely excited for dinner. I expected compliance, at best. What I got instead was Jake developing a working theory about cheese ratios and Emma explaining to her friend on the phone that “we’re having the broccoli one” in a tone that made it sound like a reward rather than a vegetable. That’s the whole thing, really: easy low-carb recipe cooking is not about what you take out, it’s about what you build in its place.

    A creamy garlic sauce, golden seared chicken, and cheese that stretches like that photo—every time this is what low-carb meal ideas look like when they actually work. When it stops being a diet dinner and starts being the one people ask for specifically.

    Whether this becomes the anchor of your chicken keto meal rotation, your go-to Sunday meal prep dish, or the first thing you make when someone in your life tells you they are trying to eat low carb and you want to prove it does not have to mean sad food, I hope it delivers. It really does. Make it once, and it earns its place permanently.

    Don’t forget to snap a picture of your keto chicken broccoli casserole before that first cheesy scoop disappears (trust me, it will disappear quickly!), and leave a rating below. We’d love to hear how this keto chicken broccoli recipe becomes part of your family weeknight story.

    Star rate this recipe and join our cozy low carb kitchen family.
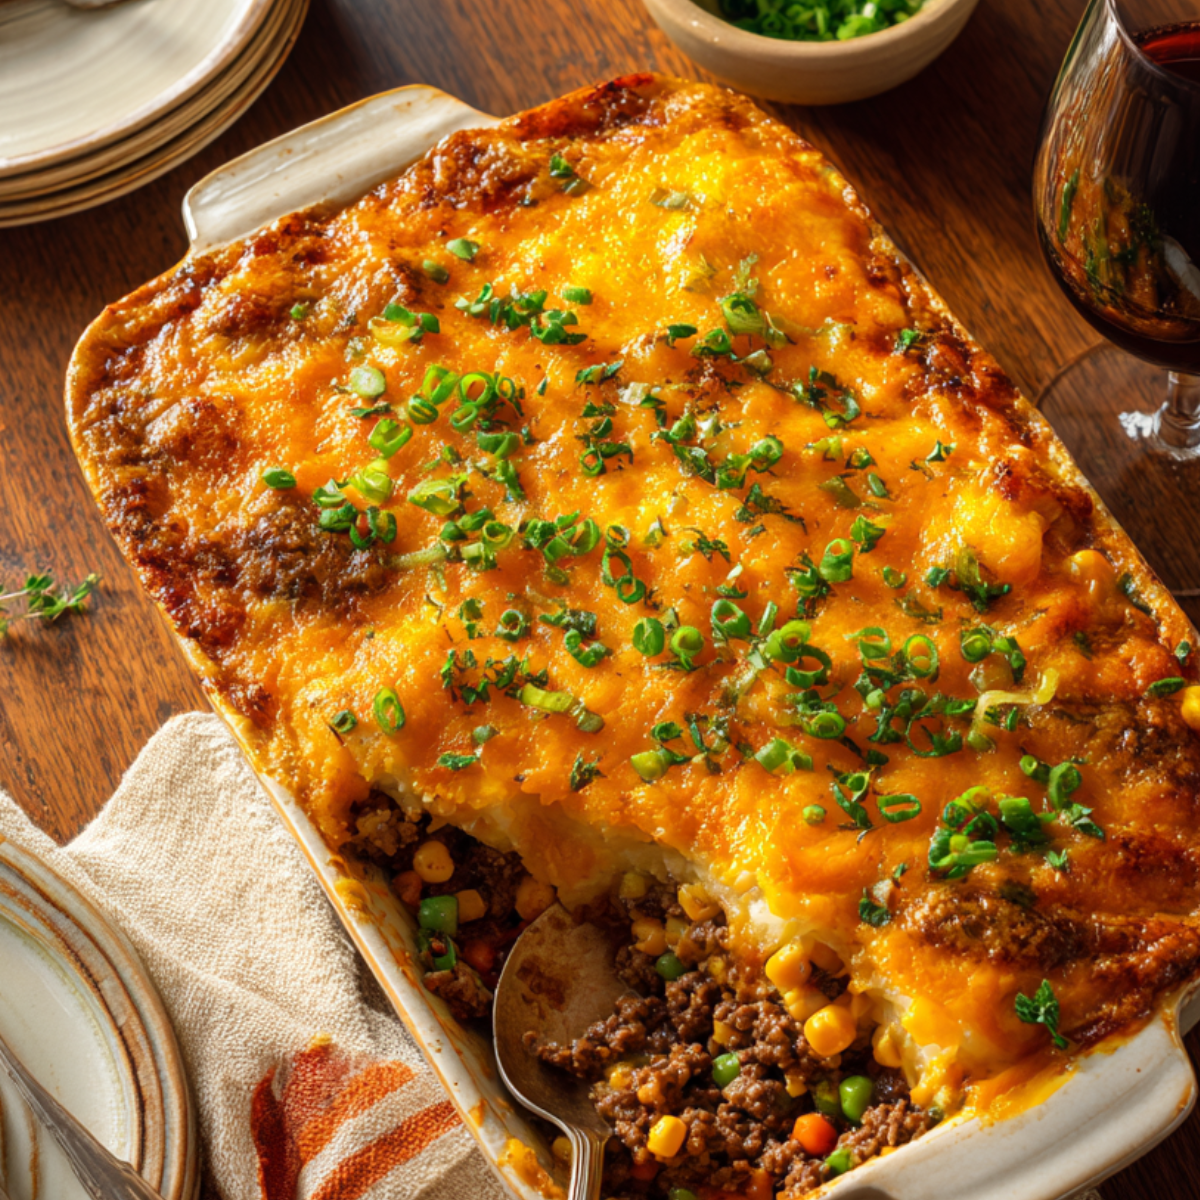
  • Easy Hobo Casserole Ground Beef Recipe

    Easy Hobo Casserole Ground Beef Recipe

    The first time I made this casserole ground beef dish, I forgot to drain the beef. By the time it came out of the oven, it was basically soup. Jake looked at it, turned to Emma, and whispered, “don’t.” She nodded very seriously. I drained it, started over, and, thirty minutes later, we had the coziest, most forgiving dinner I’d made in weeks. Never skipping that step again.

    Why This Recipe Is Special

    There is something about the name “hobo casserole” that my kids find absolutely hilarious. Jake calls it the “cowboy dinner,” and Emma insists it sounds like something from a fairy tale. But the name is exactly right: this is a no-fuss, everything-goes-in-one-dish kind of meal that was built for real life. It’s cheap, it’s filling, it layers in under 20 minutes, and it makes the whole house smell like someone actually tried. That’s a big deal on a Wednesday.

    How To Make Hobo Casserole Ground Beef

    After the soup disaster of my first attempt, I made this again the very next evening with both kids at the counter helping. Emma took charge of slicing the potatoes with supervision and a very serious look on her face while Jake seasoned the beef with what I can only describe as enthusiasm. He used about twice the garlic powder I asked for. I caught him mid-shake and grabbed his wrist, and he just grinned at me. You know what? It was delicious. We’ve made it with extra garlic ever since.

    Main Ingredients

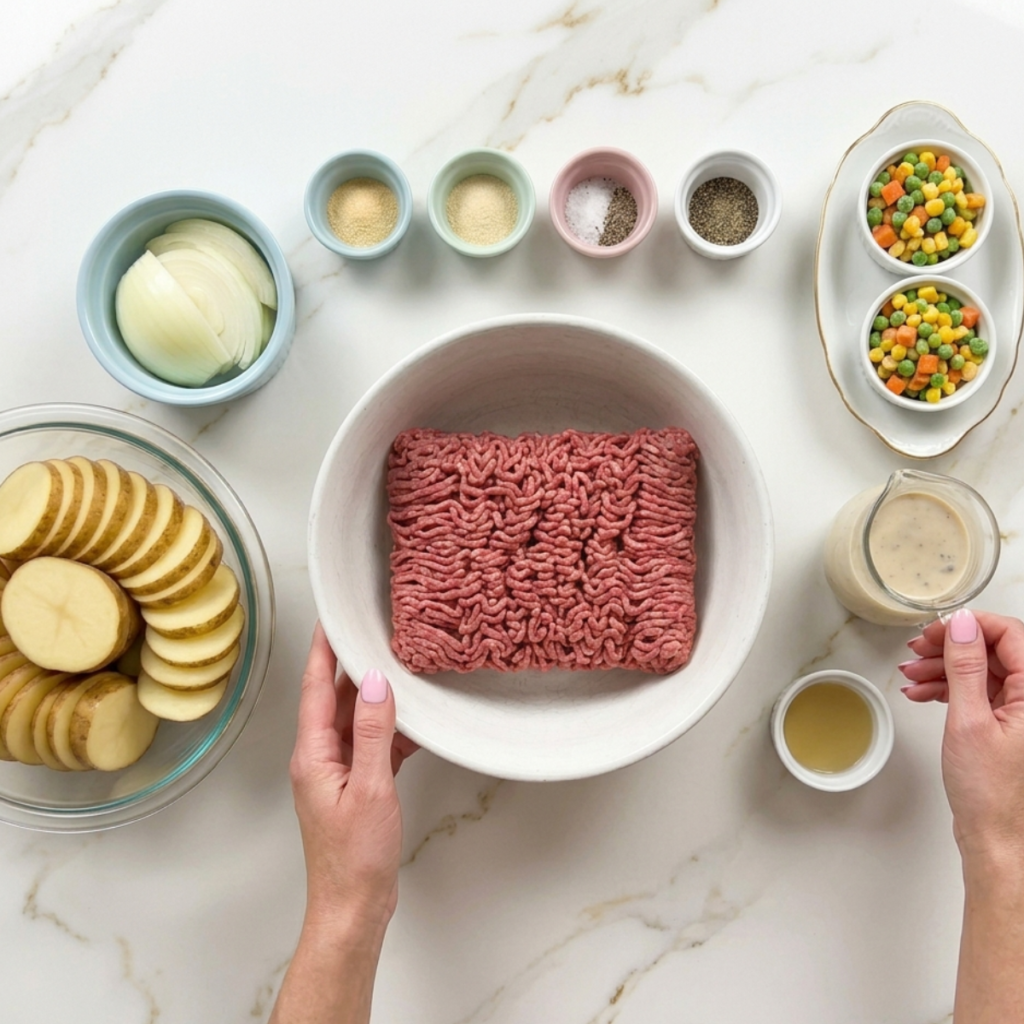
    • 1.5 lbs ground beef (80/20) The fat ratio keeps it moist. Drain after browning, always.
    • 4 medium russet potatoes Sliced thin at 1/4 inch so they cook through evenly.
    • 1 medium yellow onion Thinly sliced; softens into the layers as it bakes.
    • 2 cups frozen mixed vegetables Corn, peas, and carrots. No thawing needed.
    • 1 can (10.5oz) cream of mushroom soup The sauce. Binds everything and keeps it from drying out.
    • 1/2 cup beef broth Thins the soup so it can seep through every layer.
    • 1 tsp garlic powder Or two, per Jake’s standing recommendation.
    • 1 tsp onion powder, salt, and pepper Season the beef well before it goes into the dish.
    • 1.5 cups shredded cheddar cheese Goes on top for the last 12 to 15 minutes. Bubbly and golden.
    • 1 tbsp olive oil For browning the beef in the skillet.

    Step-by-Step Instructions

    Step 1: Brown the Beef

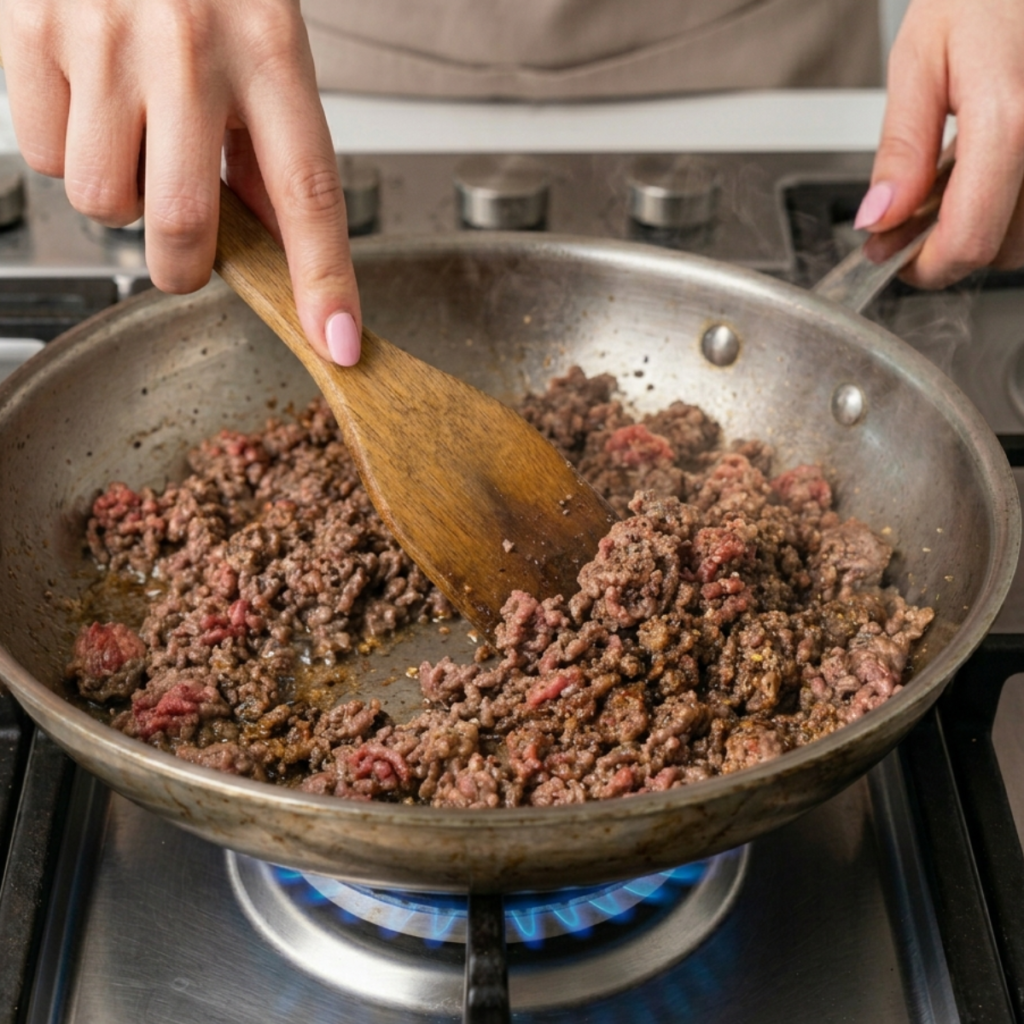
    • Heat olive oil in a skillet over medium-high heat until shimmering.
    • Add ground beef, garlic powder, onion powder, salt, and pepper.
    • Break it apart and cook until no pink remains, about 7 to 8 minutes.
    • Drain the fat completely; this step is non-negotiable; ask me why.

    Step 2: Prep and Layer

    • Preheat oven to 375°F (190°C) and grease a 9×13 inch baking dish.
    • Spread sliced potatoes in an even layer across the bottom of the dish.
    • Layer sliced onions over the potatoes, then scatter the frozen vegetables on top.
    • Spoon the drained ground beef evenly over the vegetable layer.

    Step 3: Make the Sauce and Cover

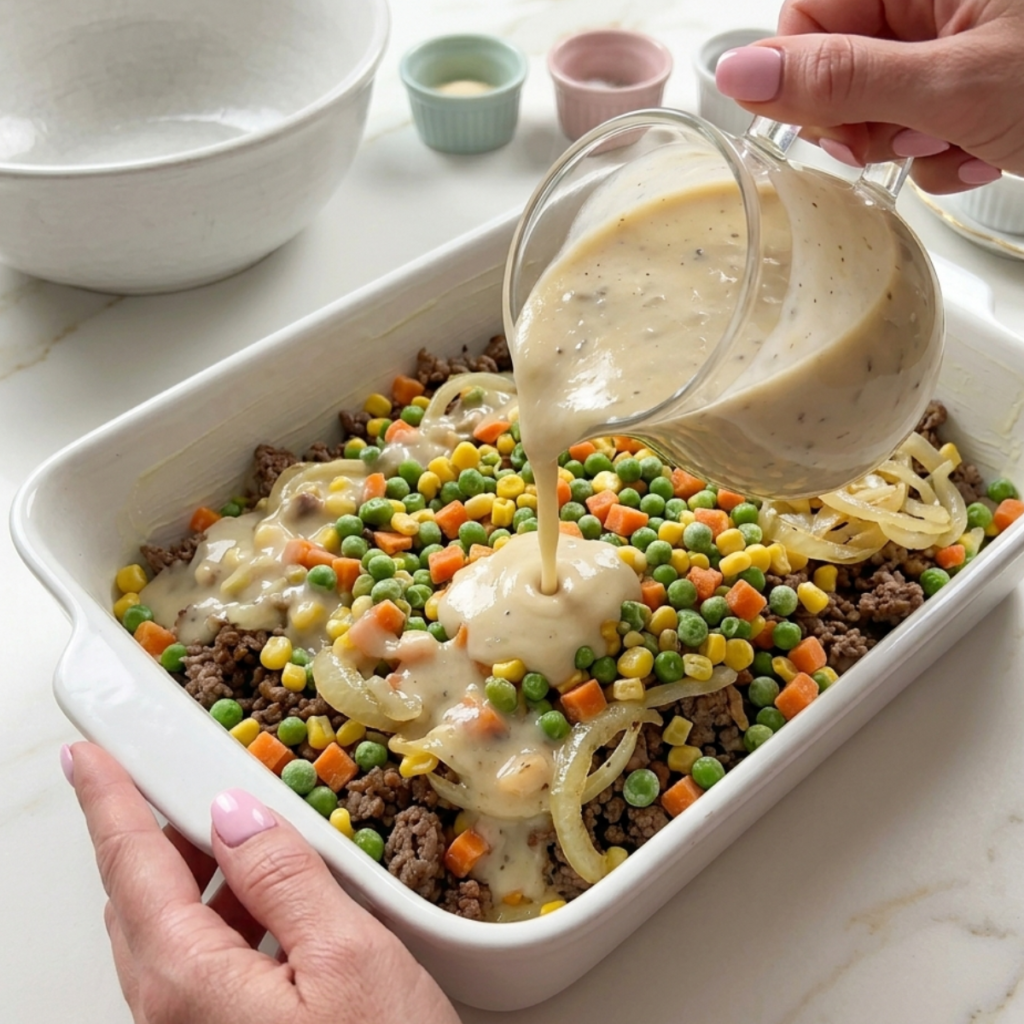
    • Whisk cream of mushroom soup and beef broth together until smooth and pourable.
    • Pour the sauce evenly over the entire casserole it will settle through the layers.
    • Cover the dish tightly with aluminum foil, sealing the edges well.
    • Bake covered for 40 minutes until potatoes are fork-tender throughout.

    Step 4: Cheese and Finish

    • Remove the foil and scatter shredded cheddar evenly across the top.
    • Return to the oven uncovered for 12 to 15 minutes until cheese is bubbly and golden.
    • Let the casserole rest for 8 to 10 minutes before serving it; slices much cleaner.
    • Garnish with fresh parsley or sliced green onions if you’re feeling fancy.

    Hobo Casserole Ground Beef Variations

    The Cowboy Version (Jake’s Official Endorsement)

    Jake lobbied hard for this one. Replace the cream of mushroom soup with cream of cheddar, swap the mixed vegetables for a drained can of black beans and a cup of frozen corn, and add a teaspoon of smoked paprika and a pinch of cumin to the beef. Top with pepper jack cheese instead of cheddar and finish with pickled jalapeños right after it comes out. He calls it “the real one.” Honestly, he’s not wrong.

    The Creamy Mushroom and Thyme (Emma’s “Fancy Dinner” Pick)

    Emma decided this casserole needed “herbs and sophistication.” She’s nine. But she was onto something: add a cup of sliced fresh mushrooms on top of the vegetable layer, mix a teaspoon of fresh thyme leaves and a tablespoon of Worcestershire sauce into the soup mixture, and top with a gruyère and mozzarella blend. It tastes like something from a French grandmother’s kitchen and requires almost no extra effort.

    The Double Potato and Velveeta Melt (The Crowd Version)

    When I need to feed more people at a potluck, a neighbor who just had a baby, or a weekend when the kids have friends over, I double the potato layer and use cubed Velveeta instead of shredded cheddar. It melts into an impossibly smooth, glossy blanket that makes everyone go quiet for a moment when it hits the table. Not glamorous. Absolutely irresistible.

    Substitutions

    • Ground beef → Ground turkey works well and cuts the fat significantly. Season it generously since it’s milder. Ground chicken is also great; just add a pinch of smoked paprika for depth.
    • Russet potatoes → Yukon Golds are creamier and hold their shape better when sliced thin. Sweet potatoes also pair beautifully with the savory beef.
    • Cream of mushroom soup → Cream of chicken is a seamless replacement. For from-scratch, a quick béchamel with a splash of Worcestershire and beef broth takes only 5 extra minutes.
    • Cheddar cheese → Colby Jack, mozzarella, or smoked gouda all melt beautifully. A mozzarella and cheddar blend gives maximum pull.

    Equipment

    • 9×13 inch baking dish
    • Large skillet or frying pan
    • Sharp knife and cutting board
    • Mandoline slicer (optional)
    • Colander or slotted spoon
    • Small mixing bowl
    • Whisk or fork
    • Aluminum foil
    • Oven mitts
    • Spatula for serving

    Storage Tips

    Make Ahead

    • Assemble the entire casserole up to 24 hours ahead, cover tightly, and refrigerate unbaked.
    • Pull it out 20 minutes before baking to take the chill off for even cooking.
    • Add 5 to 8 extra minutes of covered bake time if going straight from fridge to oven.

    Refrigerator

    • Store leftovers covered tightly in the baking dish or an airtight container.
    • Keeps well in the fridge for up to 4 days; the flavor deepens overnight.
    • The potatoes firm up cold, making clean individual portions easy to reheat.

    Freezing

    • Freeze in individual portions in freezer-safe containers for up to 3 months.
    • Thaw overnight in the fridge before reheating; do not microwave from frozen.
    • Potato texture softens slightly after freezing, but flavor is fully unchanged.

    Reheating

    • Oven is best: cover with foil and reheat at 325°F for 20 minutes until warmed through.
    • Microwave individual portions for 2 to 3 minutes, covered loosely, checking halfway.
    • Add a splash of beef broth before reheating to keep the sauce from drying out.

    Family Secret Worth Sharing

    The single thing that took this casserole from good to absolutely cannot-stop-eating is resting it after it comes out of the oven. I know. I know the smell is incredible, and everyone is standing in the kitchen hovering. I have been there. But give it a full eight to ten minutes before you cut into it.

    What happens during that rest is everything: the sauce thickens slightly, the layers compress and hold together, and the cheese sets from molten lava to that perfect pull. The first time I waited properly, Emma watched me slice it and said, very quietly, “oh that looks like a real restaurant.” From a nine-year-old who considers chicken nuggets gourmet, I’ll take it. Rest the casserole. Every single time.

    Troubleshooting FAQs

    My potatoes are still hard even after the full bake time. What went wrong?
    Two things cause the problem: slices that are too thick or a dish that wasn’t sealed well enough with foil. Make sure your slices are no thicker than 1/4 inch and crimp your foil tightly. Still firm at 40 minutes? Add another 10 covered before checking again.

    The casserole came out watery. How do I fix it?
    Undrained beef fat or icy frozen vegetables are usually the culprits. Drain the beef thoroughly; press it with a paper towel in the colander. For very icy vegetables, spread them on paper towels for 5 minutes first. The casserole should be saucy, not soupy.

    Can I make this in a slow cooker instead?
    Absolutely. Layer everything the same way in your slow cooker insert, pour the sauce over, and cook on LOW for 6 to 7 hours or HIGH for 3 to 4 hours. Add shredded cheese in the last 20 minutes with the lid slightly ajar. You won’t get the golden bubbly top, but the flavor is just as delightful.

    Can I double this recipe for a larger crowd?
    Yes, easily. Use two 9×13 dishes rather than one deep dish. Keep the bake time the same and check potato tenderness at 40 minutes. Both dishes can bake on separate oven racks; simultaneously rotate them halfway through.

    The Dinner That Made Tuesday Feel Like Something

    There’s a specific kind of magic that happens when a casserole comes out of the oven on a school night. The foil comes off, the steam rises, the cheese is bubbling at the edges, and suddenly everyone is in the kitchen without being called. Jake already has a fork in his hand. Emma is trying to claim the corner piece, which she insists has “the best cheese ratio.” She is absolutely correct about that.

    This is exactly the kind of thing I mean when I talk about effortless family meals that actually feel like an event. You don’t need a special occasion for a dinner this good. A Tuesday, a week that wiped you out, some ground beef, and a bag of potatoes—that’s all this needs. This comfort food recipe earns a permanent place in the rotation, the kind you stop looking up because you know it by heart.

    Whether it becomes your Friday cozy dinner idea or your default “I cannot think right now” weeknight hero, I hope it brings the same quiet happiness to your table that it brings to ours. Put it on the list. You’ll make it again the following week.

    Don’t forget to snap a picture of your hobo casserole ground beef before that first scoop disappears (trust me, it will disappear quickly!), and leave a rating below. We’d love to hear how this casserole ground beef recipe becomes part of your weeknight dinner story.

    Star rate this recipe and join our cozy weeknight cooking family.

  • Best High-Protein Honey Garlic Shrimp

    Best High-Protein Honey Garlic Shrimp

    The first time I made Honey Garlic Shrimp, I burned the garlic, oversalted the sauce, and forgot to thaw the shrimp all on the same Tuesday. Mia walked in, sniffed once, and said it smelled like a garbage can. Leo nodded. Two brutal little critics, one blackened pan. I ordered pizza, came back the next night, and figured it out. Best decision I ever made.

    Why This Recipe Is Special

    This recipe earns its spot in my weekly rotation because it bridges that impossible gap—dinner that’s genuinely quick but feels like you put in real effort. On nights when Leo has soccer practice until 6:30 and Mia is already whining about being hungry, I need something that goes from fridge to table in under 30 minutes. The honey and garlic together create this glossy, sticky sauce that tastes like it simmered for hours. Shrimp is a high-protein food, providing over 20 grams per serving, so everyone enjoys it without crashing an hour later.

    How To Make Honey Garlic Shrimp

    That disastrous first attempt taught me everything. Burnt garlic? Turns the whole sauce bitter; it happens in about 30 seconds if you walk away. My fix: keep the heat at medium, stir constantly, and don’t even think about checking your phone. Mia still brings up the garbage-can comment at least once a month, but now she also asks for thirds. After rebuilding this recipe from scratch, Leo declared it “top five dinners ever,” which for a nine-year-old is basically a Michelin star.

    Main Ingredients

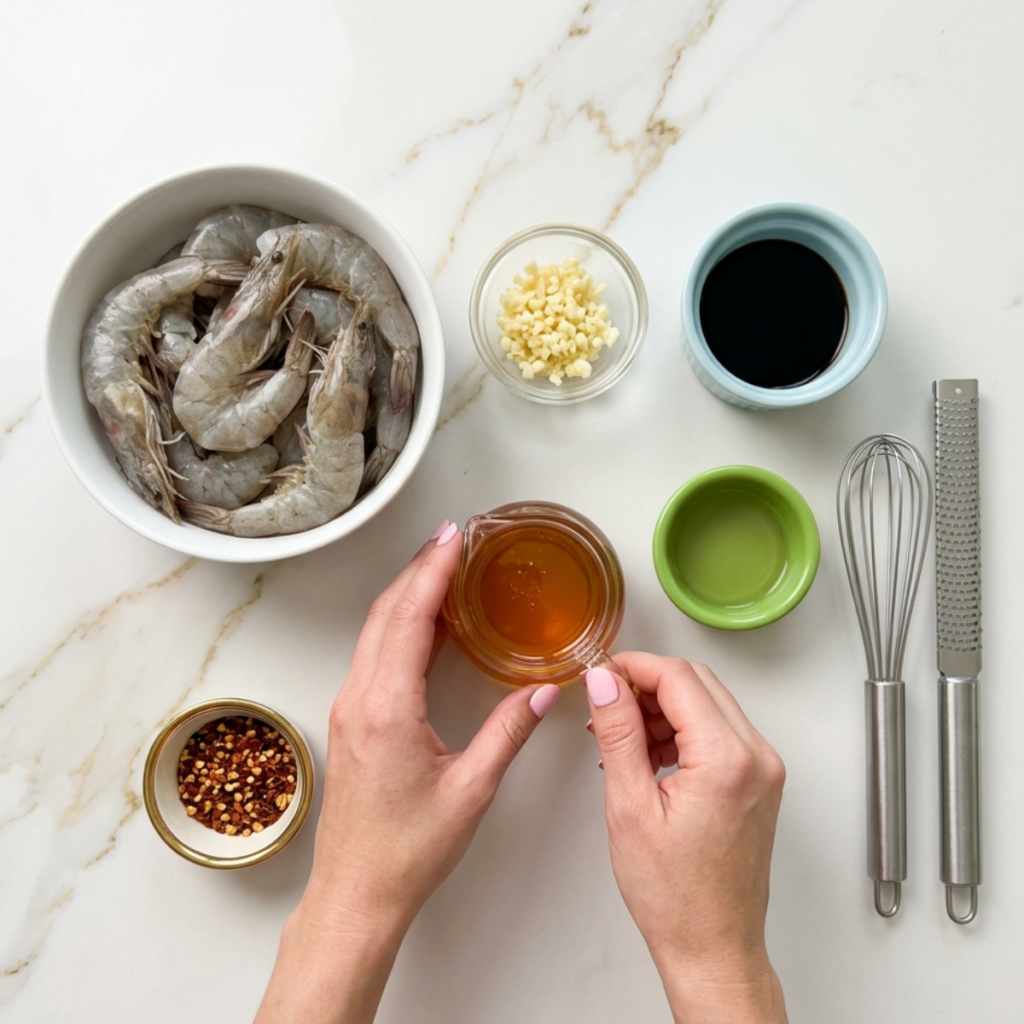
    • 1½ lbs large raw shrimp, peeled and deveined (the bigger the shrimp, the meatier and more satisfying; medium works but large is worth it)
    • ⅓ cup honey, the backbone of the sauce; don’t swap for agave here, real honey caramelizes differently
    • 4 cloves garlic, finely minced; this is where all the aroma lives; fresh only, no jarred
    • 3 tbsp low-sodium soy sauce: low-sodium keeps it from oversalting as the sauce reduces
    • 1 tbsp rice vinegar cuts through the sweetness so it doesn’t feel cloying
    • 1 tsp sesame oil, added off heat at the end; it loses its flavour if you cook it too long
    • 1 tbsp olive oil, for searing the shrimp with a nice golden edge
    • ½ tsp red pepper flakes (optional), Mia says no, Leo says yes, I do half a batch each way
    • Salt and black pepper to taste
    • 2 green onions, sliced, for colour and freshness on top
    • Sesame seeds for garnish

    Step-by-Step Instructions

    Step 1 — Prep and Pat Dry

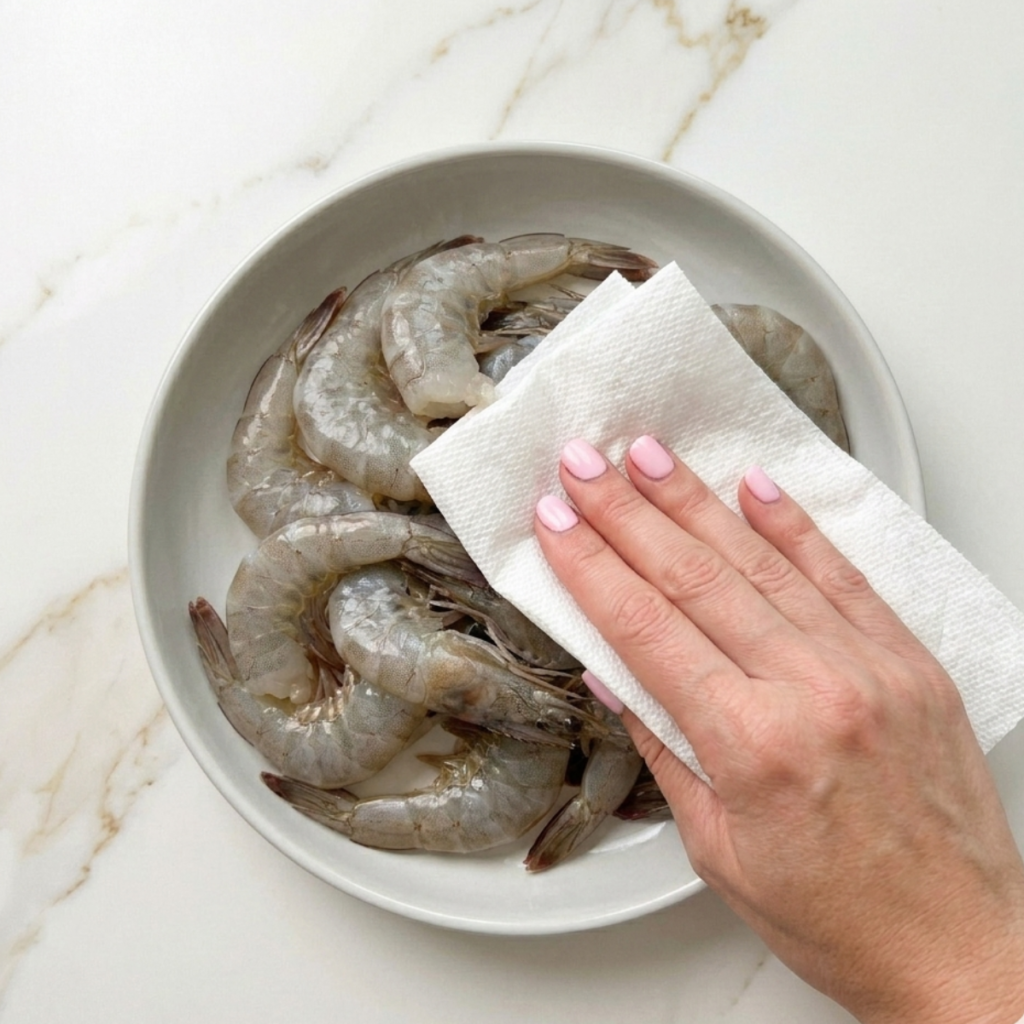
    • Make sure shrimp are fully thawed — run under cool water for 10 minutes if needed (lesson learned).
    • Pat shrimp completely dry with paper towels; moisture is the enemy of a successful sear.
    • Season lightly with salt and black pepper on both sides.
    • Whisk together honey, soy sauce, rice vinegar, and red pepper flakes in a small bowl; set aside.

    Step 2: Sear the Shrimp

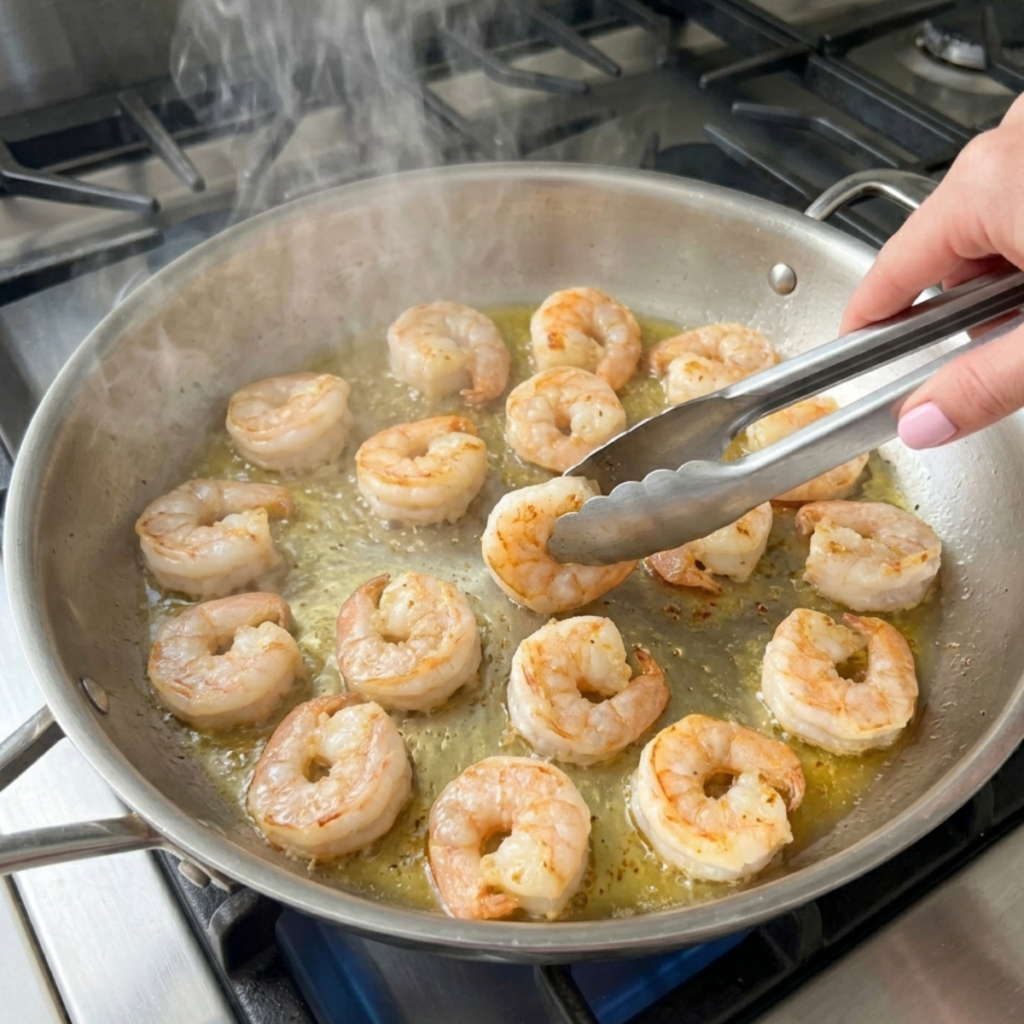
    • Heat olive oil in a large skillet over medium-high heat until shimmering.
    • Add shrimp in a single layer; do not crowd them, or they will steam instead of sear.
    • Cook 1 to 1½ minutes per side until pink and lightly golden at the edges.
    • Transfer to a plate; they will finish cooking in the sauce.

    Step 3: Build the Honey Garlic Sauce

    • Reduce heat to medium and add a tiny splash of oil if the pan looks dry.
    • Add minced garlic and stir constantly for 30 to 45 seconds until golden, not brown.
    • Pour in the honey-soy mixture and let it bubble and thicken for about 2 minutes.
    • The sauce is ready when it coats the back of a spoon and looks glossy.

    Step 4: Finish and Serve

    • Return shrimp to the skillet and toss to coat evenly in the sauce, about 1 minute.
    • Remove from heat and drizzle in the sesame oil; stir once more.
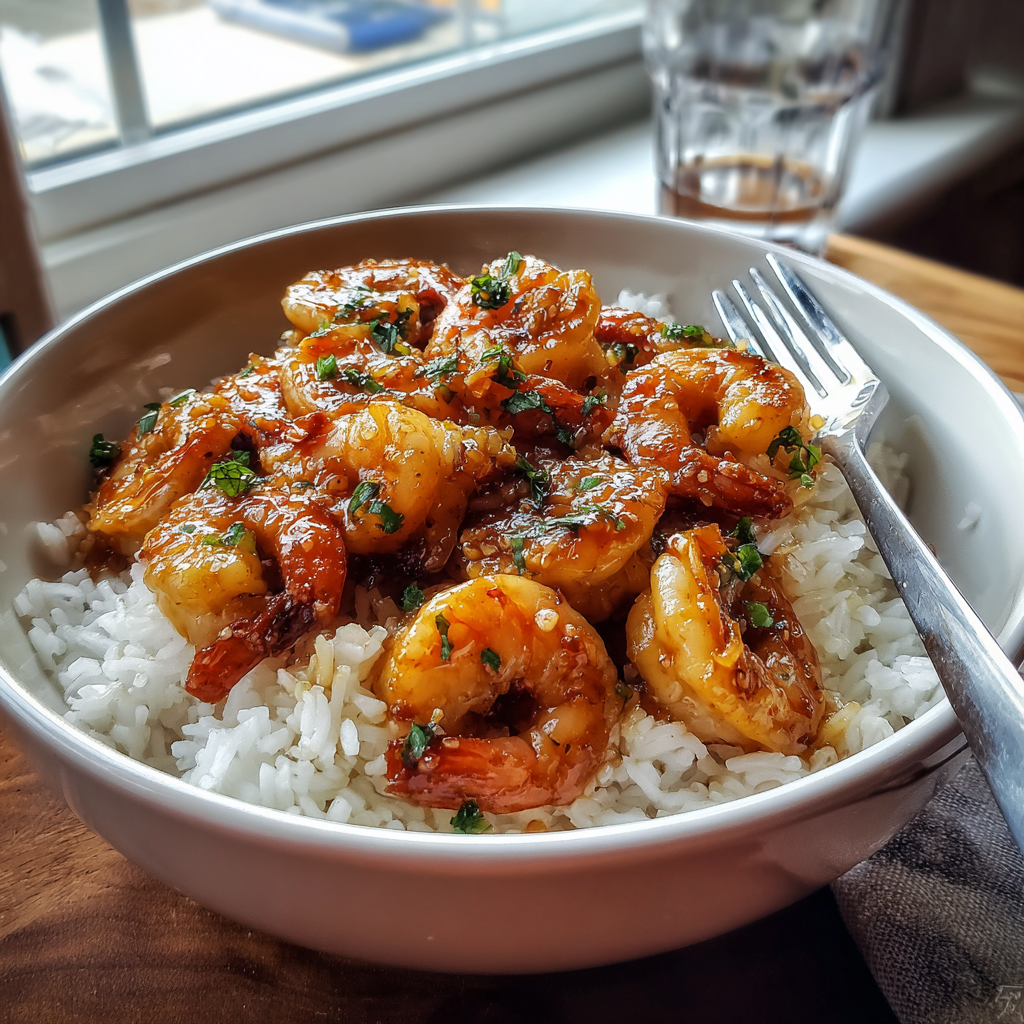
    • Plate over rice or noodles and top with green onions and sesame seeds.
    • Serve immediately; the dish is at its absolute best fresh from the pan.

    Honey Garlic Shrimp Variations

    The “Mia Approved” Mild and Sweet Version

    Skip the red pepper flakes entirely and add a teaspoon of fresh grated ginger to the sauce instead. Mia declared this one “the good one” after sniffing it suspiciously for a full minute. The ginger adds warmth without any heat, and kids who are sensitive to spice tend to love this version on top of jasmine rice with extra sauce pooled at the bottom of the bowl.

    Leo’s “Make It Spicy, Mom” Version

    Double the red pepper flakes and add half a teaspoon of sriracha directly into the sauce. Leo discovered the recipe by accident when he grabbed the sriracha off the counter “to see what happens.” What happened was a genuinely excellent spicy glaze, brighter, punchier, and great when served over fried rice or in lettuce wraps. I now make this version just for us adults after the kids are in bed.

    The 20-Minute Weeknight Noodle Bowl

    Toss the finished honey garlic shrimp directly with cooked lo mein or rice noodles right in the pan before serving. Add a handful of baby spinach at the end; it will wilt in about 30 seconds from the residual heat. This is the version I make when I realize at 6pm that I forgot to make a side dish, which is honestly more often than I’d like to admit. The noodles soak up every drop of that glossy sauce.

    Substitutions

    Shrimp → Chicken thighs: Cut boneless chicken thighs into bite-sized pieces; they take about 6 to 7 minutes to cook through, but the honey garlic sauce clings to them just as beautifully. Great for anyone avoiding shellfish.

    Soy sauce → Coconut aminos: A 1:1 swap that keeps this dish gluten-free. Coconut aminos are slightly sweeter, so reduce the honey by about a teaspoon to balance.

    Honey → Maple syrup: It works, though the sauce is a bit thinner and less glossy. Use the same amount and let it reduce for an extra 30 to 45 seconds. The flavor is earthier and slightly less sweet; some people prefer it, especially over noodles.

    Fresh garlic → Garlic powder: While it’s not my preferred option, in a dire situation, I recommend using ½ teaspoon stirred directly into the sauce. Skip the toasting step. It won’t be as deep, but it will still taste good and won’t burn, which is a win.

    Equipment

    • Large skillet or sauté pan (12-inch is ideal)
    • Small mixing bowl for the sauce
    • Whisk
    • Paper towels
    • Tongs or a silicone spatula
    • Measuring cups and spoons
    • Microplane or garlic press

    Storage Tips

    Make Ahead

    • Mix the sauce up to 3 days in advance and refrigerate in a sealed jar.
    • Peel and devein shrimp the morning of; keep them cold and pat them dry.

    Refrigerator

    • Store leftovers in an airtight container for up to 2 days.
    • Keep the sauce and shrimp together; this keeps them moist.
    • Best eaten cold over rice as a quick lunch the next day.

    Freezing

    • You can technically freeze them for up to 1 month in a zip-lock bag.
    • Texture suffers a little; shrimp can go rubbery when thawed.
    • Better to freeze the sauce separately and cook fresh shrimp.

    Reheating

    • Warm gently in a skillet over medium-low heat with a splash of water.
    • Avoid the microwave if possible; it overcooks shrimp quickly.
    • 30 to 60 seconds in the pan is usually all you need.

    Family Secret Worth Sharing

    Here’s the thing about garlic that took me an embarrassingly long time to learn: it speaks in seconds, not minutes. The window between fragrant and acrid is smaller than you think, and once you’ve crossed it, there’s no coming back. My mom used to stand right next to the stove and never once burned it, and I used to think that was just luck. It isn’t. It’s full attention. I started teaching Mia this last fall. She stood on her little step stool, wooden spoon in hand, and I explained that garlic talks to you: it smells sweet and toasty right before it’s done, and then it flips. She stirred it perfectly on the first try. Leo said she was cheating because she’s “smaller and closer to the pan. ” That argument lasted the entire dinner. But the garlic was perfect.

    Troubleshooting FAQs

    Can I use frozen shrimp straight from the bag?
    You can, but please don’t. Frozen shrimp release a ton of water in the pan, which means they steam instead of sear, and your sauce ends up thin and watery. Even a 15-minute thaw under cool running water makes a massive difference. Trust me, I learned this lesson the hard way twice.

    Why is my honey garlic sauce not thickening?
    The most common reason is heat that’s too low. The sauce needs a genuine bubble to reduce and thicken. Bring it up to medium and let it boil gently for a full 2 minutes without stirring too much. If it still seems thin, let it go another 30 to 45 seconds; it thickens more as it cools too.

    Could shrimp be considered a good high-protein option?
    It’s genuinely one of the best. Large shrimp pack around 20 to 24 grams of protein per serving while staying low in calories and fat. It fills the family up without feeling heavy, and the kids actually eat it enthusiastically, which is its kind of miracle.

    What do I serve with honey garlic shrimp?
    Steamed jasmine rice is the classic and soaks up the sauce perfectly. For something lighter, try cauliflower rice or sautéed zucchini noodles. It also makes an incredible taco filling with shredded cabbage and lime crema; that one came from a lazy Friday with nothing else in the fridge, and now it’s a regular request.

    From Our Kitchen Table to Yours

    Most Tuesday nights in this house, dinner is a negotiation. Someone does not want sauce on their rice; someone “forgot” to inform me that they have suddenly ceased eating garlic. But for this honey garlic shrimp, they both sit down for it without complaint. Leo sets the table without being asked. Mia doesn’t even mention the garbage can anymore. We eat together, the sauce gets sopped up with every last grain of rice, and for about twenty minutes, the kitchen smells warm and sweet and entirely like home.

    If you’re building your list of easy weeknight dinners that actually work, this one deserves a permanent spot. It’s the kind of recipe dinner you make once and find yourself thinking about the next morning. And if you’re putting together your rotation of cozy, easy weeknight dinners for busy family weeks, this is the one I’d start with, every single time.

    Please remember to snap a picture of your honey garlic shrimp before that glossy sauce disappears into the rice (trust me, it will disappear quickly!), and leave a rating below. We’d love to hear how this honey garlic shrimp becomes part of your weeknight family story.

    Star-rate this recipe and join our cozy home-cooking family.