Author: Sarah Mitchell

  • 8-Ingredient Glowing Beet Juice Recipe for your Skin

    8-Ingredient Glowing Beet Juice Recipe for your Skin

    The first time I made beet juice, I blended the raw beet without securing the lid. One confident pulse and magenta went absolutely everywhere: the ceiling, the backsplash, my white shirt, and the back of Jake’s neck. He turned around very slowly. Emma said, “It looks like a crime scene, Mum.” She was not wrong. We wiped everything down and started again with the lid firmly pressed on.

    Why This Recipe Is Special

    I started making this after a period when my skin was dull, tired-looking, and doing exactly what skin does when you have been surviving on school-run coffee and not enough sleep. A friend told me about beet juice for skin, and I was deeply skeptical. Three weeks of drinking this most mornings, and my skin looked genuinely, noticeably different, brighter, clearer, and more awake than I felt. The combination of raw beet, coconut water, lemon, and ginger hits the antioxidant, hydration, and anti-inflammatory notes all at once. It is one of those healthy drink recipes that earns its place in your actual routine rather than your aspirational one.

    How To Make Beet Juice for Glowing Skin

    After the ceiling incident, I made this with both kids watching from a safe distance. Emma had appointed herself quality control; her job was to assess the color, which she took to mean photographing every stage on her tablet with the focused energy of a documentary filmmaker. Jake tried it first, pulled a face that suggested he expected it to be terrible, then went quiet for a moment and said “actually that’s not bad.” From a nine-year-old who considers anything that is not beige a suspicious food choice, I will take “not bad” as the highest possible endorsement.

    Main Ingredients

    • 2 medium raw beets, peeled and roughly chopped: The foundation of the recipe. Raw beets have more nutrients than cooked; wear gloves when peeling.
    • 1 cup coconut water: Natural electrolytes and sweetness without added sugar. The best liquid base for this juice is water.
    • Juice of 1 large lemon: Brightens the flavor and adds vitamin C, which helps the body absorb the iron in the beets.
    • 1 inch fresh ginger, peeled: Anti-inflammatory and warming. Start with half an inch if you are sensitive to ginger heat.
    • 1 medium apple, cored and chopped Natural sweetness that balances the earthy beet. Use green apples for lower sugar content.
    • 1 small carrot, roughly chopped: Adds beta-carotene for skin health and natural sweetness. Optional but worth including.
    • Pinch of black pepper: Activates the anti-inflammatory properties of the ginger. Tiny amount and you will not taste it.
    • 4 to 6 ice cubes: For serving cold and slightly diluted. Makes the flavor rounder and more drinkable.

    Step-by-Step Instructions

    Step 1: Prepare the Produce

    • Peel the beets with a vegetable peeler wear kitchen gloves or dedicate yourself to having pink fingers for the rest of the day.
    • Roughly chop the beets, apple, and carrot into pieces small enough for your blender to handle, about 1 to 1.5 inch chunks.
    • Peel the ginger and either grate it or add it as a chunk directly; the blender will handle it either way.
    • Juice the lemon and set it aside with the coconut water. Having everything ready before you start means the lid goes on and stays on.

    Step 2: Blend

    • Add the coconut water to the blender first. Adding the liquid first means the blades catch and process everything more smoothly.
    • Add the chopped beet, apple, carrot, and ginger on top of the liquid.
    • Secure the lid firmly; press down on it with one hand while blending, especially for the first pulse, and blend on high for 60 to 90 seconds until completely smooth.
    • Add the lemon juice, black pepper, and ice cubes, then blend for another 20 seconds to combine and chill.

    Step 3: Strain or Serve Whole

    • For a smooth juice: pour it through a fine-mesh strainer or nut milk bag, pressing or squeezing to extract all the liquid—discard the pulp or add it to a smoothie tomorrow.
    • For a whole-blended version with all the fiber: skip the straining entirely and drink it as a thick, nutrient-dense smoothie.
    • Taste before serving and adjust more lemon for brightness, more ginger for heat, and a teaspoon of honey if you want a touch more sweetness.
    • Pour over additional ice and serve immediately for maximum flavor and nutrient retention.

    Step 4: Clean Up Before the Beet Stains

    • Rinse every surface the beet touched immediately; beet juice stains quickly and becomes extremely persistent if it dries.
    • Rinse the blender with cold water first, then wash it with hot soapy water. Hot water first can set beet color into the plastic.
    • Wipe the counters immediately with a damp cloth; beet stains on grout or marble need cold water and speed, not scrubbing later.
    • Accept that there will probably be a small pink mark somewhere and call it character; this experience is a rite of passage with beet juice, and it happens to everyone at least once.

    Beet Juice Variations

    The Lemon Coconut Glow Boost (My Morning Ritual Version)

    This recipe is the version I make on the mornings when I actually want to feel like I have my life together. Double the lemon, use coconut water as the full base, add a tablespoon of coconut cream for richness, and skip the apple for a version that is less sweet and more sharp and clean. The lemon coconut combination cuts through the earthiness of the beet in a way that makes the whole drink feel refreshing rather than medicinal. It is also the most beautiful color, a deep magenta that Emma insists looks like a luxury spa drink, which frankly makes it taste better.

    Jake’s “Make It More Normal” Apple and Ginger Version

    Jake’s negotiated version has double the apple, half the beet, and extra ginger, his theory being that if it tastes more like apple juice, it basically is apple juice and therefore cannot be considered a health drink. He is wrong about the logic but right about the result. This version is sweeter, more familiar, and significantly easier to get into the habit of drinking every morning, which makes it the best entry point for anyone who is new to juicing recipes and not yet sure about the beet situation.

    Emma’s Skin Detox Boost (The Full Project Version)

    Emma researched this one with the thoroughness of someone preparing a school presentation, which she was. Add a quarter of a cucumber, a small handful of spinach, a teaspoon of turmeric, and a tablespoon of aloe vera juice to the base recipe. It turns a remarkable shade of deep red-green, and the skin detox benefits from the combination of beet, cucumber, spinach, and turmeric are genuinely substantial. Emma presented this version to me with a printed ingredient list and a citation from a wellness website. I added it to the rotation immediately and told her she was right, which is the only currency that matters.

    Substitutions

    • Coconut water → Cold filtered water works perfectly well and keeps the flavor clean and earthy. Cucumber water adds extra skin hydration. Chilled green tea adds antioxidants and a subtle herbal note that works beautifully with the ginger.
    • Fresh ginger → If fresh ginger is unavailable, half a teaspoon of ground ginger is a reliable substitute. Use it sparingly, as ground ginger is more concentrated. A quarter teaspoon of ground turmeric can be added alongside for extra anti-inflammatory benefit.
    • Apple → Pear gives a gentler, more floral sweetness and is slightly lower in sugar. A small handful of seedless red grapes adds sweetness and extra antioxidants. For a lower-sugar version, omit the apple entirely and add an extra inch of cucumber.
    • Fresh lemon juice → Fresh orange juice adds sweetness alongside the vitamin C and creates a warmer, rounder flavor. Lime juice gives a more tropical, sharper result that pairs particularly well with the coconut water. Bottled lemon works in a pinch, but fresh tastes noticeably better.

    Equipment

    • High-speed blender
    • Vegetable peeler
    • Sharp knife and cutting board
    • Fine mesh strainer or nut milk bag
    • Large jug or bowl for straining
    • Citrus juicer
    • Kitchen gloves (beet stains strongly recommended)
    • Tall glasses for serving

    Storage Tips

    Make Ahead

    • Pre-chop and bag the beets, apple, carrot, and ginger the night before, and refrigerate; this makes morning prep only 90 seconds.
    • The whole recipe can be blended ahead and refrigerated in a sealed jar for up to 24 hours.
    • Shake or stir before drinking; natural separation is normal and not a sign anything has gone wrong.

    Refrigerator

    • Store strained juice in an airtight glass jar for up to 48 hours, as glass preserves freshness better than plastic.
    • The color will deepen slightly overnight, which is normal; the flavor mellows, and some find it even better on day two.
    • Do not store the unstrained blended version for more than 24 hours, as the fiber begins to ferment.

    Freezing

    • Freeze the strained juice in ice cube trays; one cube per use makes it easy to add to smoothies or defrost single servings.
    • Frozen beet juice cubes keep for up to 2 months with minimal nutrient loss.
    • Defrost overnight in the fridge or blend from frozen into a chilled smoothie directly.

    Reheating

    • This juice is always served cold; do not heat it, as heat degrades the antioxidants and changes the flavor significantly.
    • If your refrigerated juice is too cold, let it sit at room temperature for 5 minutes rather than warming it.
    • Add a few fresh ice cubes when serving from the fridge to refresh the texture and chill it evenly.

    Family Secret Worth Sharing

    The single thing that changed my skin results from this juice was consistency, not quantity. I spent the first two weeks drinking a large glass every morning and seeing not much. Then I got busy, dropped to a small glass four or five times a week, and paradoxically started noticing the difference more, probably because my body had finally had enough time for the cumulative antioxidant and anti-inflammatory effect to actually show up.

    The other thing nobody tells you: the black pepper is essential. It sounds like a strange thing to add to a juice, and I skipped it for weeks. The compound in ginger that fights inflammation is significantly better absorbed when black pepper is present. One small pinch, and you cannot taste it; you genuinely cannot, and the juice does more of what you are drinking it for. I told Emma this. She wrote it down. She now adds it with the earnest precision of someone conducting a clinical trial. I find it very endearing.

    Troubleshooting FAQs

    The juice tastes too earthy, and I cannot get past it. What can I do?
    Start with one small beet rather than two and double the apple. The earthiness of raw beet is real and an acquired taste for many people; there is no shame in easing in gradually. Adding more lemon also cuts through the earthy notes significantly. Over two or three weeks most people find the taste shifts from challenging to something they actually look forward to.

    My blender is not powerful enough to blend raw beets smoothly. Any tips?
    Cut the beet into much smaller pieces, about half an inch, and add extra liquid before blending. Let the blender run for longer, pausing to scrape down the sides if needed. Alternatively, lightly steam the beet for 5 minutes first to soften it without fully cooking it; this method makes it much easier to blend and only marginally reduces the nutrient content.

    I do not have a juicer. Can I still make juice?
    A blender and a fine mesh strainer are all you need; no juicer is required. Blend everything with the liquid, pour through the strainer into a large bowl, and press the pulp firmly with the back of a spoon to extract every drop. A clean tea towel or nut milk bag works even better for squeezing. The result is just as good as a dedicated juicer and significantly easier to clean.

    How long before I see skin results from drinking beet juice?
    Most people notice a difference in skin brightness and hydration within two to three weeks of drinking beet juice consistently four to five times a week. Think of it as a long-term addition to your routine rather than an overnight fix, though the energy boost is noticeable much faster, usually within the first few days.

    The Morning That Made the Pink Ceiling Worth Every Bit

    Three weeks into making this drink every morning, I was at school pickup when another mom stopped me and said, “Your skin looks amazing; what are you using?” I almost told her I had bought something new. Then I told her about the beet juice, and she looked at me exactly the way you might expect. But I sent her the recipe anyway. She messaged me two weeks later saying she was converted and had also ruined a tea towel.

    This is the kind of healthy drink recipe that feels like a small act of care for yourself on a weekday morning. Not a grand gesture. Just five minutes, a blender with the lid on, and something that tastes genuinely good while doing something genuinely good. Emma drinks hers with the satisfaction of someone who did the research. Jake drinks his and pretends it is apple juice. I drink mine and feel like I got the morning right.

    Whether you make this your new skin detox ritual, your way to boost energy naturally before the school run, or just because you want to see what the fuss about juicing recipes is, start today. Keep the lid on. And maybe wear an apron the first time.

    Please remember to snap a picture of your beet juice before that gorgeous pink color disappears (trust me, it will disappear quickly), and leave a rating below. We’d love to hear how this beet juice recipe becomes part of your morning glow story.

    Star rate this recipe and join our cozy healthy drinks family.

  • 1-Pan Creamy Keto Chicken Broccoli Casserole

    1-Pan Creamy Keto Chicken Broccoli Casserole

    The first time I made keto chicken broccoli casserole, I dropped cold cream cheese straight into the warm pan without softening it first. Just the whole brick, unmelted. Jake poked it with a spoon and said, “Is that supposed to be like that?” It was not. I scraped it out, microwaved the cream cheese for thirty seconds, started again, and never made that mistake twice.

    Why This Recipe Is Special

    Low-carb keto dinner recipes often sacrifice the one thing that makes dinner actually feel like dinner: the comfort. This one does not. The sauce is built from cream cheese, cream, and garlic, which means it is genuinely rich and creamy without a gram of flour or any starchy thickener. The chicken gets seared first so it stays juicy and golden inside the casserole rather than turning pale and sad. The broccoli holds its color and its slight bite. And on top of that, the bubbly, blistered cheddar and mozzarella crust is the reason everyone is at the table before you even call them.

    How To Make Keto Chicken Broccoli Casserole

    After the cream cheese incident, my second attempt had a proper audience. Emma had been reading about keto with the very serious energy she brings to anything she considers a “project,” and she wanted to help make a recipe that was actually engaging rather than, in her words, “just salad without the fun parts.” Jake’s position on anything keto had been suspicious until the moment he saw the amount of cheese going on top. He went very quiet, watched me scatter the second handful, and said, “Okay, I think I understand keto now.” That is the most nutritional insight he has offered to date, and I choose to take it as a win.

    Main Ingredients

    • 1.5 lbs boneless skinless chicken breast or thighs: Cut into bite-sized pieces. Thighs stay juicier; breasts work well too.
    • 4 cups broccoli florets: About 1 large head. Cut small and uniform so they steam through in the oven.
    • 8oz full-fat cream cheese, softened: Room temperature or 30 seconds in the microwave. Cold cream cheese will not blend smoothly ask me how I know.
    • 1/2 cup heavy cream: Thins the cream cheese into a pourable sauce. Do not substitute with milk.
    • 1 cup shredded cheddar, divided: Half goes into the sauce, half on top for that golden bubbly crust.
    • 1 cup shredded mozzarella: The stretch and pull. Scattered on top alongside the cheddar.
    • 4 cloves garlic, minced: Sautéed in butter before the sauce goes in. The whole dish rests on this flavor.
    • 2 tbsp butter + 1 tbsp olive oil: Butter for the sauce base, oil for searing the chicken without burning.
    • 1 tsp garlic powder + 1 tsp onion powder: For seasoning the chicken before searing. Layer the garlic flavor throughout.
    • 1/2 tsp smoked paprika, salt, and pepper: Season generously. The cream sauce is rich and needs the chicken well seasoned to match it.

    Step-by-Step Instructions

    Step 1: Season and Sear the Chicken

    • Pat chicken pieces dry and toss with garlic powder, onion powder, smoked paprika, salt, and pepper.
    • Heat olive oil in a large oven-safe skillet over medium-high heat until shimmering.
    • Sear the chicken in a single layer for 3 to 4 minutes per side, until golden. Work in batches so the pan stays hot and the chicken sears rather than steams.
    • Remove the seared chicken to a plate; it does not need to be cooked through yet; it will finish in the oven.

    Step 2: Build the Cream Sauce

    • Reduce heat to medium, add butter to the same pan, and sauté minced garlic for 60 seconds until fragrant scrape up any golden bits from the chicken.
    • Add the softened cream cheese and heavy cream, stirring constantly until the cream cheese is fully melted into a smooth, silky sauce.
    • Stir in half the cheddar until it melts into the sauce, then taste and adjust salt and pepper.
    • Remove from heat; the sauce should be thick, creamy, and pourable. If it looks too thick, add a splash more cream.

    Step 3: Assemble and Top

    • Preheat oven to 375°F (190°C) and lightly grease a 9×13 inch baking dish if not using the oven-safe skillet.
    • Add the broccoli florets to the cream sauce in the pan and stir to coat every piece thoroughly.
    • Add the seared chicken back in and fold everything together gently so the broccoli and chicken are evenly distributed through the sauce.
    • Scatter the remaining cheddar and all the mozzarella evenly over the top; do not be shy with either.

    Step 4: Bake and Rest

    • Bake uncovered for 25 to 30 minutes until the cheese is deeply golden and bubbly at the edges and the broccoli is just tender when pierced with a fork.
    • If the cheese is bubbling but not golden after 25 minutes, switch to the broiler for 2 to 3 minutes and watch it closely; it goes from perfect to too dark very fast.
    • Remove from the oven and allow to rest for 5 minutes; the sauce thickens slightly and the portions come out much cleaner.
    • Serve directly from the dish with a large spoon, pulling up that glorious cheese pull every single time.

    Keto Chicken Broccoli Casserole Variations

    The Bacon and Ranch Version (Jake’s Crowning Contribution)

    Jake’s interest in this casserole went from polite to passionate the day I added bacon. Fry six rashers until crispy, crumble them over the top along with the cheese before baking, and stir one tablespoon of dried ranch seasoning into the cream sauce instead of the garlic powder and onion powder. The ranch flavor runs all the way through the sauce, and the bacon adds crunch and smoke to every single bite. Jake calls this “the good version.” I remind him the original is also excellent. He nods, unconvinced.

    Emma’s Spinach and Sun-Dried Tomato Upgrade

    Emma’s version is the one she makes when she wants to explain to her friends that keto food is actually excellent. Stir two large handfuls of fresh spinach into the sauce with the broccoli; it wilts down to almost nothing but adds color and iron. Add a quarter cup of roughly chopped oil-packed sun-dried tomatoes at the same stage. The tomatoes add an intense, jammy burst of flavor against the richness of the cream cheese sauce and make the whole dish look considerably more impressive than a Tuesday night dinner has any right to look.

    The Spicy Jalapeño and Pepper Jack Version (My Friday Night Treat)

    When both kids are happy with their food and I get to make a version just for me, this is it. Swap the mozzarella for shredded pepper jack, add two thinly sliced fresh jalapeños scattered over the top before baking, and stir half a teaspoon of cayenne into the cream sauce. The heat builds slowly through the cream, and the jalapeños blister beautifully under the broiler. Serve with a dollop of full-fat sour cream on the side. This is one of those very low-carb recipes that feels like a proper indulgence rather than a restriction.

    Substitutions

    • Heavy cream → Full-fat coconut cream works for a dairy-free version with a slightly different flavor, but the sauce still comes together. Do not use low-fat milk or half-and-half; they are too thin, and the sauce will be watery.
    • Cream cheese → Full-fat mascarpone is a richer, slightly less tangy substitute in the exact same quantity. For dairy-free, a full-fat cashew cream cheese works; check the carb count on the label, as it varies significantly by brand.
    • Broccoli → Cauliflower florets are an excellent keto-friendly swap. Zucchini cut into half-moons also works but releases water pat it dry first and reduce the cream by two tablespoons to compensate.
    • Cheddar and mozzarella → Any good melting cheese works here. Gruyère gives a nuttier flavor. A smoky gouda on top is extraordinary and worth trying when you want something different from your usual keto-friendly meal prep rotation.

    Equipment

    • Large oven-safe skillet or sauté pan (at least 12-inch)
    • 9×13-inch baking dish (only if skillet is not oven-safe)
    • Sharp knife and cutting board
    • Wooden spoon or silicone spatula
    • Tongs
    • Measuring cups and spoons
    • Instant-read thermometer
    • Cheese grater (freshly grated melts far better than pre-shredded)

    Storage Tips

    Make Ahead

    • Assemble the full casserole up to 24 hours ahead, cover tightly, and refrigerate unbaked.
    • Add 8 to 10 extra minutes of bake time if going straight from fridge to oven.
    • The cream sauce actually deepens in flavor overnight; make-ahead is genuinely better here.

    Refrigerator

    • Store cooled leftovers in an airtight container for up to 4 days.
    • This recipe is one of those keto-friendly meal prep dishes that is just as good on day three as day one.
    • The cream sauce firms up when cold; it loosens back to creamy with a splash of cream when reheating.

    Freezing

    • Freeze in individual portions in airtight freezer containers for up to 3 months.
    • Cream-based sauces can separate slightly after freezing; stir gently when reheating to bring them back together.
    • Thaw overnight in the fridge; do not microwave from completely frozen, as the sauce will separate.

    Reheating

    • Oven at 325°F for 15 to 18 minutes covered with foil is the best method; the sauce stays creamy.
    • Microwave individual portions covered loosely for 2 to 3 minutes at 70% power, stirring halfway.
    • Add a tablespoon of heavy cream per portion before reheating to restore the sauce consistency.

    Family Secret Worth Sharing

    The biggest flavor difference between a good keto chicken broccoli casserole and a great one comes down to a step most people skip entirely: searing the chicken. I know it feels like an extra pan and extra time when you could just throw everything in raw, and yes, technically it will cook through either way. But raw chicken dumped directly into a cream sauce comes out pale, soft, and flavorless; it tastes steamed because it is steamed.

    Those golden, caramelized edges on each chicken piece carry flavor that the cream sauce cannot replicate on its own. Three minutes per side in a hot pan, and the whole casserole tastes like it came from a restaurant rather than a weeknight kitchen. Jake noticed the difference without being told he took his first bite, looked up, and said “this one’s better than last time.” I did not tell him the only change was the searing step. Some secrets are better kept until they are old enough to appreciate them.

    Troubleshooting FAQs

    My sauce came out grainy or lumpy. What went wrong?
    Almost certainly the cream cheese was too cold. It needs to be genuinely soft, either left out at room temperature for an hour or microwaved for 25 to 30 seconds. The other cause is heat that is too high when you add the cream; keep it at medium and stir constantly. If the sauce does look grainy, take the pan off the heat entirely and stir vigorously; it usually comes back together with patience.

    The broccoli came out mushy. How do I keep it with more bite?
    Cut the florets on the larger side rather than very small pieces, which overcook quickly. Make sure the broccoli goes in raw rather than pre-steamed; it will cook perfectly in the baking time from raw. If you prefer it with more crunch, fold it into the sauce and then bake for the last 10 minutes only rather than the full time.

    The sauce seems too thin and watery after baking. What happened?
    This usually means the broccoli or chicken released water during baking. Pat the broccoli florets dry before adding them to the sauce, and make sure the seared chicken has rested and drained before folding it in. If using frozen broccoli, it must be completely thawed and very thoroughly dried. Next time reduce the cream by two tablespoons as a buffer.

    Can I make the dish without searing the chicken first?
    You can, but please read the Family Secret section above before deciding to. If you are genuinely short on time, season the raw chicken pieces well, fold them into the sauce with the broccoli, and increase the covered bake time to 35 minutes, then uncover for 10. The texture will be softer and the flavor less complex, but it will still be a very respectable easy low-carb recipe that the whole table will eat without complaint.

    The Casserole That Made Keto Feel Like Something to Look Forward To

    I did not go into keto cooking expecting to find something that would make both kids genuinely excited for dinner. I expected compliance, at best. What I got instead was Jake developing a working theory about cheese ratios and Emma explaining to her friend on the phone that “we’re having the broccoli one” in a tone that made it sound like a reward rather than a vegetable. That’s the whole thing, really: easy low-carb recipe cooking is not about what you take out, it’s about what you build in its place.

    A creamy garlic sauce, golden seared chicken, and cheese that stretches like that photo—every time this is what low-carb meal ideas look like when they actually work. When it stops being a diet dinner and starts being the one people ask for specifically.

    Whether this becomes the anchor of your chicken keto meal rotation, your go-to Sunday meal prep dish, or the first thing you make when someone in your life tells you they are trying to eat low carb and you want to prove it does not have to mean sad food, I hope it delivers. It really does. Make it once, and it earns its place permanently.

    Don’t forget to snap a picture of your keto chicken broccoli casserole before that first cheesy scoop disappears (trust me, it will disappear quickly!), and leave a rating below. We’d love to hear how this keto chicken broccoli recipe becomes part of your family weeknight story.

    Star rate this recipe and join our cozy low carb kitchen family.

  • 8-Ingredient Fudgy Healthy Brownie Recipe

    8-Ingredient Fudgy Healthy Brownie Recipe

    The first time I made a healthy brownie recipe, I used black beans. I blended them up and baked them proudly, and Jake took one bite, put it down, and said, “Mum, these taste like a garden.” Emma just looked at the plate and walked away. I ate the whole tray myself out of stubbornness and started over the next morning with an entirely different approach.

    Why This Recipe Is Special

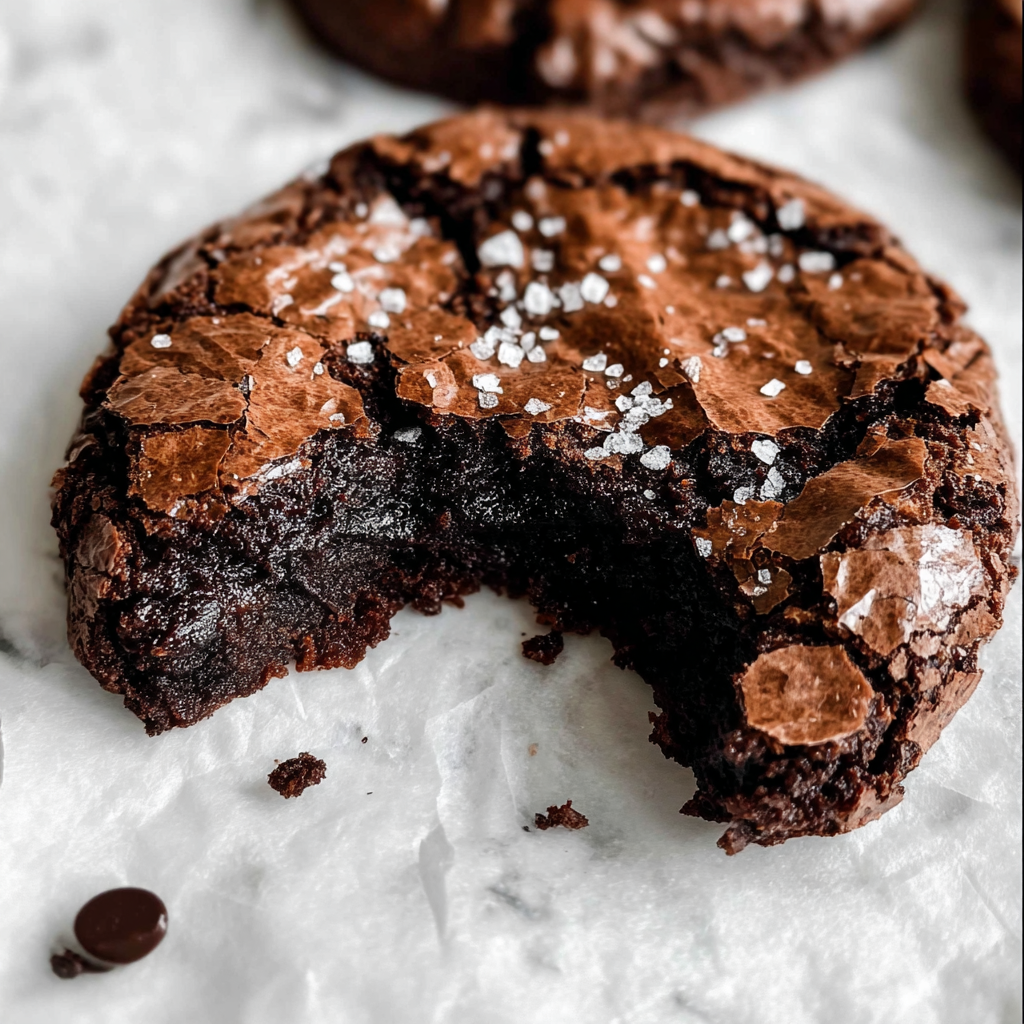
    This is the healthy brownie recipe that actually tastes like a brownie. Not a health food that pretends to be one. Not something you eat with a resigned expression and tell yourself is fine. These have a proper crinkle top, a fudgy center, and that deep chocolate richness that makes you close your eyes for a second when you take a bite. The secret is swapping refined ingredients for better ones without stripping out the things that make brownies worth eating. Coconut oil instead of butter, maple syrup instead of white sugar, and almond flour instead of plain flour. Three swaps. That is all the recipe is.

    How To Make Healthy Brownies

    After the bean incident, I spent two weeks testing versions until I landed on this one. Jake came into the kitchen for the third test batch, sniffed the air, and said “that actually smells like brownies.” High praise. Emma positioned herself by the oven for the last ten minutes of baking time with the focused energy of someone awaiting very important news. When I cut the first square and the center was still fudgy and glossy and entirely brownie-shaped, she grabbed it before I could say a word and ate it standing at the counter. “These are the good ones,” she confirmed, with absolute authority. They are. They really are.

    Main Ingredients

    • 3 large eggs, room temperature: The whole structure. They create the crinkle top when whisked properly with the maple syrup.
    • 1/2 cup coconut oil, melted and cooled: Replaces butter entirely. Refined coconut oil has no coconut flavor if you prefer neutral.
    • 1/2 cup pure maple syrup: Real maple only. It sweetens gently and adds a subtle depth that white sugar cannot.
    • 2 tsp pure vanilla extract: Real vanilla matters here. It smooths out the cocoa and rounds the whole flavor.
    • 3/4 cup unsweetened cocoa powder Dutch-process gives the deepest, most fudgy result. Do not use hot drink powder.
    • 1 cup blanched almond flour: Finely ground blanched almond flour only not almond meal, which is coarser and drier.
    • 1/2 tsp baking powder + 1/4 tsp salt: Just enough lift without making these cakey. The salt is as important as the chocolate.
    • 1/3 cup dark chocolate chips (70%+): Optional but strongly advised. They melt into fudgy pockets throughout.

    Step-by-Step Instructions

    Step 1: Preheat and Prep Your Pan

    • Preheat oven to 350°F (175°C) and line an 8×8 inch baking pan with parchment, leaving an overhang on two sides.
    • Melt the coconut oil gently in a small saucepan or in the microwave in 20-second bursts; do not let it get hot.
    • Allow the melted coconut oil to cool for 3 to 4 minutes before using; hot oil will scramble your eggs when combined.
    • Set the lined pan aside on a flat, level surface so you can pour the batter straight in without adjusting.

    Step 2: Build the Batter

    • In a large bowl, whisk the eggs, maple syrup, cooled coconut oil, and vanilla together for a full 2 minutes until the mixture lightens slightly in color and looks glossy.
    • Sift the cocoa powder directly into the wet mixture sifting removes lumps and means you do not spend the next five minutes chasing them with a whisk.
    • Add the almond flour, baking powder, and salt, and fold gently with a rubber spatula until just combined; do not overmix.
    • Fold in the chocolate chips with 3 or 4 gentle strokes; the batter will be thick, glossy, and considerably more promising than a garden.

    Step 3: Bake

    • Pour and spread the batter evenly into the prepared pan a small offset spatula is ideal, but the back of a spoon works perfectly well.
    • Bake for 20 to 24 minutes; the top should look set and matte, with the edges pulling very slightly from the sides of the pan.
    • A toothpick inserted into the center should come out with a few moist, fudgy crumbs wet batter means more time; completely clean means slightly overbaked.
    • Remember that these will continue to firm up as they cool, so pulling them a minute early is always the right instinct.

    Step 4: Cool and Slice

    • Allow to cool in the pan for at least 20 full minutes before attempting to lift or slice; the structure needs that time.
    • Lift out using the parchment overhang and transfer to a cutting board.
    • Slice with a sharp knife, wiping the blade clean between cuts for neat, clean edges.
    • The squares will firm up further as they cool to room temperature, genuinely being better 30 minutes out of the oven than at 5 minutes.

    Healthy Brownies Variations

    The Espresso and Sea Salt Version (My Absolute Favourite)

    This is what I make when I want something that feels genuinely sophisticated rather than just quietly nutritious. Add one teaspoon of instant espresso powder to the wet ingredients; it deepens the chocolate flavor in a way that is almost startling, without tasting at all like coffee. Then scatter a generous pinch of flaky sea salt across the top before baking. The salt crystals catch the light, and the flavor combination is the kind that makes people ask what is in these?” and then immediately ask for the second one.

    Jake’s Peanut Butter Marble (Non-Negotiable on Weekends)

    Jake discovered that peanut butter swirled into anything becomes his favorite version of that thing, and he is correct. Pour the batter into the pan, then drop four or five generous tablespoons of natural peanut butter across the surface. Drag a butter knife through in slow, wide strokes to create a rough marble pattern. The peanut butter bakes in and becomes dense and salty against the dark chocolate. Jake considers this his recipe. He did not develop this recipe. He suggested it once, and I tested it four times to get it right. I have given him full credit anyway.

    Emma’s Raspberry Swirl (The “Pretty One”)

    Emma’s contribution was aesthetic rather than flavor-based: she wanted them to be prettier. She pressed eight or nine fresh raspberries into the top of the batter before baking and scattered a small handful of extra chocolate chips around them. The raspberries sink slightly as they bake, leaving little jewel-pink pockets in the dark chocolate. Emma presents these to anyone who visits with the energy of someone unveiling something significant. She is not wrong; they do look extraordinarily good, and the sharp raspberry against the rich chocolate is exactly as good as it sounds.

    Substitutions

    • Almond flour → Oat flour works well and gives a slightly more cake-like result. Use the same quantity. For nut-free, sunflower seed flour is a reliable 1:1 swap. Regular all-purpose flour also works, but you lose the grain-free benefit.
    • Maple syrup → Honey is the closest swap in the same quantity, slightly denser, with a gentle floral note. Coconut sugar dissolved in a tablespoon of warm water also works; use 1/2 cup and adjust to taste.
    • Coconut oil → Melted unsalted butter works as a direct swap for a more traditional brownie flavor. For dairy-free, neutral avocado oil works; use 6 tablespoons since it is more liquid than solid coconut oil.
    • Eggs → For a vegan version, two flax eggs (2 tablespoons ground flaxseed mixed with 6 tablespoons water, rested 10 minutes) plus one tablespoon of extra coconut oil gives a dense, fudgy result. The crinkle top will not form, but the flavor holds up very well.

    Equipment

    • 8×8 inch baking pan
    • Parchment paper
    • Large mixing bowl
    • Whisk
    • Rubber spatula
    • Fine mesh sieve (for cocoa powder)
    • Small offset spatula
    • Sharp knife for slicing
    • Cooling rack
    • Toothpick or skewer

    Storage Tips

    Make Ahead

    • Brownies can be baked up to 2 days before serving; they improve as they sit.
    • Store whole or sliced; the cut surface benefits from being pressed against parchment if stored sliced.
    • Batter can be made and refrigerated for up to 24 hours before baking bring to room temperature first.

    Refrigerator

    • Store in an airtight container at room temperature for 4 days or in the fridge for up to 7 days.
    • Cold brownies are actually excellent; the texture firms into something almost truffle-like.
    • Let refrigerated brownies sit at room temperature for 15 minutes before serving for best texture.

    Freezing

    • Freeze individual squares wrapped tightly in parchment, then placed in a zip-lock freezer bag.
    • Keeps well for up to 3 months; these freeze better than almost any other baked good I make.
    • Thaw at room temperature for an hour or in the fridge overnight from frozen.

    Reheating

    • Microwave a single square for 12 to 15 seconds; it comes back to warm, fudgy life immediately.
    • Oven at 300°F for 5 to 6 minutes, covered loosely with foil if reheating several at once.
    • Serve warm with a spoonful of natural yogurt for a dessert that feels completely indulgent.

    Family Secret Worth Sharing

    The crinkle top on a brownie is not luck; it is technique. Those gorgeous, papery, cracked ridges come from one specific step: whisking the eggs and sweetener together properly before anything else goes in. In a traditional brownie, that means dissolving the sugar into warm butter. In this recipe it means whisking the eggs with the maple syrup for a full two minutes until the mixture turns slightly pale and leaves a ribbon when you lift the whisk.

    The first time Emma helped me make these, she was in charge of the whisking. She gave it about thirty seconds and declared it done. The top of those brownies came out completely flat and sad. The second batch, I set a timer, and she whisked for the full two minutes, looking deeply put-upon about it. Crinkle top. Perfect. That is the whole secret. She has never skipped the two minutes since, though she does sigh heavily while doing it, which I respect as her right.

    Troubleshooting FAQs

    My brownies came out dry and cakey. What happened?
    Two likely causes: it was overbaked, or the almond flour was packed too tightly when measured. For almond flour, always spoon it into the measuring cup and level it off; never scoop directly from the bag. Pull them the moment the toothpick has moist crumbs rather than waiting for it to come out clean. These are meant to underbake very slightly and firm up as they cool.

    My batter looks too thick to spread. Is that normal?
    Completely normal almond flour batter is considerably thicker than regular wheat flour batter. Spread it with a small offset spatula or the dampened back of a spoon. If it seems unusually stiff, check that your coconut oil was fully liquid before adding it; partially solid coconut oil will make the batter seize up unevenly.

    Can I use cocoa powder from a hot drink mix like Cadbury?
    I would really steer you away from this. Drinking chocolate mixes contain added sugar and dried milk, which will throw off the balance of the recipe. Use unsweetened pure Dutch-process cocoa powder for the deepest flavor or natural cocoa if that is what you have. The quality of the cocoa is probably the single most important ingredient in this recipe.

    There is no crinkle top on mine. What did I do wrong?
    Ask Emma; she knows. The crinkle top comes from fully whisking the eggs and maple syrup together for the full two minutes before adding anything else. Thirty seconds is not enough. Set a timer, whisk properly, and it will happen every single time.

    The Brownies That Made the Bean Version Worth Forgetting

    Last Saturday I made a double batch of these and put them on the counter to cool. Forty minutes later I came back to find that Emma had eaten two and Jake had eaten three, and there were exactly seven squares left out of sixteen. Neither of them mentioned it. They just walked around looking extremely casual and slightly chocolatey. I said nothing. This is what healthy homemade brownies should be: the kind that disappear without ceremony, that nobody describes as “healthy” when they are eating them because they are just too busy eating them.

    These are the kind of healthy baked dessert recipes that earn their place in your permanent rotation not because they are good for a healthy brownie but because they are genuinely, honestly, no-qualification-needed good. Full stop. The kids agree. The bean brownies are never spoken of.

    Whether you make these for a lunchbox, a dinner party, a school bake sale where you quietly want to be the parent who brought the best thing, or just for a quiet Tuesday evening when you want something that feels like a proper treat without the aftermath, these are it. The kind of effortless, healthy baking recipes that will not last. They never do.

    Don’t forget to snap a picture of your healthy brownies before that first square disappears from the board (trust me, it will disappear quickly!), and leave a rating below. We’d love to hear how this healthy brownie recipe becomes part of your family baking story.
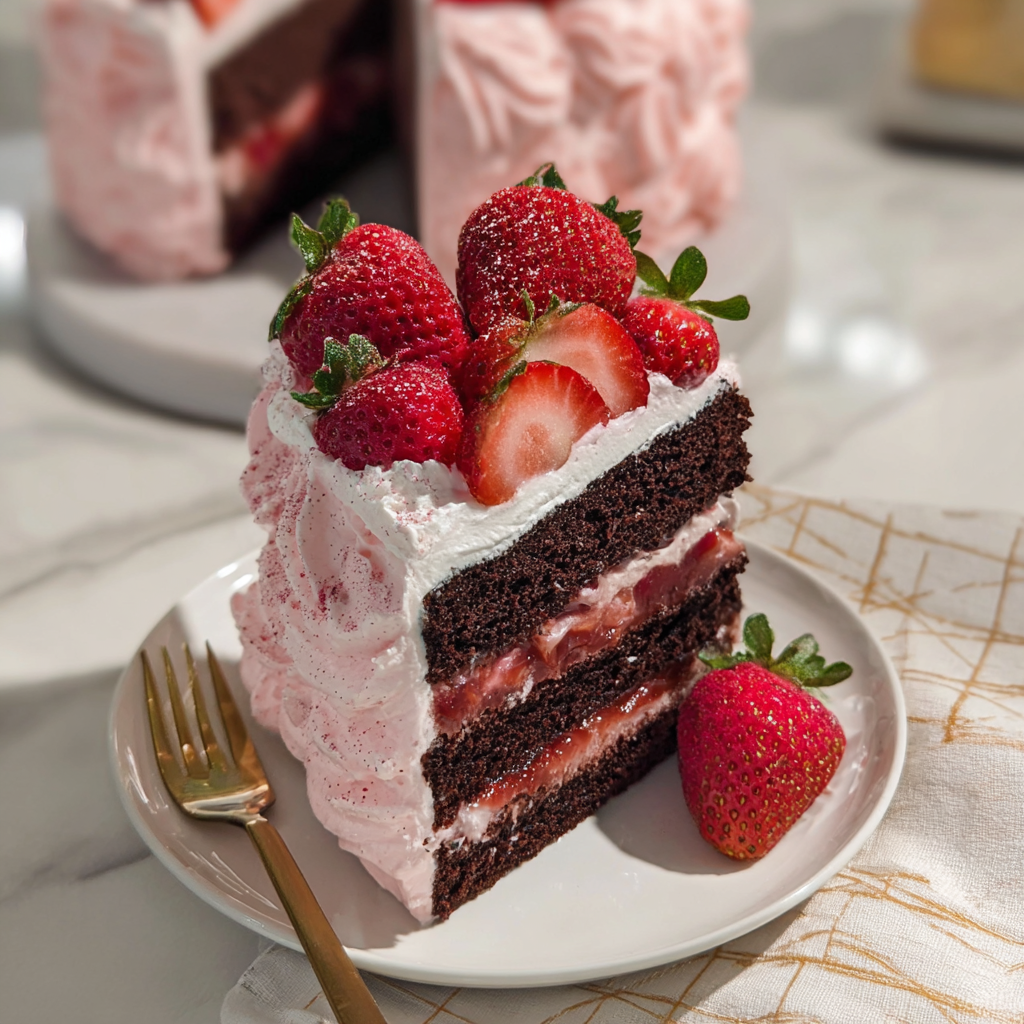
    Star rate this recipe and join our cozy healthy baking family.

  • Easy One Pot Chicken and Rice Recipe

    Easy One Pot Chicken and Rice Recipe

    The first time I made one pot chicken and rice in one pot, I tipped the dry rice straight in before the broth. Just right on top of the raw chicken. Jake stared at it for five seconds and said, very quietly, “is that right?” It was not right. I fished out what I could, started over, and produced something so good Emma declared it her birthday dinner request. In October. For March.

    Why This Recipe Is Special

    One pot dinners get a bad reputation for being boring, and I think that is deeply unfair. This one earns its place at the table every single week. The chicken thighs get seared first so the skin turns golden and stays that way. The rice toasts in the leftover drippings before the broth even goes in, picking up all that savory chicken fat flavor. The whole thing simmers together into something deeply satisfying, a proper healthy meal that tastes like you were in the kitchen for hours, even though you genuinely were not.

    How To Make One Pot Chicken and Rice

    After my dry-rice disaster, I started making this on rotation, which means both kids have now watched me make it enough times to have opinions. Emma thinks I add too much garlic. Jake thinks I add too little. They have been having this argument for two months, and I have been quietly keeping the garlic exactly where I like it, which is firmly in the middle. The recipe has become a kind of Thursday night ritual: I sear the chicken, Jake sets the table without being asked because he knows dinner is coming, and Emma hovers near the pot asking when it will be ready approximately every four minutes.

    Main Ingredients

    • 6 bone-in, skin-on chicken thighs: Thighs over breasts every time. They stay juicy and flavorful through the long simmer.
    • 1 1/2 cups long-grain white rice: Rinsed until the water runs clear. Removes excess starch for separate, fluffy grains.
    • 2 1/2 cups low-sodium chicken broth: The flavor base. Low-sodium lets you control the salt level throughout.
    • 1 medium yellow onion, diced: Sautéed in the drippings after searing builds the whole flavor base.
    • 4 garlic cloves, minced: Jake says more; Emma says less; I say four is perfect, and I am the one cooking.
    • 1 tsp smoked paprika + 1 tsp cumin: The two spices that make this taste like something rather than just rice and chicken.
    • 1 tsp dried thyme + 1 bay leaf: Background herbs. You notice them more when they are missing.
    • Salt, pepper, and 1 tbsp olive oil: Season the chicken generously before searing. This is where the flavor really starts.
    • Juice of half a lemon: Squeezed in right at the end. It lifts the whole dish and makes it taste finished.
    • Fresh parsley, roughly chopped: For garnish and freshness. Emma picks hers off, but it looks beautiful.

    Step-by-Step Instructions

    Step 1: Season and Sear the Chicken

    • Pat chicken thighs completely dry with paper towels moisture is the enemy of a golden sear.
    • Season generously on both sides with salt, pepper, smoked paprika, and cumin.
    • Heat olive oil in a large heavy-bottomed pot or Dutch oven over medium-high heat until shimmering.
    • Add chicken skin-side down and sear undisturbed for 5 to 6 minutes until deeply golden; flip and sear 3 more minutes, then remove to a plate it will finish cooking in the pot.

    Step 2: Build the Flavour Base

    • Reduce heat to medium and add diced onion directly to the same pot, scraping up any golden bits from the bottom.
    • Cook the onion for 4 to 5 minutes until soft and translucent, stirring occasionally.
    • Add minced garlic and dried thyme and stir for 60 seconds until fragrant; do not let the garlic brown.
    • Add the rinsed rice and stir to coat every grain in the drippings, toasting for 2 minutes until it smells nutty.

    Step 3: Add the Broth and Simmer

    • Pour in the chicken broth, add the bay leaf, stir to combine, and taste for seasoning; adjust salt now before the lid goes on.
    • Nestle the seared chicken thighs skin-side up on top of the rice, pressing them in slightly so they sit level.
    • Bring to a gentle boil, then reduce heat to low and cover with a tight-fitting lid.
    • Simmer undisturbed for 25 minutes; do not lift the lid, the steam is doing the work, and every peek costs you fluffy rice.

    Step 4: Rest, Finish, and Serve

    • Remove from heat and leave the lid on for a full 5 minutes — the rice finishes absorbing moisture and the chicken finishes cooking through.
    • Remove and discard the bay leaf, then squeeze the lemon juice over everything.
    • Check that the chicken has reached 165°F internally; if not, cover and return to low heat for 5 more minutes.
    • Scatter with fresh parsley and serve directly from the pot one less dish, maximum satisfaction.

    One Pot Chicken and Rice Variations

    The Lemon Herb Version (Emma’s “Can We Have the Green One”)

    Emma went through a phase of requesting “the green one” every single week, and this is it. Add a full teaspoon of lemon zest to the broth along with a handful of fresh spinach stirred in right at the end when you lift the lid for the rest. Swap the cumin for dried oregano and use vegetable broth for a slightly lighter result. The spinach wilts into the rice, and the whole pot turns this beautiful pale green that Emma finds deeply satisfying. So do I, honestly.

    The Tomato and Olive (Jake’s “Make It Spanish, Mum” Request)

    Jake became obsessed with Spanish rice after a school trip project, and this is what came out of that obsession. Add one 14-ounce can of diced tomatoes when you pour in the broth, reduce the broth by half a cup to compensate for the extra liquid, and stir in a handful of pitted Kalamata olives and a pinch of saffron if you have it. The rice turns deep rust-red, and the whole thing tastes bold and rich and a little smoky. Jake considers this his personal contribution to the family recipe collection. I let him have that.

    The Turmeric and Coconut Milk (My Thursday Treat Version)

    On Thursday evenings when I want something that feels more interesting without doing more work, I swap half the chicken broth for full-fat coconut milk, stir in a teaspoon of ground turmeric with the spices, and add a thumb of grated ginger with the garlic. The rice turns a gorgeous golden yellow, and the whole dish tastes creamy and fragrant. Serve with a wedge of lime instead of lemon and scatter with fresh coriander. Both kids eat it without complaint, which in this house is a very high bar.

    Substitutions

    • Chicken thighs → Bone-in drumsticks work exactly the same way. Boneless skinless thighs also work; skip the searing step and just brown briefly, they cook faster, so check at 20 minutes. Avoid chicken breasts; they dry out before the rice is done.
    • Long-grain white rice → Basmati rice is excellent and gives a slightly more aromatic result. Brown rice needs an extra half cup of broth and 15 more minutes of cooking time. Do not substitute short-grain or arborio; they turn too starchy in this method.
    • Chicken broth → Vegetable broth makes this surprisingly good and works especially well with the turmeric-coconut variation. Water can be used in a pinch, but you will need to season much more aggressively to compensate.
    • Smoked paprika → Sweet paprika works fine and gives a milder result. For more warmth, swap for mild chili powder. The smoked version is worth having in your spice rack, though it shows up in so many Easy Recipes With White Rice and transforms the flavor profile of even the simplest dish.

    Equipment

    • Large Dutch oven or heavy-bottomed pot (at least 5-quart)
    • Tight-fitting lid
    • Tongs
    • Wooden spoon or spatula
    • Sharp knife and cutting board
    • Measuring cups and spoons
    • Instant-read thermometer
    • Fine mesh strainer (for rinsing rice)

    Storage Tips

    Make Ahead

    • Season the chicken and prep all vegetables up to 24 hours ahead; store covered in the fridge.
    • The entire cooked dish holds well, and the flavor deepens noticeably by the next day.
    • Make the full pot on Sunday and portion it for weekday lunches; it holds beautifully for 4 days.

    Refrigerator

    • Store cooled leftovers in an airtight container in the fridge for up to 4 days.
    • Keep chicken and rice together; the rice absorbs the juices overnight and gets even better.
    • The rice will firm up when cold; a splash of broth or water when reheating brings it right back.

    Freezing

    • Cool completely before freezing freeze in individual portions for easy weeknight meals.
    • Keeps well for up to 3 months; the chicken holds better than the rice texture-wise.
    • Thaw overnight in the fridge for best results; avoid microwaving from completely frozen.

    Reheating

    • Add 2 to 3 tablespoons of water or broth per portion before reheating to restore moisture.
    • Stovetop over low heat, covered for 8 minutes, is the best method: gentle and even.
    • Microwave works in a pinch: cover loosely, 2 minutes at 70% power, and stir halfway through.

    Family Secret Worth Sharing

    The single biggest upgrade I ever made to this recipe was toasting the rice. Before I learned to do this, my one-pot chicken and rice was fine pleasant, filling, totally fine. The moment I started stirring the rinsed rice through those chicken drippings for two full minutes before the broth went in, everything changed. The grains pick up all that rendered fat and golden fond from the bottom of the pot, and what comes out the other end tastes genuinely complex and savory rather than just starchy and neutral.

    My mum never toasted her rice. She would pour it straight in, and the result was perfectly acceptable. But one evening I watched a restaurant cook on television spend what looked like an embarrassingly long time just stirring dry rice in a hot pan, and something clicked. Two minutes of patience before the liquid goes in is worth more than any extra ingredient you could add. I have told Jake and Emma this. They roll their eyes. They will understand one day when they are making this for their own families and everything clicks.

    Troubleshooting FAQs

    My rice came out mushy. What went wrong?
    Almost always one of three things: too much liquid, the lid was not tight enough, or the heat was too high during the simmer. Check your measurements carefully; even a quarter cup extra of broth makes a difference. Make sure the lid seals properly and that your simmer is genuinely low, not medium-low pretending to be low.

    The rice is cooked, but the chicken is not done yet. What do I do?
    Pull the chicken out and cover the rice to keep it warm. Place the chicken in a hot oven at 400°F for 8 to 10 minutes to finish cooking through. This is almost always a lid seal issue or a heat issue next time go slightly lower and slightly longer. An instant-read thermometer is genuinely worth having for exactly this situation.

    The rice stuck to the bottom of the pot. Is it ruined?
    Not at all that crispy layer on the bottom is actually prized in many cultures, and it tastes incredible. Scrape it up and serve it. If it is more burnt than crispy, the heat was too high; next time use a lower simmer and a heavier pot if you have one.

    Can I use chicken breasts instead of thighs?
    Technically yes, but I would steer you away from it. Breasts cook faster and have less fat, so they tend to dry out before the rice finishes. If you really prefer breasts, use boneless, skinless ones and check them at the 18-minute mark; pull them out at 165°F and let the rice finish covered without them.

    The Pot That Turned Thursday Into Our Favourite Night

    There is something about a one-pot dinner that changes the whole atmosphere at the table. No separate sides to juggle, no four different things to time, no pile of dishes at the end. Just one pot that comes to the table steaming and golden and smells like someone put real effort in, even when you made the whole thing during homework hour. This is what I mean when I talk about a healthy meal that actually gets made—not the aspirational Tuesday salad that becomes Wednesday takeout, but the Thursday pot that you come home to making again and again.

    Emma eats two full bowls and picks the parsley off the top of both. Jake asks every single time if there is more chicken, as though the pot has a secret compartment I have been hiding from him. And I sit there at the end of the week feeling genuinely like I got dinner right. It is such a small thing and such a big thing at the same time.

    Whether this becomes your Sunday meal prep anchor, your weeknight fallback, or the first one of your Easy Recipes With White Rice that the whole family agrees on, I hope it gives you the same Thursday feeling it gives us. Make it once, and it will be in permanent rotation before the week is out.

    Don’t forget to snap a picture of your chicken and rice before that first scoop disappears from the pot (trust me, it will disappear quickly!), and leave a rating below. We’d love to hear how this chicken and rice recipe becomes part of your family weeknight story.

    Star rate this recipe and join our cozy weeknight cooking family.

  • Easy Brown Butter Brookies Recipe

    Easy Brown Butter Brookies Recipe

    The first time I made brown butter brookies, I burned the butter so badly Jake came running in yelling, “MOM IS IT A FIRE?” Emma stood in the doorway holding her stuffed rabbit, looking genuinely concerned. I started over and burned it again during a homework argument. Third try? The most extraordinary thing I have ever pulled from our oven. The smoke alarms were honestly worth it.

    Why This Recipe Is Special

    A brookie is exactly what it sounds like: a brownie and a cookie baked into one impossibly delicious bar. But this version is not just any brookie. The butter gets browned first, filling the kitchen with that warm, nutty, almost caramel smell that makes both kids materialize at the counter without being asked. The layers are built in a specific order so neither one overbakes you get a genuinely fudgy brownie bottom and a genuinely chewy cookie top in the same bite. It is a completely unreasonable amount of joy in one pan.

    How To Make Brown Butter Brookies

    By my third attempt, I had both kids stationed at the stove with me. Jake was on official brown-butter watch; his job was to tell me the moment the foam settled and he could see the golden bits forming at the bottom. He took this responsibility extremely seriously. Emma pressed the first layer of cookie dough into the pan and kept sneaking chips from the bowl. “That is a tax,” she told me, completely straight-faced. Nine years old, going on forty-five. The whole kitchen smelled like a bakery, and even the process was worth it.

    Main Ingredients Brownie Batter

    • 10 tbsp salted butter: Browned in a light-colored pan until nutty and golden. The whole flavor foundation.
    • 3 tbsp vegetable oil: Keeps the brownie fudgy even after cooling. Do not skip.
    • 4 oz semi-sweet chocolate, finely chopped: Melted directly into the warm brown butter.
    • 1/4 cup cocoa powder: Used alongside the melted chocolate for extra depth.
    • 3 large eggs, room temperature: Whisked with sugar until fully dissolved for that shiny crust.
    • 1 cup granulated + 1/4 cup powdered sugar: The combo creates the gorgeous, paper-thin, shiny brownie top.
    • 2 tsp vanilla extract + 1/2 tsp salt: Real vanilla only.
    • 1 cup all-purpose flour Spooned and leveled, never scooped.

    Main Ingredients Cookie Dough

    • 3/4 cup salted butter, melted: Melted, not browned; this is what makes the cookies chewy.
    • 3/4 cup each of granulated and brown sugar: Brown sugar keeps them soft and chewy for days.
    • 2 large eggs + 2 tsp vanilla, room temperature: Room-temp eggs mix in smoothly.
    • 2 1/4 cups flour + 1 tsp baking soda + 1/2 tsp salt: Fold until just combined.
    • 2 cups semi-sweet chocolate chips: 1.5 cups in dough, rest scattered on top before baking.

    Step-by-Step Instructions

    Step 1: Make the Cookie Dough

    • Melt the butter, then whisk in both sugars, both eggs, and vanilla until smooth.
    • Stir in the flour, baking soda, and salt until just combined; do not overwork.
    • Fold in 1 1/2 cups of chocolate chips, keeping the rest for topping.
    • Divide the dough in half, press one half into a parchment-lined 9×13 to form a sheet, carefully lift it out intact, and set it aside; this is your middle layer.

    Step 2: Brown the Butter and Build the Brownie Batter

    • Melt 10 tbsp butter in a light-colored saucepan over medium heat, stirring constantly, until it foams, the foam settles, and golden-brown specks form on the bottom with a nutty caramel aroma; then pull off heat immediately.
    • Whisk in chopped chocolate, vegetable oil, and cocoa powder until smooth, then cool 5 minutes.
    • In a separate large bowl, vigorously whisk eggs and granulated sugar for 2 full minutes until sugar dissolves, then whisk in powdered sugar, vanilla, and salt.
    • Fold the chocolate mixture into the egg bowl, then gently fold in the flour until no dry streaks remain.

    Step 3: Layer and Assemble

    • Preheat oven to 350°F (175°C) and line a fresh 9×13 pan with parchment, leaving an overhang on both long sides.
    • Spread half the brownie batter in an even layer across the bottom of the pan.
    • Lay the pre-formed cookie dough sheet directly on top of the brownie layer.
    • Spread the remaining brownie batter over the cookie layer, then drop the remaining cookie dough in small discs across the surface and scatter the reserved chocolate chips.

    Step 4: Bake, Rest, and Slice

    • Bake for 26 to 30 minutes: edges set, top matte not shiny, toothpick has moist crumbs, not wet batter.
    • Do not overbake; they finish setting as they cool and will look slightly underdone when right.
    • Cool in the pan for at least 30 minutes before lifting out using the parchment handles.
    • For the cleanest slices, cool fully and wipe the knife between cuts or cut warm and embrace the glorious mess.

    Brown Butter Brookies Variations

    The Salted Caramel Drizzle (Emma’s “Make It Pretty” Edition)

    Emma’s position is that everything is improved by being drizzled on. She is mostly correct. Drizzle the cooled brookies with salted caramel sauce and a scatter of flaky sea salt before slicing. The caramel soaks into the top cookie layer, and the salt cuts through all that chocolate richness in a way that makes your eyes close involuntarily. Emma presents these with the energy of someone accepting an award.

    The Peanut Butter Swirl (Jake’s Non-Negotiable Request)

    Jake decided that all chocolate things are better with peanut butter, and he is simply not wrong. After pouring the top brownie layer, drop five or six large spoonfuls of peanut butter across the surface and drag a butter knife through in slow, lazy swirls. The peanut butter bakes in and creates rich, salty ribbons through the fudgy layer. Jake calls this “the best thing in our house,” and I choose not to take that personally.

    The White Chocolate and Raspberry (My Quiet Afternoon Version)

    When I get the kitchen to myself, rare and precious, I swap half the semi-sweet chips for white chocolate and press eight or ten fresh raspberries into the top layer before baking. They create little jewel-like pockets of tart fruit against the dark chocolate richness. The fanciest thing this kitchen has produced, and it takes no extra effort at all.

    Substitutions

    • Salted butter → Unsalted works in both layers; add an extra pinch of salt to each. The brown butter flavor comes from the browning process, not the salt.
    • Semi-sweet chocolate → Dark chocolate (60 to 70% cacao) gives a more intense, less sweet brownie. Milk chocolate makes the whole bar sweeter.
    • Vegetable oil → Any neutral oil works: sunflower, canola, or light coconut. Avoid olive oil. Do not leave it out; it keeps the brownie fudgy rather than cakey.
    • All-purpose flour → A 1:1 gluten-free baking flour works in both layers with no other changes. Tested for a friend, the brookies disappeared in under an hour.

    Equipment

    • 9×13 inch baking pan
    • Parchment paper
    • Light-coloured saucepan (essential for browning butter)
    • Two large mixing bowls
    • Whisk
    • Rubber spatula
    • Kitchen scale (highly recommended)
    • Oven thermometer
    • Cooling rack
    • Sharp knife for slicing

    Storage Tips

    Make Ahead

    • Make both batters and the pre-formed cookie sheet up to 24 hours ahead, cover, and refrigerate.
    • Let everything come to room temperature for 20 minutes before assembling and baking.
    • The fully assembled unbaked pan can be refrigerated overnight and baked fresh the next day.

    Refrigerator

    • Store cooled sliced bars in an airtight container at room temperature for 3 to 4 days.
    • If your kitchen runs warm, the fridge extends freshness to 5 to 6 days; bring it to room temperature before eating.
    • A 10 to 15 second microwave warm-up restores that just-baked fudgy texture beautifully.

    Freezing

    • Freeze fully cooled individual bars on a baking sheet first, then transfer to a zip-lock freezer bag.
    • Keeps well for up to 2 months; the brownie layer freezes particularly well.
    • Thaw at room temperature for an hour or warm gently in the microwave from frozen.

    Reheating

    • Microwave a single bar for 15 to 20 seconds; it comes back to life spectacularly.
    • Oven: place bars at 300°F for 6 to 8 minutes, covered loosely with foil.
    • Serve warm with vanilla ice cream if you want to cause a scene in your own kitchen.

    Family Secret Worth Sharing

    Brown butter terrified me for years. It goes from perfect to ruined so fast that the first two times I made these, I either pulled it too early or went two seconds too far into a smoky kitchen and two alarmed children. The fix my mom finally showed me: use a light-colored pan so you can actually see the color change. Dark nonstick hides everything, and that is how you end up overcooking it every time.

    Watch for three stages: first it foams, then the foam settles, then tiny golden-brown specks appear on the bottom, and it smells like warm hazelnuts and caramel. That third-stage moment five seconds after the smell hits you is when you pull it off the heat. Jake now does brown-butter watch for me every single time and has not let it burn once. A nine-year-old can be a better brown-butter guardian than you would ever expect.

    Troubleshooting FAQs

    My brookies came out cakey instead of fudgy. What happened?
    Almost certainly overbaked. The centers should look barely set when you pull them; they finish cooking from residual heat. A toothpick with wet batter is too much; moist crumbs are exactly right. Set a timer for 26 minutes and check from there.

    The layers mixed together when I assembled. How do I keep them separate?
    The key is the pre-formed middle cookie layer. Press it into parchment first, lift the whole sheet out, and lay it on top of the brownie batter. Also let the butter mixture cool 5 minutes before folding in the flour so the batter is not too warm at assembly.

    My brown butter keeps burning before I reach the nutty stage. Any tips?
    Medium heat and a light-colored saucepan. Stir or swirl constantly. Once you smell hazelnut-caramel, you are either there or one second away; pull the pan immediately.

    Can I make these in a smaller pan?
    Yes, halve the entire recipe and bake in a 9×9 inch pan. Layers will be thicker, so check at 28 minutes. The smaller batch disappears at exactly the same speed, just so you know.

    The Bake That Made the Whole Burnt Butter Saga Worth It

    Last weekend I pulled a fresh pan of brownies from the oven and set it on the counter to cool. I turned around for four minutes to answer the door. When I came back, Jake had removed a corner piece, the whole corner, clean, and was eating it standing at the counter, looking like he had done absolutely nothing wrong. Emma was watching from the doorway. “He said it was quality control,” she reported, very helpfully.

    This is what easy family meals look like in this house: batter-covered counters, a brown-butter guardian who eats the evidence, and a kitchen that smells like the best possible version of a Saturday. If you are looking for comfort food recipes that feel genuinely special, something that makes even a regular Tuesday feel worth the effort, this is the pan right here.

    Whether you bake these as a bake sale hero, a birthday treat, a school-night cheer-up, or just as your new favorite breakfast ideas that nobody in the family will technically argue with, these brown butter brookies will earn a permanent place in your life. I have no doubt about that whatsoever.

    Don’t forget to snap a picture of your brown butter brookies before that first bar disappears (trust me, it will disappear quickly!), and leave a rating below. We’d love to hear how these brown butter brookies become part of your family baking story.
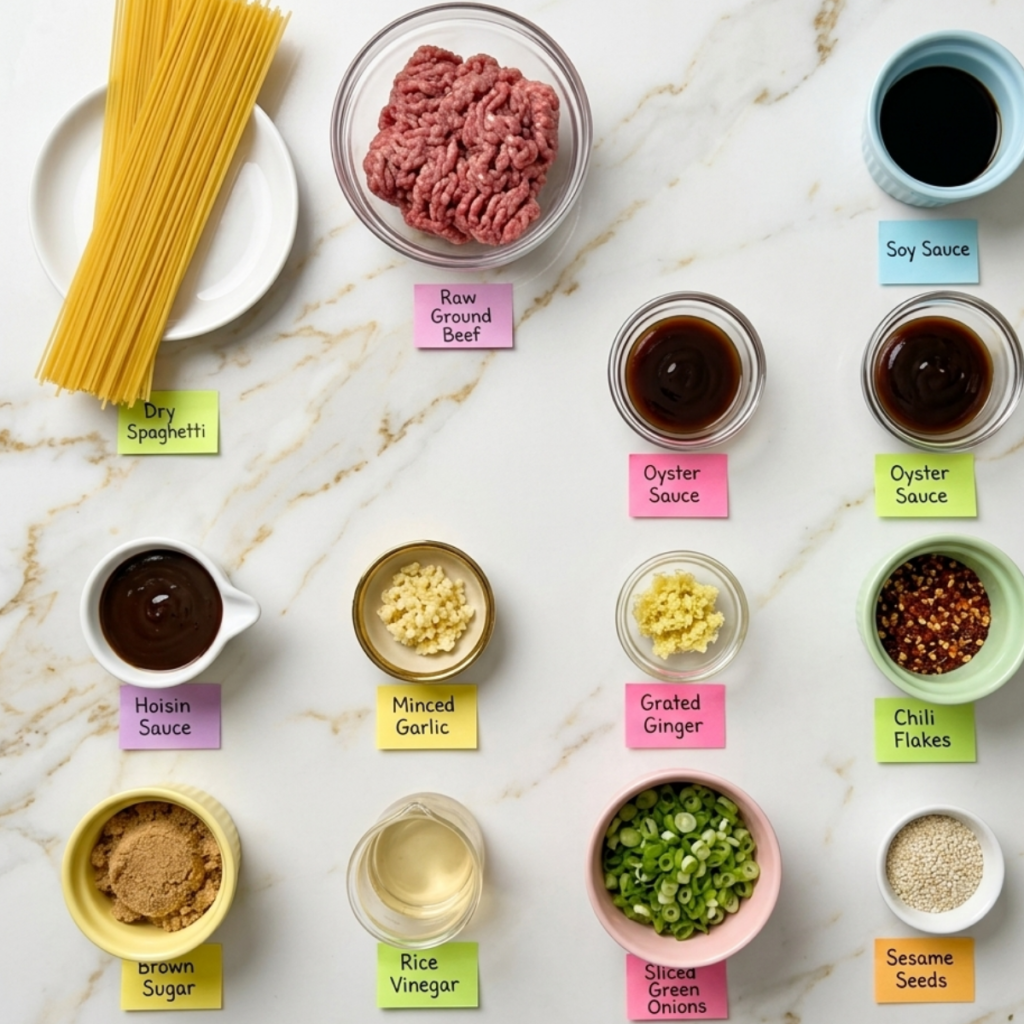
    Star rate this recipe and join our cozy home baking family.

  • Easy Hobo Casserole Ground Beef Recipe

    Easy Hobo Casserole Ground Beef Recipe

    The first time I made this casserole ground beef dish, I forgot to drain the beef. By the time it came out of the oven, it was basically soup. Jake looked at it, turned to Emma, and whispered, “don’t.” She nodded very seriously. I drained it, started over, and, thirty minutes later, we had the coziest, most forgiving dinner I’d made in weeks. Never skipping that step again.

    Why This Recipe Is Special

    There is something about the name “hobo casserole” that my kids find absolutely hilarious. Jake calls it the “cowboy dinner,” and Emma insists it sounds like something from a fairy tale. But the name is exactly right: this is a no-fuss, everything-goes-in-one-dish kind of meal that was built for real life. It’s cheap, it’s filling, it layers in under 20 minutes, and it makes the whole house smell like someone actually tried. That’s a big deal on a Wednesday.

    How To Make Hobo Casserole Ground Beef

    After the soup disaster of my first attempt, I made this again the very next evening with both kids at the counter helping. Emma took charge of slicing the potatoes with supervision and a very serious look on her face while Jake seasoned the beef with what I can only describe as enthusiasm. He used about twice the garlic powder I asked for. I caught him mid-shake and grabbed his wrist, and he just grinned at me. You know what? It was delicious. We’ve made it with extra garlic ever since.

    Main Ingredients

    • 1.5 lbs ground beef (80/20) The fat ratio keeps it moist. Drain after browning, always.
    • 4 medium russet potatoes Sliced thin at 1/4 inch so they cook through evenly.
    • 1 medium yellow onion Thinly sliced; softens into the layers as it bakes.
    • 2 cups frozen mixed vegetables Corn, peas, and carrots. No thawing needed.
    • 1 can (10.5oz) cream of mushroom soup The sauce. Binds everything and keeps it from drying out.
    • 1/2 cup beef broth Thins the soup so it can seep through every layer.
    • 1 tsp garlic powder Or two, per Jake’s standing recommendation.
    • 1 tsp onion powder, salt, and pepper Season the beef well before it goes into the dish.
    • 1.5 cups shredded cheddar cheese Goes on top for the last 12 to 15 minutes. Bubbly and golden.
    • 1 tbsp olive oil For browning the beef in the skillet.

    Step-by-Step Instructions

    Step 1: Brown the Beef

    • Heat olive oil in a skillet over medium-high heat until shimmering.
    • Add ground beef, garlic powder, onion powder, salt, and pepper.
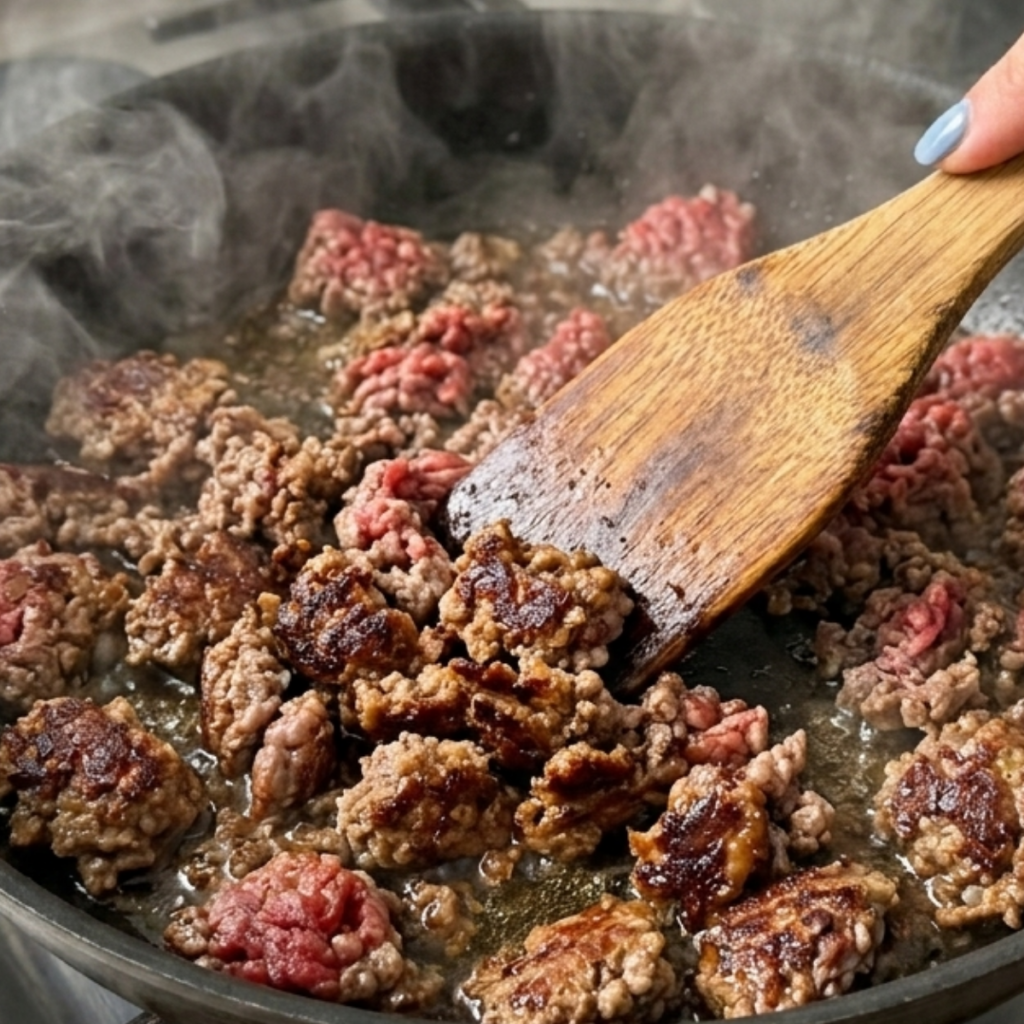
    • Break it apart and cook until no pink remains, about 7 to 8 minutes.
    • Drain the fat completely; this step is non-negotiable; ask me why.

    Step 2: Prep and Layer

    • Preheat oven to 375°F (190°C) and grease a 9×13 inch baking dish.
    • Spread sliced potatoes in an even layer across the bottom of the dish.
    • Layer sliced onions over the potatoes, then scatter the frozen vegetables on top.
    • Spoon the drained ground beef evenly over the vegetable layer.

    Step 3: Make the Sauce and Cover

    • Whisk cream of mushroom soup and beef broth together until smooth and pourable.
    • Pour the sauce evenly over the entire casserole it will settle through the layers.
    • Cover the dish tightly with aluminum foil, sealing the edges well.
    • Bake covered for 40 minutes until potatoes are fork-tender throughout.

    Step 4: Cheese and Finish

    • Remove the foil and scatter shredded cheddar evenly across the top.
    • Return to the oven uncovered for 12 to 15 minutes until cheese is bubbly and golden.
    • Let the casserole rest for 8 to 10 minutes before serving it; slices much cleaner.
    • Garnish with fresh parsley or sliced green onions if you’re feeling fancy.

    Hobo Casserole Ground Beef Variations

    The Cowboy Version (Jake’s Official Endorsement)

    Jake lobbied hard for this one. Replace the cream of mushroom soup with cream of cheddar, swap the mixed vegetables for a drained can of black beans and a cup of frozen corn, and add a teaspoon of smoked paprika and a pinch of cumin to the beef. Top with pepper jack cheese instead of cheddar and finish with pickled jalapeños right after it comes out. He calls it “the real one.” Honestly, he’s not wrong.

    The Creamy Mushroom and Thyme (Emma’s “Fancy Dinner” Pick)

    Emma decided this casserole needed “herbs and sophistication.” She’s nine. But she was onto something: add a cup of sliced fresh mushrooms on top of the vegetable layer, mix a teaspoon of fresh thyme leaves and a tablespoon of Worcestershire sauce into the soup mixture, and top with a gruyère and mozzarella blend. It tastes like something from a French grandmother’s kitchen and requires almost no extra effort.

    The Double Potato and Velveeta Melt (The Crowd Version)

    When I need to feed more people at a potluck, a neighbor who just had a baby, or a weekend when the kids have friends over, I double the potato layer and use cubed Velveeta instead of shredded cheddar. It melts into an impossibly smooth, glossy blanket that makes everyone go quiet for a moment when it hits the table. Not glamorous. Absolutely irresistible.

    Substitutions

    • Ground beef → Ground turkey works well and cuts the fat significantly. Season it generously since it’s milder. Ground chicken is also great; just add a pinch of smoked paprika for depth.
    • Russet potatoes → Yukon Golds are creamier and hold their shape better when sliced thin. Sweet potatoes also pair beautifully with the savory beef.
    • Cream of mushroom soup → Cream of chicken is a seamless replacement. For from-scratch, a quick béchamel with a splash of Worcestershire and beef broth takes only 5 extra minutes.
    • Cheddar cheese → Colby Jack, mozzarella, or smoked gouda all melt beautifully. A mozzarella and cheddar blend gives maximum pull.

    Equipment

    • 9×13 inch baking dish
    • Large skillet or frying pan
    • Sharp knife and cutting board
    • Mandoline slicer (optional)
    • Colander or slotted spoon
    • Small mixing bowl
    • Whisk or fork
    • Aluminum foil
    • Oven mitts
    • Spatula for serving

    Storage Tips

    Make Ahead

    • Assemble the entire casserole up to 24 hours ahead, cover tightly, and refrigerate unbaked.
    • Pull it out 20 minutes before baking to take the chill off for even cooking.
    • Add 5 to 8 extra minutes of covered bake time if going straight from fridge to oven.

    Refrigerator

    • Store leftovers covered tightly in the baking dish or an airtight container.
    • Keeps well in the fridge for up to 4 days; the flavor deepens overnight.
    • The potatoes firm up cold, making clean individual portions easy to reheat.

    Freezing

    • Freeze in individual portions in freezer-safe containers for up to 3 months.
    • Thaw overnight in the fridge before reheating; do not microwave from frozen.
    • Potato texture softens slightly after freezing, but flavor is fully unchanged.

    Reheating

    • Oven is best: cover with foil and reheat at 325°F for 20 minutes until warmed through.
    • Microwave individual portions for 2 to 3 minutes, covered loosely, checking halfway.
    • Add a splash of beef broth before reheating to keep the sauce from drying out.

    Family Secret Worth Sharing

    The single thing that took this casserole from good to absolutely cannot-stop-eating is resting it after it comes out of the oven. I know. I know the smell is incredible, and everyone is standing in the kitchen hovering. I have been there. But give it a full eight to ten minutes before you cut into it.

    What happens during that rest is everything: the sauce thickens slightly, the layers compress and hold together, and the cheese sets from molten lava to that perfect pull. The first time I waited properly, Emma watched me slice it and said, very quietly, “oh that looks like a real restaurant.” From a nine-year-old who considers chicken nuggets gourmet, I’ll take it. Rest the casserole. Every single time.

    Troubleshooting FAQs

    My potatoes are still hard even after the full bake time. What went wrong?
    Two things cause the problem: slices that are too thick or a dish that wasn’t sealed well enough with foil. Make sure your slices are no thicker than 1/4 inch and crimp your foil tightly. Still firm at 40 minutes? Add another 10 covered before checking again.

    The casserole came out watery. How do I fix it?
    Undrained beef fat or icy frozen vegetables are usually the culprits. Drain the beef thoroughly; press it with a paper towel in the colander. For very icy vegetables, spread them on paper towels for 5 minutes first. The casserole should be saucy, not soupy.

    Can I make this in a slow cooker instead?
    Absolutely. Layer everything the same way in your slow cooker insert, pour the sauce over, and cook on LOW for 6 to 7 hours or HIGH for 3 to 4 hours. Add shredded cheese in the last 20 minutes with the lid slightly ajar. You won’t get the golden bubbly top, but the flavor is just as delightful.

    Can I double this recipe for a larger crowd?
    Yes, easily. Use two 9×13 dishes rather than one deep dish. Keep the bake time the same and check potato tenderness at 40 minutes. Both dishes can bake on separate oven racks; simultaneously rotate them halfway through.

    The Dinner That Made Tuesday Feel Like Something

    There’s a specific kind of magic that happens when a casserole comes out of the oven on a school night. The foil comes off, the steam rises, the cheese is bubbling at the edges, and suddenly everyone is in the kitchen without being called. Jake already has a fork in his hand. Emma is trying to claim the corner piece, which she insists has “the best cheese ratio.” She is absolutely correct about that.

    This is exactly the kind of thing I mean when I talk about effortless family meals that actually feel like an event. You don’t need a special occasion for a dinner this good. A Tuesday, a week that wiped you out, some ground beef, and a bag of potatoes—that’s all this needs. This comfort food recipe earns a permanent place in the rotation, the kind you stop looking up because you know it by heart.

    Whether it becomes your Friday cozy dinner idea or your default “I cannot think right now” weeknight hero, I hope it brings the same quiet happiness to your table that it brings to ours. Put it on the list. You’ll make it again the following week.

    Don’t forget to snap a picture of your hobo casserole ground beef before that first scoop disappears (trust me, it will disappear quickly!), and leave a rating below. We’d love to hear how this casserole ground beef recipe becomes part of your weeknight dinner story.
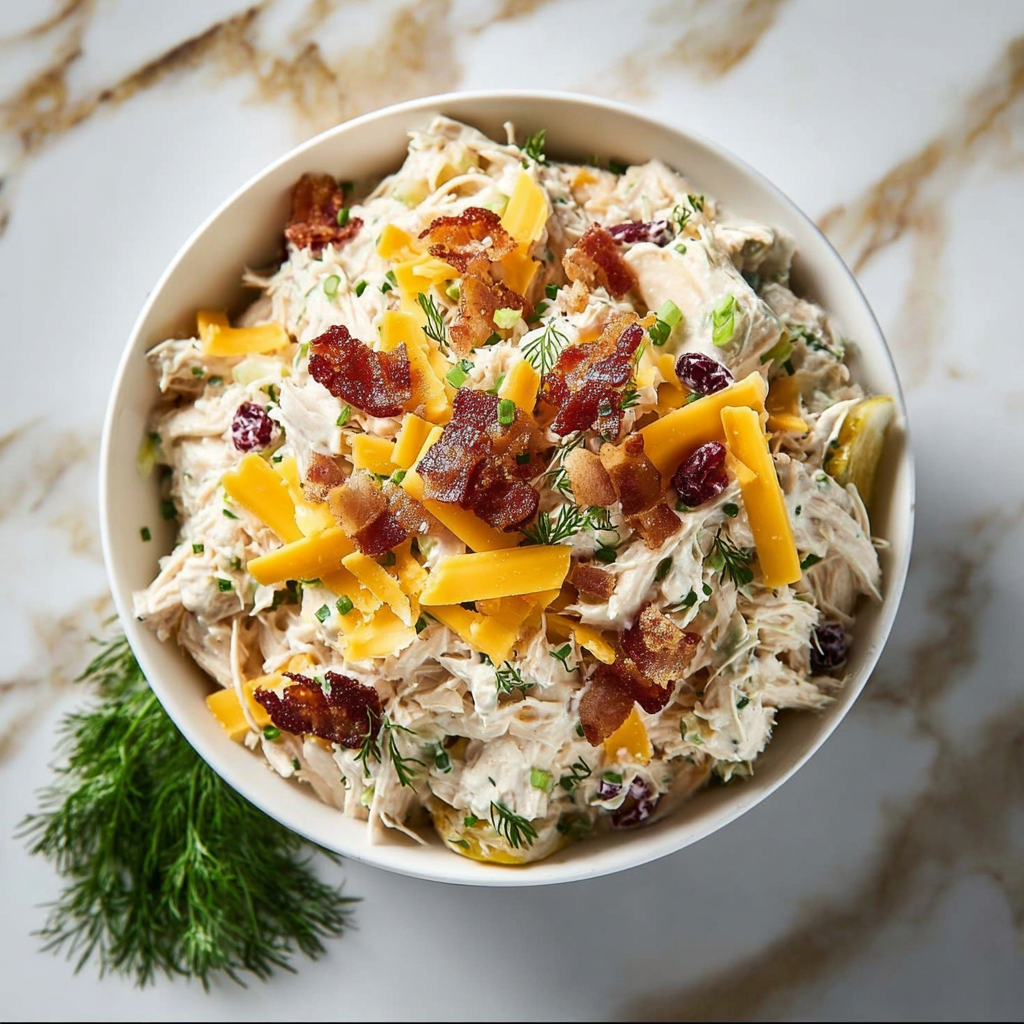
    Star rate this recipe and join our cozy weeknight cooking family.

  • Best Classic Banana Bread Recipe

    Best Classic Banana Bread Recipe

    The first time I made this banana bread recipe, I forgot the sugar. All of it. Emma took one polite bite, set the slice back down, and said, “Mama, I think it’s broken.” Jake just stared at it like I’d committed a crime. I laughed until I cried, tossed the loaf, and started over that same afternoon. That humiliating little moment gave us the best kitchen memory we own.

    Why This Recipe Is Special

    This isn’t a recipe I found in a magazine. It’s one I rebuilt from scratch twice in a real kitchen with two opinionated kids climbing my counters. It comes together in one bowl, uses bananas that are basically beyond saving, and fills your whole house with that warm, brown-butter-and-caramel smell that makes everyone appear from nowhere. It’s the kind of bake that turns an ordinary Tuesday into something worth remembering.

    How To Make Banana Bread

    My second attempt went smoother until Jake decided to “help” by mashing the bananas with his fist. Not a fork. His fist. There was a banana on the ceiling. I honestly do not know how. Emma stood at the edge of the kitchen in her socks saying “this is fine,” like a tiny disaster reporter. We wiped everything down, fished a chunk of banana off the light fixture, and finished the batter together. That loaf? Perfect. Golden, moist, and sweet in all the right ways. I never made it without at least one helper after that.

    Main Ingredients

    • 3 very ripe bananas: The blacker the peel, the sweeter and more flavorful. Don’t skip the ripeness.
    • 1/3 cup melted butter (75g): Brown it for 3 extra minutes if you want a nutty, caramel depth.
    • 3/4 cup granulated sugar (150g) Do not forget the sugar. Ask me how I know.
    • 1 large egg, room temperature. Room temperature blends smoother and gives a more even crumb.
    • 1 tsp pure vanilla extract Pure, not imitation; it shows in the flavor)
    • 1 tsp baking soda The lift. Makes sure your loaf rises evenly.
    • Pinch of salt Balances the sweetness and makes every bite pop.
    • 1 1/2 cups all-purpose flour (190g) Spooned and leveled — never packed or scooped.

    Step-by-Step Instructions

    Step 1: Prep & Preheat

    • Preheat your oven to 350°F (175°C) and position the rack in the center.
    • Grease a standard 9×5-inch loaf pan generously with butter or non-stick spray.
    • Line with a strip of parchment paper lengthwise, leaving an overhang on each side.
    • Set the pan aside; having it ready before mixing saves you a chaotic scramble.

    Step 2: Mash & Mix Wet

    • Peel and mash the ripe bananas in a large bowl until almost no lumps remain.
    • Stir in the melted butter until fully combined with the banana mash.
    • Add sugar, the beaten egg, and vanilla extract and stir until the mixture is smooth.
    • Sprinkle baking soda and salt directly into the wet mixture and stir to incorporate.

    Step 3: Add Flour & Fold

    • Add the flour all at once and fold gently with a rubber spatula, not a whisk.
    • Stir only until the flour disappears; a few streaks are fine, but overmixing is not.
    • Stop the moment the batter comes together; this step is what keeps the crumb tender.
    • Fold in any mix-ins now (chocolate chips, walnuts) with 3 to 4 gentle strokes.

    Step 4: Bake & Cool

    • Pour batter into the prepared pan and smooth the top with the spatula.
    • Bake for 55 to 65 minutes until a toothpick inserted in the center comes out clean.
    • Cool in the pan for 10 minutes, then lift out using parchment handles onto a rack.
    • Wait at least 20 minutes before slicing; the texture is absolutely worth it.

    Banana Bread Variations

    The Chocolate Chip Situation (Jake’s Request, Always)

    Jake’s standing order is chocolate chips. He folds in a generous 3/4 cup of semi-sweet chips after the flour is mixed and considers anything less a personal insult. The chocolate melts into dark little pockets that make every bite feel like a tiny event. Add a small sprinkle of flaky salt on top before baking and you’ll understand why this version disappears fastest.

    The Cinnamon Swirl (Emma’s “Fancy” Version)

    Emma’s version involves a swirl. She mixes 2 tablespoons of brown sugar with 1 teaspoon of cinnamon, pours half the batter in the pan, scatters the cinnamon sugar across it, tops it with the rest, and drags a butter knife through once. She calls it “the fancy one.” It smells like the best possible version of autumn and is genuinely stunning when sliced.

    The Walnut and Honey Loaf (My Version)

    When the kids are at school and I get the kitchen to myself, I fold in 1/2 cup of roughly chopped toasted walnuts and swap 2 tablespoons of sugar for warm honey. The walnuts add a satisfying crunch against that soft crumb, and the honey gives the top crust a slightly glossy, caramelized finish. Paired with a proper cup of tea, it is an absolutely unreasonable amount of comfort.

    Substitutions

    • Butter → Swap for an equal amount of melted coconut oil for a subtle tropical note, or use neutral vegetable oil for a completely unfussy dairy-free loaf. The texture stays moist either way.
    • Granulated sugar → Brown sugar works beautifully here and adds a deeper, almost toffee-like warmth to the crumb. Use the same amount. Coconut sugar is also particularly good if you want slightly less sweetness overall.
    • All-purpose flour → A 1:1 gluten-free baking flour blend works well, and I’ve tested it with excellent results. The loaf will be slightly denser but still delicious. Whole wheat flour can replace up to half the all-purpose for a nuttier flavor.
    • Egg → Use one flax egg (1 tablespoon ground flaxseed mixed with 3 tablespoons water, rested 5 minutes) as a reliable vegan replacement. The loaf will be slightly more dense but still hold together well.

    Equipment

    • 9×5-inch loaf pan
    • Large mixing bowl
    • Fork or potato masher
    • Rubber spatula
    • Measuring cups and spoons
    • Kitchen scale (optional)
    • Parchment paper
    • Cooling rack
    • Toothpick or skewer

    Storage Tips

    Make Ahead

    • Mix the dry ingredients and wet ingredients separately up to one day ahead.
    • Store the mashed banana mixture covered in the fridge overnight.
    • Combine and bake the next morning for effortlessly fresh bread.

    Refrigerator

    • Wrap the cooled loaf tightly in plastic wrap or store it in an airtight container.
    • Keeps in the fridge for up to 5 days without losing moisture.
    • Let slices come to room temperature for 15 minutes before serving or toast them.

    Freezing

    • Slice the fully cooled loaf and freeze slices individually on a baking sheet first.
    • Transfer frozen slices to a zip-lock bag; they keep well for up to 3 months.
    • Thaw overnight in the fridge or pop a frozen slice straight into the toaster.

    Reheating

    • Microwave a slice for 20 to 25 seconds for that fresh-baked warmth.
    • Toast in a toaster or toaster oven for a lightly crisp edge—highly recommended.
    • Reheat the whole loaf wrapped in foil at 300°F for 10 to 12 minutes.

    Family Secret Worth Sharing

    My mom always told me the secret to banana bread isn’t the recipe; it’s the patience. She meant the bananas; she’d leave hers on the counter until they were almost entirely black and the whole kitchen smelled like warm sugar. I thought she was just forgetful. She was not. Those deeply spotted bananas have more natural sugar than anything you’ll add from a bag, and that’s what gives the loaf its rich, almost caramel flavor. When Emma asks me now why we never throw away the “gross” bananas, I tell her exactly what my mum told me: the ugly ones are the sweetest. She rolls her eyes, but she always eats two slices.

    Troubleshooting FAQs

    Why is my banana bread still gooey in the middle even after the full bake time?
    Ovens run differently; this issue is the most common culprit. If your toothpick comes out wet, tent the loaf loosely with foil to prevent over-browning the top and bake for another 8 to 10 minutes. Every oven has its own personality, and banana bread is patient.

    My loaf sank in the middle. What did I do wrong?
    Usually, too much leavening, overmixing, or opening the oven door too early can cause problems. Stick to exactly 1 teaspoon of baking soda, fold your flour gently until just combined, and resist opening that oven door for the first 45 minutes. The batter needs that uninterrupted heat to set.

    Can I use frozen bananas instead of fresh ones?
    Absolutely frozen bananas are actually ideal for this recipe. Thaw them completely at room temperature, drain any excess liquid that collects, and mash as normal. They’re often even sweeter and softer than fresh overripe ones, and the result is a brilliant way to use whatever’s been sitting in your freezer since January.

    My banana bread is dry. How do I fix it next time?
    Dry banana bread is almost always from overbaking or using bananas that weren’t ripe enough. Pull the loaf out as soon as the toothpick comes out with just a few moist crumbs, not wet batter. And wait for those black-spotted bananas. They carry the moisture and sweetness that keep everything tender.

    The Loaf That Keeps Bringing Everyone Back to the Kitchen

    Last Sunday, Emma set the table without being asked. Jake poured the milk. I sliced the banana bread while it was still slightly warm, and we sat there together in that relaxed, quiet way that only happens when food is involved. It’s the kind of moment that those easy family meals and cozy dinner ideas on my Pinterest board are constantly trying to capture, except it’s real, it’s yours, and it smells better than any photograph ever could.

    Whether you end up making this loaf as one of your go-to comfort food recipes on a rainy weeknight or baking it on a slow Sunday with little hands helping (and possibly launching bananas at your ceiling), this loaf will become part of your kitchen rhythm. I promise you that.

    Please remember to snap a picture of your banana bread before that first slice disappears (trust me, it will disappear quickly!), and leave a rating below. We’d love to hear how this banana bread recipe becomes part of your family kitchen story.
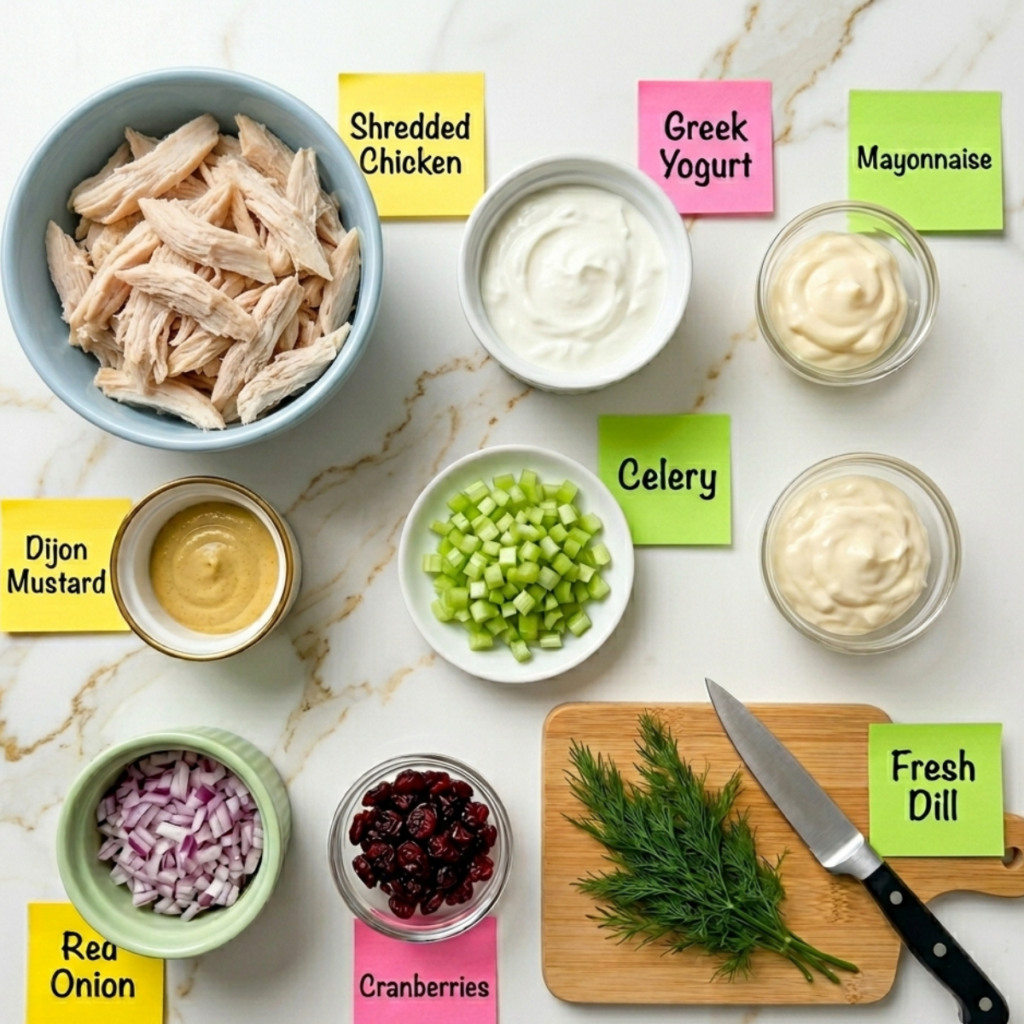
    Star rate this recipe and join our cozy home-baking family.

  • Best High-Protein Honey Garlic Shrimp

    Best High-Protein Honey Garlic Shrimp

    The first time I made Honey Garlic Shrimp, I burned the garlic, oversalted the sauce, and forgot to thaw the shrimp all on the same Tuesday. Mia walked in, sniffed once, and said it smelled like a garbage can. Leo nodded. Two brutal little critics, one blackened pan. I ordered pizza, came back the next night, and figured it out. Best decision I ever made.

    Why This Recipe Is Special

    This recipe earns its spot in my weekly rotation because it bridges that impossible gap—dinner that’s genuinely quick but feels like you put in real effort. On nights when Leo has soccer practice until 6:30 and Mia is already whining about being hungry, I need something that goes from fridge to table in under 30 minutes. The honey and garlic together create this glossy, sticky sauce that tastes like it simmered for hours. Shrimp is a high-protein food, providing over 20 grams per serving, so everyone enjoys it without crashing an hour later.

    How To Make Honey Garlic Shrimp

    That disastrous first attempt taught me everything. Burnt garlic? Turns the whole sauce bitter; it happens in about 30 seconds if you walk away. My fix: keep the heat at medium, stir constantly, and don’t even think about checking your phone. Mia still brings up the garbage-can comment at least once a month, but now she also asks for thirds. After rebuilding this recipe from scratch, Leo declared it “top five dinners ever,” which for a nine-year-old is basically a Michelin star.

    Main Ingredients

    • 1½ lbs large raw shrimp, peeled and deveined (the bigger the shrimp, the meatier and more satisfying; medium works but large is worth it)
    • ⅓ cup honey, the backbone of the sauce; don’t swap for agave here, real honey caramelizes differently
    • 4 cloves garlic, finely minced; this is where all the aroma lives; fresh only, no jarred
    • 3 tbsp low-sodium soy sauce: low-sodium keeps it from oversalting as the sauce reduces
    • 1 tbsp rice vinegar cuts through the sweetness so it doesn’t feel cloying
    • 1 tsp sesame oil, added off heat at the end; it loses its flavour if you cook it too long
    • 1 tbsp olive oil, for searing the shrimp with a nice golden edge
    • ½ tsp red pepper flakes (optional), Mia says no, Leo says yes, I do half a batch each way
    • Salt and black pepper to taste
    • 2 green onions, sliced, for colour and freshness on top
    • Sesame seeds for garnish

    Step-by-Step Instructions

    Step 1 — Prep and Pat Dry

    • Make sure shrimp are fully thawed — run under cool water for 10 minutes if needed (lesson learned).
    • Pat shrimp completely dry with paper towels; moisture is the enemy of a successful sear.
    • Season lightly with salt and black pepper on both sides.
    • Whisk together honey, soy sauce, rice vinegar, and red pepper flakes in a small bowl; set aside.

    Step 2: Sear the Shrimp

    • Heat olive oil in a large skillet over medium-high heat until shimmering.
    • Add shrimp in a single layer; do not crowd them, or they will steam instead of sear.
    • Cook 1 to 1½ minutes per side until pink and lightly golden at the edges.
    • Transfer to a plate; they will finish cooking in the sauce.

    Step 3: Build the Honey Garlic Sauce

    • Reduce heat to medium and add a tiny splash of oil if the pan looks dry.
    • Add minced garlic and stir constantly for 30 to 45 seconds until golden, not brown.
    • Pour in the honey-soy mixture and let it bubble and thicken for about 2 minutes.
    • The sauce is ready when it coats the back of a spoon and looks glossy.

    Step 4: Finish and Serve

    • Return shrimp to the skillet and toss to coat evenly in the sauce, about 1 minute.
    • Remove from heat and drizzle in the sesame oil; stir once more.
    • Plate over rice or noodles and top with green onions and sesame seeds.
    • Serve immediately; the dish is at its absolute best fresh from the pan.

    Honey Garlic Shrimp Variations

    The “Mia Approved” Mild and Sweet Version

    Skip the red pepper flakes entirely and add a teaspoon of fresh grated ginger to the sauce instead. Mia declared this one “the good one” after sniffing it suspiciously for a full minute. The ginger adds warmth without any heat, and kids who are sensitive to spice tend to love this version on top of jasmine rice with extra sauce pooled at the bottom of the bowl.

    Leo’s “Make It Spicy, Mom” Version

    Double the red pepper flakes and add half a teaspoon of sriracha directly into the sauce. Leo discovered the recipe by accident when he grabbed the sriracha off the counter “to see what happens.” What happened was a genuinely excellent spicy glaze, brighter, punchier, and great when served over fried rice or in lettuce wraps. I now make this version just for us adults after the kids are in bed.

    The 20-Minute Weeknight Noodle Bowl

    Toss the finished honey garlic shrimp directly with cooked lo mein or rice noodles right in the pan before serving. Add a handful of baby spinach at the end; it will wilt in about 30 seconds from the residual heat. This is the version I make when I realize at 6pm that I forgot to make a side dish, which is honestly more often than I’d like to admit. The noodles soak up every drop of that glossy sauce.

    Substitutions

    Shrimp → Chicken thighs: Cut boneless chicken thighs into bite-sized pieces; they take about 6 to 7 minutes to cook through, but the honey garlic sauce clings to them just as beautifully. Great for anyone avoiding shellfish.

    Soy sauce → Coconut aminos: A 1:1 swap that keeps this dish gluten-free. Coconut aminos are slightly sweeter, so reduce the honey by about a teaspoon to balance.

    Honey → Maple syrup: It works, though the sauce is a bit thinner and less glossy. Use the same amount and let it reduce for an extra 30 to 45 seconds. The flavor is earthier and slightly less sweet; some people prefer it, especially over noodles.

    Fresh garlic → Garlic powder: While it’s not my preferred option, in a dire situation, I recommend using ½ teaspoon stirred directly into the sauce. Skip the toasting step. It won’t be as deep, but it will still taste good and won’t burn, which is a win.

    Equipment

    • Large skillet or sauté pan (12-inch is ideal)
    • Small mixing bowl for the sauce
    • Whisk
    • Paper towels
    • Tongs or a silicone spatula
    • Measuring cups and spoons
    • Microplane or garlic press

    Storage Tips

    Make Ahead

    • Mix the sauce up to 3 days in advance and refrigerate in a sealed jar.
    • Peel and devein shrimp the morning of; keep them cold and pat them dry.

    Refrigerator

    • Store leftovers in an airtight container for up to 2 days.
    • Keep the sauce and shrimp together; this keeps them moist.
    • Best eaten cold over rice as a quick lunch the next day.

    Freezing

    • You can technically freeze them for up to 1 month in a zip-lock bag.
    • Texture suffers a little; shrimp can go rubbery when thawed.
    • Better to freeze the sauce separately and cook fresh shrimp.

    Reheating

    • Warm gently in a skillet over medium-low heat with a splash of water.
    • Avoid the microwave if possible; it overcooks shrimp quickly.
    • 30 to 60 seconds in the pan is usually all you need.

    Family Secret Worth Sharing

    Here’s the thing about garlic that took me an embarrassingly long time to learn: it speaks in seconds, not minutes. The window between fragrant and acrid is smaller than you think, and once you’ve crossed it, there’s no coming back. My mom used to stand right next to the stove and never once burned it, and I used to think that was just luck. It isn’t. It’s full attention. I started teaching Mia this last fall. She stood on her little step stool, wooden spoon in hand, and I explained that garlic talks to you: it smells sweet and toasty right before it’s done, and then it flips. She stirred it perfectly on the first try. Leo said she was cheating because she’s “smaller and closer to the pan. ” That argument lasted the entire dinner. But the garlic was perfect.

    Troubleshooting FAQs

    Can I use frozen shrimp straight from the bag?
    You can, but please don’t. Frozen shrimp release a ton of water in the pan, which means they steam instead of sear, and your sauce ends up thin and watery. Even a 15-minute thaw under cool running water makes a massive difference. Trust me, I learned this lesson the hard way twice.

    Why is my honey garlic sauce not thickening?
    The most common reason is heat that’s too low. The sauce needs a genuine bubble to reduce and thicken. Bring it up to medium and let it boil gently for a full 2 minutes without stirring too much. If it still seems thin, let it go another 30 to 45 seconds; it thickens more as it cools too.

    Could shrimp be considered a good high-protein option?
    It’s genuinely one of the best. Large shrimp pack around 20 to 24 grams of protein per serving while staying low in calories and fat. It fills the family up without feeling heavy, and the kids actually eat it enthusiastically, which is its kind of miracle.

    What do I serve with honey garlic shrimp?
    Steamed jasmine rice is the classic and soaks up the sauce perfectly. For something lighter, try cauliflower rice or sautéed zucchini noodles. It also makes an incredible taco filling with shredded cabbage and lime crema; that one came from a lazy Friday with nothing else in the fridge, and now it’s a regular request.

    From Our Kitchen Table to Yours

    Most Tuesday nights in this house, dinner is a negotiation. Someone does not want sauce on their rice; someone “forgot” to inform me that they have suddenly ceased eating garlic. But for this honey garlic shrimp, they both sit down for it without complaint. Leo sets the table without being asked. Mia doesn’t even mention the garbage can anymore. We eat together, the sauce gets sopped up with every last grain of rice, and for about twenty minutes, the kitchen smells warm and sweet and entirely like home.

    If you’re building your list of easy weeknight dinners that actually work, this one deserves a permanent spot. It’s the kind of recipe dinner you make once and find yourself thinking about the next morning. And if you’re putting together your rotation of cozy, easy weeknight dinners for busy family weeks, this is the one I’d start with, every single time.

    Please remember to snap a picture of your honey garlic shrimp before that glossy sauce disappears into the rice (trust me, it will disappear quickly!), and leave a rating below. We’d love to hear how this honey garlic shrimp becomes part of your weeknight family story.
    Star-rate this recipe and join our cozy home-cooking family.