Category: Meal Prep

Batch cooking guides, make-ahead recipes, and weekly prep ideas to set your week up right. Cook once, eat well all week quick, practical meal prep for busy families.

  • 3 Secrets to Perfect Crispy Ground Beef Tacos

    3 Secrets to Perfect Crispy Ground Beef Tacos

    I got the pan too hot, walked away for ninety seconds, and came back to one side completely charred. Mia took a bite of the burnt side and said, “Still good.” Ben had already eaten two before I could plate them. That first burnt batch is what taught me the technique, and these crispy ground beef tacos have been our Friday night staple ever since.

    Why This Recipe Is Special

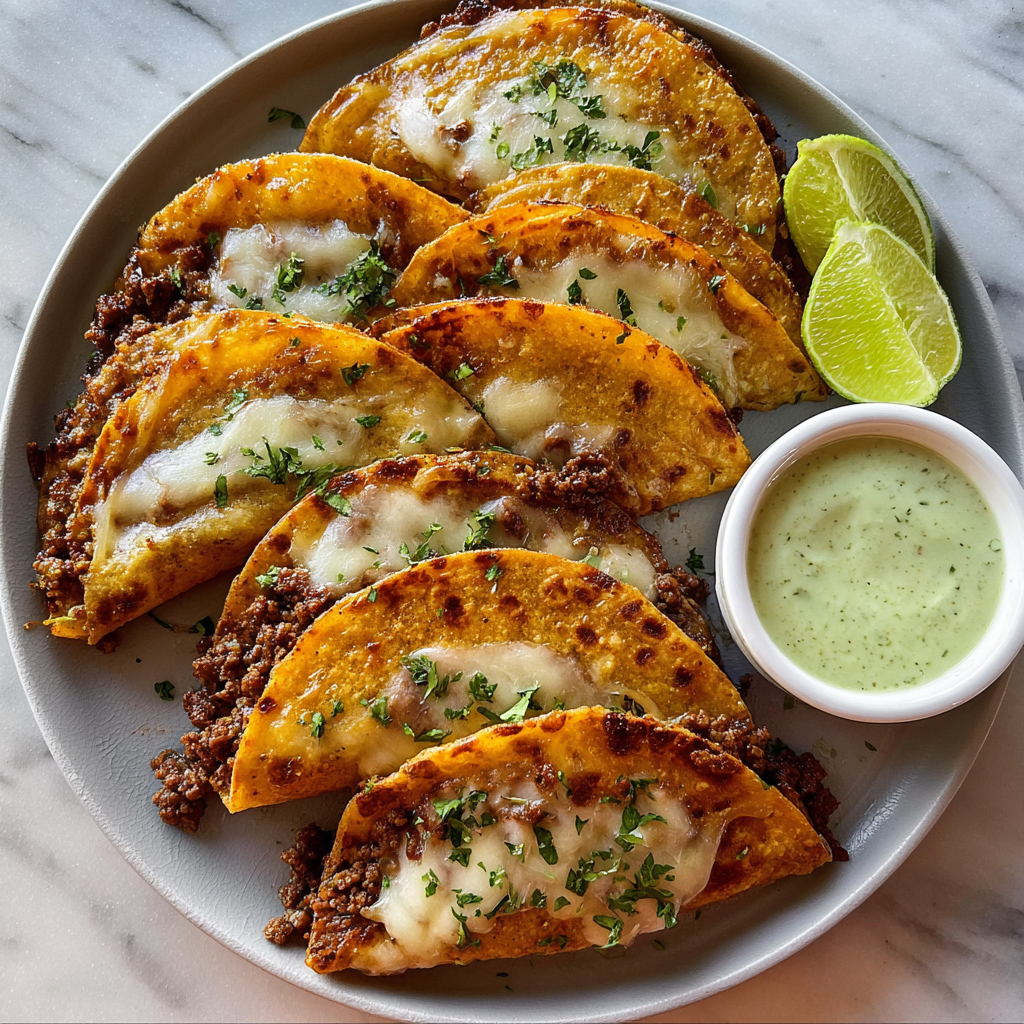
    These are not the soft taco Tuesday situations most people picture. These are pan-fried, golden, and shatteringly crispy on the outside, with seasoned ground beef and melted cheese sealed inside so every single bite has that crunch and that pull at the same time. They come together in under 30 minutes with ingredients most people already have, and they make the whole kitchen smell like the kind of Mexican restaurant you drive across town for. Mia calls them “crunch tacos” and refuses to call them anything else.

    How To Make Crispy Ground Beef Tacos

    The version that actually worked was a Saturday lunch situation where both kids were home and extremely invested in the process. Mia had taken it upon herself to be the cheese distributor, which mostly meant she was eating handfuls of shredded cheese directly from the bowl between each taco. Ben was standing at the stove watching the first taco fry with the focused intensity of someone expecting something to go wrong. When that first one came out golden and blistered and perfect, he said, “That sounds right,” referring to the crunch when I pressed it down. He was absolutely right.

    The lesson from the burnt batch was about heat management. You want the pan hot enough to get that immediate sizzle when the tortilla hits the oil, but medium rather than high so the cheese has time to melt completely before the outside burns. The combination of pre-cooking the beef, loading the taco, and folding it before it hits the pan is what creates that sealed, crispy pocket with no steam escaping and no filling falling out. Ben now monitors the heat with a dedication that would impress a professional cook.

    Main Ingredients

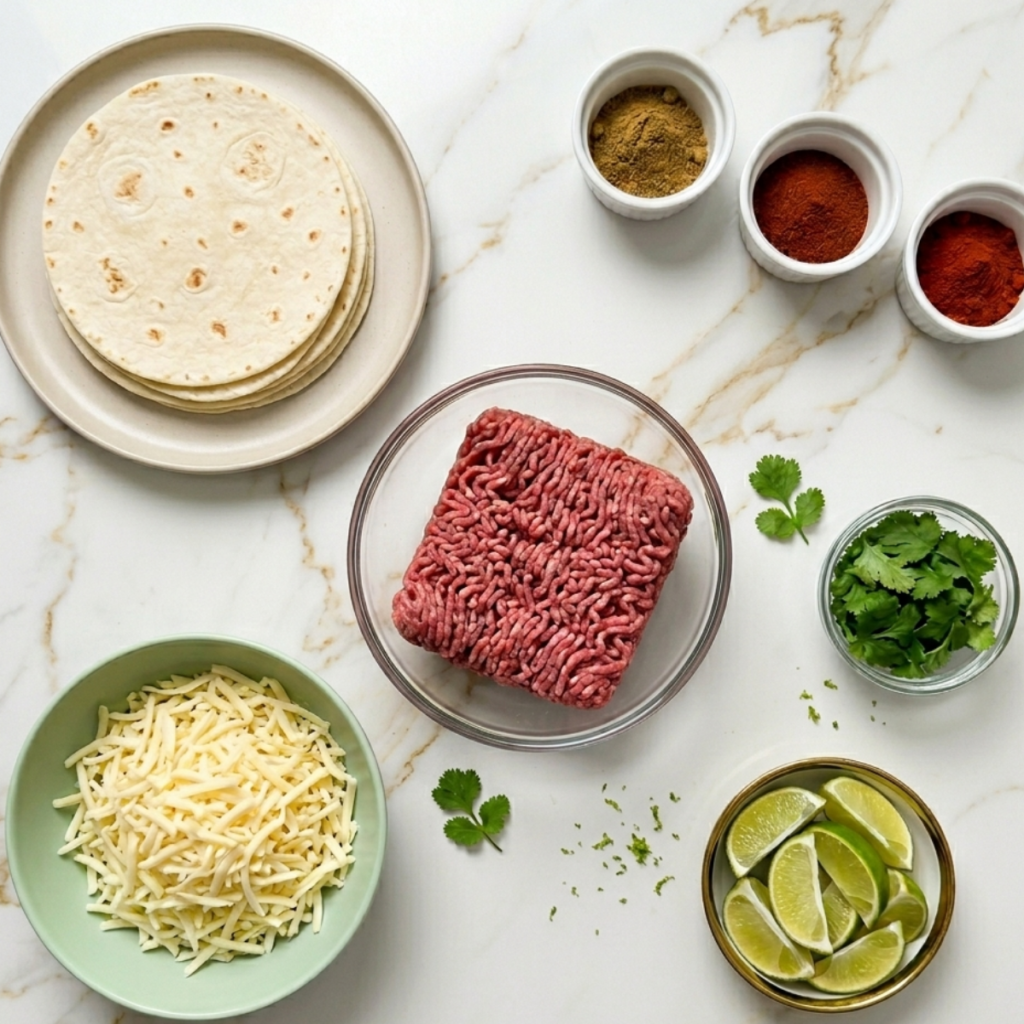
    • 1 lb ground beef (80/20) – The fat content gives the beef flavor and keeps it juicy inside the crispy taco shell
    • 8 small flour tortillas – Small flour tortillas fry up crispier and more evenly than large ones; corn tortillas also work beautifully
    • 1.5 cups shredded Monterey Jack or mozzarella cheese – Melts fast and creates that irresistible cheese pull; cheddar works too but melts slightly slower
    • 1 teaspoon cumin – The warm earthy backbone of the taco seasoning
    • 1 teaspoon chili powder – Depth and color in the beef; reduce to half for the kids’ version
    • 1 teaspoon smoked paprika – Adds a subtle smokiness that makes the filling taste deeply seasoned
    • 1/2 teaspoon garlic powder – Layered savory flavor throughout the beef
    • 1/2 teaspoon onion powder – Sweetness and depth without having to dice an onion
    • Salt and black pepper to taste – Season the beef generously while it cooks
    • 2 to 3 tablespoons neutral oil – For pan-frying; vegetable or avocado oil both work well
    • Fresh cilantro or parsley, chopped – For garnish; adds brightness against the rich golden crust
    • Lime wedges for serving – A squeeze of lime over the finished tacos is genuinely transformative
    • Avocado green sauce or salsa for dipping – The creamy dipping sauce in the image is what takes these to another level entirely
    Step-by-Step Instructions

    Step 1: Cook the Ground Beef

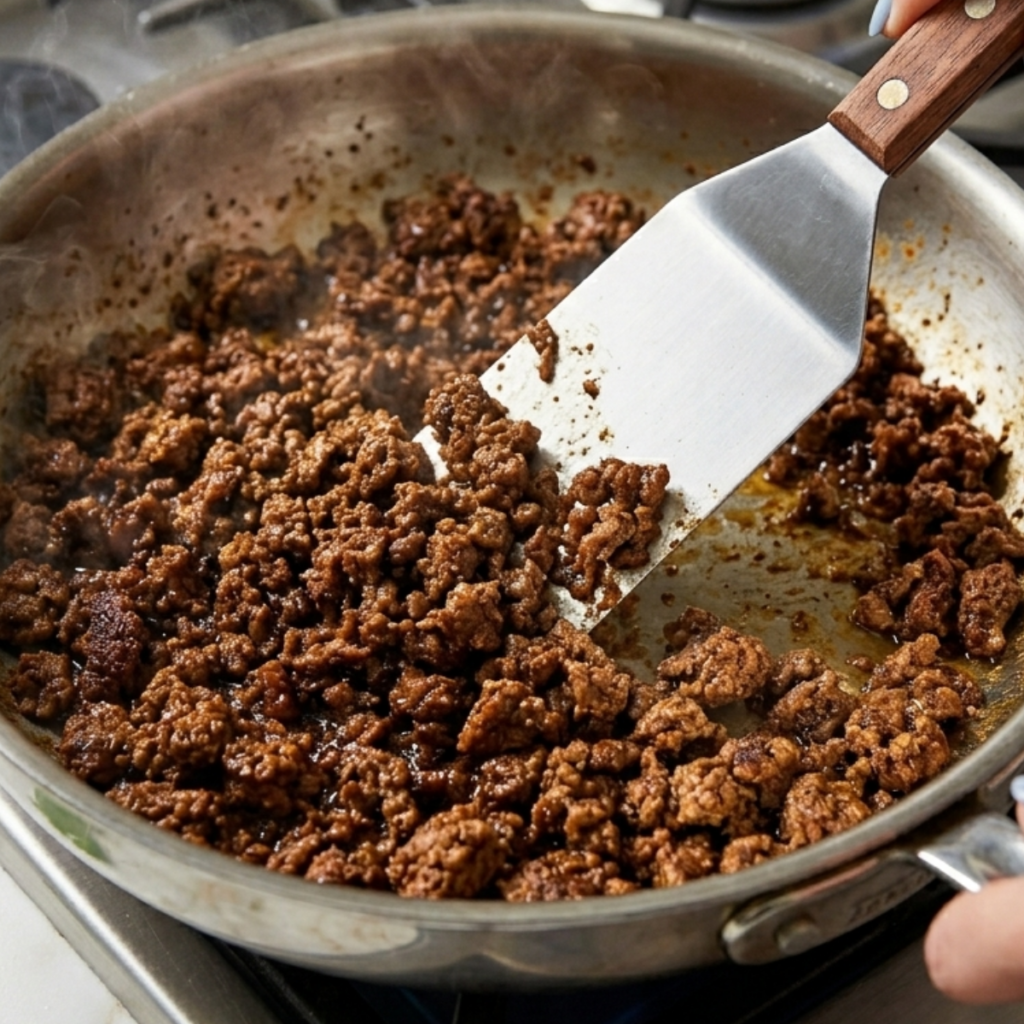
    • Heat a large skillet over medium-high heat, add the ground beef, and cook undisturbed for 2 minutes before breaking it up so it gets some browning instead of just steaming
    • Break the beef into small crumbles and cook until deeply browned with no pink remaining, about 5 to 6 minutes total
    • Drain any excess fat from the pan, leaving about one tablespoon behind, then add the cumin, chili powder, smoked paprika, garlic powder, onion powder, salt, and pepper
    • Stir the spices into the beef for 1 minute over medium heat until everything is deeply coated and fragrant, then remove from heat and set aside
    Step 2: Assemble the Tacos

    • Lay the flour tortillas flat on a clean surface and place a generous spoonful of seasoned beef on one half of each tortilla, leaving a small border at the edge
    • Scatter a good pinch of shredded cheese over the beef on each tortilla; the cheese goes between the beef and the fold so it melts directly against the hot filling
    • Fold each tortilla in half firmly, pressing down gently so the filling is compact and the taco holds its shape without splitting open during frying
    • Work quickly once you start assembling so the tortillas do not have time to absorb moisture from the filling and go soft before they hit the pan

    Step 3: Fry Until Crispy

    • Heat the neutral oil in a large skillet over medium heat until shimmering; the oil should sizzle immediately when the taco edge touches it
    • Place 2 to 3 assembled tacos in the pan at a time without crowding; work in batches so the temperature stays consistent
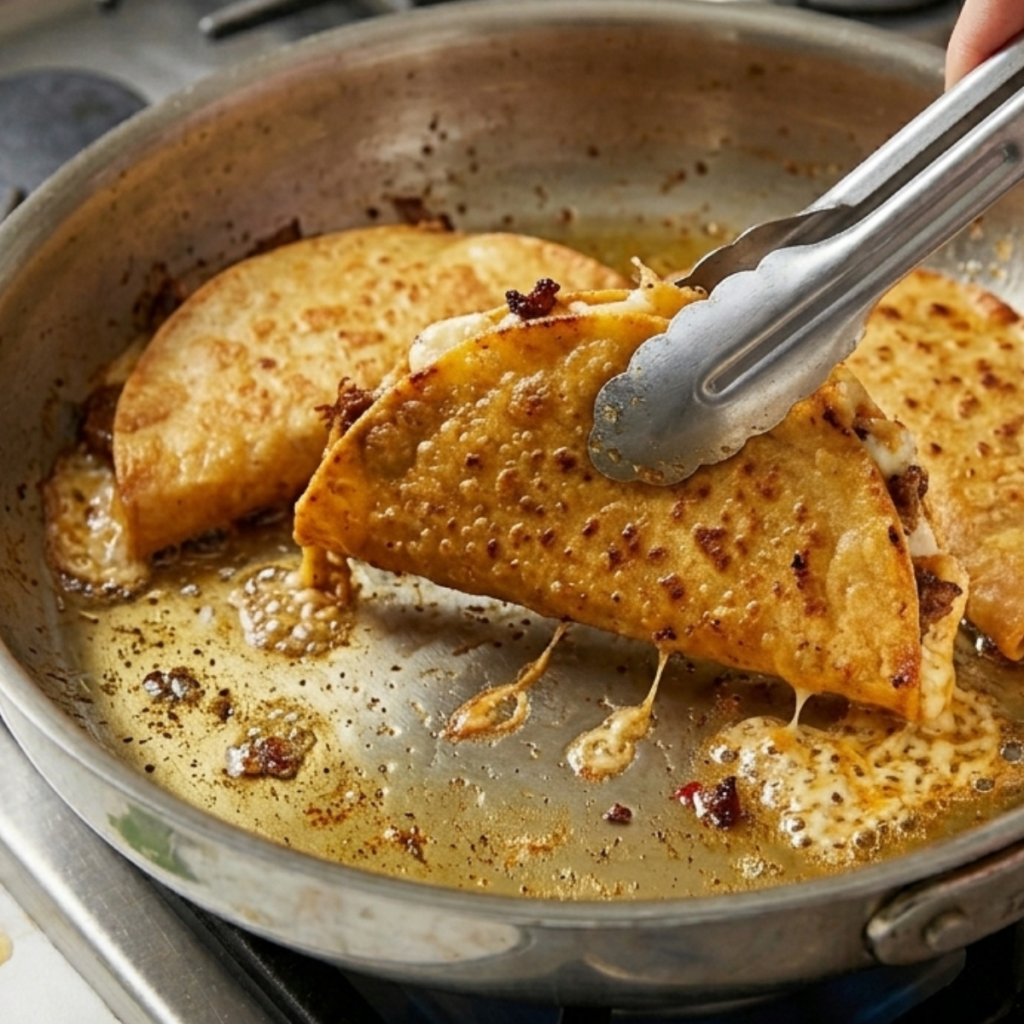
    • Cook for 2 to 3 minutes on the first side without moving until deep golden and blistered, then flip carefully with tongs and cook for another 2 minutes on the second side
    • Press down gently on each taco with a spatula during the last 30 seconds of cooking to maximize the contact between the tortilla and the hot oil for an even, all-over crunch
    Step 4: Drain, Garnish, and Serve

    • Transfer the fried tacos to a wire rack or a plate lined with paper towels to drain for about 60 seconds; a rack keeps the underside crispy while a paper towel can make it steam
    • Sprinkle freshly chopped cilantro or parsley over the top of each taco immediately while the surface is still slightly oily so the herbs stick
    • Serve right away with lime wedges on the side and a bowl of creamy avocado green sauce or your favorite salsa for dipping
    • These tacos are at their absolute best in the first five minutes out of the pan; the crunch is loudest and the cheese is at peak meltiness right from the start

    Crispy Ground Beef Tacos Variations

    Mia’s “Extra Cheese Inside” Version

    Mia has never once in her life felt that any dish contained enough cheese. She conducted a formal inspection of the first assembled taco, looked at me very seriously, and said there was not enough cheese. There was plenty of cheese. For her version, double the cheese inside each taco and add a small extra pinch right at the fold line so it melts into a crispy cheese crust right at the edge of the tortilla. That little seam of blistered cheese that forms is so good I now do it for everyone and just call it Mia’s method.

    Ben’s “Spicy Crunch” Version

    Ben went through a spicy food phase that is now apparently permanent. He adds a thin swipe of chipotle hot sauce directly onto the tortilla before the beef goes on, which creates a little heat layer that builds slowly under all that crispy golden shell. He also requests extra smoked paprika in the beef seasoning and finishes his plate with a very aggressive squeeze of lime. The result is genuinely one of the best versions of these tacos, and I have started making it this way for myself on the nights the kids are not watching.

    The Sheet Pan Oven Version

    On the nights when I have eight or more tacos to make and standing over the stove in batches sounds exhausting, I do the whole thing in the oven. Brush both sides of the assembled tacos lightly with oil, place them on a lined baking sheet, and bake at 425 degrees F for 12 to 14 minutes, flipping once at the halfway point. They come out golden, crispy, and remarkably close to the stovetop version. The whole batch is done at once, cleanup is minimal, and Ben calls it “the lazy version,” which he means as a compliment.

    Substitutions

    Ground beef to ground turkey or chicken: Ground turkey or chicken works well here and keeps things slightly leaner. Since both are lower in fat than 80/20 beef, add an extra half tablespoon of oil to the pan when cooking the meat and season a little more generously since leaner meat holds seasoning slightly differently than beef.

    Flour tortillas to corn tortillas: Corn tortillas give a more traditional flavor and a slightly different crunch that is thinner and crispier than flour. Warm them briefly in a dry skillet before assembling so they are pliable enough to fold without cracking. They are also naturally gluten-free, which makes this recipe work for more people at the table.

    Monterey Jack to pepper jack: Pepper jack adds a subtle heat from the jalapeño pieces inside the cheese and melts just as beautifully as Monterey Jack. It is Ben’s preferred cheese for obvious reasons, and it pairs incredibly well with the smoked paprika in the beef seasoning. A half-and-half mix of Monterey Jack and pepper jack is the version I make most often now.

    Fresh lime to bottled lime juice: Fresh lime is genuinely worth squeezing here because the brightness and the aroma from the zest do something that bottled lime juice simply cannot replicate. If fresh is not available, a small splash of bottled works and is still better than nothing, but if you have fresh limes on hand, this is one of those recipes where it really makes a difference at the end.

    Equipment

    • Large skillet for cooking the ground beef
    • Separate large skillet or the same skillet wiped clean for frying the tacos
    • Tongs for flipping the tacos safely without breaking them
    • Wide spatula for pressing down during frying
    • Wire rack or paper towel-lined plate for draining
    • Sharp knife and cutting board for the cilantro and lime
    • Small bowl for the dipping sauce
    • Measuring spoons for the spice blend
    • Paper towels for patting the beef dry if needed and for draining the fried tacos

    Storage Tips

    Make Ahead

    • The seasoned ground beef can be cooked up to 3 days ahead and stored in an airtight container in the fridge; reheat in a skillet before assembling and frying the tacos
    • Assemble the tacos up to 30 minutes before frying and keep them covered at room temperature; do not assemble too far ahead or the tortilla will absorb moisture and go soft
    • The spice blend can be mixed in a small jar and stored for up to 3 months so taco night is even faster next time

    Refrigerator

    • Store leftover cooked tacos in an airtight container in the fridge for up to 3 days; they will lose their crunch but the flavor is still excellent
    • Store the cooked beef and the fried tortilla shells separately if possible for the best texture when reheating
    • Keep any leftover dipping sauce in a sealed jar in the fridge for up to 2 days; stir well before serving

    Freezing

    • The cooked and seasoned ground beef freezes well for up to 2 months; thaw overnight in the fridge and reheat in a skillet before assembling
    • Do not freeze assembled or fried tacos, as the tortilla texture changes completely after thawing
    • Freeze the beef in individual portion bags so you can pull out exactly what you need for a quick weeknight taco night without thawing the whole batch

    Reheating

    • Reheat leftover fried tacos in a dry skillet over medium heat for 2 to 3 minutes per side to restore as much crunch as possible; avoid the microwave, which makes them soggy
    • The oven at 375 degrees F for 8 to 10 minutes on a wire rack also works well and brings back a good amount of the original crispiness
    • A splash of fresh lime juice and a sprinkle of fresh cilantro after reheating makes leftovers taste almost as good as the original batch

    Family Secret Worth Sharing

    My mom always added a tiny splash of Worcestershire sauce to her ground beef while it was cooking, and I spent years thinking it was unnecessary until I tried leaving it out one night and immediately noticed the difference. It adds this deep, slightly savory, almost caramelized quality to the meat that is impossible to pin down but remarkably to miss when it is gone. I add it immediately after the spices are added, using just a small splash, perhaps a teaspoon. Ben caught me doing it once and asked what it was. I told him it was my mom’s secret. He stirred it in himself the next time without saying anything. That is precisely how recipes pass between people.

    Troubleshooting FAQs

    My tacos are burning on the outside, but the cheese is not melting inside. What went wrong?
    The pan is too hot. This is exactly what happened to my first batch. Medium heat gives the cheese enough time to melt completely before the outside gets too dark. If the cheese is still not melting fast enough, cover the pan with a lid for the first minute of frying on each side; the trapped steam melts the cheese without adding moisture to the outside of the tortilla.

    The tortilla keeps splitting open when I try to fold it. How do I fix it?
    Cold or dry tortillas crack instead of fold. Warm each tortilla for 20 to 30 seconds in a dry skillet or in the microwave under a damp paper towel before assembling. This makes them pliable enough to fold cleanly without any cracking. Flour tortillas are more forgiving than corn for this reason, but both work well once they are properly warmed.

    My tacos are greasy and soggy instead of crispy. What happened?
    Too much oil in the pan or the oil was not hot enough before the taco went in. The oil should shimmer, and the taco edge should sizzle immediately on contact. Drain the tacos on a wire rack rather than paper towels for the first minute; a rack lets air circulate underneath and prevents the bottom from steaming against a flat surface. Also make sure not to overcrowd the pan.

    Can I make these without frying in oil?
    Yes. A dry non-stick skillet over medium heat works if you want a lighter result. The tortilla will still crisp up from the dry heat and the cheese will still melt, but the color will be paler and more toasted than golden and the texture will be slightly drier than the oil-fried version. Brushing the outside of the assembled taco with a very light coat of oil spray before it goes into the dry pan is a good middle ground that many people prefer.

    Friday Night Just Got a Whole Lot Crunchier

    Friday nights in our house used to mean whatever was easiest. Now they mean tacos, the sound of that first crunch coming from the pan, Mia stationed at the cheese bowl, and Ben standing at the stove with a timer and more opinions than I was ready for. These crispy ground beef tacos have quietly become one of our most beloved easy weeknight dinner recipes in the whole rotation, right there alongside the other ground beef dinner recipes I reach for when I need something fast and genuinely satisfying. For the weeks when the whole table needs to feel like taco night done properly, these pair perfectly with our healthy chicken enchiladas for a spread that covers every craving and leaves absolutely nothing on the table. Some dinners just become the ones your family builds a whole evening around, and this one did exactly that for us.
  • 5 Secrets to the Best Protein Chicken Salad That Keeps You Full All Afternoon

    5 Secrets to the Best Protein Chicken Salad That Keeps You Full All Afternoon

    Mia looked at the bowl, then looked at me, and said very seriously, “Mom, is the meal a punishment?” I had used canned tuna instead of chicken by accident, forgotten to drain it, and added so much celery it crunched on every single bite. My protein chicken salad was not chicken. Leo confirmed the result. I stood there reading the tin label. Right. We started from scratch.

    Why This Recipe Is Special

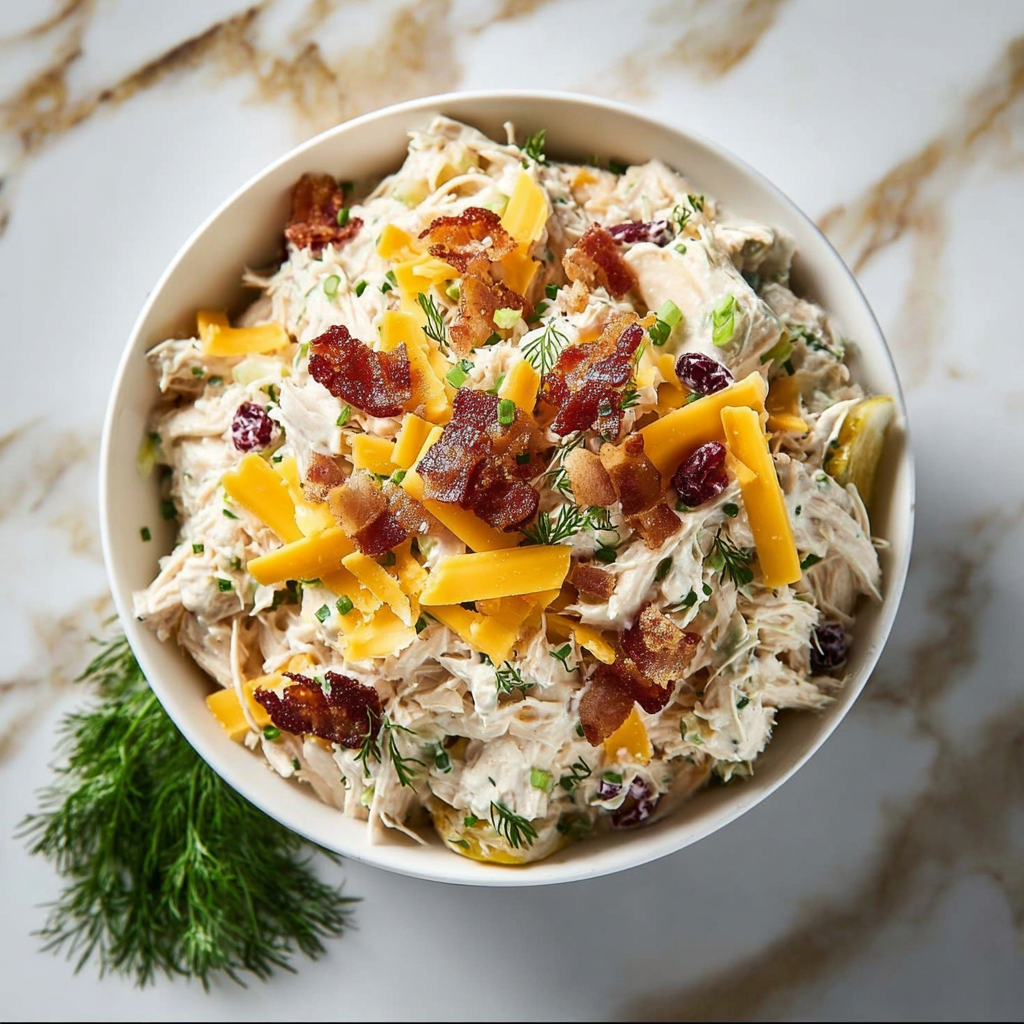
    This protein chicken salad sits in a very particular and useful category: it genuinely fills you up, it takes fifteen minutes to make, and it doesn’t feel like punishment food, which, as Mia’s early review made clear, is a standard that matters enormously in this household. Two cups of shredded chicken breast gives you over 40 grams of protein per serving before anything else goes in. Added Greek yogurt instead of pure mayo keeps it creamy while stacking the protein even higher. For anyone following a keto diet, bariatric eating guidelines, or just trying to eat more protein at lunch without cooking an entire meal, this is the bowl that does it. Leo wraps it up. Mia eats it with crackers. I eat it straight from the bowl with a fork, which is the correct way.

    How To Make Protein Chicken Salad

    After the tuna incident, which nobody has forgotten despite my best efforts, I rebuilt this recipe very deliberately. The second lesson came from overdressing. I added too much mayo-yogurt mix on a day when I was in a hurry, and the whole thing became a puddle. Leo said it looked like soup that couldn’t decide what it wanted to be. Mia took photos. The fix is to add the dressing in two stages: add half first, mix, check the consistency, and then add more only if it needs it. That one change made this recipe something I actually look forward to making on a Sunday for the week ahead.

    Main Ingredients

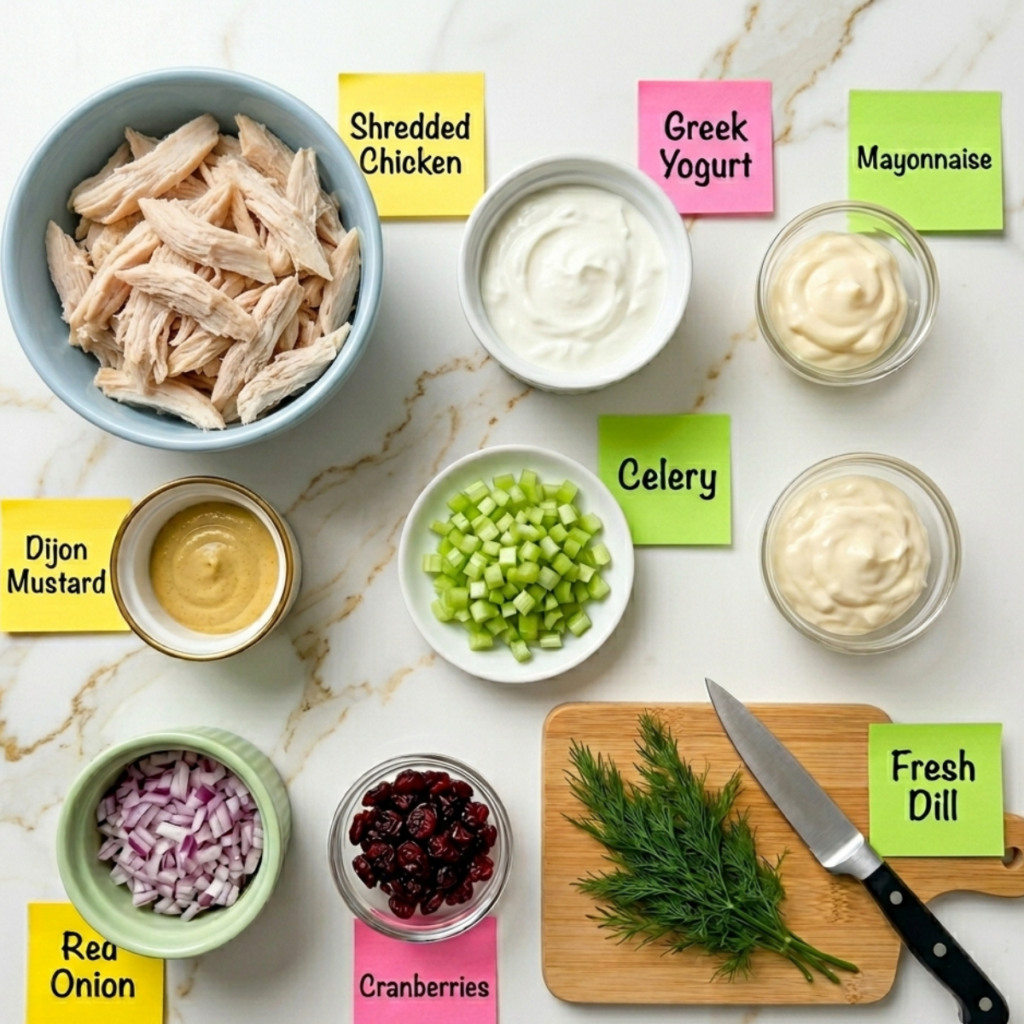
    • 2 cups cooked chicken breast, shredded or diced: poached or rotisserie both work; rotisserie saves time and the flavour holds up beautifully in a salad
    • 3 tbsp plain Greek yogurt (full-fat): the protein booster that replaces some of the mayo; full-fat keeps the texture creamy rather than watery
    • 2 tbsp good quality mayonnaise: still here for flavour and richness; Greek yogurt alone makes it taste too sharp
    • 1 tbsp Dijon mustard: the flavour anchor; don’t skip this; it’s what makes it taste like more than just chicken in a sauce
    • 1 stalk celery, finely diced: finely diced this time, not huge chunks; this was a lesson I learned
    • 2 tbsp red onion, finely minced (optional): adds a sharp note; soak in cold water for 5 minutes first if you want it milder
    • 1 tbsp fresh lemon juice: brightens the whole bowl; bottled lemon tastes flat here
    • Salt and black pepper to taste
    • Fresh dill or parsley, roughly chopped (optional): Mia picks the dill out and Leo eats all of his without complaint
    • 2 tbsp dried cranberries or halved grapes (optional): adds a sweet contrast that makes this feel less like diet food and more like something you actually chose to eat

    Step-by-Step Instructions

    Step 1: Prep the Chicken and Mix-ins

    • If cooking from scratch, poach chicken breast in lightly salted water for 15 minutes until cooked through, then let it cool completely before shredding.
    • Shred or dice cooled chicken into bite-sized pieces shredded gives a traditional texture; diced is easier for wraps and meal prep containers.
    • Finely dice the celery and red onion; if using red onion, soak in cold water for 5 minutes and then drain well to soften the bite.
    • Set all prepped ingredients aside before making the dressing; adding dressing to warm chicken makes it watery.

    Step 2: Make the Protein Dressing

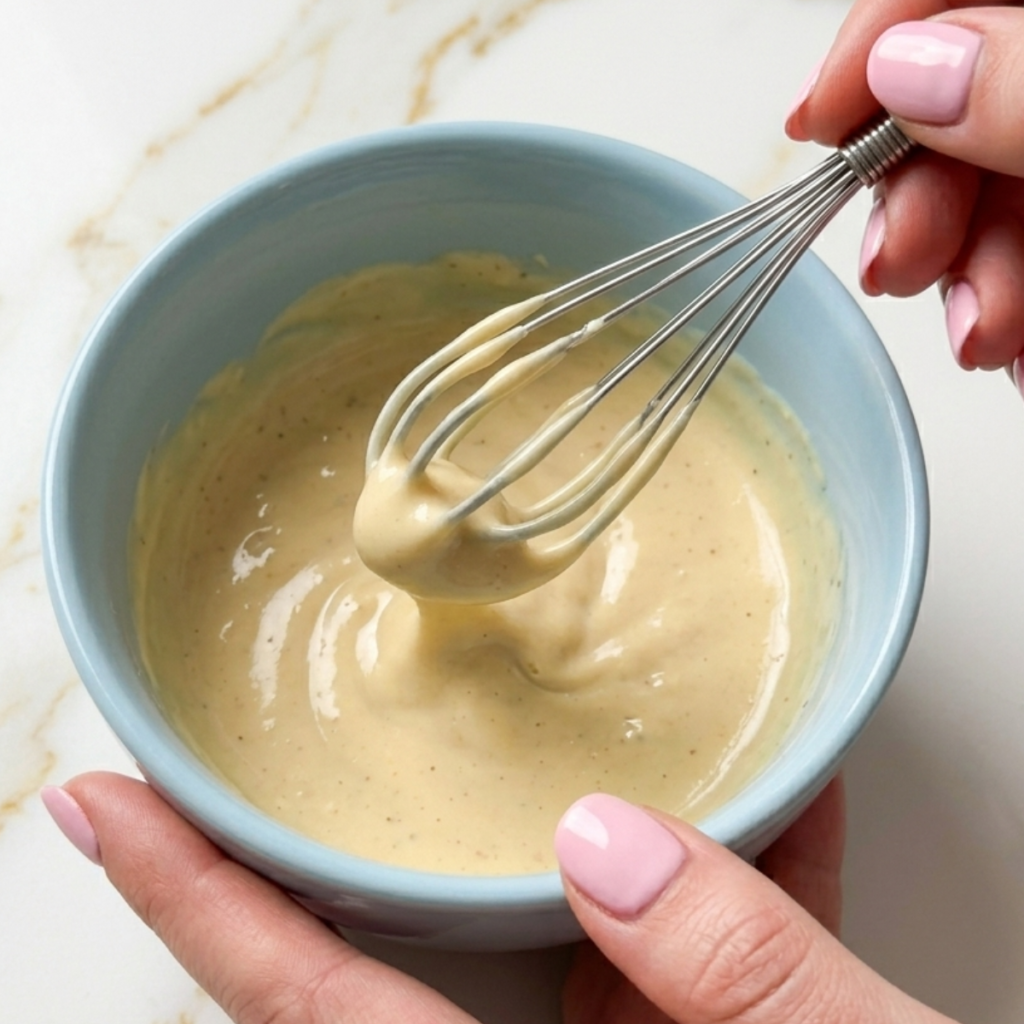
    • Whisk together Greek yogurt, mayonnaise, Dijon mustard, and lemon juice in a small bowl until completely smooth.
    • Season generously with salt and black pepper; the dressing needs to be well-seasoned on its own before it touches the chicken.
    • Taste and adjust: more lemon if it needs brightness, more mustard if it tastes flat, more yogurt if it needs creaminess.
    • The dressing should be thick and spoonable, not runny; if it pours easily, it will make the salad watery.

    Step 3: Combine and Taste

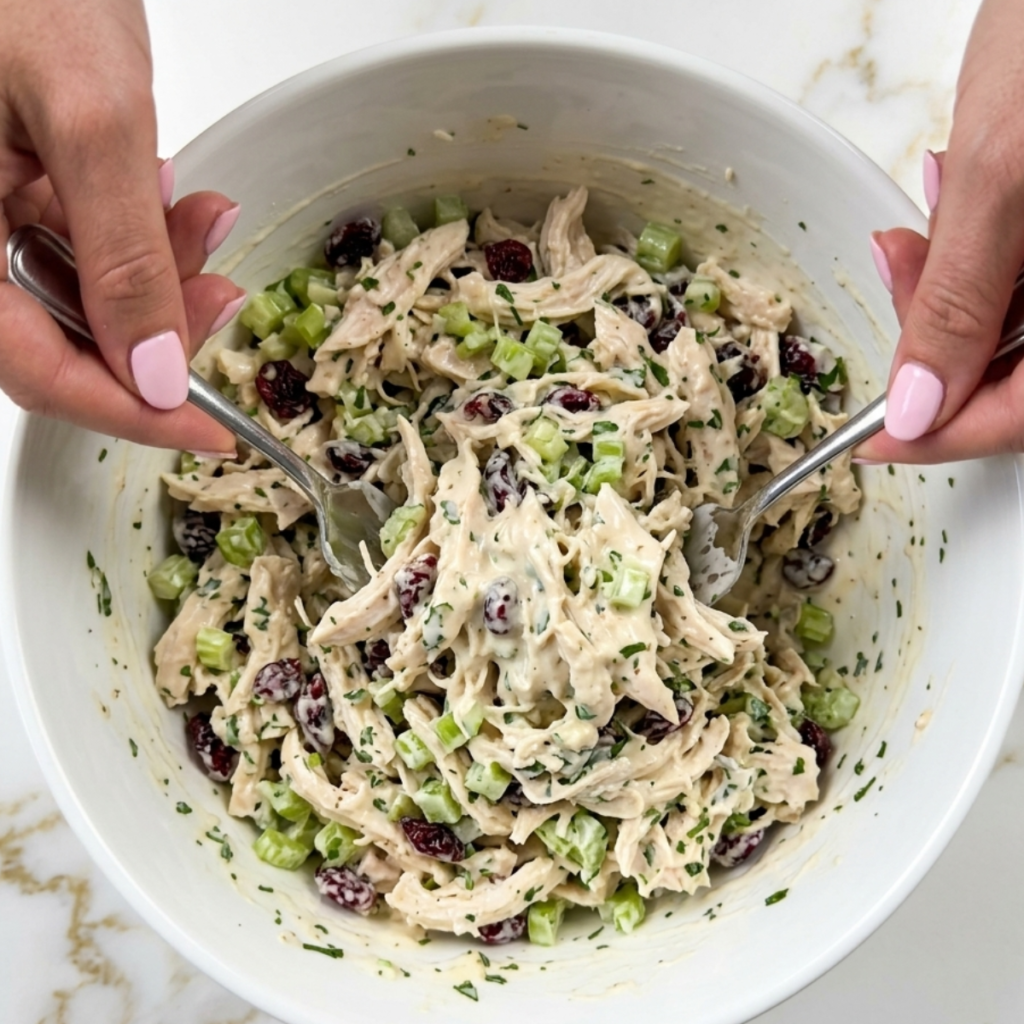
    • Add the chicken, celery, and onion to a large bowl and add half the dressing first; stir gently to coat.
    • Check the consistency; it should look creamy and cohesive, not dry and not soupy; add more dressing only if needed.
    • Fold in cranberries or grapes if using and the fresh herbs, and stir once more.
    • Taste the finished salad and adjust salt, pepper, and lemon before serving; this is the most important step.

    Step 4: Serve or Store

    • Serve immediately on lettuce cups, in a wrap, on crackers, or straight from the bowl with a fork.
    • For meal prep, divide into four airtight containers and refrigerate; the flavor is actually better after a few hours.
    • If serving later, hold back a tablespoon of dressing and stir it in fresh before eating to restore the creamy texture.
    • Top with extra dill, a crack of black pepper, and a squeeze of lemon right before serving.

    Protein Chicken Salad Variations

    Keto Chicken Salad with Bacon and Avocado

    Skip the cranberries entirely and add 2 strips of crumbled crispy bacon and half a diced ripe avocado. This version sits beautifully inside a keto diet framework: zero added sugar, high fat, and very high protein, and it is the version Leo approves of most enthusiastically, largely because of the bacon. He adds it to everything now. The avocado makes it extraordinarily creamy without any extra mayo. Eat it immediately once the avocado is in; it doesn’t hold overnight.

    Mia’s Mild Version with Apple and Honey

    Replace the Dijon with a teaspoon of honey and swap the red onion for a quarter cup of finely diced sweet apple. Mia built this variation over three separate lunch prep sessions, removing things she didn’t like one by one with the careful method of a scientist. The result is genuinely excellent, sweeter and milder, still packed with protein, and the apple adds a little crunch that everyone at the table ends up requesting. It also works exceptionally well in a sandwich.

    High Protein Caveman-Style Bowl

    Double the chicken to 3 cups, skip all the optional extras, and serve the salad over sliced cucumber rounds or thick-cut romaine instead of any bread or crackers. This stripped-back version aligns with paleo and caveman diet principles: just clean protein, a small amount of healthy fat from the mayo and yogurt, and fresh vegetables. Leo calls it the boring one. I call it “Tuesday lunch” when I have a 2pm meeting and no time to think about food.

    Substitutions

    Greek yogurt → Cottage cheese, blended smooth: Blend cottage cheese until completely smooth before using. It adds even more protein than Greek yogurt, and the texture is nearly identical in the finished salad. This is a favorite swap for anyone following bariatric eating guidelines where high protein per calorie matters most.

    Chicken breast → Canned chicken, well drained: Works well in a pinch and is genuinely faster. Drain very thoroughly; this was where the tuna incident began, and pat dry with paper towels. The texture is slightly softer, but the flavor holds up well with a good dressing.

    Mayonnaise → Avocado oil mayo or plain avocado: Avocado oil mayo swaps 1:1 for a cleaner fat profile. Or mash half a ripe avocado directly into the dressing for a dairy-free, mayo-free version that is remarkably good and very high in healthy fat.

    Fresh lemon juice → Apple cider vinegar: Use half the quantity, 1½ teaspoons, instead of 1 tablespoon. Apple cider vinegar gives a slightly sharper, earthier tang that works particularly well in the caveman-style version with no fruit.

    Equipment

    • Large mixing bowl
    • Small bowl for dressing
    • Whisk or fork for dressing
    • Sharp knife and cutting board
    • Two forks for shredding chicken
    • 4 airtight containers for meal prep

    Storage Tips

    Make Ahead

    • Make the full salad up to 1 day ahead; it actually tastes better after a few hours.
    • Hold back 1 tablespoon of dressing to stir in fresh before serving to restore creaminess.

    Refrigerator

    • Airtight container up to 3 days.
    • Stir well before serving; the dressing can settle at the bottom.
    • Do not keep it for more than 3 days once dressed.

    Meal Prep

    • Divide into 4 individual containers for the week.
    • Keep crackers, wraps, or lettuce cups separate until serving.
    • Ideal Sunday prep ready for Monday through Wednesday lunches.

    Freezing

    • Not recommended mayo and yogurt separate when thawed and become grainy.
    • Freeze cooked plain chicken only; dress fresh when ready to serve.

    Family Secret Worth Sharing

    The two-stage dressing trick changed this recipe entirely. I used to add everything at once and wonder why it was always either too dry or too wet, never quite right. What I didn’t understand was that the chicken releases a little moisture as it sits in the dressing, so what looks slightly underdressed when you first mix it is usually perfectly dressed five minutes later. Adding half the dressing first, waiting a minute, then deciding whether it needs more is the move that makes this consistently good rather than occasionally good. My mom dressed salads by eye and never measured anything, and I used to think that was a gift she had that I didn’t. It turns out it was just practice and patience, which are both things I now have and which Mia watches very carefully every Sunday while I make the salad, spoon in hand, waiting to be appointed tasting officer. She always is.

    Troubleshooting FAQs

    Why is my chicken salad watery after a few hours?
    The chicken was warm when you dressed it, or the celery wasn’t properly dried after washing. Always use completely cooled chicken and pat everything dry before mixing. The two-stage dressing method also helps add less dressing than you think you need, because the chicken releases moisture as it sits.

    Can I make this for bariatric meals?
    This dish is actually one of the best recipes for bariatric eating: high protein, moderate fat, low carb, and genuinely flavorful in small portions. The Greek yogurt swap boosts protein per calorie compared to full-fat mayo. Swap all the mayonnaise for blended cottage cheese to push the protein even higher and reduce the fat further.

    How do I get more flavor without more calories?
    Season in layers. Season the chicken while it cooks, season the dressing separately before it meets the chicken, and taste and adjust the finished salad before serving. Each stage of seasoning builds depth. The Dijon and lemon are doing a lot of work here; don’t reduce either of them.

    Is this recipe keto and low carb?
    Yes, served on lettuce cups or cucumber rounds, it is fully keto-friendly, with around 4 to 6 grams of net carbs per serving. Skip the cranberries and grapes for a stricter version. The keto bacon and avocado variation brings the carbs even lower while adding healthy fats.

    The Bowl That Proved Mia Wrong

    Mia still has opinions about this recipe. She will tell you that her version with the apple and honey is definitively better, and she is not entirely wrong, but she also eats the original version on Tuesdays without being asked and refills her bowl when she thinks I am not watching. Leo hasn’t asked, “Is this chicken?” since the second batch. I take that as the highest possible endorsement. Sunday protein chicken salad prep has become the thing we do together now: Mia on dressing duty, Leo in charge of shredding, and me trying not to get distracted and add too much of anything.

    If you are building a collection of easy weeknight dinners that actually work for the whole family, this chicken salad earns its permanent spot in the rotation. It sits right alongside our high protein honey garlic shrimp as proof that healthy and delicious are not opposing goals. And for more recipes in the same spirit, the whole healthy recipes collection is worth an hour of browsing on a Sunday when you are planning the week.

    Don’t forget to snap a picture of your protein chicken salad before those creamy, herby spoonfuls disappear into wraps and lunchboxes (trust me, they will disappear quickly!), and leave a rating below. We’d love to hear how this protein-rich chicken salad becomes part of your family’s weekly lunch story.

  • 1-Pan Creamy Keto Chicken Broccoli Casserole

    1-Pan Creamy Keto Chicken Broccoli Casserole

    The first time I made keto chicken broccoli casserole, I dropped cold cream cheese straight into the warm pan without softening it first. Just the whole brick, unmelted. Jake poked it with a spoon and said, “Is that supposed to be like that?” It was not. I scraped it out, microwaved the cream cheese for thirty seconds, started again, and never made that mistake twice.

    Why This Recipe Is Special

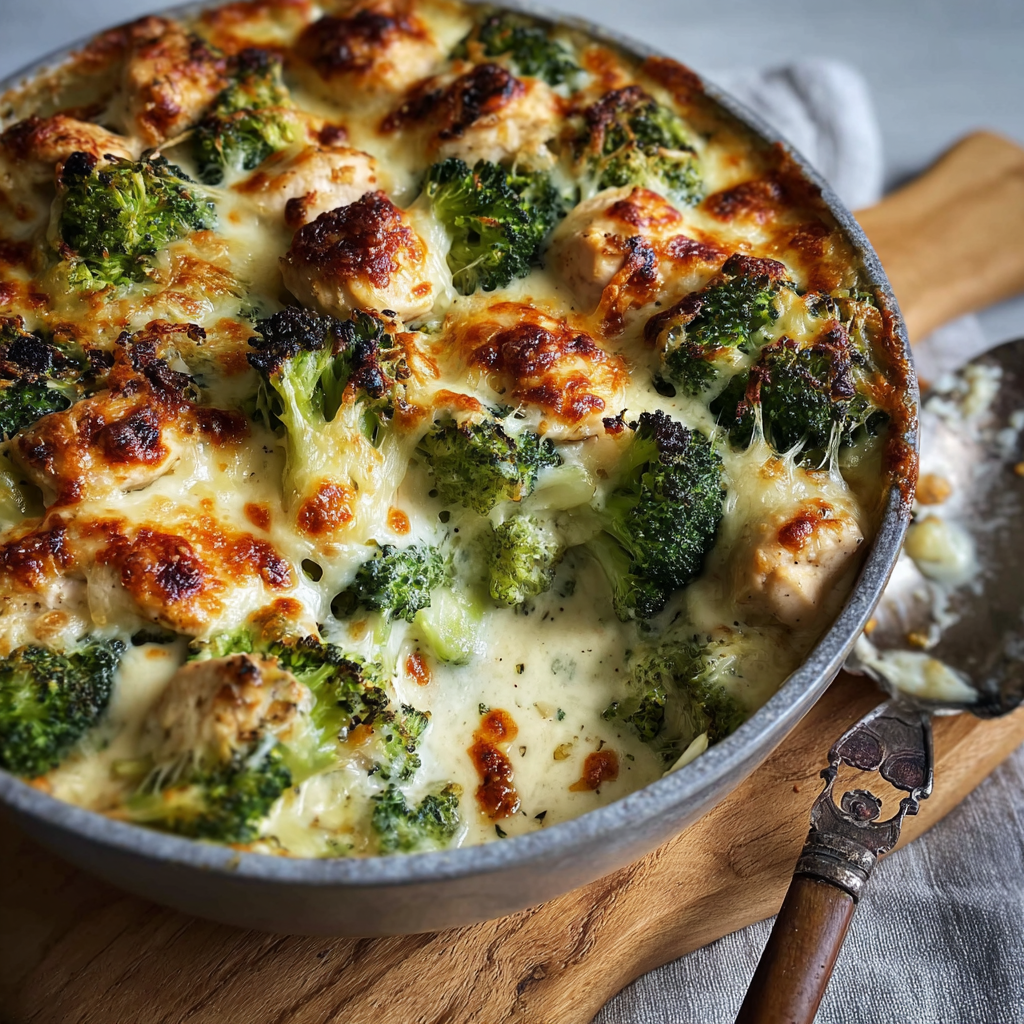
    Low-carb keto dinner recipes often sacrifice the one thing that makes dinner actually feel like dinner: the comfort. This one does not. The sauce is built from cream cheese, cream, and garlic, which means it is genuinely rich and creamy without a gram of flour or any starchy thickener. The chicken gets seared first so it stays juicy and golden inside the casserole rather than turning pale and sad. The broccoli holds its color and its slight bite. And on top of that, the bubbly, blistered cheddar and mozzarella crust is the reason everyone is at the table before you even call them.

    How To Make Keto Chicken Broccoli Casserole

    After the cream cheese incident, my second attempt had a proper audience. Emma had been reading about keto with the very serious energy she brings to anything she considers a “project,” and she wanted to help make a recipe that was actually engaging rather than, in her words, “just salad without the fun parts.” Jake’s position on anything keto had been suspicious until the moment he saw the amount of cheese going on top. He went very quiet, watched me scatter the second handful, and said, “Okay, I think I understand keto now.” That is the most nutritional insight he has offered to date, and I choose to take it as a win.

    Main Ingredients

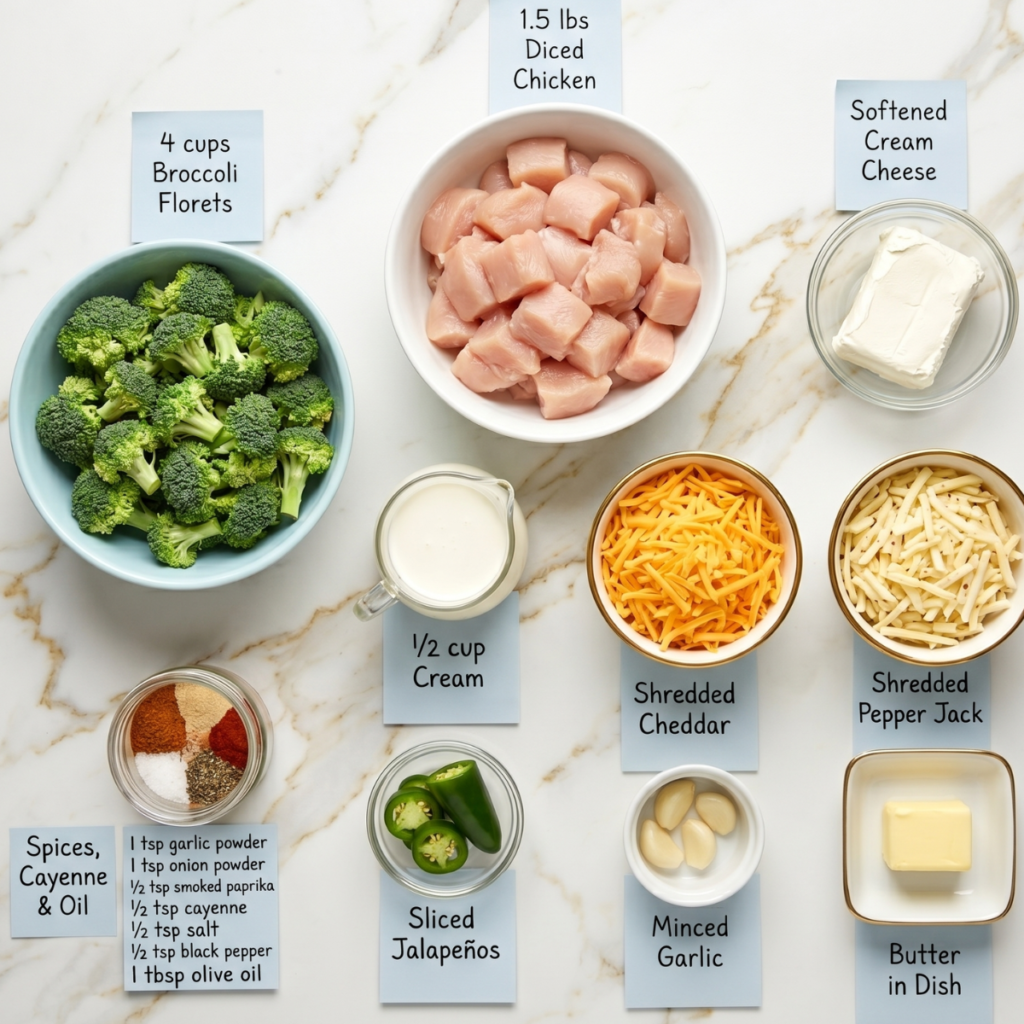
    • 1.5 lbs boneless skinless chicken breast or thighs: Cut into bite-sized pieces. Thighs stay juicier; breasts work well too.
    • 4 cups broccoli florets: About 1 large head. Cut small and uniform so they steam through in the oven.
    • 8oz full-fat cream cheese, softened: Room temperature or 30 seconds in the microwave. Cold cream cheese will not blend smoothly ask me how I know.
    • 1/2 cup heavy cream: Thins the cream cheese into a pourable sauce. Do not substitute with milk.
    • 1 cup shredded cheddar, divided: Half goes into the sauce, half on top for that golden bubbly crust.
    • 1 cup shredded mozzarella: The stretch and pull. Scattered on top alongside the cheddar.
    • 4 cloves garlic, minced: Sautéed in butter before the sauce goes in. The whole dish rests on this flavor.
    • 2 tbsp butter + 1 tbsp olive oil: Butter for the sauce base, oil for searing the chicken without burning.
    • 1 tsp garlic powder + 1 tsp onion powder: For seasoning the chicken before searing. Layer the garlic flavor throughout.
    • 1/2 tsp smoked paprika, salt, and pepper: Season generously. The cream sauce is rich and needs the chicken well seasoned to match it.

    Step-by-Step Instructions

    Step 1: Season and Sear the Chicken

    • Pat chicken pieces dry and toss with garlic powder, onion powder, smoked paprika, salt, and pepper.
    • Heat olive oil in a large oven-safe skillet over medium-high heat until shimmering.
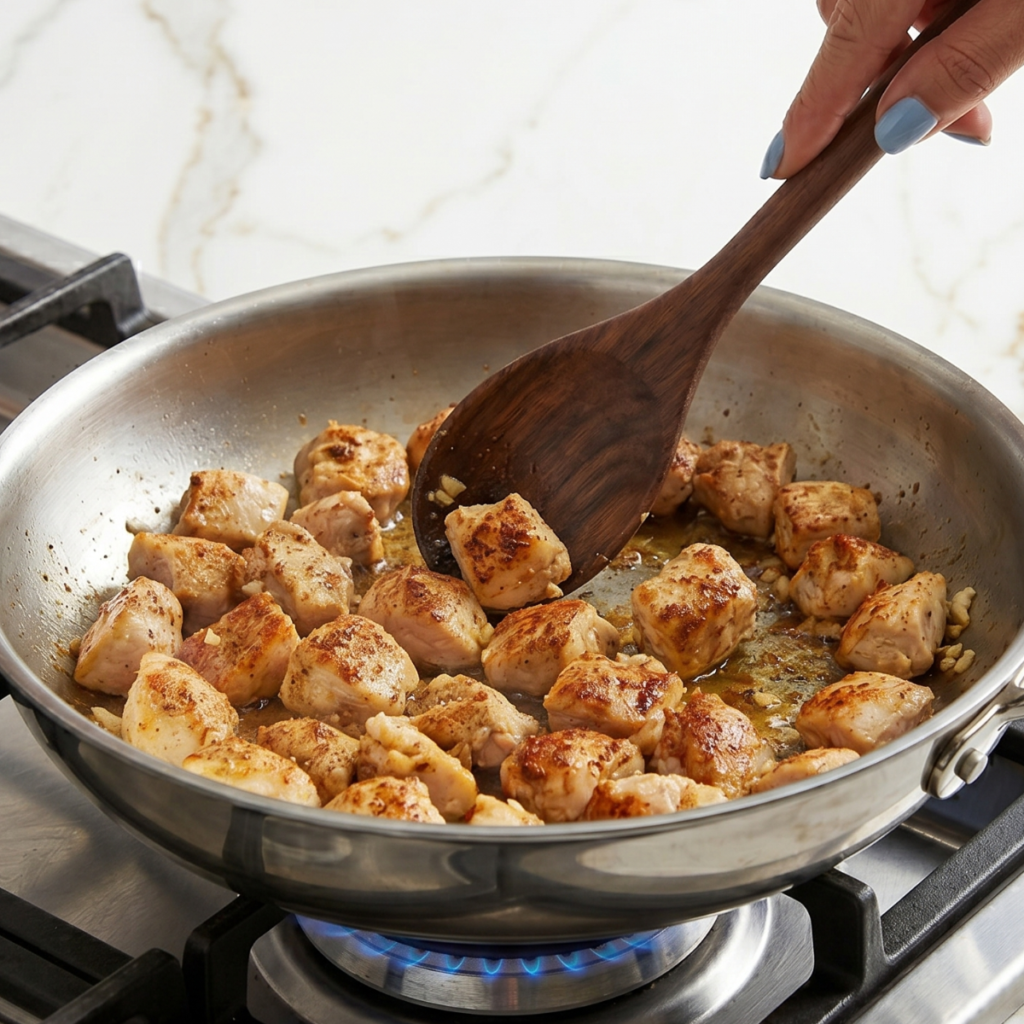
    • Sear the chicken in a single layer for 3 to 4 minutes per side, until golden. Work in batches so the pan stays hot and the chicken sears rather than steams.
    • Remove the seared chicken to a plate; it does not need to be cooked through yet; it will finish in the oven.

    Step 2: Build the Cream Sauce

    • Reduce heat to medium, add butter to the same pan, and sauté minced garlic for 60 seconds until fragrant scrape up any golden bits from the chicken.
    • Add the softened cream cheese and heavy cream, stirring constantly until the cream cheese is fully melted into a smooth, silky sauce.
    • Stir in half the cheddar until it melts into the sauce, then taste and adjust salt and pepper.
    • Remove from heat; the sauce should be thick, creamy, and pourable. If it looks too thick, add a splash more cream.

    Step 3: Assemble and Top

    • Preheat oven to 375°F (190°C) and lightly grease a 9×13 inch baking dish if not using the oven-safe skillet.
    • Add the broccoli florets to the cream sauce in the pan and stir to coat every piece thoroughly.
    • Add the seared chicken back in and fold everything together gently so the broccoli and chicken are evenly distributed through the sauce.
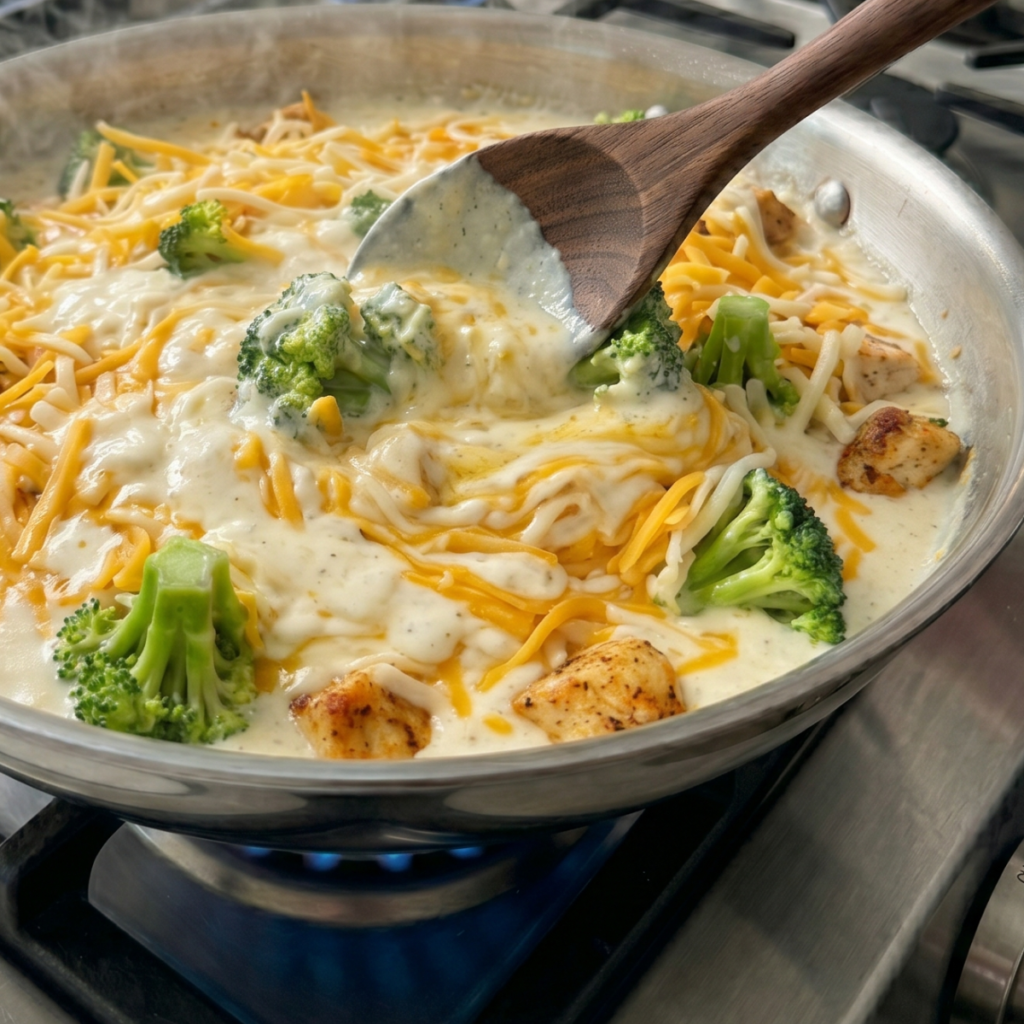
    • Scatter the remaining cheddar and all the mozzarella evenly over the top; do not be shy with either.

    Step 4: Bake and Rest

    • Bake uncovered for 25 to 30 minutes until the cheese is deeply golden and bubbly at the edges and the broccoli is just tender when pierced with a fork.
    • If the cheese is bubbling but not golden after 25 minutes, switch to the broiler for 2 to 3 minutes and watch it closely; it goes from perfect to too dark very fast.
    • Remove from the oven and allow to rest for 5 minutes; the sauce thickens slightly and the portions come out much cleaner.
    • Serve directly from the dish with a large spoon, pulling up that glorious cheese pull every single time.

    Keto Chicken Broccoli Casserole Variations

    The Bacon and Ranch Version (Jake’s Crowning Contribution)

    Jake’s interest in this casserole went from polite to passionate the day I added bacon. Fry six rashers until crispy, crumble them over the top along with the cheese before baking, and stir one tablespoon of dried ranch seasoning into the cream sauce instead of the garlic powder and onion powder. The ranch flavor runs all the way through the sauce, and the bacon adds crunch and smoke to every single bite. Jake calls this “the good version.” I remind him the original is also excellent. He nods, unconvinced.

    Emma’s Spinach and Sun-Dried Tomato Upgrade

    Emma’s version is the one she makes when she wants to explain to her friends that keto food is actually excellent. Stir two large handfuls of fresh spinach into the sauce with the broccoli; it wilts down to almost nothing but adds color and iron. Add a quarter cup of roughly chopped oil-packed sun-dried tomatoes at the same stage. The tomatoes add an intense, jammy burst of flavor against the richness of the cream cheese sauce and make the whole dish look considerably more impressive than a Tuesday night dinner has any right to look.

    The Spicy Jalapeño and Pepper Jack Version (My Friday Night Treat)

    When both kids are happy with their food and I get to make a version just for me, this is it. Swap the mozzarella for shredded pepper jack, add two thinly sliced fresh jalapeños scattered over the top before baking, and stir half a teaspoon of cayenne into the cream sauce. The heat builds slowly through the cream, and the jalapeños blister beautifully under the broiler. Serve with a dollop of full-fat sour cream on the side. This is one of those very low-carb recipes that feels like a proper indulgence rather than a restriction.

    Substitutions

    • Heavy cream → Full-fat coconut cream works for a dairy-free version with a slightly different flavor, but the sauce still comes together. Do not use low-fat milk or half-and-half; they are too thin, and the sauce will be watery.
    • Cream cheese → Full-fat mascarpone is a richer, slightly less tangy substitute in the exact same quantity. For dairy-free, a full-fat cashew cream cheese works; check the carb count on the label, as it varies significantly by brand.
    • Broccoli → Cauliflower florets are an excellent keto-friendly swap. Zucchini cut into half-moons also works but releases water pat it dry first and reduce the cream by two tablespoons to compensate.
    • Cheddar and mozzarella → Any good melting cheese works here. Gruyère gives a nuttier flavor. A smoky gouda on top is extraordinary and worth trying when you want something different from your usual keto-friendly meal prep rotation.

    Equipment

    • Large oven-safe skillet or sauté pan (at least 12-inch)
    • 9×13-inch baking dish (only if skillet is not oven-safe)
    • Sharp knife and cutting board
    • Wooden spoon or silicone spatula
    • Tongs
    • Measuring cups and spoons
    • Instant-read thermometer
    • Cheese grater (freshly grated melts far better than pre-shredded)

    Storage Tips

    Make Ahead

    • Assemble the full casserole up to 24 hours ahead, cover tightly, and refrigerate unbaked.
    • Add 8 to 10 extra minutes of bake time if going straight from fridge to oven.
    • The cream sauce actually deepens in flavor overnight; make-ahead is genuinely better here.

    Refrigerator

    • Store cooled leftovers in an airtight container for up to 4 days.
    • This recipe is one of those keto-friendly meal prep dishes that is just as good on day three as day one.
    • The cream sauce firms up when cold; it loosens back to creamy with a splash of cream when reheating.

    Freezing

    • Freeze in individual portions in airtight freezer containers for up to 3 months.
    • Cream-based sauces can separate slightly after freezing; stir gently when reheating to bring them back together.
    • Thaw overnight in the fridge; do not microwave from completely frozen, as the sauce will separate.

    Reheating

    • Oven at 325°F for 15 to 18 minutes covered with foil is the best method; the sauce stays creamy.
    • Microwave individual portions covered loosely for 2 to 3 minutes at 70% power, stirring halfway.
    • Add a tablespoon of heavy cream per portion before reheating to restore the sauce consistency.

    Family Secret Worth Sharing

    The biggest flavor difference between a good keto chicken broccoli casserole and a great one comes down to a step most people skip entirely: searing the chicken. I know it feels like an extra pan and extra time when you could just throw everything in raw, and yes, technically it will cook through either way. But raw chicken dumped directly into a cream sauce comes out pale, soft, and flavorless; it tastes steamed because it is steamed.

    Those golden, caramelized edges on each chicken piece carry flavor that the cream sauce cannot replicate on its own. Three minutes per side in a hot pan, and the whole casserole tastes like it came from a restaurant rather than a weeknight kitchen. Jake noticed the difference without being told he took his first bite, looked up, and said “this one’s better than last time.” I did not tell him the only change was the searing step. Some secrets are better kept until they are old enough to appreciate them.

    Troubleshooting FAQs

    My sauce came out grainy or lumpy. What went wrong?
    Almost certainly the cream cheese was too cold. It needs to be genuinely soft, either left out at room temperature for an hour or microwaved for 25 to 30 seconds. The other cause is heat that is too high when you add the cream; keep it at medium and stir constantly. If the sauce does look grainy, take the pan off the heat entirely and stir vigorously; it usually comes back together with patience.

    The broccoli came out mushy. How do I keep it with more bite?
    Cut the florets on the larger side rather than very small pieces, which overcook quickly. Make sure the broccoli goes in raw rather than pre-steamed; it will cook perfectly in the baking time from raw. If you prefer it with more crunch, fold it into the sauce and then bake for the last 10 minutes only rather than the full time.

    The sauce seems too thin and watery after baking. What happened?
    This usually means the broccoli or chicken released water during baking. Pat the broccoli florets dry before adding them to the sauce, and make sure the seared chicken has rested and drained before folding it in. If using frozen broccoli, it must be completely thawed and very thoroughly dried. Next time reduce the cream by two tablespoons as a buffer.

    Can I make the dish without searing the chicken first?
    You can, but please read the Family Secret section above before deciding to. If you are genuinely short on time, season the raw chicken pieces well, fold them into the sauce with the broccoli, and increase the covered bake time to 35 minutes, then uncover for 10. The texture will be softer and the flavor less complex, but it will still be a very respectable easy low-carb recipe that the whole table will eat without complaint.

    The Casserole That Made Keto Feel Like Something to Look Forward To

    I did not go into keto cooking expecting to find something that would make both kids genuinely excited for dinner. I expected compliance, at best. What I got instead was Jake developing a working theory about cheese ratios and Emma explaining to her friend on the phone that “we’re having the broccoli one” in a tone that made it sound like a reward rather than a vegetable. That’s the whole thing, really: easy low-carb recipe cooking is not about what you take out, it’s about what you build in its place.

    A creamy garlic sauce, golden seared chicken, and cheese that stretches like that photo—every time this is what low-carb meal ideas look like when they actually work. When it stops being a diet dinner and starts being the one people ask for specifically.

    Whether this becomes the anchor of your chicken keto meal rotation, your go-to Sunday meal prep dish, or the first thing you make when someone in your life tells you they are trying to eat low carb and you want to prove it does not have to mean sad food, I hope it delivers. It really does. Make it once, and it earns its place permanently.

    Don’t forget to snap a picture of your keto chicken broccoli casserole before that first cheesy scoop disappears (trust me, it will disappear quickly!), and leave a rating below. We’d love to hear how this keto chicken broccoli recipe becomes part of your family weeknight story.

    Star rate this recipe and join our cozy low carb kitchen family.