Category: Healthy

Clean, nourishing recipes that never sacrifice flavor. Gluten-free, dairy-free, high-protein, and vegetable-forward meals for everyday healthy eating the whole family will enjoy.

  • 3 Secrets to the Best Roasted Vegetable Bowls Healthy

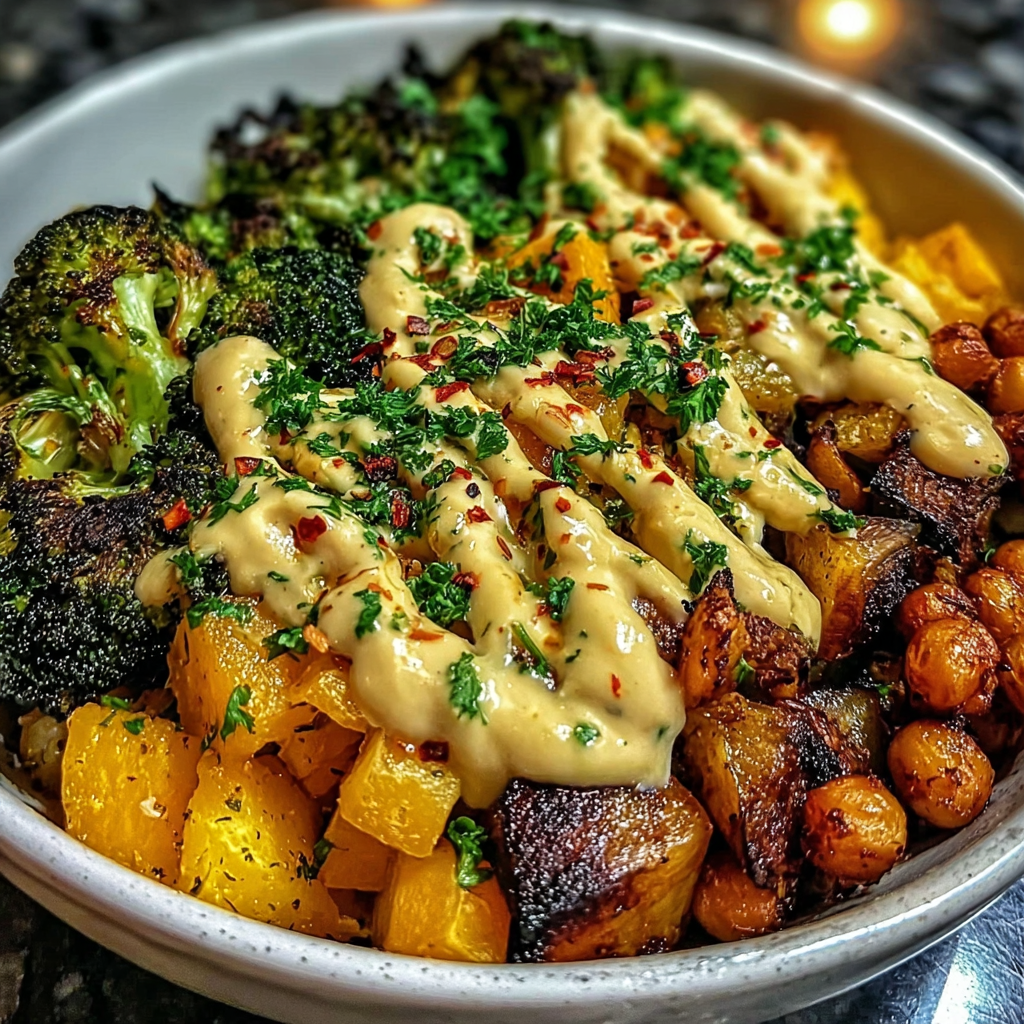
    3 Secrets to the Best Roasted Vegetable Bowls Healthy

    I set off the smoke alarm twice while trying to roast the vegetables. Twice. I forgot about both pans while helping Ben with his spelling words and walked back to a pure kitchen disaster. Mia wandered in, sniffed the smoky air, and announced, “Something smells like school lunch. ” That was not a compliment. Once I figured it out, these roasted vegetable bowls healthy enough for any weeknight, became everything.

    Why This Recipe Is Special

    Here is the thing nobody tells you about roasted vegetables: when you get them right, even the kids who make dramatic gagging sounds at the word “broccoli” will eat them without complaint. Ben, my nine-year-old, once described these bowls as “actually pretty good for something healthy,” which in our house is a standing ovation. This recipe is filling, flexible, and genuinely one of the best ways I know to get a real vegetable-focused dinner on the table without spending an hour in the kitchen.

    How To Make Roasted Vegetable Bowls Healthy

    My first real successful attempt happened on a Tuesday in January when I was determined to stop ordering delivery. I had Mia sitting on the counter eating a handful of raw chickpeas straight from the can (she does this; I have accepted it) and Ben reading the ingredient list over my shoulder like a tiny food critic. When the first tray came out of the oven smelling like golden caramelized edges and warm spices, Mia slid off the counter and pressed her nose up to the pan. “Can I eat just the potatoes?” she asked. Reader, she ate the broccoli too.

    The big lesson from my burnt-vegetable disaster days was simple: do not crowd the pan. I used to pile everything onto one baking sheet thinking it would save time, and what I got instead was sad, steamed vegetables sitting in their liquid. Spread them out, give them space, and let the oven do its job. Two sheet pans, side by side, changed everything. Ben now calls himself the “spreader,” which mostly means he arranges the vegetables with the focused intensity of someone doing surgery.

    Main Ingredients

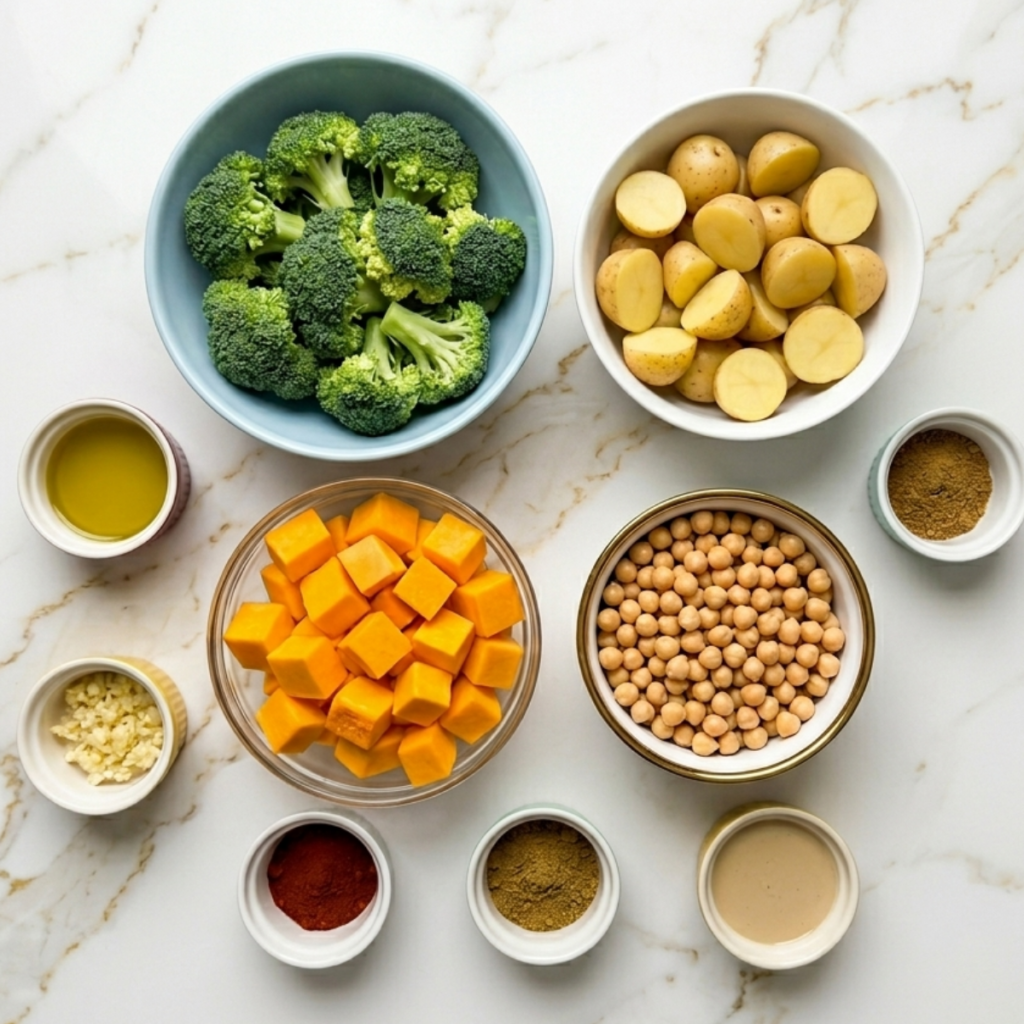
    • 2 cups broccoli florets – Gets beautifully crispy at the edges; cut them similar in size so they roast evenly
    • 2 cups baby potatoes, halved – The golden, crispy base of the bowl; creamy inside, caramelized outside
    • 1.5 cups butternut squash, cubed – Adds natural sweetness and gorgeous color; cut into 3/4-inch pieces
    • 1 cup chickpeas, drained and dried – Your protein hero: they turn irresistibly crunchy in the oven
    • 3 tablespoons olive oil – Coats everything evenly and helps achieve that golden roast
    • 1 teaspoon garlic powder – Warm, savory backbone for the whole bowl
    • 1 teaspoon smoked paprika – Gives everything that deep, slightly smoky color and flavor
    • 1/2 teaspoon cumin – Earthy warmth that ties all the vegetables together
    • Salt and black pepper to taste – Season generously; vegetables need more salt than you think
    • For the tahini drizzle: 3 tablespoons tahini – Nutty, creamy, and the sauce that makes this bowl feel complete
    • 2 tablespoons lemon juice – Brightens the tahini and cuts through the richness
    • 1 tablespoon olive oil – Loosens the sauce to a drizzleable consistency
    • 2 to 3 tablespoons warm water – Thins the tahini sauce to just the right pourable texture
    • Fresh parsley, chopped – For garnish; adds color and a clean, fresh finish
    • Red pepper flakes – Optional, for a little heat on top

    Step-by-Step Instructions

    Step 1: Prep and Season the Vegetables

    • Preheat your oven to 425 degrees F and line two large baking sheets with parchment paper
    • Pat the chickpeas completely dry with paper towels; moisture is the enemy of crunch
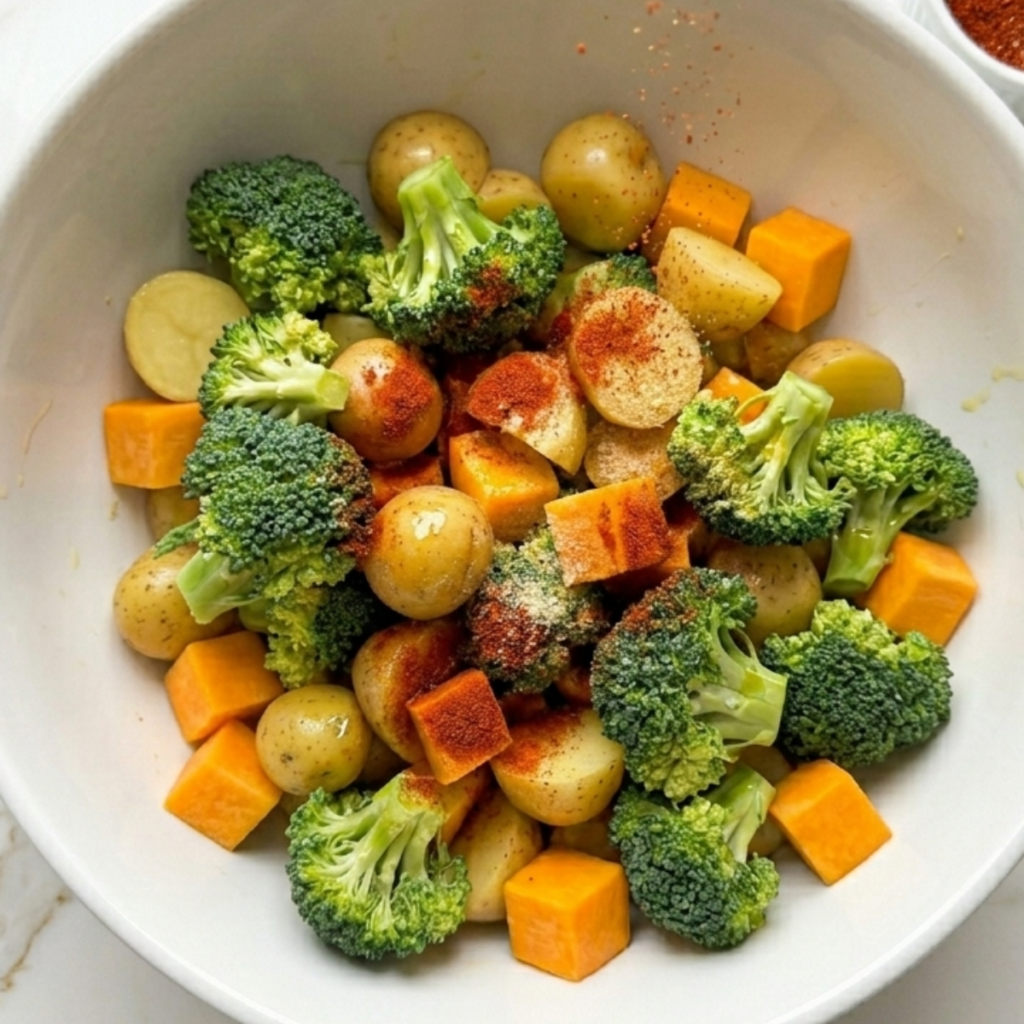
    • Toss the broccoli, potatoes, squash, and chickpeas separately with olive oil, garlic powder, smoked paprika, cumin, salt, and pepper
    • Keep the chickpeas on their own section of the pan since they roast faster than the root vegetables

    Step 2: Roast the Vegetables

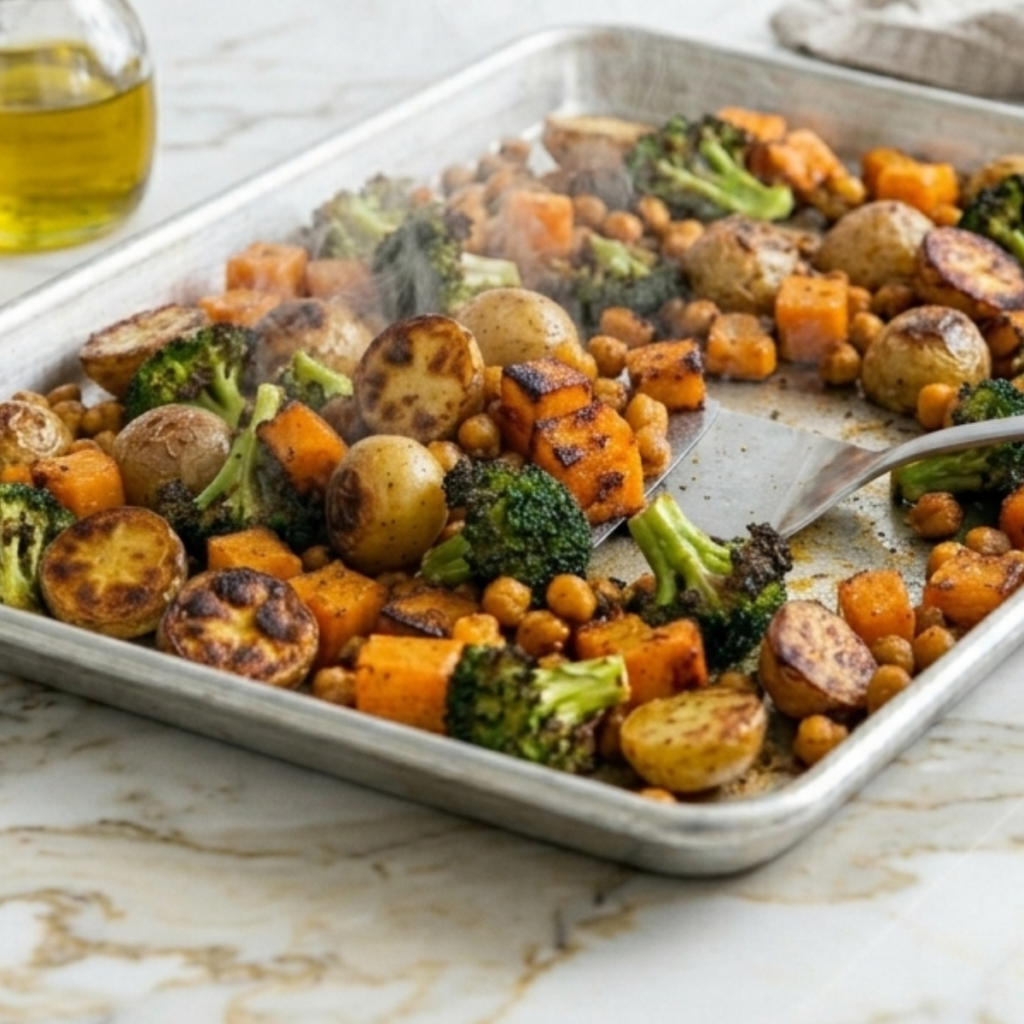
    • Spread everything across two baking sheets in a single layer with space between each piece
    • Place potatoes and squash on one pan, broccoli and chickpeas on the second pan
    • Roast at 425 degrees F for 25 to 30 minutes, flipping everything once halfway through
    • Remove the broccoli and chickpeas at 20 to 22 minutes if they are browning faster than the root vegetables

    Step 3: Make the Tahini Sauce

    • Whisk together the tahini, lemon juice, and olive oil in a small bowl until smooth
    • Add warm water one tablespoon at a time, whisking between each addition until the sauce is pourable but not thin
    • Taste and adjust with a pinch of salt or extra lemon juice to your preference
    • Set aside at room temperature; the sauce will thicken slightly as it sits so keep the warm water nearby

    Step 4: Assemble the Bowls

    • Start with a base of your choice: cooked grains, leafy greens, or simply the roasted potatoes as the foundation
    • Layer the roasted broccoli, squash, and crispy chickpeas over the top
    • Drizzle the tahini sauce generously across everything in a slow zigzag
    • Finish with fresh parsley and a pinch of red pepper flakes, and serve immediately while everything is still warm

    Roasted Vegetable Bowls Healthy Variations

    Ben’s “Make It a Grain Bowl” Version

    Ben went through a phase where everything had to have quinoa in it after he learned it was a “complete protein” from a school project. He told me the news very seriously while pointing at the bag like a tiny nutritionist. For a heartier bowl that keeps hungry kids full through homework and after-school activities, serve everything over a cup of cooked quinoa or brown rice. The grains soak up the tahini sauce in the most satisfying way and turn this into a real meal-prep-with-lots-of-veggies situation for the week ahead.

    Mia’s “Everything Crispy” Bowl

    Mia has one rule in life: texture matters. She will reject anything soft, mushy, or what she calls “too wet.” For the crunch-obsessed members of your household, double the chickpeas, add a handful of pumpkin seeds to the pan in the last five minutes of roasting, and swap the tahini drizzle for a lemon-herb yogurt sauce instead. Everything gets that satisfying crunch that makes Mia eat her vegetables without a single negotiation.

    The “Clean Out the Fridge” Sunday Version

    This is honestly how the recipe started. I had half a head of cauliflower, some sad carrots, and a sweet potato that was on its last good day. Everything got tossed with the same spice mix and roasted together. The rule is simple: any vegetable that can survive 425 degrees F for 25 minutes is fair game. Zucchini, bell peppers, red onion, Brussels sprouts, and green beans all work beautifully. This dish is my favorite kind of hearty vegetable meal because the recipe changes every single week.

    Substitutions

    Butternut squash to sweet potato: Sweet potato is actually my go-to swap when I cannot find squash. It roasts in almost the same time and has a similar natural sweetness, and Mia cannot tell the difference. Cut it into the same size cubes for even cooking.

    Tahini sauce to hummus drizzle: If tahini is not something you keep on hand, thin out two tablespoons of store-bought hummus with a little lemon juice and olive oil until it is pourable. It gives you a similar creamy, savory finish with zero extra effort.

    Chickpeas to white beans: White beans roast up beautifully and give you a slightly softer, creamier bite compared to the crunch of chickpeas. They are also a wonderful option if someone in your house has a texture preference. Dry them well before roasting, just like you would chickpeas.

    Smoked paprika to regular paprika plus a pinch of cayenne: If you only have sweet paprika in your spice rack, add just a tiny pinch of cayenne alongside it to recreate that subtle smoky warmth. Start small since cayenne is much hotter than smoked paprika and builds quickly.

    Equipment

    • Two large rimmed baking sheets (half sheet pans are ideal)
    • Parchment paper or silicone baking mats
    • Large mixing bowl for tossing the vegetables
    • Small mixing bowl for the tahini sauce
    • Whisk
    • Sharp chef’s knife and cutting board
    • Vegetable peeler for the squash
    • Paper towels for drying the chickpeas
    • Measuring spoons
    • Tongs or a wide spatula for flipping
    • Timer (non-negotiable after my two-pan smoke alarm situation)

    Storage Tips

    Make Ahead

    • Chop all your vegetables up to two days ahead and store them in separate airtight containers in the fridge
    • The tahini sauce can be made three days in advance; store it in a sealed jar and whisk in a splash of warm water before serving to loosen it back up
    • This recipe is one of the best veggie food prep options out there; roast a double batch on Sunday and you have four days of easy lunches sorted

    Refrigerator

    • Store roasted vegetables in an airtight container in the fridge for up to 4 days
    • Keep the tahini sauce in a separate container so it does not make the vegetables soggy
    • The chickpeas will soften over time in the fridge, so re-crisp them in a dry skillet for two minutes before serving if you want that crunch back

    Freezing

    • Roasted potatoes and squash freeze reasonably well for up to 6 weeks in a freezer-safe bag
    • Broccoli and chickpeas do not freeze well after roasting because they lose their texture completely, so freeze those components raw instead
    • Do not freeze the tahini sauce; make it fresh each time since it takes less than three minutes

    Reheating

    • The best way to reheat roasted vegetables is back in the oven at 400 degrees F for 8 to 10 minutes so they crisp back up
    • Microwave reheating works in a pinch but the vegetables will be softer; spread them on a plate in a single layer and heat in 60-second bursts
    • A hot skillet with a tiny drizzle of olive oil for two to three minutes brings back a lot of the original roasted texture and flavor

    Family Secret Worth Sharing

    My mom always said the difference between good roasted vegetables and great ones is what you do in the last five minutes. She would pull the pan out just before everything was done, drizzle a tiny bit of honey over the squash and carrots, and slide it back in for one final burst. The sugars caramelize just enough to turn those last few minutes into something magical. I tried it once on a whim while Ben was watching, and he grabbed a piece of squash straight off the hot pan, burned his fingers, and said it was “worth it.” My mom would have loved that kid.

    Troubleshooting FAQs

    Why are my roasted vegetables coming out soggy instead of crispy?
    Three things cause soggy vegetables every time: a crowded pan, too much oil, or vegetables that were not dried properly. Make sure every piece has space around it, use just enough oil to lightly coat each piece, and if you washed the vegetables before roasting, dry them thoroughly. Even a little surface moisture steams the vegetables instead of letting them roast.

    My chickpeas are not getting crunchy. What am I doing wrong?
    The number one culprit is moisture. Canned chickpeas need to be drained, rinsed, and then patted aggressively dry with paper towels. Spread them on the pan with space around each one and do not stir them too often; let them sit and develop a crust. Some brands of canned chickpeas are waterlogged and may need an extra five minutes in the oven.

    Can I use frozen vegetables instead of fresh?
    You can, but they need one extra step. Spread the frozen vegetables on a baking sheet and let them thaw at room temperature for 20 minutes, then blot dry with paper towels before tossing with oil and spices. Frozen vegetables carry a lot of extra moisture that will steam everything if you put them in the oven straight from the bag.

    The tahini sauce seized up and turned into a paste. How do I fix it?
    This happens to everyone the first time, and it is completely normal. Tahini thickens dramatically when it first meets acid like lemon juice. Keep whisking and add warm water one tablespoon at a time, whisking between each addition. It will loosen up into a smooth, creamy sauce. Cold water makes it seize even more, so always use warm.

    A Bowl Full of Good and a Kitchen Full of Noise

    These days, Tuesday night in our kitchen smells like smoked paprika and toasted chickpeas, and I genuinely could not be happier about it. Mia picks out the squash and eats it first. Ben arranges his bowl in sections so nothing touches, which tells you everything you need to know about him. This has become one of our favorite low fat veggie recipes that actually satisfies everyone at the table, right alongside the other roasted vegetables dinner meals we rotate through the week. Whenever someone asks me what to eat with roasted vegetables, I always say: make it a bowl, add a good sauce, and do not underestimate how much a little crunch changes everything. These are the kinds of hearty vegetable meals that make you feel like you are genuinely taking care of your family, one messy, noisy, wonderful Tuesday at a time.

    Don’t forget to snap a picture of your roasted vegetable bowls healthy before that… (trust me, it will disappear quickly!), and leave a rating below. We’d love to hear how this roasted vegetable bowls healthy recipe becomes part of your family dinner story.

    Star rate this recipe and join our warm kitchen family.

  • The Best Pineapple Chicken and Rice

    The Best Pineapple Chicken and Rice

    It started with a smoke alarm, a very dramatic six-year-old, and what can only be described as chicken jerky. I was heated too high, got distracted by a homework crisis, and came back to find my beautiful pineapple chicken and rice looking like a sad campfire story. Mia fanned the air with a folder. Ben said, very seriously, “Mom, I don’t think we should eat that.” We ordered pizza.

    Why This Recipe Is Special

    But here is the thing about cooking with your kids watching: they remember everything. The week after my little disaster, Ben asked if we could “try the pineapple chicken again, but maybe not burnt this time.” That completely unsolicited vote of confidence is what got me back in the kitchen. This dish is sweet, sticky, a little caramelized, and packed with flavor that feels like takeout but better. It is our Friday night tradition now, and both kids ask for it by name.

    How To Make Pineapple Chicken and Rice

    My first real attempt (the successful one, not the smoke alarm incident) taught me something important: patience. I was rushing, as usual, with Mia sitting on the counter and Ben reading over my shoulder, narrating every step like a sports commentator. When the sauce hit the hot pan and that caramelized pineapple smell filled the kitchen, Mia announced, “It smells like a vacation.” Ben immediately countered, “It smells like Hawaii.” We had never been to Hawaii. I told them that was precisely the point.

    The turning point was learning to dry the chicken pieces really well before they hit the pan. My first burnt attempt? I had skipped that step entirely. Wet chicken steams instead of sears, and you end up with sad, gray pieces instead of those gorgeous caramelized edges. Ben now considers himself the official chicken-patting expert, which means he stands on a step stool with a paper towel looking very pleased with himself.

    Main Ingredients

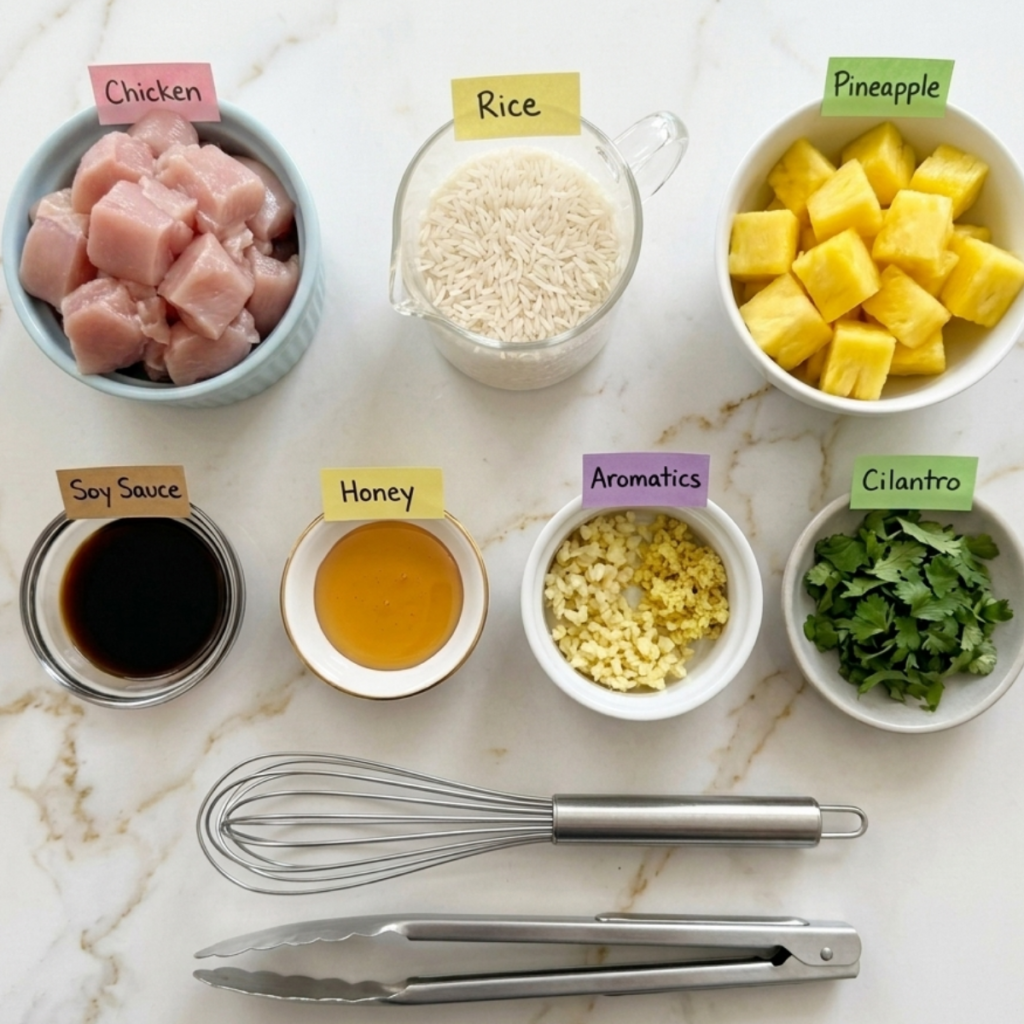
    • 1.5 lbs boneless, skinless chicken thighs, cut into 1-inch pieces: Thighs stay juicy even if you pull them a minute late; breasts dry out fast
    • 1.5 cups long-grain white rice: The starchy base that soaks up every drop of that sticky sauce
    • 1 can (20 oz) pineapple chunks in juice, drained (juice reserved): The juice goes in the sauce; canned is more consistent than fresh here
    • 3 tablespoons soy sauce: Depth and saltiness; use low-sodium if you are watching salt
    • 2 tablespoons honey: Brings the sticky glaze; do not skip or substitute with maple syrup for this one
    • 1 tablespoon rice vinegar: Brightens the whole sauce and balances the sweetness
    • 1 tablespoon sesame oil: Adds that unmistakable toasty aroma; a little goes a long way
    • 3 cloves garlic, minced: Non-negotiable flavor backbone
    • 1 teaspoon fresh ginger, grated: Gives the dish its warmth; ground ginger works in a pinch
    • 1 tablespoon cornstarch: Thickens the sauce into that glossy, clingy glaze
    • 2 tablespoons neutral oil (vegetable or avocado) – High smoke point so you get a proper sear
    • Salt and black pepper: Season the chicken before it hits the pan
    • Fresh cilantro for garnish: Optional but highly recommended; my kids pick it off and I eat theirs

    Step-by-Step Instructions

    Step 1: Make Your Sauce

    • Whisk together the soy sauce, honey, rice vinegar, and sesame oil in a small bowl
    • Add 3 tablespoons of the reserved pineapple juice and stir to combine
    • Whisk in the cornstarch until completely smooth with no lumps
    • Set aside close to the stove so it is ready when you need it

    Step 2: Cook the Rice

    • Rinse the rice in cold water until it runs mostly clear, about 30 seconds
    • Combine rice with 3 cups of water in a saucepan, bring to a boil, then reduce to a simmer
    • Cover and cook on low heat for 18 minutes without lifting the lid
    • Remove from heat and let it steam, still covered, for another 5 minutes

    Step 3: Sear the Chicken

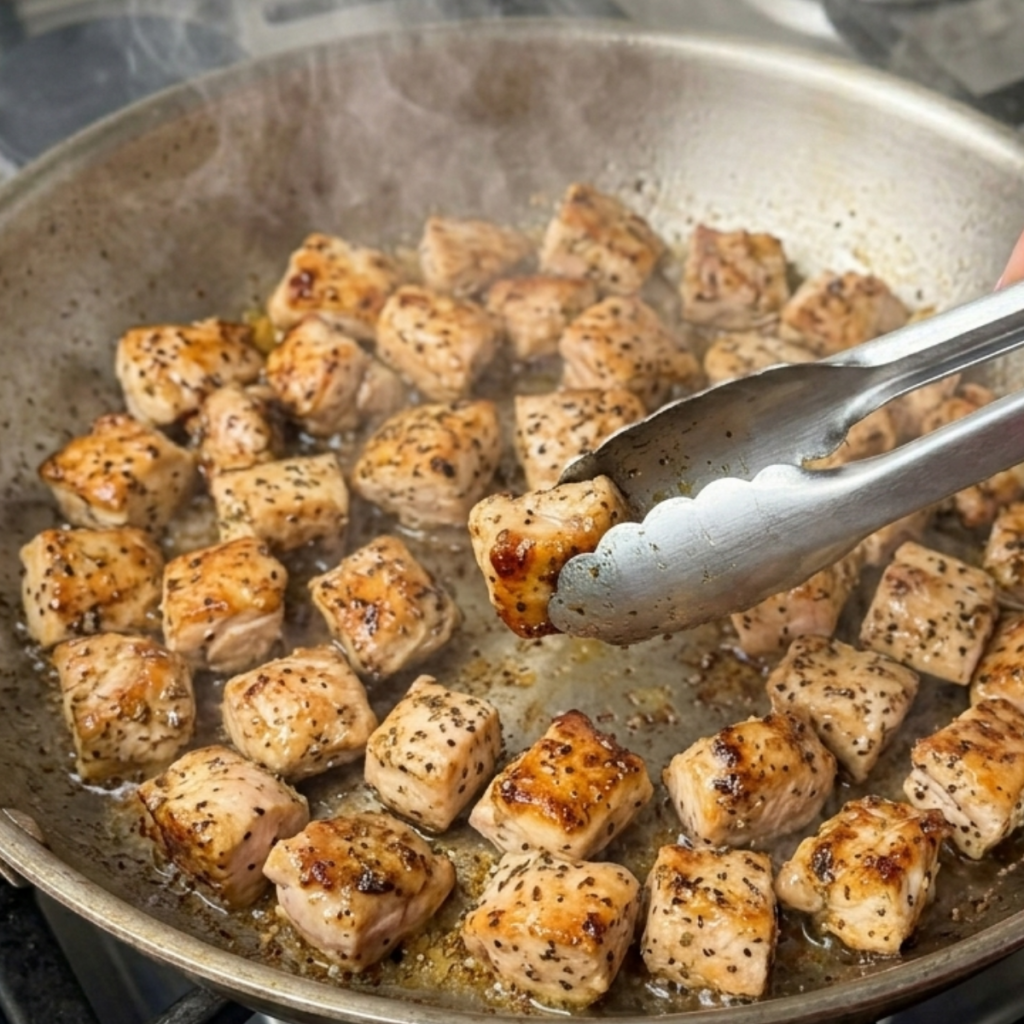
    • Pat the chicken pieces completely dry with paper towels, then season generously with salt and pepper
    • Heat the neutral oil in a large skillet or wok over medium-high heat until shimmering
    • Add the chicken in a single layer and work in two batches if pieces are crowding the pan
    • Cook 3 to 4 minutes per side without moving until deeply golden, then remove and set aside

    Step 4: Build the Dish

    • In the same pan, sauté the garlic and ginger for 30 seconds until fragrant
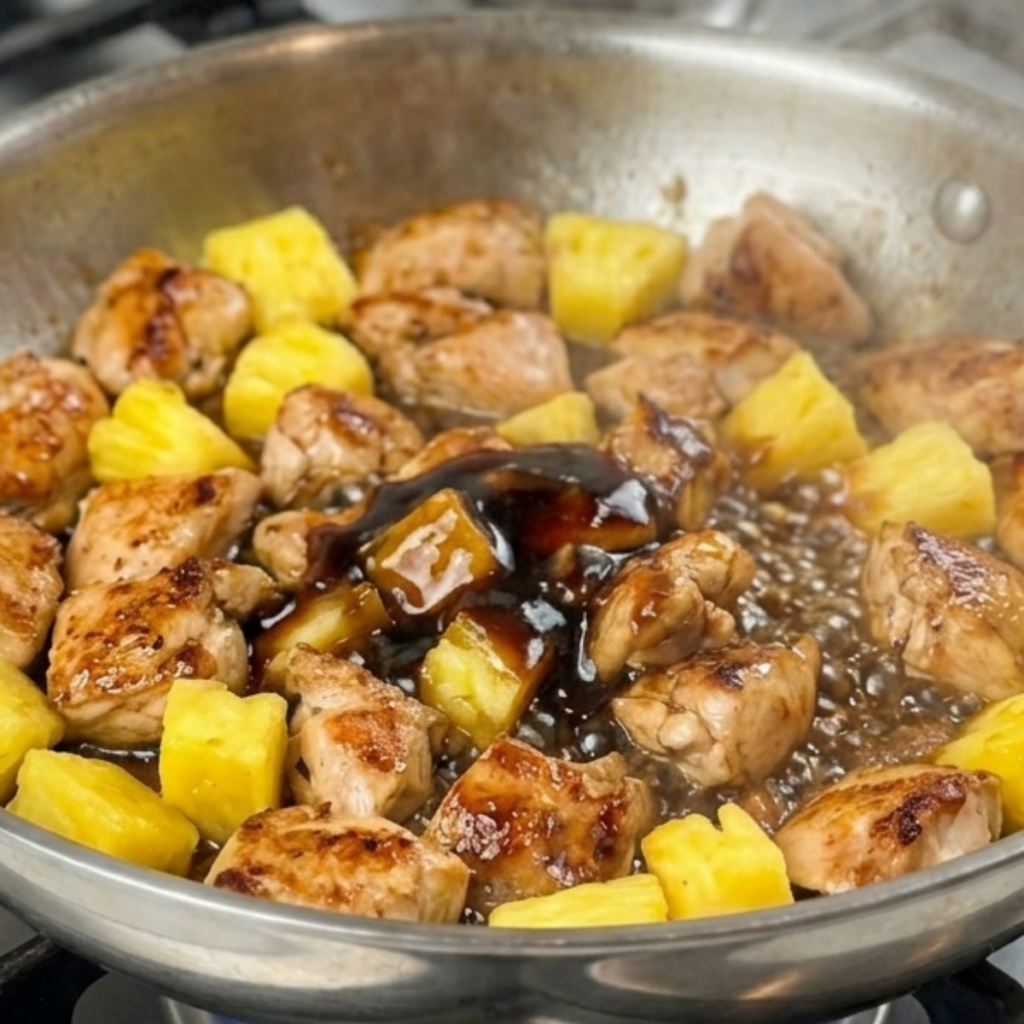
    • Add the pineapple chunks and cook for 2 minutes until they pick up some color on the edges
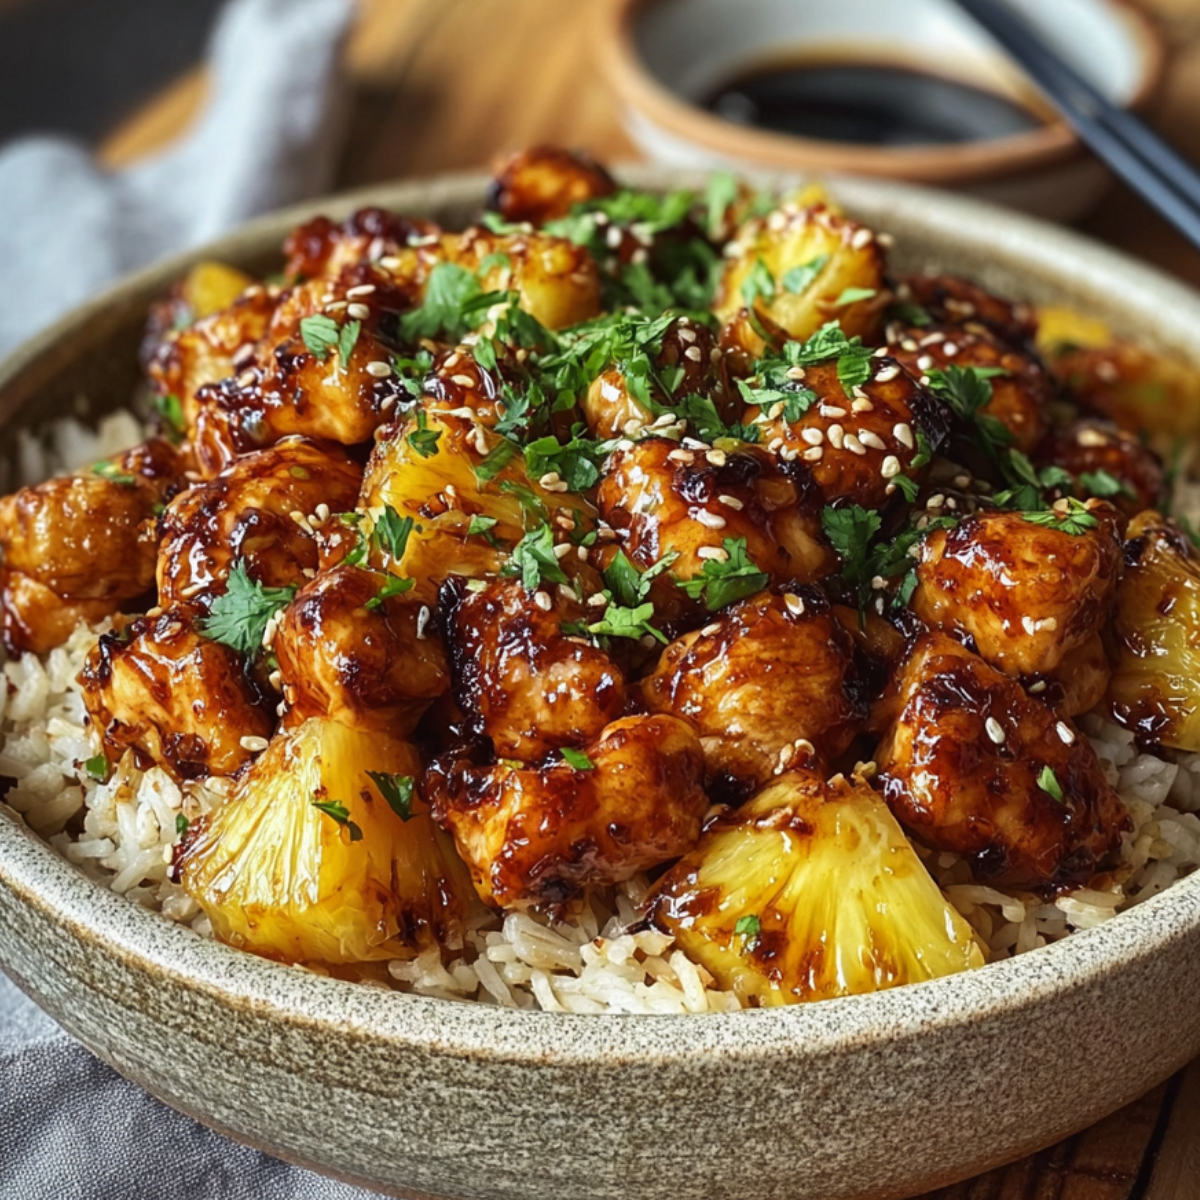
    • Return the chicken to the pan, pour the sauce over everything, and toss to coat
    • Cook for another 2 to 3 minutes, stirring gently, until the sauce thickens and coats every piece

    Pineapple Chicken and Rice Variations

    The “Make It Spicy, Mom” Version

    Ben went through a phase at age seven where everything had to be spicy. He had zero tolerance for actual heat but insisted on asking for it anyway. For those of you with braver palates (or braver kids), add a tablespoon of sriracha or chili garlic sauce directly into the sauce mixture. A pinch of red pepper flakes in the pan with the garlic also does the trick. The sweet pineapple plays beautifully against the heat.

    Mia’s No-Cilantro, Extra-Pineapple Bowl

    Mia has very strong opinions about cilantro. She says it tastes like “soap and sadness,” which is honestly fair. For the cilantro-averse members of your family, skip it entirely and double the pineapple chunks for a sweeter, fruitier result. She also likes hers served with the rice on the side instead of mixed in, which she calls “fancy restaurant style.”

    The Weeknight Sheet Pan Remix

    On the nights when even standing at the stove feels like too much, I skip the skillet entirely. Toss the marinated chicken and pineapple chunks on a sheet pan, roast at 425 degrees Fahrenheit for 20 to 22 minutes, then drizzle the sauce (cooked separately in a small saucepan for 2 minutes) over the top. You lose a little of the caramelization magic, but the cleanup is a dream, and the kids can help lay everything out on the pan.

    Substitutions

    Chicken thighs to chicken breast: Totally doable, but reduce the cooking time by about one minute per side and pull them off the heat the moment they are cooked through. Breast meat punishes you for overcooking.

    Fresh pineapple to canned pineapple chunks: Fresh pineapple is beautiful here, but it releases more liquid. If using fresh, pat those chunks dry, just like you do the chicken, or your sauce will be thin. About 2 cups of fresh chunks equals one standard can.

    Soy sauce to tamari or coconut aminos: Tamari is a great gluten-free swap with an almost identical flavor. Coconut aminos are sweeter and less salty, so taste as you go and reduce the honey slightly if you make that switch.

    White rice to jasmine or brown rice: Jasmine rice is actually my preference. It has a slightly floral quality that echoes the pineapple. Brown rice works too; just cook it separately according to package directions since it takes much longer than white.

    Equipment

    • Large skillet or wok (12-inch minimum) with a lid
    • Medium saucepan for rice
    • Small mixing bowl for the sauce
    • Whisk
    • Cutting board and sharp chef’s knife
    • Microplane or box grater for fresh ginger
    • Paper towels for patting the chicken dry
    • Tongs
    • Measuring spoons and a liquid measuring cup
    • Step stool (if your six-year-old insists on being the official chicken-pat supervisor)

    Storage Tips

    Make Ahead

    • The sauce can be whisked together and stored in a sealed jar in the fridge for up to 3 days before you need it
    • Chop and portion your chicken a day ahead and keep it covered in the fridge
    • Cook a big batch of rice at the start of the week; leftover rice actually fries and sauces better than freshly cooked

    Refrigerator

    • Store leftovers in an airtight container in the fridge for up to 4 days
    • Keep the rice and chicken separate if possible; rice stored with the saucy chicken soaks up all the liquid and gets a little mushy
    • Let everything cool completely before sealing to avoid condensation

    Freezing

    • The chicken and sauce freeze beautifully for up to 2 months in a freezer-safe container
    • Rice freezes well too; portion it into individual servings in freezer bags, pressing flat to save space
    • Do not freeze fresh cilantro garnish; add it fresh when you reheat and serve

    Reheating

    • Reheat the chicken gently in a covered skillet over medium-low heat with a splash of water or pineapple juice to loosen the sauce
    • Microwave works in a pinch; cover with a damp paper towel and heat in 90-second increments, stirring in between
    • For rice, a few drops of water before microwaving prevents that sad, hard clump situation

    Family Secret Worth Sharing

    The real secret to this dish comes straight from something my mom used to do, which I thought was weird until I tried it myself: she always added a tiny bit of reserved pineapple juice to the rice cooking water instead of using plain water. Not all of it, just a couple tablespoons. The rice comes out with this barely-there sweetness that you cannot quite identify but absolutely notice. Ben figured it out one night and demanded I tell him what I did differently. When I explained, he looked at me with the most serious face and said, “Grandma was a genius.” She really was.

    Troubleshooting FAQs

    Why is my sauce not thickening into a glaze?
    The most common culprit is not enough heat or too much liquid. Make sure your pan is on medium-high when you add the sauce, and if you used fresh pineapple, it likely released extra juice. Give it an extra minute or two, stirring constantly. If it still will not tighten up, mix half a teaspoon of cornstarch with a teaspoon of cold water and stir it in.

    My chicken is cooked through, but there is no golden crust. What happened?
    Two things cause this: crowding the pan and wet chicken. If pieces are touching, they steam instead of sear. Work in batches, leave space between each piece, and make absolutely sure you have patted every surface dry with paper towels before seasoning. A dry surface is what creates that caramelized, golden crust.

    The dish came out way too sweet. How do I balance it?
    Add an extra teaspoon of rice vinegar or a small squeeze of fresh lime juice right at the end. A little more soy sauce also helps pull things back into balance. If you used sweetened pineapple juice instead of the unsweetened reserved juice from the can, that is likely the cause. Always check the label.

    Can I make this in a slow cooker for a busy day?
    Yes, with a small adjustment: sear the chicken first in a skillet for color and flavor, then transfer everything to the slow cooker with the sauce. Cook on low for 3 to 4 hours. The texture is softer and less caramelized than the stovetop version, but it is still deeply flavorful and incredibly hands-off. Add the cornstarch slurry in the last 20 minutes with the lid cracked to let it thicken.

    From Our Table to Yours

    Friday nights in our house smell like pineapple and soy sauce now, and honestly I would not have it any other way. There is something about watching Mia push the cilantro to the edge of her bowl with this long-suffering expression and Ben announcing the meal is “restaurant quality” with rice on his chin that makes all of it feel exactly right. This pineapple chicken and rice sits alongside our beloved easy chicken dinner recipes and has honestly become one of our most requested Asian dishes in the regular rotation. Whenever I need a crowd-pleaser that lands somewhere between comfort food and something that feels a little special, this is the one I reach for, right up there with our other favorite chicken and rice dishes that have carried us through busy school weeks and lazy Sunday nights alike.

    Please remember to snap a picture of your pineapple chicken and rice before that… (trust me, it will disappear quickly!), and leave a rating below. We’d love to hear how this pineapple chicken and rice becomes part of your family dinner story.

    Star rate this recipe and join our warm kitchen family.

  • 5 Secrets to the Best Protein Chicken Salad That Keeps You Full All Afternoon

    5 Secrets to the Best Protein Chicken Salad That Keeps You Full All Afternoon

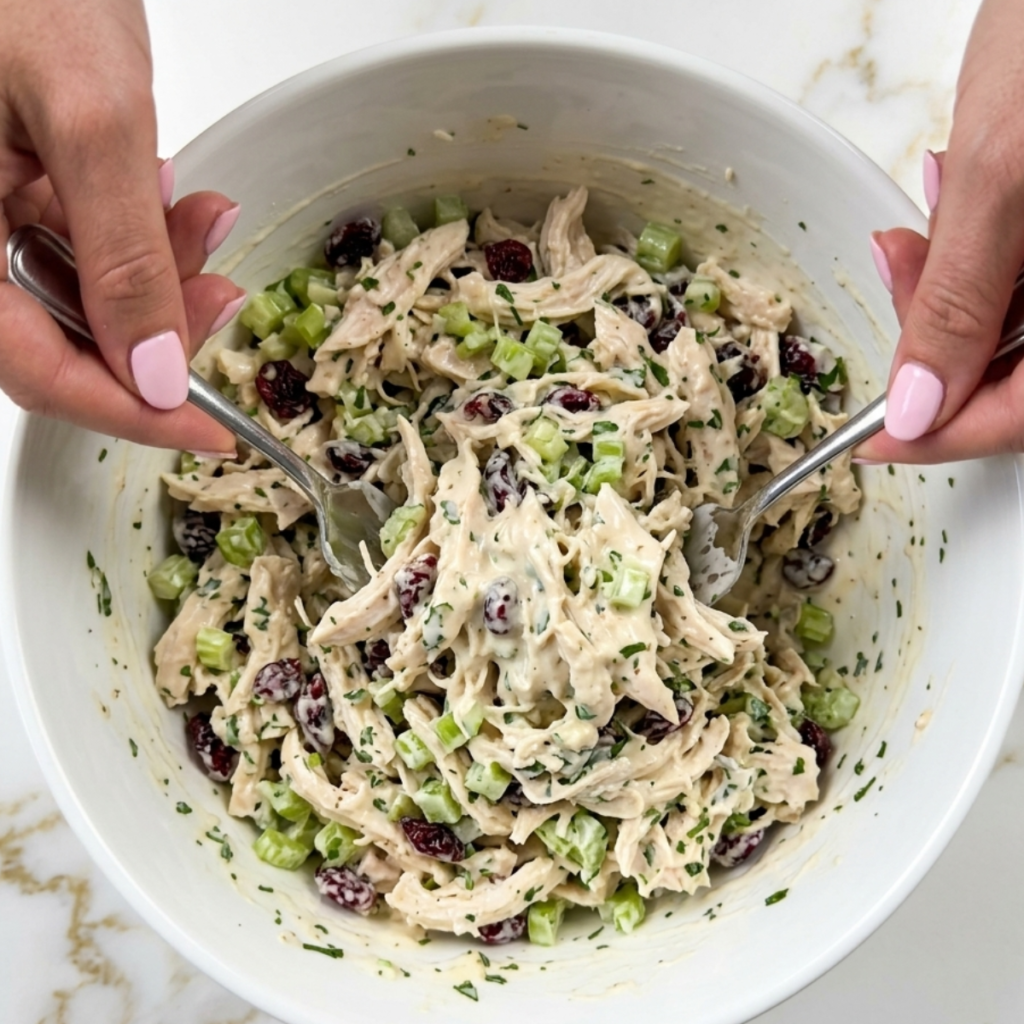
    Mia looked at the bowl, then looked at me, and said very seriously, “Mom, is the meal a punishment?” I had used canned tuna instead of chicken by accident, forgotten to drain it, and added so much celery it crunched on every single bite. My protein chicken salad was not chicken. Leo confirmed the result. I stood there reading the tin label. Right. We started from scratch.

    Why This Recipe Is Special

    This protein chicken salad sits in a very particular and useful category: it genuinely fills you up, it takes fifteen minutes to make, and it doesn’t feel like punishment food, which, as Mia’s early review made clear, is a standard that matters enormously in this household. Two cups of shredded chicken breast gives you over 40 grams of protein per serving before anything else goes in. Added Greek yogurt instead of pure mayo keeps it creamy while stacking the protein even higher. For anyone following a keto diet, bariatric eating guidelines, or just trying to eat more protein at lunch without cooking an entire meal, this is the bowl that does it. Leo wraps it up. Mia eats it with crackers. I eat it straight from the bowl with a fork, which is the correct way.

    How To Make Protein Chicken Salad

    After the tuna incident, which nobody has forgotten despite my best efforts, I rebuilt this recipe very deliberately. The second lesson came from overdressing. I added too much mayo-yogurt mix on a day when I was in a hurry, and the whole thing became a puddle. Leo said it looked like soup that couldn’t decide what it wanted to be. Mia took photos. The fix is to add the dressing in two stages: add half first, mix, check the consistency, and then add more only if it needs it. That one change made this recipe something I actually look forward to making on a Sunday for the week ahead.

    Main Ingredients

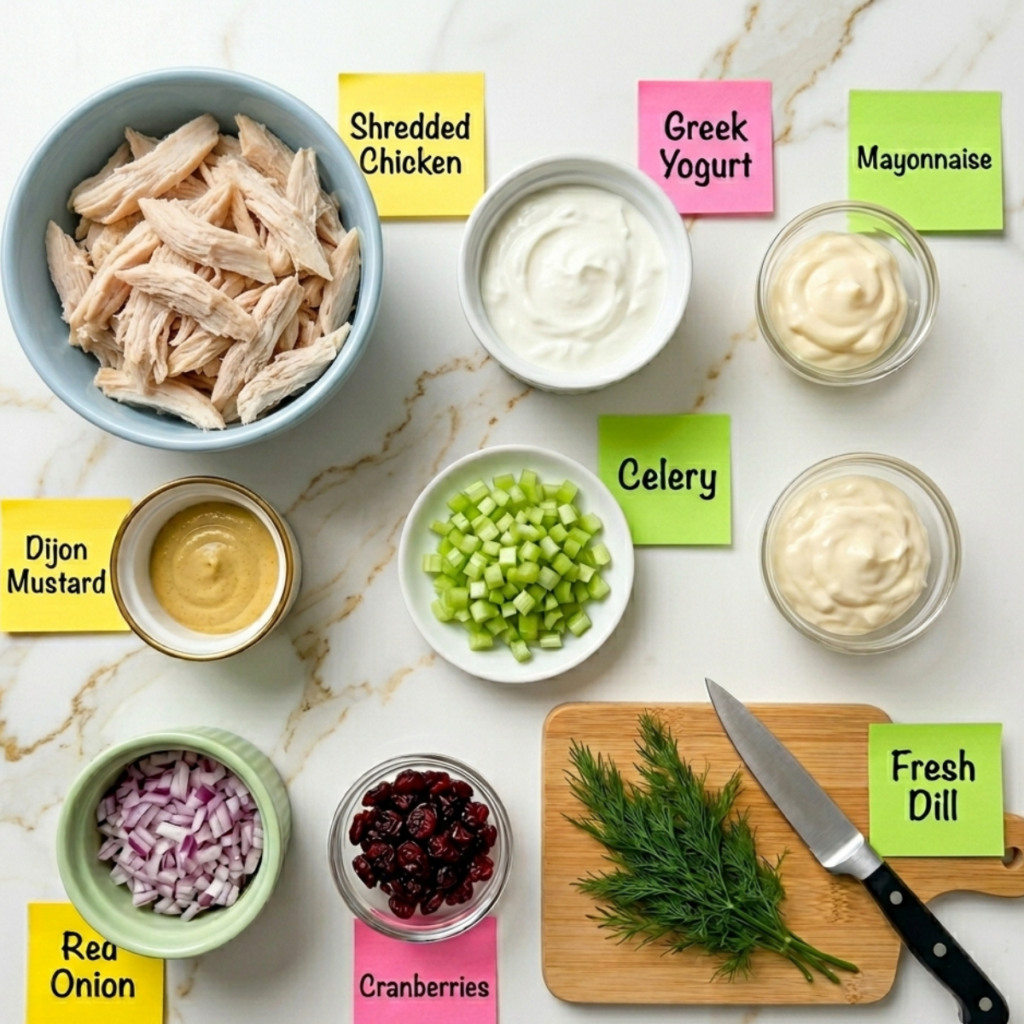
    • 2 cups cooked chicken breast, shredded or diced: poached or rotisserie both work; rotisserie saves time and the flavour holds up beautifully in a salad
    • 3 tbsp plain Greek yogurt (full-fat): the protein booster that replaces some of the mayo; full-fat keeps the texture creamy rather than watery
    • 2 tbsp good quality mayonnaise: still here for flavour and richness; Greek yogurt alone makes it taste too sharp
    • 1 tbsp Dijon mustard: the flavour anchor; don’t skip this; it’s what makes it taste like more than just chicken in a sauce
    • 1 stalk celery, finely diced: finely diced this time, not huge chunks; this was a lesson I learned
    • 2 tbsp red onion, finely minced (optional): adds a sharp note; soak in cold water for 5 minutes first if you want it milder
    • 1 tbsp fresh lemon juice: brightens the whole bowl; bottled lemon tastes flat here
    • Salt and black pepper to taste
    • Fresh dill or parsley, roughly chopped (optional): Mia picks the dill out and Leo eats all of his without complaint
    • 2 tbsp dried cranberries or halved grapes (optional): adds a sweet contrast that makes this feel less like diet food and more like something you actually chose to eat

    Step-by-Step Instructions

    Step 1: Prep the Chicken and Mix-ins

    • If cooking from scratch, poach chicken breast in lightly salted water for 15 minutes until cooked through, then let it cool completely before shredding.
    • Shred or dice cooled chicken into bite-sized pieces shredded gives a traditional texture; diced is easier for wraps and meal prep containers.
    • Finely dice the celery and red onion; if using red onion, soak in cold water for 5 minutes and then drain well to soften the bite.
    • Set all prepped ingredients aside before making the dressing; adding dressing to warm chicken makes it watery.

    Step 2: Make the Protein Dressing

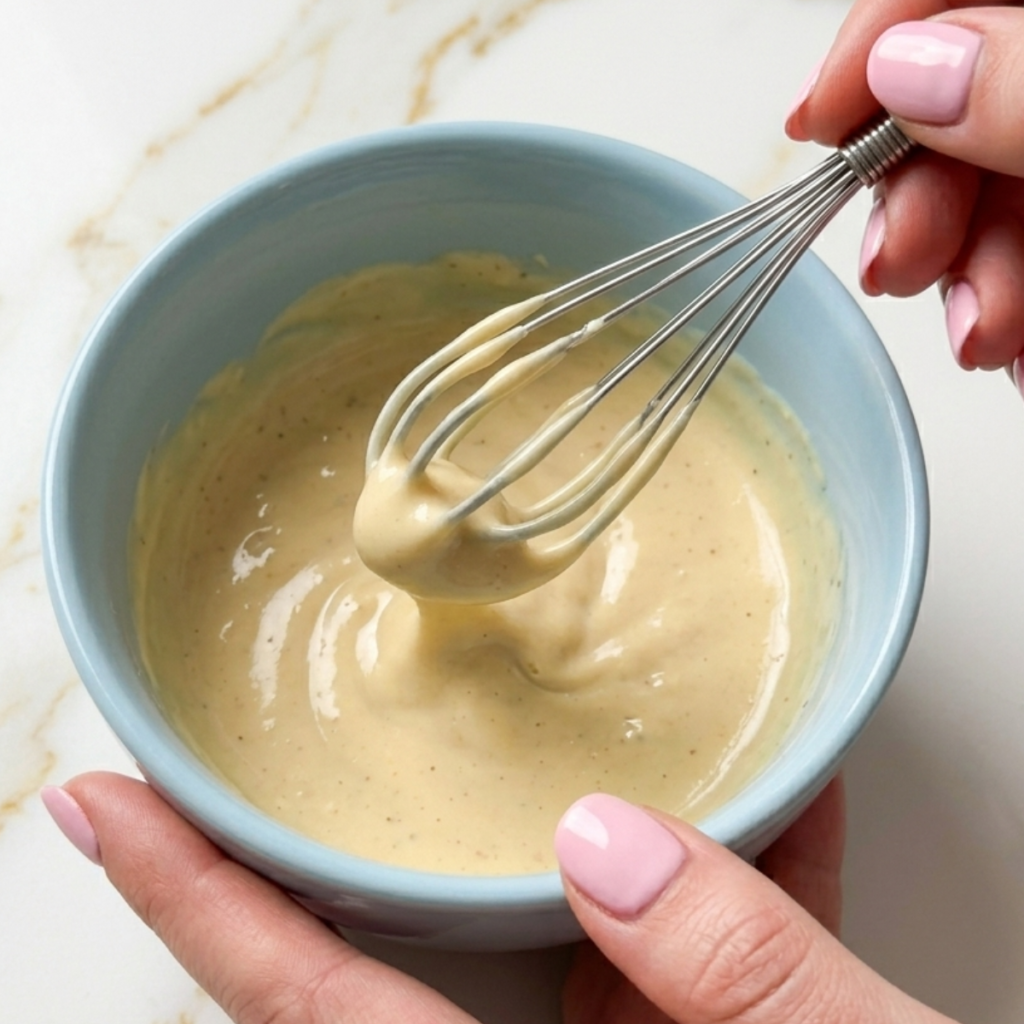
    • Whisk together Greek yogurt, mayonnaise, Dijon mustard, and lemon juice in a small bowl until completely smooth.
    • Season generously with salt and black pepper; the dressing needs to be well-seasoned on its own before it touches the chicken.
    • Taste and adjust: more lemon if it needs brightness, more mustard if it tastes flat, more yogurt if it needs creaminess.
    • The dressing should be thick and spoonable, not runny; if it pours easily, it will make the salad watery.

    Step 3: Combine and Taste

    • Add the chicken, celery, and onion to a large bowl and add half the dressing first; stir gently to coat.
    • Check the consistency; it should look creamy and cohesive, not dry and not soupy; add more dressing only if needed.
    • Fold in cranberries or grapes if using and the fresh herbs, and stir once more.
    • Taste the finished salad and adjust salt, pepper, and lemon before serving; this is the most important step.

    Step 4: Serve or Store

    • Serve immediately on lettuce cups, in a wrap, on crackers, or straight from the bowl with a fork.
    • For meal prep, divide into four airtight containers and refrigerate; the flavor is actually better after a few hours.
    • If serving later, hold back a tablespoon of dressing and stir it in fresh before eating to restore the creamy texture.
    • Top with extra dill, a crack of black pepper, and a squeeze of lemon right before serving.

    Protein Chicken Salad Variations

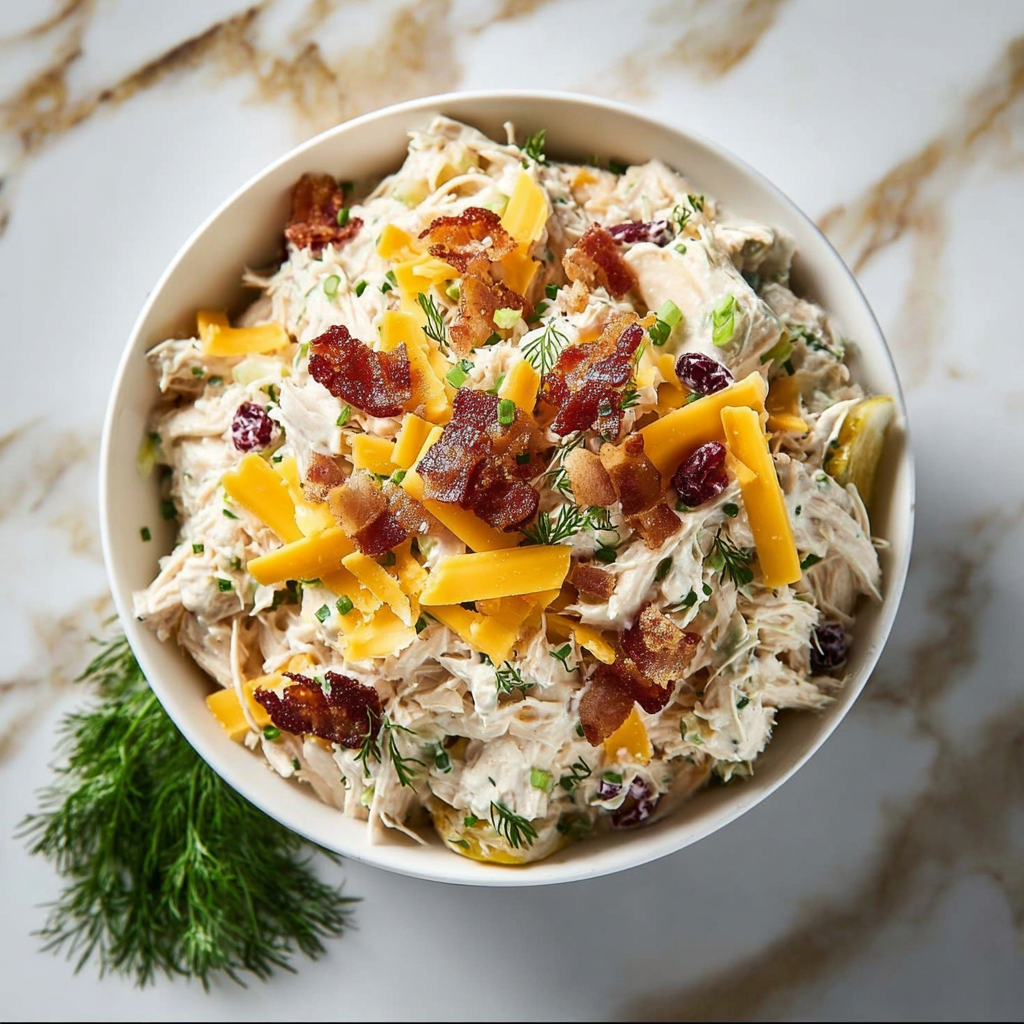
    Keto Chicken Salad with Bacon and Avocado

    Skip the cranberries entirely and add 2 strips of crumbled crispy bacon and half a diced ripe avocado. This version sits beautifully inside a keto diet framework: zero added sugar, high fat, and very high protein, and it is the version Leo approves of most enthusiastically, largely because of the bacon. He adds it to everything now. The avocado makes it extraordinarily creamy without any extra mayo. Eat it immediately once the avocado is in; it doesn’t hold overnight.

    Mia’s Mild Version with Apple and Honey

    Replace the Dijon with a teaspoon of honey and swap the red onion for a quarter cup of finely diced sweet apple. Mia built this variation over three separate lunch prep sessions, removing things she didn’t like one by one with the careful method of a scientist. The result is genuinely excellent, sweeter and milder, still packed with protein, and the apple adds a little crunch that everyone at the table ends up requesting. It also works exceptionally well in a sandwich.

    High Protein Caveman-Style Bowl

    Double the chicken to 3 cups, skip all the optional extras, and serve the salad over sliced cucumber rounds or thick-cut romaine instead of any bread or crackers. This stripped-back version aligns with paleo and caveman diet principles: just clean protein, a small amount of healthy fat from the mayo and yogurt, and fresh vegetables. Leo calls it the boring one. I call it “Tuesday lunch” when I have a 2pm meeting and no time to think about food.

    Substitutions

    Greek yogurt → Cottage cheese, blended smooth: Blend cottage cheese until completely smooth before using. It adds even more protein than Greek yogurt, and the texture is nearly identical in the finished salad. This is a favorite swap for anyone following bariatric eating guidelines where high protein per calorie matters most.

    Chicken breast → Canned chicken, well drained: Works well in a pinch and is genuinely faster. Drain very thoroughly; this was where the tuna incident began, and pat dry with paper towels. The texture is slightly softer, but the flavor holds up well with a good dressing.

    Mayonnaise → Avocado oil mayo or plain avocado: Avocado oil mayo swaps 1:1 for a cleaner fat profile. Or mash half a ripe avocado directly into the dressing for a dairy-free, mayo-free version that is remarkably good and very high in healthy fat.

    Fresh lemon juice → Apple cider vinegar: Use half the quantity, 1½ teaspoons, instead of 1 tablespoon. Apple cider vinegar gives a slightly sharper, earthier tang that works particularly well in the caveman-style version with no fruit.

    Equipment

    • Large mixing bowl
    • Small bowl for dressing
    • Whisk or fork for dressing
    • Sharp knife and cutting board
    • Two forks for shredding chicken
    • 4 airtight containers for meal prep

    Storage Tips

    Make Ahead

    • Make the full salad up to 1 day ahead; it actually tastes better after a few hours.
    • Hold back 1 tablespoon of dressing to stir in fresh before serving to restore creaminess.

    Refrigerator

    • Airtight container up to 3 days.
    • Stir well before serving; the dressing can settle at the bottom.
    • Do not keep it for more than 3 days once dressed.

    Meal Prep

    • Divide into 4 individual containers for the week.
    • Keep crackers, wraps, or lettuce cups separate until serving.
    • Ideal Sunday prep ready for Monday through Wednesday lunches.

    Freezing

    • Not recommended mayo and yogurt separate when thawed and become grainy.
    • Freeze cooked plain chicken only; dress fresh when ready to serve.

    Family Secret Worth Sharing

    The two-stage dressing trick changed this recipe entirely. I used to add everything at once and wonder why it was always either too dry or too wet, never quite right. What I didn’t understand was that the chicken releases a little moisture as it sits in the dressing, so what looks slightly underdressed when you first mix it is usually perfectly dressed five minutes later. Adding half the dressing first, waiting a minute, then deciding whether it needs more is the move that makes this consistently good rather than occasionally good. My mom dressed salads by eye and never measured anything, and I used to think that was a gift she had that I didn’t. It turns out it was just practice and patience, which are both things I now have and which Mia watches very carefully every Sunday while I make the salad, spoon in hand, waiting to be appointed tasting officer. She always is.

    Troubleshooting FAQs

    Why is my chicken salad watery after a few hours?
    The chicken was warm when you dressed it, or the celery wasn’t properly dried after washing. Always use completely cooled chicken and pat everything dry before mixing. The two-stage dressing method also helps add less dressing than you think you need, because the chicken releases moisture as it sits.

    Can I make this for bariatric meals?
    This dish is actually one of the best recipes for bariatric eating: high protein, moderate fat, low carb, and genuinely flavorful in small portions. The Greek yogurt swap boosts protein per calorie compared to full-fat mayo. Swap all the mayonnaise for blended cottage cheese to push the protein even higher and reduce the fat further.

    How do I get more flavor without more calories?
    Season in layers. Season the chicken while it cooks, season the dressing separately before it meets the chicken, and taste and adjust the finished salad before serving. Each stage of seasoning builds depth. The Dijon and lemon are doing a lot of work here; don’t reduce either of them.

    Is this recipe keto and low carb?
    Yes, served on lettuce cups or cucumber rounds, it is fully keto-friendly, with around 4 to 6 grams of net carbs per serving. Skip the cranberries and grapes for a stricter version. The keto bacon and avocado variation brings the carbs even lower while adding healthy fats.

    The Bowl That Proved Mia Wrong

    Mia still has opinions about this recipe. She will tell you that her version with the apple and honey is definitively better, and she is not entirely wrong, but she also eats the original version on Tuesdays without being asked and refills her bowl when she thinks I am not watching. Leo hasn’t asked, “Is this chicken?” since the second batch. I take that as the highest possible endorsement. Sunday protein chicken salad prep has become the thing we do together now: Mia on dressing duty, Leo in charge of shredding, and me trying not to get distracted and add too much of anything.

    If you are building a collection of easy weeknight dinners that actually work for the whole family, this chicken salad earns its permanent spot in the rotation. It sits right alongside our high protein honey garlic shrimp as proof that healthy and delicious are not opposing goals. And for more recipes in the same spirit, the whole healthy recipes collection is worth an hour of browsing on a Sunday when you are planning the week.

    Don’t forget to snap a picture of your protein chicken salad before those creamy, herby spoonfuls disappear into wraps and lunchboxes (trust me, they will disappear quickly!), and leave a rating below. We’d love to hear how this protein-rich chicken salad becomes part of your family’s weekly lunch story.

  • 8-Ingredient Fudgy Healthy Brownie Recipe

    8-Ingredient Fudgy Healthy Brownie Recipe

    The first time I made a healthy brownie recipe, I used black beans. I blended them up and baked them proudly, and Jake took one bite, put it down, and said, “Mum, these taste like a garden.” Emma just looked at the plate and walked away. I ate the whole tray myself out of stubbornness and started over the next morning with an entirely different approach.

    Why This Recipe Is Special

    This is the healthy brownie recipe that actually tastes like a brownie. Not a health food that pretends to be one. Not something you eat with a resigned expression and tell yourself is fine. These have a proper crinkle top, a fudgy center, and that deep chocolate richness that makes you close your eyes for a second when you take a bite. The secret is swapping refined ingredients for better ones without stripping out the things that make brownies worth eating. Coconut oil instead of butter, maple syrup instead of white sugar, and almond flour instead of plain flour. Three swaps. That is all the recipe is.

    How To Make Healthy Brownies

    After the bean incident, I spent two weeks testing versions until I landed on this one. Jake came into the kitchen for the third test batch, sniffed the air, and said “that actually smells like brownies.” High praise. Emma positioned herself by the oven for the last ten minutes of baking time with the focused energy of someone awaiting very important news. When I cut the first square and the center was still fudgy and glossy and entirely brownie-shaped, she grabbed it before I could say a word and ate it standing at the counter. “These are the good ones,” she confirmed, with absolute authority. They are. They really are.

    Main Ingredients

    • 3 large eggs, room temperature: The whole structure. They create the crinkle top when whisked properly with the maple syrup.
    • 1/2 cup coconut oil, melted and cooled: Replaces butter entirely. Refined coconut oil has no coconut flavor if you prefer neutral.
    • 1/2 cup pure maple syrup: Real maple only. It sweetens gently and adds a subtle depth that white sugar cannot.
    • 2 tsp pure vanilla extract: Real vanilla matters here. It smooths out the cocoa and rounds the whole flavor.
    • 3/4 cup unsweetened cocoa powder Dutch-process gives the deepest, most fudgy result. Do not use hot drink powder.
    • 1 cup blanched almond flour: Finely ground blanched almond flour only not almond meal, which is coarser and drier.
    • 1/2 tsp baking powder + 1/4 tsp salt: Just enough lift without making these cakey. The salt is as important as the chocolate.
    • 1/3 cup dark chocolate chips (70%+): Optional but strongly advised. They melt into fudgy pockets throughout.

    Step-by-Step Instructions

    Step 1: Preheat and Prep Your Pan

    • Preheat oven to 350°F (175°C) and line an 8×8 inch baking pan with parchment, leaving an overhang on two sides.
    • Melt the coconut oil gently in a small saucepan or in the microwave in 20-second bursts; do not let it get hot.
    • Allow the melted coconut oil to cool for 3 to 4 minutes before using; hot oil will scramble your eggs when combined.
    • Set the lined pan aside on a flat, level surface so you can pour the batter straight in without adjusting.

    Step 2: Build the Batter

    • In a large bowl, whisk the eggs, maple syrup, cooled coconut oil, and vanilla together for a full 2 minutes until the mixture lightens slightly in color and looks glossy.
    • Sift the cocoa powder directly into the wet mixture sifting removes lumps and means you do not spend the next five minutes chasing them with a whisk.
    • Add the almond flour, baking powder, and salt, and fold gently with a rubber spatula until just combined; do not overmix.
    • Fold in the chocolate chips with 3 or 4 gentle strokes; the batter will be thick, glossy, and considerably more promising than a garden.

    Step 3: Bake

    • Pour and spread the batter evenly into the prepared pan a small offset spatula is ideal, but the back of a spoon works perfectly well.
    • Bake for 20 to 24 minutes; the top should look set and matte, with the edges pulling very slightly from the sides of the pan.
    • A toothpick inserted into the center should come out with a few moist, fudgy crumbs wet batter means more time; completely clean means slightly overbaked.
    • Remember that these will continue to firm up as they cool, so pulling them a minute early is always the right instinct.

    Step 4: Cool and Slice

    • Allow to cool in the pan for at least 20 full minutes before attempting to lift or slice; the structure needs that time.
    • Lift out using the parchment overhang and transfer to a cutting board.
    • Slice with a sharp knife, wiping the blade clean between cuts for neat, clean edges.
    • The squares will firm up further as they cool to room temperature, genuinely being better 30 minutes out of the oven than at 5 minutes.

    Healthy Brownies Variations

    The Espresso and Sea Salt Version (My Absolute Favourite)

    This is what I make when I want something that feels genuinely sophisticated rather than just quietly nutritious. Add one teaspoon of instant espresso powder to the wet ingredients; it deepens the chocolate flavor in a way that is almost startling, without tasting at all like coffee. Then scatter a generous pinch of flaky sea salt across the top before baking. The salt crystals catch the light, and the flavor combination is the kind that makes people ask what is in these?” and then immediately ask for the second one.

    Jake’s Peanut Butter Marble (Non-Negotiable on Weekends)

    Jake discovered that peanut butter swirled into anything becomes his favorite version of that thing, and he is correct. Pour the batter into the pan, then drop four or five generous tablespoons of natural peanut butter across the surface. Drag a butter knife through in slow, wide strokes to create a rough marble pattern. The peanut butter bakes in and becomes dense and salty against the dark chocolate. Jake considers this his recipe. He did not develop this recipe. He suggested it once, and I tested it four times to get it right. I have given him full credit anyway.

    Emma’s Raspberry Swirl (The “Pretty One”)

    Emma’s contribution was aesthetic rather than flavor-based: she wanted them to be prettier. She pressed eight or nine fresh raspberries into the top of the batter before baking and scattered a small handful of extra chocolate chips around them. The raspberries sink slightly as they bake, leaving little jewel-pink pockets in the dark chocolate. Emma presents these to anyone who visits with the energy of someone unveiling something significant. She is not wrong; they do look extraordinarily good, and the sharp raspberry against the rich chocolate is exactly as good as it sounds.

    Substitutions

    • Almond flour → Oat flour works well and gives a slightly more cake-like result. Use the same quantity. For nut-free, sunflower seed flour is a reliable 1:1 swap. Regular all-purpose flour also works, but you lose the grain-free benefit.
    • Maple syrup → Honey is the closest swap in the same quantity, slightly denser, with a gentle floral note. Coconut sugar dissolved in a tablespoon of warm water also works; use 1/2 cup and adjust to taste.
    • Coconut oil → Melted unsalted butter works as a direct swap for a more traditional brownie flavor. For dairy-free, neutral avocado oil works; use 6 tablespoons since it is more liquid than solid coconut oil.
    • Eggs → For a vegan version, two flax eggs (2 tablespoons ground flaxseed mixed with 6 tablespoons water, rested 10 minutes) plus one tablespoon of extra coconut oil gives a dense, fudgy result. The crinkle top will not form, but the flavor holds up very well.

    Equipment

    • 8×8 inch baking pan
    • Parchment paper
    • Large mixing bowl
    • Whisk
    • Rubber spatula
    • Fine mesh sieve (for cocoa powder)
    • Small offset spatula
    • Sharp knife for slicing
    • Cooling rack
    • Toothpick or skewer

    Storage Tips

    Make Ahead

    • Brownies can be baked up to 2 days before serving; they improve as they sit.
    • Store whole or sliced; the cut surface benefits from being pressed against parchment if stored sliced.
    • Batter can be made and refrigerated for up to 24 hours before baking bring to room temperature first.

    Refrigerator

    • Store in an airtight container at room temperature for 4 days or in the fridge for up to 7 days.
    • Cold brownies are actually excellent; the texture firms into something almost truffle-like.
    • Let refrigerated brownies sit at room temperature for 15 minutes before serving for best texture.

    Freezing

    • Freeze individual squares wrapped tightly in parchment, then placed in a zip-lock freezer bag.
    • Keeps well for up to 3 months; these freeze better than almost any other baked good I make.
    • Thaw at room temperature for an hour or in the fridge overnight from frozen.

    Reheating

    • Microwave a single square for 12 to 15 seconds; it comes back to warm, fudgy life immediately.
    • Oven at 300°F for 5 to 6 minutes, covered loosely with foil if reheating several at once.
    • Serve warm with a spoonful of natural yogurt for a dessert that feels completely indulgent.

    Family Secret Worth Sharing

    The crinkle top on a brownie is not luck; it is technique. Those gorgeous, papery, cracked ridges come from one specific step: whisking the eggs and sweetener together properly before anything else goes in. In a traditional brownie, that means dissolving the sugar into warm butter. In this recipe it means whisking the eggs with the maple syrup for a full two minutes until the mixture turns slightly pale and leaves a ribbon when you lift the whisk.

    The first time Emma helped me make these, she was in charge of the whisking. She gave it about thirty seconds and declared it done. The top of those brownies came out completely flat and sad. The second batch, I set a timer, and she whisked for the full two minutes, looking deeply put-upon about it. Crinkle top. Perfect. That is the whole secret. She has never skipped the two minutes since, though she does sigh heavily while doing it, which I respect as her right.

    Troubleshooting FAQs

    My brownies came out dry and cakey. What happened?
    Two likely causes: it was overbaked, or the almond flour was packed too tightly when measured. For almond flour, always spoon it into the measuring cup and level it off; never scoop directly from the bag. Pull them the moment the toothpick has moist crumbs rather than waiting for it to come out clean. These are meant to underbake very slightly and firm up as they cool.

    My batter looks too thick to spread. Is that normal?
    Completely normal almond flour batter is considerably thicker than regular wheat flour batter. Spread it with a small offset spatula or the dampened back of a spoon. If it seems unusually stiff, check that your coconut oil was fully liquid before adding it; partially solid coconut oil will make the batter seize up unevenly.

    Can I use cocoa powder from a hot drink mix like Cadbury?
    I would really steer you away from this. Drinking chocolate mixes contain added sugar and dried milk, which will throw off the balance of the recipe. Use unsweetened pure Dutch-process cocoa powder for the deepest flavor or natural cocoa if that is what you have. The quality of the cocoa is probably the single most important ingredient in this recipe.

    There is no crinkle top on mine. What did I do wrong?
    Ask Emma; she knows. The crinkle top comes from fully whisking the eggs and maple syrup together for the full two minutes before adding anything else. Thirty seconds is not enough. Set a timer, whisk properly, and it will happen every single time.

    The Brownies That Made the Bean Version Worth Forgetting

    Last Saturday I made a double batch of these and put them on the counter to cool. Forty minutes later I came back to find that Emma had eaten two and Jake had eaten three, and there were exactly seven squares left out of sixteen. Neither of them mentioned it. They just walked around looking extremely casual and slightly chocolatey. I said nothing. This is what healthy homemade brownies should be: the kind that disappear without ceremony, that nobody describes as “healthy” when they are eating them because they are just too busy eating them.

    These are the kind of healthy baked dessert recipes that earn their place in your permanent rotation not because they are good for a healthy brownie but because they are genuinely, honestly, no-qualification-needed good. Full stop. The kids agree. The bean brownies are never spoken of.

    Whether you make these for a lunchbox, a dinner party, a school bake sale where you quietly want to be the parent who brought the best thing, or just for a quiet Tuesday evening when you want something that feels like a proper treat without the aftermath, these are it. The kind of effortless, healthy baking recipes that will not last. They never do.

    Don’t forget to snap a picture of your healthy brownies before that first square disappears from the board (trust me, it will disappear quickly!), and leave a rating below. We’d love to hear how this healthy brownie recipe becomes part of your family baking story.
    Star rate this recipe and join our cozy healthy baking family.

  • Easy One Pot Chicken and Rice Recipe

    Easy One Pot Chicken and Rice Recipe

    The first time I made one pot chicken and rice in one pot, I tipped the dry rice straight in before the broth. Just right on top of the raw chicken. Jake stared at it for five seconds and said, very quietly, “is that right?” It was not right. I fished out what I could, started over, and produced something so good Emma declared it her birthday dinner request. In October. For March.

    Why This Recipe Is Special

    One pot dinners get a bad reputation for being boring, and I think that is deeply unfair. This one earns its place at the table every single week. The chicken thighs get seared first so the skin turns golden and stays that way. The rice toasts in the leftover drippings before the broth even goes in, picking up all that savory chicken fat flavor. The whole thing simmers together into something deeply satisfying, a proper healthy meal that tastes like you were in the kitchen for hours, even though you genuinely were not.

    How To Make One Pot Chicken and Rice

    After my dry-rice disaster, I started making this on rotation, which means both kids have now watched me make it enough times to have opinions. Emma thinks I add too much garlic. Jake thinks I add too little. They have been having this argument for two months, and I have been quietly keeping the garlic exactly where I like it, which is firmly in the middle. The recipe has become a kind of Thursday night ritual: I sear the chicken, Jake sets the table without being asked because he knows dinner is coming, and Emma hovers near the pot asking when it will be ready approximately every four minutes.

    Main Ingredients

    • 6 bone-in, skin-on chicken thighs: Thighs over breasts every time. They stay juicy and flavorful through the long simmer.
    • 1 1/2 cups long-grain white rice: Rinsed until the water runs clear. Removes excess starch for separate, fluffy grains.
    • 2 1/2 cups low-sodium chicken broth: The flavor base. Low-sodium lets you control the salt level throughout.
    • 1 medium yellow onion, diced: Sautéed in the drippings after searing builds the whole flavor base.
    • 4 garlic cloves, minced: Jake says more; Emma says less; I say four is perfect, and I am the one cooking.
    • 1 tsp smoked paprika + 1 tsp cumin: The two spices that make this taste like something rather than just rice and chicken.
    • 1 tsp dried thyme + 1 bay leaf: Background herbs. You notice them more when they are missing.
    • Salt, pepper, and 1 tbsp olive oil: Season the chicken generously before searing. This is where the flavor really starts.
    • Juice of half a lemon: Squeezed in right at the end. It lifts the whole dish and makes it taste finished.
    • Fresh parsley, roughly chopped: For garnish and freshness. Emma picks hers off, but it looks beautiful.

    Step-by-Step Instructions

    Step 1: Season and Sear the Chicken

    • Pat chicken thighs completely dry with paper towels moisture is the enemy of a golden sear.
    • Season generously on both sides with salt, pepper, smoked paprika, and cumin.
    • Heat olive oil in a large heavy-bottomed pot or Dutch oven over medium-high heat until shimmering.
    • Add chicken skin-side down and sear undisturbed for 5 to 6 minutes until deeply golden; flip and sear 3 more minutes, then remove to a plate it will finish cooking in the pot.

    Step 2: Build the Flavour Base

    • Reduce heat to medium and add diced onion directly to the same pot, scraping up any golden bits from the bottom.
    • Cook the onion for 4 to 5 minutes until soft and translucent, stirring occasionally.
    • Add minced garlic and dried thyme and stir for 60 seconds until fragrant; do not let the garlic brown.
    • Add the rinsed rice and stir to coat every grain in the drippings, toasting for 2 minutes until it smells nutty.

    Step 3: Add the Broth and Simmer

    • Pour in the chicken broth, add the bay leaf, stir to combine, and taste for seasoning; adjust salt now before the lid goes on.
    • Nestle the seared chicken thighs skin-side up on top of the rice, pressing them in slightly so they sit level.
    • Bring to a gentle boil, then reduce heat to low and cover with a tight-fitting lid.
    • Simmer undisturbed for 25 minutes; do not lift the lid, the steam is doing the work, and every peek costs you fluffy rice.

    Step 4: Rest, Finish, and Serve

    • Remove from heat and leave the lid on for a full 5 minutes — the rice finishes absorbing moisture and the chicken finishes cooking through.
    • Remove and discard the bay leaf, then squeeze the lemon juice over everything.
    • Check that the chicken has reached 165°F internally; if not, cover and return to low heat for 5 more minutes.
    • Scatter with fresh parsley and serve directly from the pot one less dish, maximum satisfaction.

    One Pot Chicken and Rice Variations

    The Lemon Herb Version (Emma’s “Can We Have the Green One”)

    Emma went through a phase of requesting “the green one” every single week, and this is it. Add a full teaspoon of lemon zest to the broth along with a handful of fresh spinach stirred in right at the end when you lift the lid for the rest. Swap the cumin for dried oregano and use vegetable broth for a slightly lighter result. The spinach wilts into the rice, and the whole pot turns this beautiful pale green that Emma finds deeply satisfying. So do I, honestly.

    The Tomato and Olive (Jake’s “Make It Spanish, Mum” Request)

    Jake became obsessed with Spanish rice after a school trip project, and this is what came out of that obsession. Add one 14-ounce can of diced tomatoes when you pour in the broth, reduce the broth by half a cup to compensate for the extra liquid, and stir in a handful of pitted Kalamata olives and a pinch of saffron if you have it. The rice turns deep rust-red, and the whole thing tastes bold and rich and a little smoky. Jake considers this his personal contribution to the family recipe collection. I let him have that.

    The Turmeric and Coconut Milk (My Thursday Treat Version)

    On Thursday evenings when I want something that feels more interesting without doing more work, I swap half the chicken broth for full-fat coconut milk, stir in a teaspoon of ground turmeric with the spices, and add a thumb of grated ginger with the garlic. The rice turns a gorgeous golden yellow, and the whole dish tastes creamy and fragrant. Serve with a wedge of lime instead of lemon and scatter with fresh coriander. Both kids eat it without complaint, which in this house is a very high bar.

    Substitutions

    • Chicken thighs → Bone-in drumsticks work exactly the same way. Boneless skinless thighs also work; skip the searing step and just brown briefly, they cook faster, so check at 20 minutes. Avoid chicken breasts; they dry out before the rice is done.
    • Long-grain white rice → Basmati rice is excellent and gives a slightly more aromatic result. Brown rice needs an extra half cup of broth and 15 more minutes of cooking time. Do not substitute short-grain or arborio; they turn too starchy in this method.
    • Chicken broth → Vegetable broth makes this surprisingly good and works especially well with the turmeric-coconut variation. Water can be used in a pinch, but you will need to season much more aggressively to compensate.
    • Smoked paprika → Sweet paprika works fine and gives a milder result. For more warmth, swap for mild chili powder. The smoked version is worth having in your spice rack, though it shows up in so many Easy Recipes With White Rice and transforms the flavor profile of even the simplest dish.

    Equipment

    • Large Dutch oven or heavy-bottomed pot (at least 5-quart)
    • Tight-fitting lid
    • Tongs
    • Wooden spoon or spatula
    • Sharp knife and cutting board
    • Measuring cups and spoons
    • Instant-read thermometer
    • Fine mesh strainer (for rinsing rice)

    Storage Tips

    Make Ahead

    • Season the chicken and prep all vegetables up to 24 hours ahead; store covered in the fridge.
    • The entire cooked dish holds well, and the flavor deepens noticeably by the next day.
    • Make the full pot on Sunday and portion it for weekday lunches; it holds beautifully for 4 days.

    Refrigerator

    • Store cooled leftovers in an airtight container in the fridge for up to 4 days.
    • Keep chicken and rice together; the rice absorbs the juices overnight and gets even better.
    • The rice will firm up when cold; a splash of broth or water when reheating brings it right back.

    Freezing

    • Cool completely before freezing freeze in individual portions for easy weeknight meals.
    • Keeps well for up to 3 months; the chicken holds better than the rice texture-wise.
    • Thaw overnight in the fridge for best results; avoid microwaving from completely frozen.

    Reheating

    • Add 2 to 3 tablespoons of water or broth per portion before reheating to restore moisture.
    • Stovetop over low heat, covered for 8 minutes, is the best method: gentle and even.
    • Microwave works in a pinch: cover loosely, 2 minutes at 70% power, and stir halfway through.

    Family Secret Worth Sharing

    The single biggest upgrade I ever made to this recipe was toasting the rice. Before I learned to do this, my one-pot chicken and rice was fine pleasant, filling, totally fine. The moment I started stirring the rinsed rice through those chicken drippings for two full minutes before the broth went in, everything changed. The grains pick up all that rendered fat and golden fond from the bottom of the pot, and what comes out the other end tastes genuinely complex and savory rather than just starchy and neutral.

    My mum never toasted her rice. She would pour it straight in, and the result was perfectly acceptable. But one evening I watched a restaurant cook on television spend what looked like an embarrassingly long time just stirring dry rice in a hot pan, and something clicked. Two minutes of patience before the liquid goes in is worth more than any extra ingredient you could add. I have told Jake and Emma this. They roll their eyes. They will understand one day when they are making this for their own families and everything clicks.

    Troubleshooting FAQs

    My rice came out mushy. What went wrong?
    Almost always one of three things: too much liquid, the lid was not tight enough, or the heat was too high during the simmer. Check your measurements carefully; even a quarter cup extra of broth makes a difference. Make sure the lid seals properly and that your simmer is genuinely low, not medium-low pretending to be low.

    The rice is cooked, but the chicken is not done yet. What do I do?
    Pull the chicken out and cover the rice to keep it warm. Place the chicken in a hot oven at 400°F for 8 to 10 minutes to finish cooking through. This is almost always a lid seal issue or a heat issue next time go slightly lower and slightly longer. An instant-read thermometer is genuinely worth having for exactly this situation.

    The rice stuck to the bottom of the pot. Is it ruined?
    Not at all that crispy layer on the bottom is actually prized in many cultures, and it tastes incredible. Scrape it up and serve it. If it is more burnt than crispy, the heat was too high; next time use a lower simmer and a heavier pot if you have one.

    Can I use chicken breasts instead of thighs?
    Technically yes, but I would steer you away from it. Breasts cook faster and have less fat, so they tend to dry out before the rice finishes. If you really prefer breasts, use boneless, skinless ones and check them at the 18-minute mark; pull them out at 165°F and let the rice finish covered without them.

    The Pot That Turned Thursday Into Our Favourite Night

    There is something about a one-pot dinner that changes the whole atmosphere at the table. No separate sides to juggle, no four different things to time, no pile of dishes at the end. Just one pot that comes to the table steaming and golden and smells like someone put real effort in, even when you made the whole thing during homework hour. This is what I mean when I talk about a healthy meal that actually gets made—not the aspirational Tuesday salad that becomes Wednesday takeout, but the Thursday pot that you come home to making again and again.

    Emma eats two full bowls and picks the parsley off the top of both. Jake asks every single time if there is more chicken, as though the pot has a secret compartment I have been hiding from him. And I sit there at the end of the week feeling genuinely like I got dinner right. It is such a small thing and such a big thing at the same time.

    Whether this becomes your Sunday meal prep anchor, your weeknight fallback, or the first one of your Easy Recipes With White Rice that the whole family agrees on, I hope it gives you the same Thursday feeling it gives us. Make it once, and it will be in permanent rotation before the week is out.

    Don’t forget to snap a picture of your chicken and rice before that first scoop disappears from the pot (trust me, it will disappear quickly!), and leave a rating below. We’d love to hear how this chicken and rice recipe becomes part of your family weeknight story.
    Star rate this recipe and join our cozy weeknight cooking family.