Category: Breakfast

Quick and easy breakfast recipes for every kind of morning from speedy weekday eggs to lazy weekend brunch spreads. Global morning flavours made simple at home.

  • 5-Minute Perfect Avocado Toast

    5-Minute Perfect Avocado Toast

    I put salt, pepper, and nothing else and then wondered why it tasted flat and forgettable. Ben tried it and said, “It needs something.” Mia said “it needs more.” They were both right; neither could tell me what. That under-seasoned slice sent me on a proper seasoning mission, and now this avocado toast is the most requested breakfast in our house by a significant margin.

    Why This Recipe Is Special

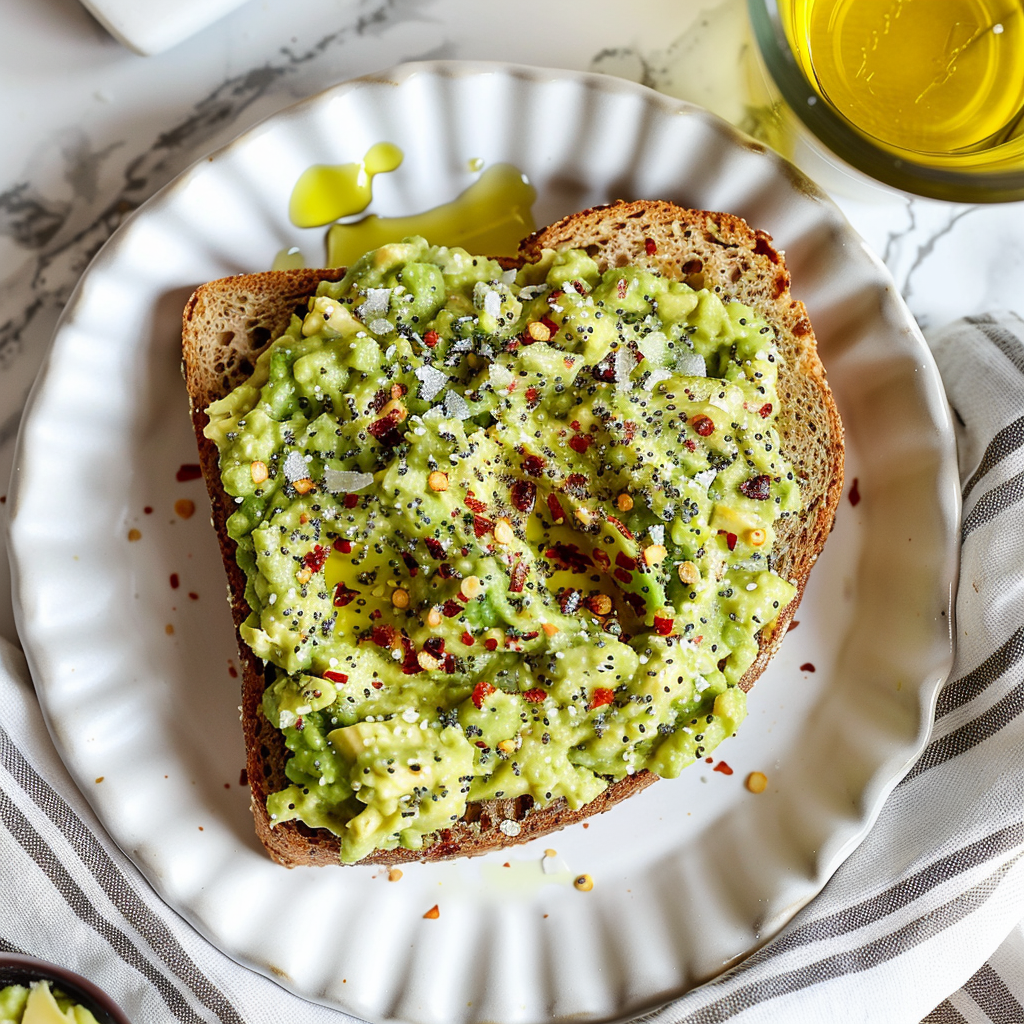
    This is not just mashed avocado on bread. The avocado gets seasoned with lemon juice, flaky salt, red pepper flakes, and everything bagel seasoning before it goes anywhere near the toast, and that layering of flavors is what turns a simple ingredient into something genuinely worth making every morning. The bread gets toasted properly golden and slightly crispy so it holds the avocado without immediately going soft. The whole thing comes together in under five minutes and tastes like something you would pay twelve dollars for at a brunch spot. Mia asks for hers with extra red pepper flakes, which I allow because it makes her very happy.

    How To Make Avocado Toast

    The version that changed everything came on a Saturday morning when both kids had decided they were extremely interested in avocado toast after seeing it on every food account they had accidentally encountered. Mia was mashing the avocado with real commitment and a fork that was slightly too small for the bowl, which meant avocado pieces were launching themselves over the edge at intervals. Ben was tasting the avocado at every stage and providing detailed feedback that essentially amounted to “more lemon” every single time. When I finally added the everything bagel seasoning and the red pepper flakes and the lemon zest and let Ben taste it, he went quiet for a second and then said “okay that is completely different.” It is completely different.

    The thing that elevated the recipe from fine to genuinely great was treating the avocado mash like a proper preparation rather than just spreading raw avocado on bread. Season the avocado in the bowl before it goes on the toast, not after. Add lemon juice while mashing so it gets incorporated throughout, add the flaky salt while the avocado is still slightly warm from being just cut, and add the lemon zest last so it stays bright and fragrant. Ben now does the seasoning step himself and has developed specific opinions about the exact ratio of everything bagel seasoning to red pepper flakes. His ratio is correct, and I have started using it.

    Main Ingredients

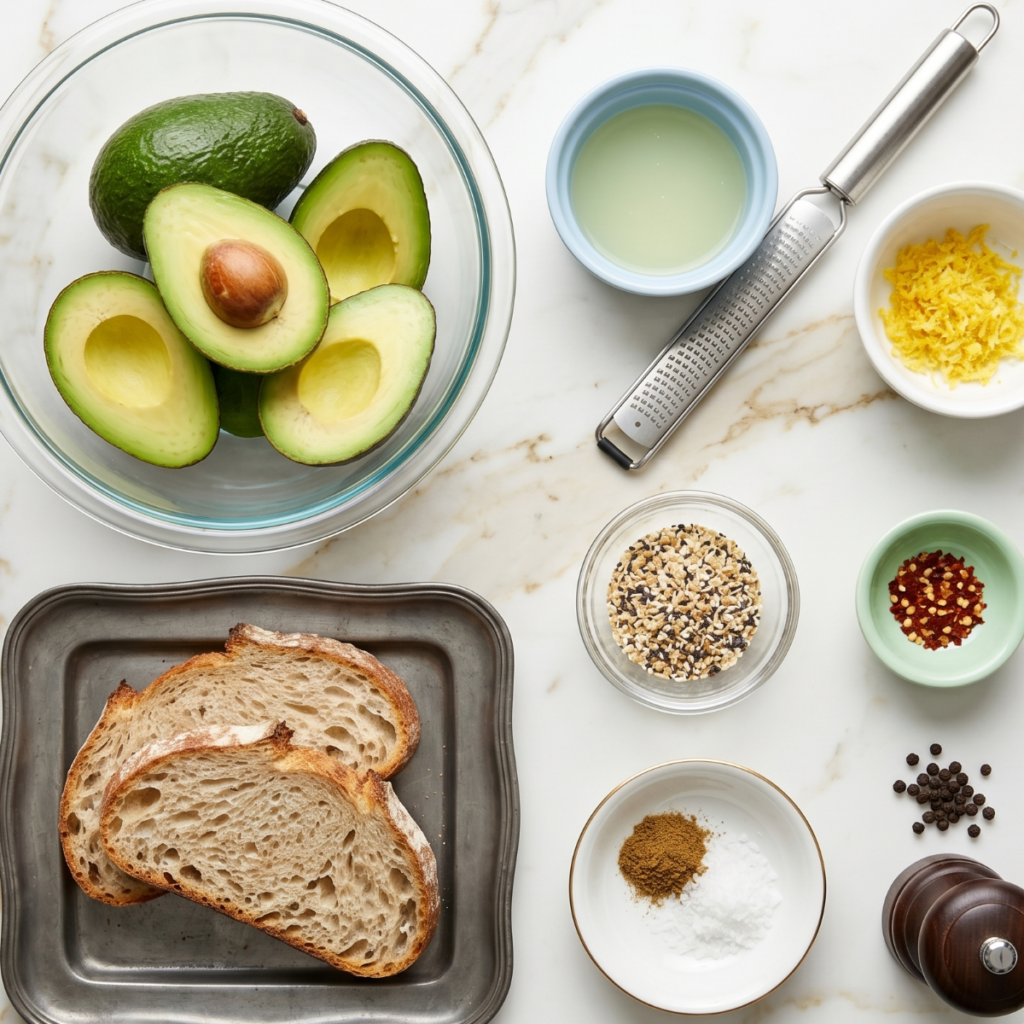
    • 2 ripe avocados – Ripe but not overripe; they should yield gently to pressure without feeling mushy; overripe avocados are stringy and bitter
    • 2 thick slices of good bread – Sourdough, whole grain, or a thick country loaf; the bread needs structure to hold the avocado without collapsing
    • 1.5 tablespoons fresh lemon juice – Squeezed directly into the mash while still warm; brightens the whole avocado and keeps it from browning
    • 1 teaspoon lemon zest – Added last for a fragrant citrus lift that lemon juice alone cannot give
    • 1 teaspoon everything bagel seasoning – The seasoning that takes avocado toast from fine to genuinely interesting; covers garlic, onion, sesame, and poppy in one pinch
    • 1/4 teaspoon red pepper flakes – Adds a gentle building heat; adjust to preference; Mia wants more, Ben wants exactly this amount
    • Flaky sea salt to taste – Added to the avocado in the bowl and again over the finished toast; flaky salt is noticeably better here than fine salt
    • Black pepper to taste – A few cracks of freshly ground black pepper over the finished toast
    • 1 tablespoon good olive oil – Drizzled over the finished toast for richness and a slightly grassy note that complements the avocado
    • Optional toppings: sliced cherry tomatoes, a fried or poached egg, microgreens, or extra lemon – Any of these make the toast a complete meal rather than a snack
    Step-by-Step Instructions

    Step 1: Toast the Bread

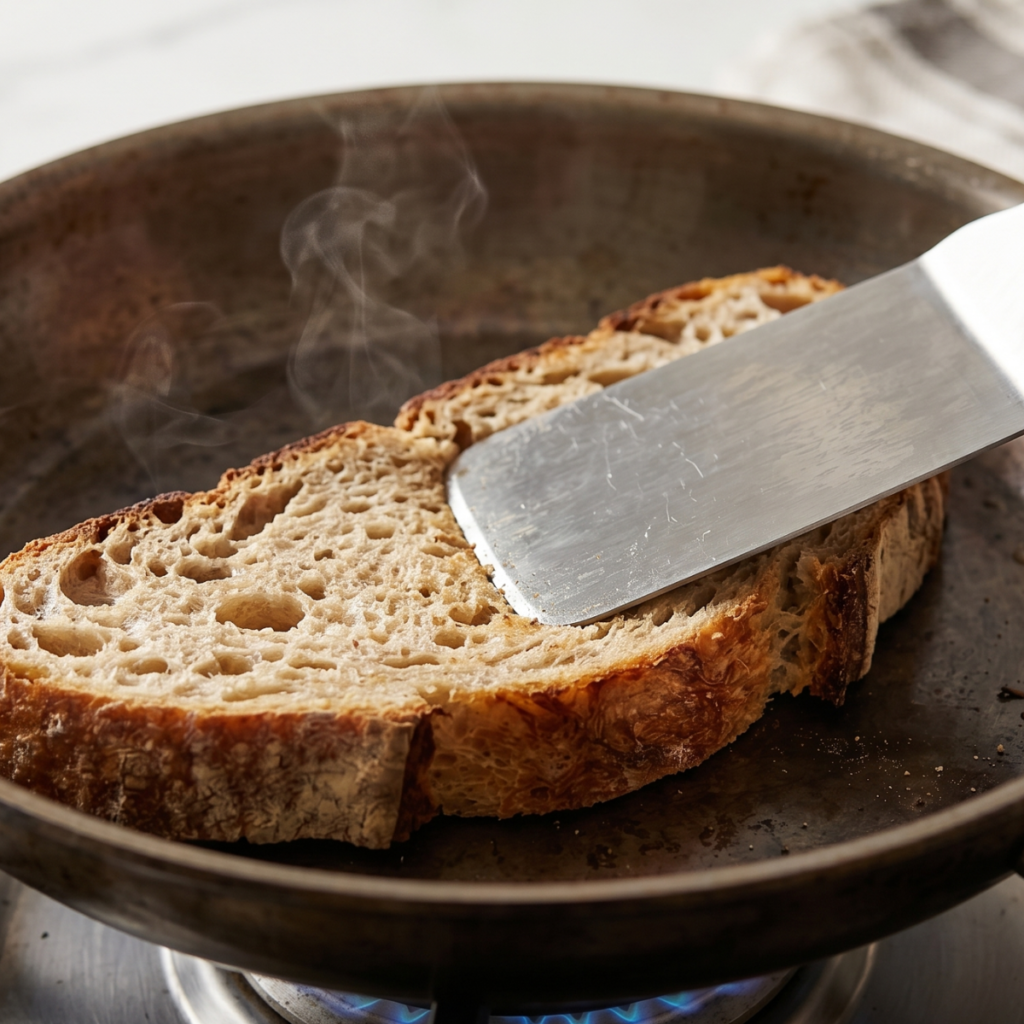
    • Toast the bread slices until they are deeply golden on both sides with a slight crunch at the surface; pale or soft toast collapses under the weight of the avocado within seconds of being assembled
    • Use a toaster, toaster oven, or a dry skillet over medium-high heat; the skillet method gives a more evenly golden surface and a slightly crispier result than a toaster
    • If using a skillet, press the bread down gently with a spatula for the first 30 seconds so the whole surface makes contact with the pan and toasts evenly without domed spots
    • Let the toast cool for 60 seconds before adding the avocado; adding avocado to extremely hot toast steams it slightly and changes the texture
    Step 2: Season the Avocado

    • Halve the ripe avocados, remove the pits, and scoop the flesh into a medium bowl; if the avocados are perfectly ripe the flesh will come away from the skin in one clean piece
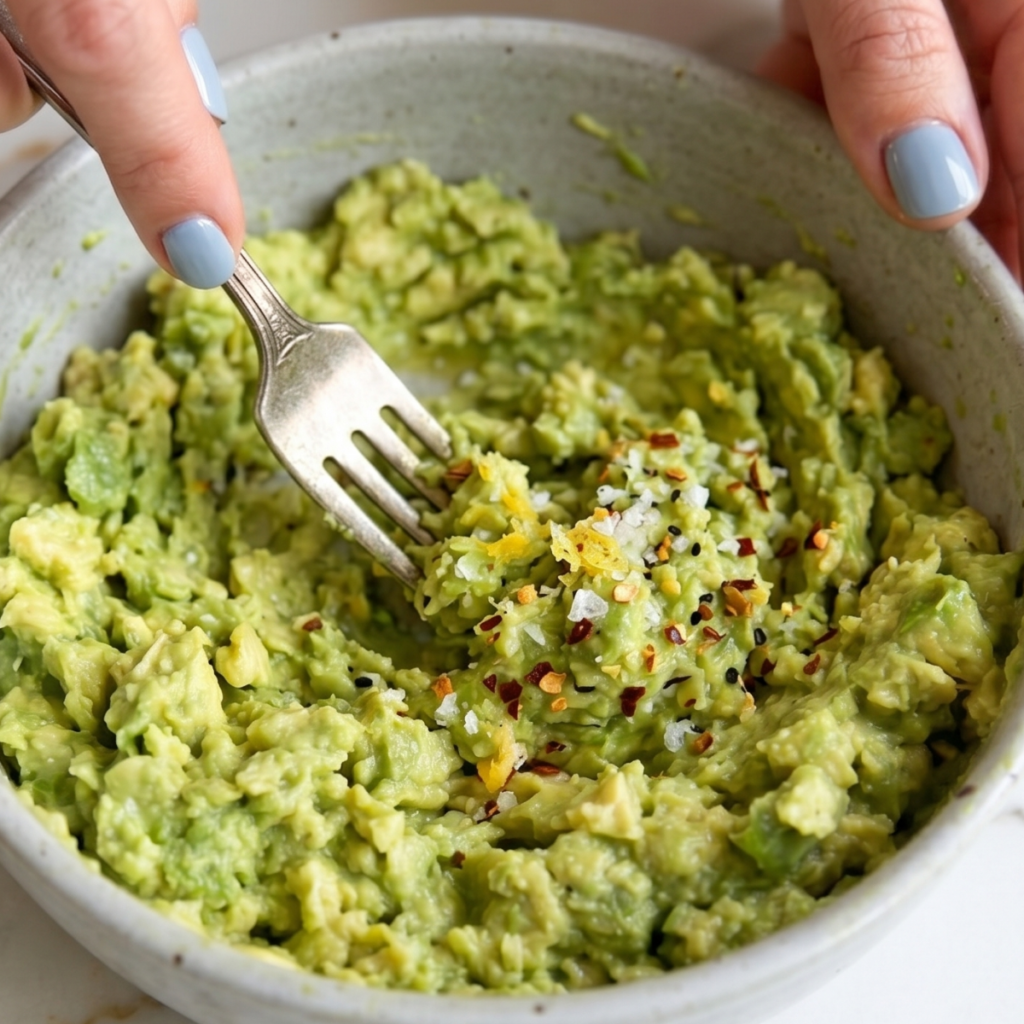
    • Add the lemon juice, flaky salt, and a few cracks of black pepper directly to the bowl and mash with a fork to your preferred texture; some people want completely smooth, some want chunky; both are correct
    • Add the lemon zest and stir it through the mash gently so it distributes evenly without being overworked; overworking the avocado after adding lemon zest dulls the bright fragrance you are adding it for
    • Taste the mash and adjust the salt and lemon before it goes anywhere near the toast; properly seasoned avocado mash should taste slightly more seasoned than feels right since the toast will dilute the flavor
    Step 3: Assemble and Season the Toast

    • Spoon the seasoned avocado mash generously onto each slice of toast and spread it to the edges with the back of the spoon, going all the way to the crust so every bite has avocado
    • Scatter the everything bagel seasoning evenly over the top of the avocado so it covers the whole surface with a visible layer of seasoning rather than being concentrated in one spot
    • Add the red pepper flakes over the everything bagel seasoning and then drizzle the olive oil in a slow, thin stream across the entire surface
    • Finish with a final pinch of flaky sea salt over the very top; the visual contrast of the white salt crystals against the green avocado is part of what makes this look as good as it tastes

    Step 4: Add Toppings and Serve

    • Add any optional toppings at this stage: halved cherry tomatoes placed cut-side up, a fried or poached egg placed on top of the avocado, a small handful of microgreens scattered over, or a few extra drops of lemon juice
    • Serve immediately while the toast is still warm and the avocado has not had time to oxidize; avocado toast is a right-now food and does not improve with waiting
    • Crack a final round of fresh black pepper over the finished plate and add an extra lemon wedge alongside for anyone who wants more brightness
    • For the Mediterranean version, add a small crumble of feta cheese and a few Kalamata olives over the top before serving for a version that could genuinely replace a full brunch plate

    Avocado Toast Variations

    Mia’s “Extra Everything” Version

    Mia discovered everything bagel seasoning by tasting it directly from the jar, which was not a sanctioned activity but produced a useful piece of information: she loves it. Her version uses a full teaspoon and a half of everything bagel seasoning spread liberally over every inch of the avocado surface, extra red pepper flakes, and an additional squeeze of lemon over the finished toast. She eats it with the satisfied focus of someone who seasoned it herself, which she now does every time. I let her control her own seasoning because the results are genuinely good and because arguing with Mia about quantities of everything bagel seasoning is not a productive use of a Saturday morning.

    Ben’s “Egg On Top, Obviously” Version

    Ben made his position on avocado toast very clear early: it is a snack unless it has an egg on it. For his version, fry an egg in butter over medium heat until the white is fully set and the yolk is still runny, then slide it carefully onto the assembled avocado toast so the yolk sits in the center. When Ben cuts into it and the yolk runs over the seasoned avocado and soaks into the toast, he nods once with the satisfaction of someone whose instincts about breakfast have been validated. He is not wrong. The egg version is a complete meal and significantly more satisfying than plain avocado toast.

    The Mediterranean Diet Avocado Toast Version

    This is my personal favorite version and the one I make on the mornings when I want breakfast to feel genuinely nourishing and a little bit special. Spread the seasoned avocado as directed and then add a generous crumble of good feta cheese, three or four Kalamata olives sliced in half, a handful of halved cherry tomatoes, a scatter of fresh oregano or basil leaves, and a drizzle of the best olive oil you have. A squeeze of lemon goes over everything at the end. It is vibrant and colorful and tastes like a proper Mediterranean breakfast. Both kids tried it once and Ben called it “the adult version,” which is entirely accurate and not an insult coming from him.

    Substitutions

    Everything bagel seasoning to homemade blend: Mix together one teaspoon each of sesame seeds, poppy seeds, dried minced garlic, dried minced onion, and flaky salt for a homemade version that tastes identical and costs significantly less. Make a jar and keep it in the pantry for every avocado toast going forward. Ben helped me make the first batch and now considers the jar his.

    Sourdough to gluten-free bread: Any thick, good-quality gluten-free bread works here as long as it is toasted properly golden. Thin or soft gluten-free bread collapses under the avocado quickly, so look for a country-style or sandwich loaf with some structure. Toast it slightly longer than you would regular bread for the firmest possible base.

    Fresh lemon to lime: Fresh lime juice gives a slightly more tropical, less sharp citrus note that works beautifully with avocado and pairs particularly well with the red pepper flakes. Use the same quantity of juice and zest. The flavor is distinctly different but equally delicious, and if you are out of lemons, it is a completely valid swap.

    Olive oil drizzle to sesame oil: A very small drizzle of toasted sesame oil in place of olive oil gives a nutty, slightly smoky finish that works particularly well with the everything bagel seasoning since both contain sesame. Use half the quantity since sesame oil is significantly more intense than olive oil: a few drops rather than a full tablespoon.

    Equipment

    • Toaster, toaster oven, or dry skillet for the bread
    • Medium bowl for the avocado mash
    • Fork for mashing: a fork gives more texture control than a blender or food processor
    • Microplane or fine grater for the lemon zest
    • Small spoon or the back of a large spoon for spreading the avocado
    • Sharp knife and cutting board for the avocados and optional toppings
    • Small bowls for the seasonings if you want to set up a topping station

    Storage Tips

    Make Ahead

    • Avocado toast is best made and eaten immediately; it is a right-now recipe that does not benefit from being assembled ahead of time
    • The seasoned avocado mash can be made up to 30 minutes ahead if you press plastic wrap directly against the surface to prevent oxidation; add the lemon juice generously and stir well before storing
    • Toast the bread fresh each morning; pre-toasted bread goes soft quickly and the whole point of the recipe is the contrast between crispy toast and creamy avocado

    Refrigerator

    • Store leftover avocado mash with plastic wrap pressed directly against the surface in an airtight container for up to 1 day; expect some surface browning but the flavor holds
    • Adding a thin layer of lemon juice over the surface before pressing on the plastic wrap slows oxidation significantly
    • Do not refrigerate assembled avocado toast; the bread goes soft and the avocado goes grey and the whole thing is disappointing

    Freezing

    • Avocado mash does not freeze well; the texture becomes watery and grainy on thawing and the flavor changes unpleasantly
    • The bread can be pre-sliced and frozen for up to 2 months; toast directly from frozen, adding 30 extra seconds to the toasting time
    • If you have very ripe avocados that need to be used, make the mash and refrigerate for up to 1 day rather than attempting to freeze it.

    Reheating

    • Avocado toast does not reheat; the concept of reheating this recipe goes against everything it stands for
    • If the toast has gone cold and soft before you could eat it, re-toast the bread separately and add fresh avocado mash; it takes two minutes and is genuinely worth the reset
    • Cold avocado mash on warm toast is actually fine and both kids eat it this way without complaint when the morning is rushed

    Family Secret Worth Sharing

    My mom always added a tiny pinch of cumin to her avocado mash, and I completely forgot about this until I made a batch that tasted slightly flat despite correct seasoning and remembered it mid-mash. Cumin in avocado does not make it taste like guacamole; it adds a warm, slightly earthy undertone that makes the avocado flavor itself taste deeper and more complex. A tiny pinch, maybe an eighth of a teaspoon, stirred in with the salt and lemon. Mia tasted a batch with it and a batch without and picked the cumin version without hesitation. Ben said the cumin one “tastes more like it knows what it is.” I wrote that down because it is completely accurate and also the best description of what cumin does to avocado that I have ever heard from anyone at any age.

    Troubleshooting FAQs

    The avocado toast tastes flat and bland no matter what I do. What is wrong?
    The avocado itself needs more seasoning than feels comfortable, and the seasoning needs to happen in the bowl before the avocado goes on the toast. Salt and lemon juice added to already-assembled toast sit on the surface rather than incorporating themselves throughout the mash. Season in the bowl, taste, season again, and taste again. Properly seasoned avocado mash should taste slightly over-seasoned on its own because the toast dilutes everything significantly. Add the cumin. This is the other thing most people skip, and it is the difference between flat and complete.

    The avocado turned brown before I could eat the toast. How do I prevent this?
    Lemon juice is the only reliable prevention. Add it generously while mashing and make sure it gets distributed throughout rather than just sitting on top. The acid in the lemon slows the oxidation process significantly. Eating the toast immediately also helps more than any other strategy; avocado toast is a right-now food and the longer it sits, the more it browns regardless of how much lemon juice went in.

    The toast went soggy almost immediately. What happened?
    Either the toast was not golden enough, the bread was too thin, or the avocado was too wet. Toast to deep golden, not pale beige, and let it cool for 60 seconds before adding the avocado. If the avocado is extremely ripe and watery, strain the mash through a fine mesh strainer for a moment before using. Thicker, denser bread also holds up significantly longer than thin sandwich bread.

    My avocados are not ripe yet. Can I speed it up?
    Place unripe avocados in a paper bag with a banana or an apple and fold the top closed. The ethylene gas from the other fruit accelerates ripening dramatically. At room temperature this typically works in one to two days. Do not refrigerate unripe avocados; the cold stops the ripening process completely, and you will be waiting indefinitely.

    The Five-Minute Breakfast That Made Everything Else Optional

    There are mornings in our house when this is the only thing anyone wants and nobody is apologetic about it. Ben eats his with an egg on top and calls it a complete meal, which it is. Mia seasons hers herself now and has strong opinions about everything bagel seasoning ratios that I do not argue with because she is right. This avocado toast sits naturally alongside our healthy savory breakfast recipes as one of the fastest and most satisfying starts to any morning, and on the days when I want to build a full brunch spread, it pairs beautifully with our easy weekend breakfast recipes that come together just as quickly. For the mornings when the table needs something that feels complete and genuinely nourishing without a lot of effort, this avocado toast next to our easy high-protein breakfast recipes covers every craving with almost no time at all. Some recipes become the ones you make without thinking about it and this one reached that status faster than anything else I have put in this rotation.

    Don’t forget to snap a picture of your avocado toast before that… (trust me, it will disappear quickly), and leave a rating below. We’d love to hear how this avocado toast recipe becomes part of your family morning story.
  • 2 Secrets to Perfect Potato Recipes Side Dishes

    2 Secrets to Perfect Potato Recipes Side Dishes

    My mashed potatoes were too wet, and every fritter dissolved the moment it hit the pan. Ben tried to save one with a spatula, and it disintegrated. Mia said, “they became soup.” I laughed and started over. That fallen fritter disaster taught me the one prep step that makes these the crispiest, most satisfying potato recipes side dishes I have ever put on the table.

    Why This Recipe Is Special

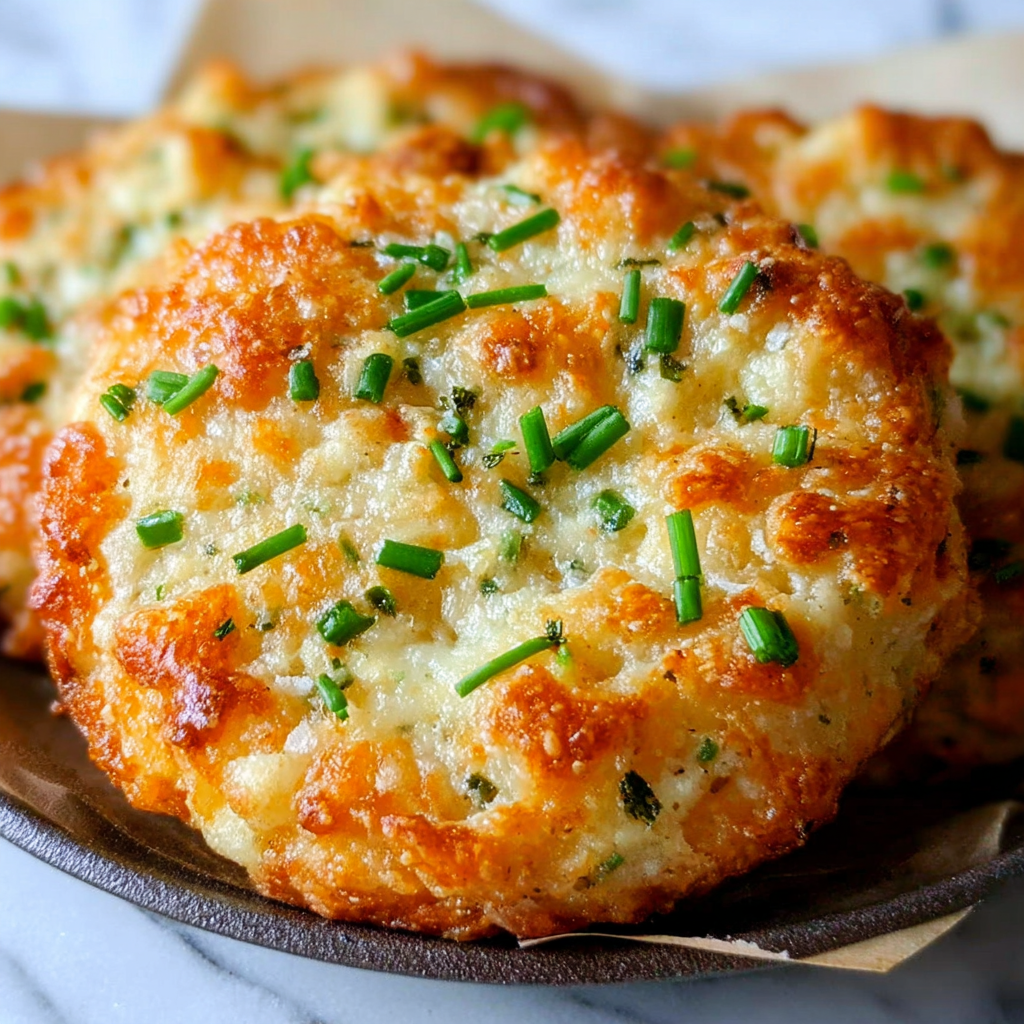
    These are not the sad, dense potato patties you make just to use up leftovers. These are golden, crispy-edged fritters packed with sweet corn, sharp cheddar, and fresh chives that hold together beautifully and taste like something you made on purpose for the best possible reason. The outside goes genuinely golden and slightly crunchy from the pan, and the inside stays soft and potato-pillowy with pockets of melted cheese. Mia eats them plain, Ben eats them with sour cream and hot sauce, and I eat them standing at the stove because I cannot wait for a plate.

    How To Make Crispy Cheddar Corn Potato Fritters

    The successful batch came on a Sunday afternoon when both kids decided the fritter rescue mission from the first attempt had been dramatic enough that they wanted to supervise the second attempt personally. Mia was stationed at the mixing bowl and took the job of combining the corn and cheddar into the potato mixture with the seriousness of someone who has watched too many baking shows. Ben was in charge of the pan temperature and providing updates approximately every twenty seconds. When the first fritter went in and made that perfect sizzle and held its shape completely while going golden at the edges, both kids actually cheered. Ben said “we fixed it.” He was right, and he knew exactly which step we had fixed.

    The step that saved everything was squeezing the mashed potato mixture in a clean kitchen towel before mixing in the other ingredients. Leftover mashed potatoes hold a surprising amount of moisture, and that moisture is the enemy of a crispy fritter. Squeeze the potatoes until they feel dry and crumbly; add the egg, cheese, corn, and chives, and the mixture holds together firmly enough to form patties that stay intact from bowl to pan to plate. Ben watched me do this and said “that is the whole trick.” It is the whole trick.

    Main Ingredients

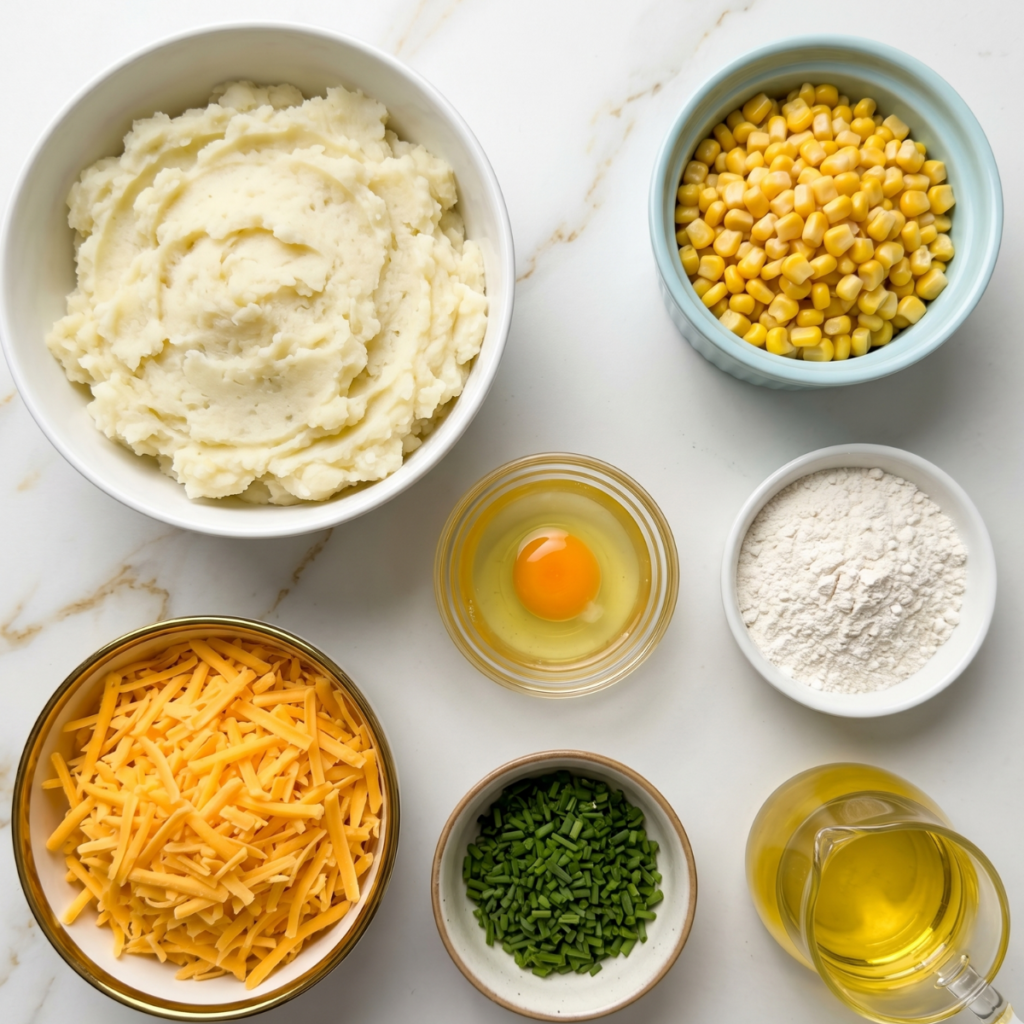
    • 2 cups cold mashed potatoes – Cold and well-chilled leftover mashed potatoes work best; fresh hot mashed potatoes are too soft and wet to form fritters that hold together
    • 1 cup frozen or canned corn, drained and patted dry – Adds sweetness and texture; patting dry is important so it does not add extra moisture to the mixture
    • 1 cup shredded sharp cheddar cheese – The sharper the cheddar the better the flavor; it melts into pockets throughout the fritter and gets golden at the edges
    • 1 large egg – The binder that holds every fritter together; do not skip it
    • 3 tablespoons all-purpose flour – Just enough extra structure to help the fritters hold their shape during cooking
    • 3 tablespoons fresh chives or green onions, finely chopped – Adds a fresh savory note throughout every bite
    • 1/2 teaspoon garlic powder – Savory depth that ties the potato and cheese together
    • 1/2 teaspoon smoked paprika – Gives the fritters a subtle color and warmth from the inside
    • Salt and black pepper to taste – Season the mixture generously before forming; cold potatoes absorb seasoning differently than hot
    • 2 to 3 tablespoons neutral oil for frying – Vegetable or avocado oil; enough to coat the bottom of the pan generously
    • Sour cream and extra chives for serving – The finishing touch that makes these feel like something worth sitting down for

    Step by Step Instructions

    Step 1: Prep the Potato Mixture

    • Place the cold mashed potatoes in the center of a clean kitchen towel, gather the edges, and squeeze firmly over the sink until as much liquid as possible has been removed; the potatoes should feel noticeably drier and slightly crumbly when done
    • Transfer the squeezed potatoes to a large mixing bowl and add the egg, flour, garlic powder, smoked paprika, salt, and pepper; stir until combined
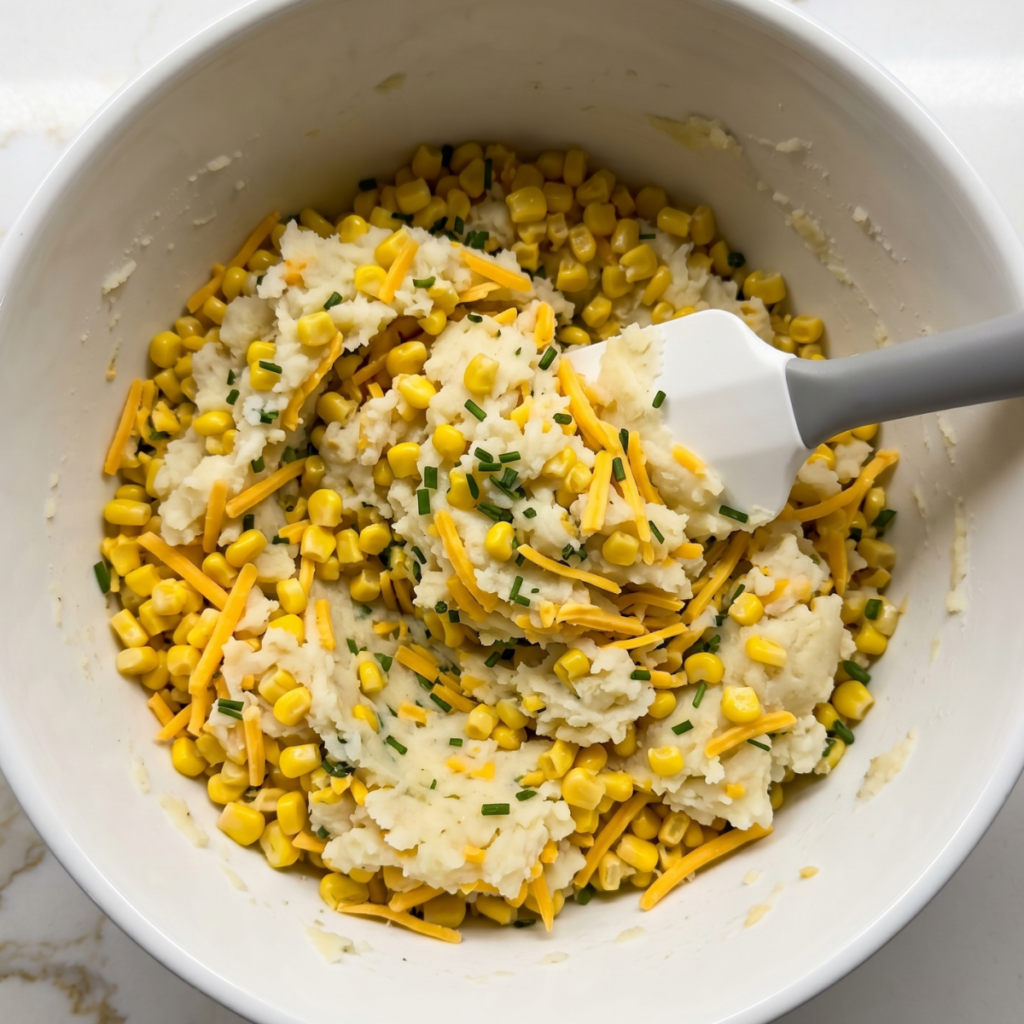
    • Fold in the shredded cheddar, drained corn, and chopped chives until evenly distributed throughout the mixture
    • Taste the mixture at this stage and adjust seasoning; cold mashed potatoes need more salt than you expect and an under-seasoned fritter will taste flat no matter how golden it gets

    Step 2: Form the Fritters

    • Scoop about a quarter cup of the potato mixture and shape it gently between your palms into a disc about half an inch thick and three inches across; do not pack too tightly or the fritters will be dense rather than light inside
    • Place the formed fritters on a parchment-lined plate or tray and refrigerate for 15 minutes before frying; this brief chill firms them up and makes them significantly less likely to fall apart in the pan
    • If the mixture feels too wet to hold its shape even after squeezing the potatoes, add another tablespoon of flour and stir gently before forming; this is a quick fix that works every time
    • This recipe makes approximately 8 to 10 fritters depending on how generous your scoops are; plan on two to three per person as a side dish

    Step 3: Fry Until Crispy

    • Heat the neutral oil in a large non-stick or cast iron skillet over medium heat until shimmering; the oil should sizzle immediately when the edge of a fritter touches it
    • Add the chilled fritters in batches of three to four without crowding; crowded fritters steam instead of fry and will never get genuinely golden
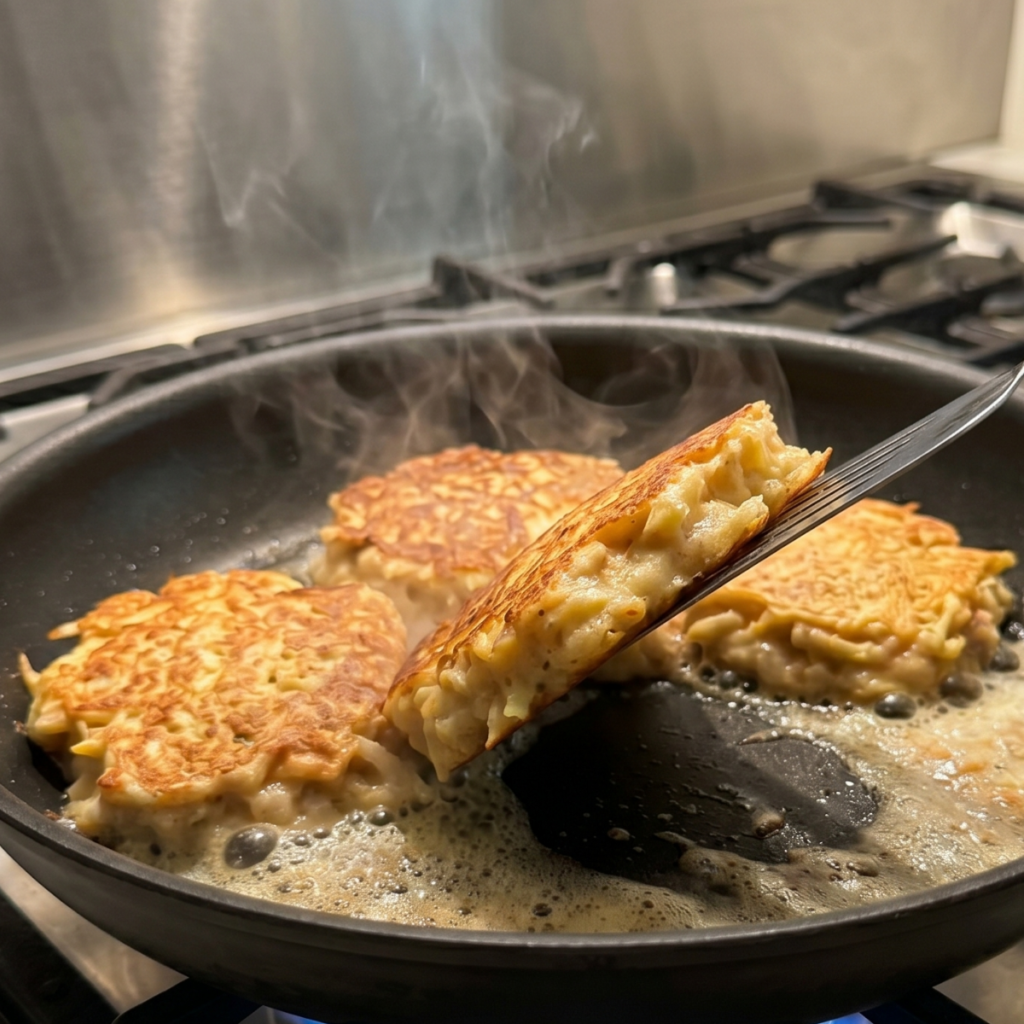
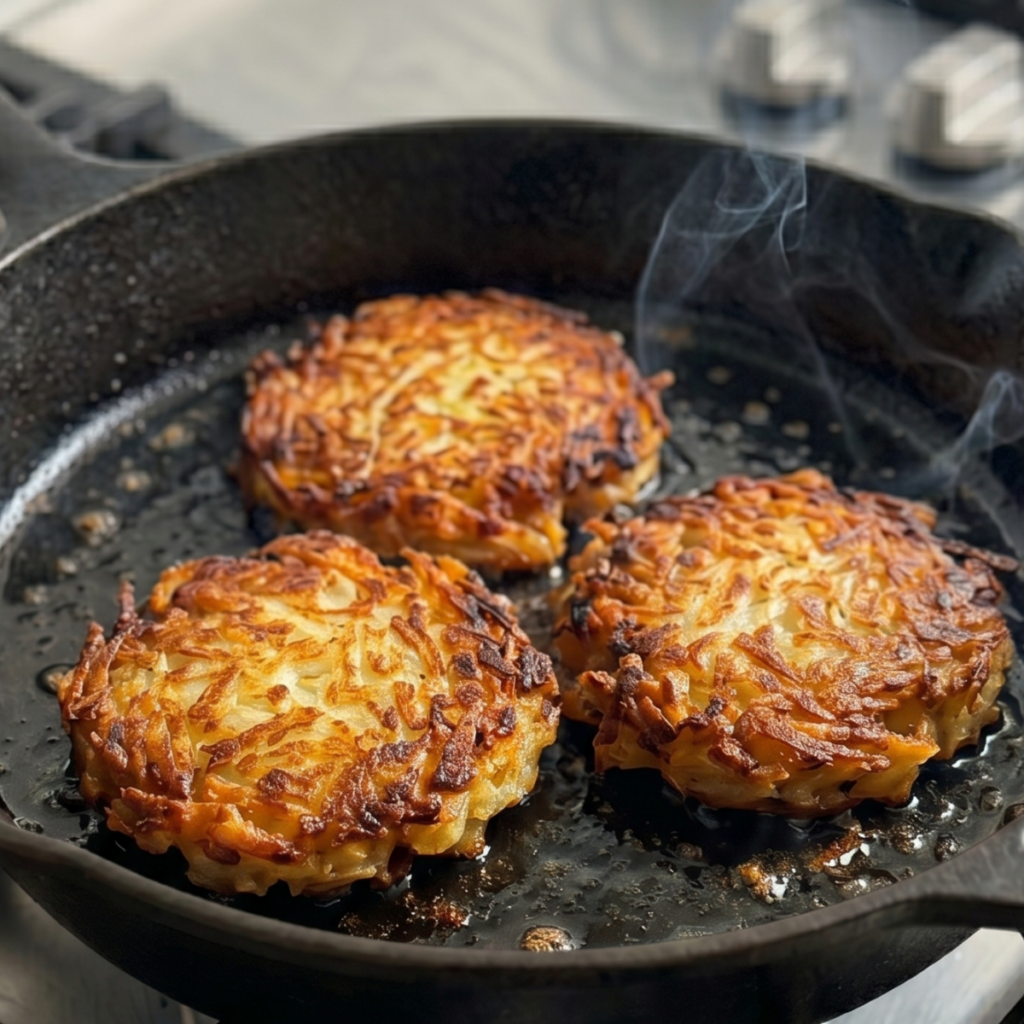
    • Cook undisturbed for 3 to 4 minutes on the first side until a deep golden crust has formed; do not move or press them during this time or the crust will break before it has set
    • Flip carefully with a thin wide spatula and cook for another 3 minutes on the second side until equally golden; transfer to a paper towel-lined plate and repeat with the remaining fritters

    Step 4: Drain, Garnish, and Serve

    • Transfer the finished fritters to a paper towel-lined plate for sixty seconds to absorb any excess oil from the surface
    • Move to a serving plate immediately after draining so the bottoms do not steam against the paper towel and lose their crispiness
    • Scatter freshly chopped chives over the top and serve immediately with sour cream alongside; these fritters are at their absolute best in the first five minutes out of the pan when the crust is at peak crunch
    • For a complete spread, serve alongside extra toppings like hot sauce, sliced avocado, or a simple green salad to balance the richness of the fried fritters

    Crispy Cheddar Corn Potato Fritters Variations

    Mia’s “All Corn, Extra Cheese” Version

    Mia’s relationship with corn in any context is enthusiastic and consistent. She increased the corn from one cup to one and a half cups during her mixing session with the bowl and did not tell me until after it was cooked. The extra corn made the fritters slightly sweeter and gave them more texture throughout, and Mia announced at the table that hers were “improved.” She was not wrong. For her version, use one and a half cups of corn and add an extra quarter cup of cheddar. The cheese pockets become more generous, and the sweetness of the corn is more prominent in every bite.

    Ben’s “Spicy Cheddar” Version

    Ben requested jalapeno in the fritters with the same calm inevitability he brings to every spice request in this kitchen. For his version, finely dice one small jalapeno and fold it into the mixture with the corn and cheese. Use pepper jack in place of half the cheddar for an extra heat layer. The fritters go golden the same way, but every bite has a building warmth that Ben describes as “the correct amount of flavor.” He dips his in hot sauce additionally, which he describes as “his personal touch,” and I have learned to stop commenting on this.

    The Baked Sheet Pan Version

    On the nights when frying a batch of fritters sounds like more standing at the stove than I have energy for, the oven version saves everything. Brush each formed fritter generously on both sides with oil and place on a parchment-lined baking sheet. Bake at 425 degrees F for 15 minutes, flip carefully, and bake for another 10 minutes until golden and crispy. They are not quite as deeply golden as the pan-fried version, but the result is genuinely good, and the cleanup is significantly easier. Ben calls this version “the responsible choice” and eats just as many of them.

    Substitutions

    Cold mashed potatoes to freshly mashed: If you do not have leftover cold mashed potatoes, make a fresh batch and spread them on a baking sheet to cool and dry out for 20 to 30 minutes before using. Fresh hot mashed potatoes have too much steam and moisture to form fritters that hold together. The cooling and drying time is the critical step whether you are using leftovers or fresh ones.

    Sharp cheddar to Gruyere or smoked gouda: Gruyere gives a nuttier, more complex flavor that feels slightly more elevated for a dinner party side dish. Smoked gouda adds a deeper smokiness alongside the smoked paprika that is genuinely excellent. Both melt beautifully and create the same golden cheese pockets in the finished fritter.

    All-purpose flour to gluten-free flour or cornmeal: A 1:1 gluten-free flour substitutes in exactly the same quantity with almost no change to the finished fritter. Cornmeal in place of flour adds a slightly grittier texture and a corn-on-corn depth of flavor that works beautifully alongside the corn in the mixture and gives the crust an extra crunch.

    Fresh chives to parsley or dill: Fresh flat-leaf parsley gives a slightly more herby, less onion-forward flavor that works beautifully. Fresh dill adds a brightness that pairs surprisingly well with the potato and cheddar and gives the fritters a more Eastern European character. Use the same quantity of either substitute.

    Equipment

    • Large non-stick or cast iron skillet for frying
    • Clean kitchen towel for squeezing moisture from the potatoes
    • Large mixing bowl for the fritter mixture
    • Quarter-cup measure or large cookie scoop for consistent fritter sizing
    • Thin wide spatula for flipping without breaking
    • Parchment-lined tray for chilling the formed fritters before frying
    • Paper towel-lined plate for draining after frying
    • Sharp knife and cutting board for the chives and garnish

    Storage Tips

    Make Ahead

    • Form the fritters up to 24 hours ahead and store on a parchment-lined tray covered with plastic wrap in the fridge; fry fresh at serving time for the best crispiness
    • The potato mixture can be made up to 2 days ahead and stored covered in the fridge; stir gently before forming and add a splash of flour if it has loosened slightly
    • These are one of the most practical potato recipes side dishes for entertaining since all the prep can be done completely ahead and the frying takes under fifteen minutes

    Refrigerator

    • Store cooked fritters in an airtight container in the fridge for up to 3 days; they will lose their crispiness but the flavor holds up beautifully
    • Layer between parchment sheets to prevent sticking and keep the edges from getting soggy against each other
    • Cold fritters eaten straight from the fridge are a legitimate snack that both kids have discovered and neither apologizes for

    Freezing

    • Freeze cooked fritters on a parchment-lined tray until solid, then transfer to a freezer bag for up to 2 months
    • Reheat directly from frozen in a 400 degree F oven for 12 to 15 minutes for a result close to freshly fried; do not microwave from frozen as they go limp
    • Raw formed fritters can also be frozen on a tray and then bagged; fry directly from frozen, adding 2 extra minutes per side

    Reheating

    • Reheat in a dry non-stick skillet over medium heat for 2 to 3 minutes per side for the closest result to freshly fried; the exterior crisps back up remarkably well
    • Air fryer reheating at 375 degrees F for 5 to 6 minutes is the best method for restoring crispiness with minimal effort; Ben discovered this and uses the air fryer for every leftover fritter
    • Oven reheating at 400 degrees F on a wire rack for 10 minutes keeps the bottoms crispy rather than steaming them against a flat sheet pan

    Family Secret Worth Sharing

    My mom always stirred a tablespoon of sour cream directly into the fritter mixture before forming, not just serving it alongside as a dip. She said it added a slight tang to the inside of the fritter that made the whole thing taste more rounded and less starchy. I thought this was just a personal preference until I made a batch without it, and the fritters tasted noticeably flatter even with everything else done correctly. The sour cream goes in with the egg and flour, just one tablespoon, and it disappears completely into the mixture without making it wet. Ben helped me make a batch once and stirred it in himself without asking what it was because he had seen me do it. He said later it tasted “more like a real thing.” That is exactly what one tablespoon of sour cream does to a potato fritter, and my mom knew that before anyone told her.

    Troubleshooting FAQs

    My fritters are falling apart in the pan. What went wrong?
    Three things cause this: the potatoes were not squeezed dry enough, the fritters were not chilled before frying, or the pan was not hot enough when they went in. Address all three and the problem disappears. Squeeze the potatoes until they feel genuinely dry, chill the formed fritters for at least fifteen minutes, and make sure the oil shimmers before the first fritter goes in. A fritter that hits a properly hot pan starts forming its crust immediately and is far less likely to fall apart during flipping.

    The fritters are not getting golden, they are just getting greasy. What happened?
    The oil was not hot enough, or the pan was overcrowded. Cold oil means the fritters absorb it instead of frying in it. Test the oil temperature by touching the edge of a fritter to the pan; if it sizzles immediately, the oil is ready. Also, fry in batches of three to four maximum so the oil temperature stays consistent. Crowded fritters drop the pan temperature and steam rather than fry, which is how you get greasy, pale fritters instead of golden, crispy ones.

    The fritters are golden on the outside but raw and pasty in the middle. How do I fix it?
    The fritters are too thick or the heat is too high. Flatten each fritter to about half an inch thickness before frying; thicker fritters need longer in the pan than the outside can handle before burning. Medium heat rather than medium-high gives the heat time to cook through the center before the exterior over-browns. A thinner fritter cooked on medium is what gives that perfectly golden outside and warm soft inside simultaneously.

    Can I use instant mashed potatoes instead of regular?
    Yes, and they actually work quite well because instant mashed potatoes tend to be drier than homemade. Make them slightly stiffer than you normally would by using slightly less water than the package directs, then cool completely before mixing with the other ingredients. Skip the squeezing step since they will already be dry enough. The flavor is simpler than homemade mashed potatoes, but the texture of the finished fritter is perfectly good.

    The Side Dish That Quietly Steals the Whole Dinner

    There is a moment at every dinner table when someone reaches for the side dish before the main course is even served and looks completely unapologetic about it. In our house that moment always happens with these fritters. Ben takes the corner ones because the crust is thicker there. Mia eats hers with so much sour cream that the fritter is barely visible underneath, which she considers a reasonable ratio. These crispy cheddar corn and potato fritters have become one of the most reliable easy weeknight side dish recipes in our whole dinner rotation, right alongside our comforting potato dinner recipes that make the whole table feel genuinely satisfied. For the nights when I want the full spread covered, these fritters next to our easy family dinner recipes mean every person at the table is eating something they actually wanted, and nobody is negotiating. That is a dinner worth making again.

    Don’t forget to snap a picture of your potato recipes’ side dishes before that… (trust me, it will disappear quickly!), and leave a rating below. We’d love to hear how this potato recipe side dish becomes part of your family dinner story.

  • 4-Step Fluffy Blueberry Cottage Cheese Breakfast Bake

    4-Step Fluffy Blueberry Cottage Cheese Breakfast Bake

    I used plain unsweetened cottage cheese and completely forgot the sugar. It came out tasting like warm blueberry cheese. Ben ate a square because he was hungry. Mia took one bite, set her fork down very carefully, and quietly changed the subject entirely. That silent review sent me back to the recipe, and this blueberry cottage cheese bake now starts every weekend morning exactly right.

    Why This Recipe Is Special

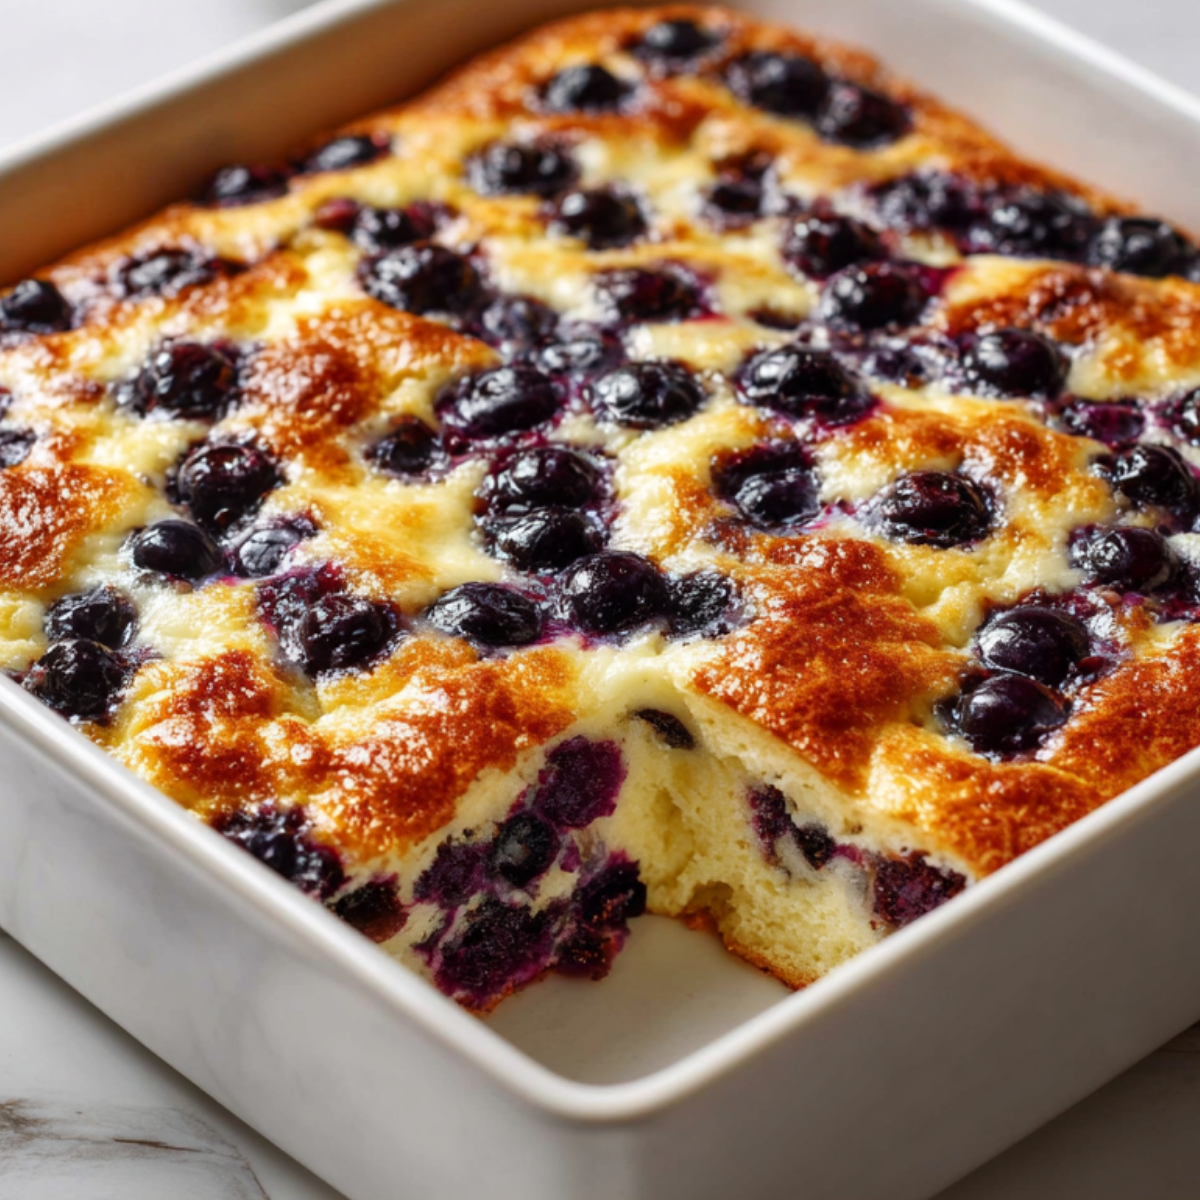
    This is the breakfast bake that looks like a treat, tastes like something genuinely special, and secretly has more protein per square than almost anything else on the breakfast table. The cottage cheese melts into the batter during baking and creates a soft, almost custard-like interior that you cannot get from regular flour-only bakes. The blueberries burst and collapse into jammy pools throughout the crumb, and the whole thing comes together in one bowl in under ten minutes of actual work. Mia calls it “the blueberry cake” and eats it on weekdays when I meal-prep it, which tells me everything I need to know.

    How To Make Blueberry Cottage Cheese Breakfast Bake

    The successful batch happened on a Sunday morning when both kids were already at the table before I had started, which is not a thing that normally happens voluntarily. Mia had heard the word “blueberry” and arrived in the kitchen with the focused energy of someone who has a strong position on blueberries. Ben was reading the cottage cheese container with the skeptical expression he reserves for any ingredient he does not recognize in a sweet context. When I explained that cottage cheese in baking makes things soft and adds protein and you cannot taste it as cottage cheese, he said “prove it.” I did. He had two squares and said nothing more about it.

    The thing that fixed the undersweetened batch was understanding that this batter needs sweetness from two directions: the sugar in the batter and a small handful of extra sugar scattered on top before baking. The top sugar caramelizes in the oven into a very thin, slightly golden crust that makes every bite taste finished rather than plain. It also makes the blueberries look like they are set in something glazed and intentional when the bake comes out, which Ben now calls “the professional look.” I let him claim it.

    Main Ingredients

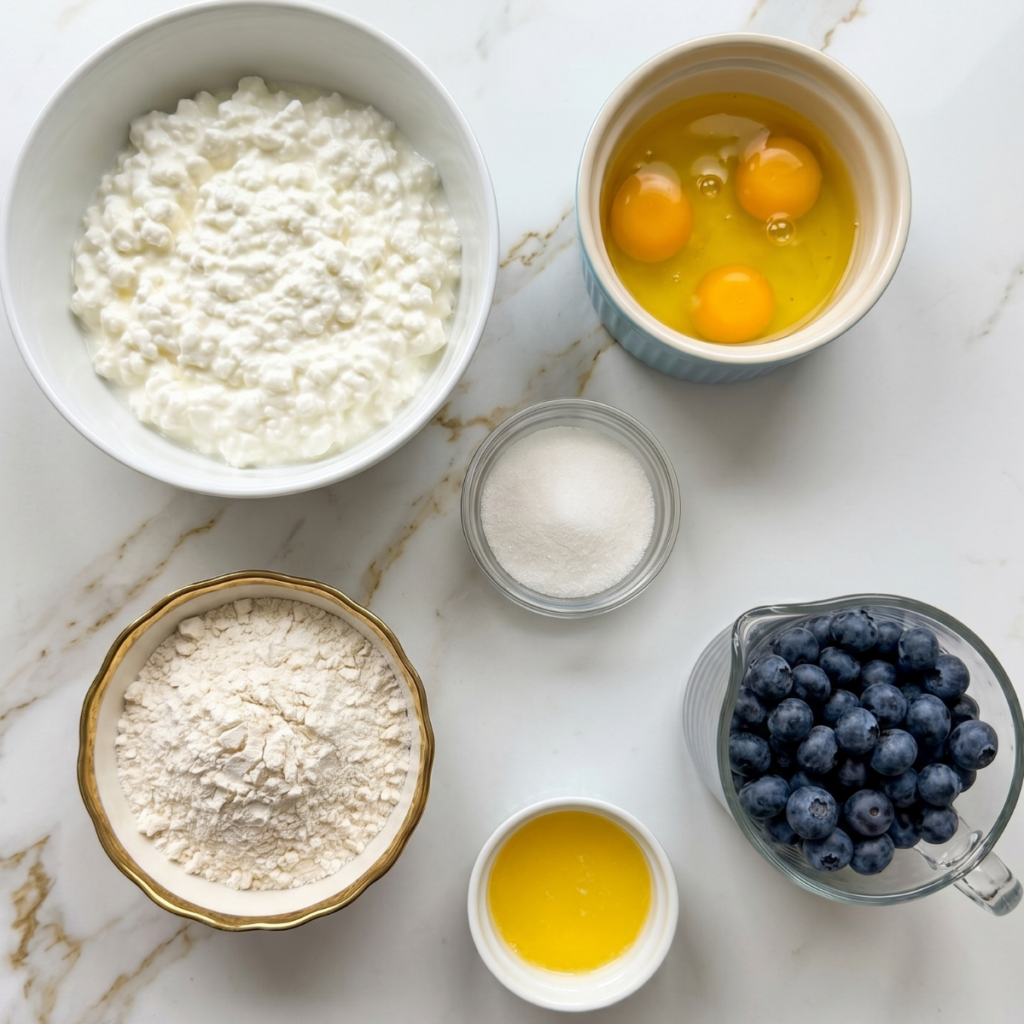
    • 2 cups full-fat cottage cheese – Full-fat gives the richest, creamiest result; low-fat works but the interior is slightly less custardy
    • 3 large eggs – The structure that holds the whole bake together; room temperature eggs incorporate more smoothly
    • 1/3 cup granulated sugar plus 1 tablespoon for topping – The batter sugar sweetens throughout and the topping sugar caramelizes into that thin golden crust
    • 1/3 cup all-purpose flour – Just enough to give the bake structure without making it cakey; it stays closer to a custardy baked good than a cake
    • 1 teaspoon vanilla extract – Rounds out the sweetness and the cottage cheese tang beautifully
    • 1 teaspoon baking powder – Gives a gentle lift without making the texture cakey
    • 1/4 teaspoon salt – Enhances every other flavor including the blueberry and the vanilla
    • Zest of one lemon – Brightens the whole bake and makes the blueberry flavor more vivid; do not skip this
    • 1.5 cups fresh or frozen blueberries – Fresh give slightly cleaner pockets; frozen work perfectly and turn the whole batter lavender as they thaw, which Mia approves of
    • 2 tablespoons melted butter – Stirred into the batter for richness and helps the top go golden in the oven

    Step-by-Step Instructions

    Step 1: Prep the Pan and Make the Batter Base

    • Preheat your oven to 375 degrees F and grease an 8×8 or 9×9 inch baking dish generously with butter or cooking spray; a well-greased pan is important here since the cottage cheese batter sticks more readily than a regular cake batter
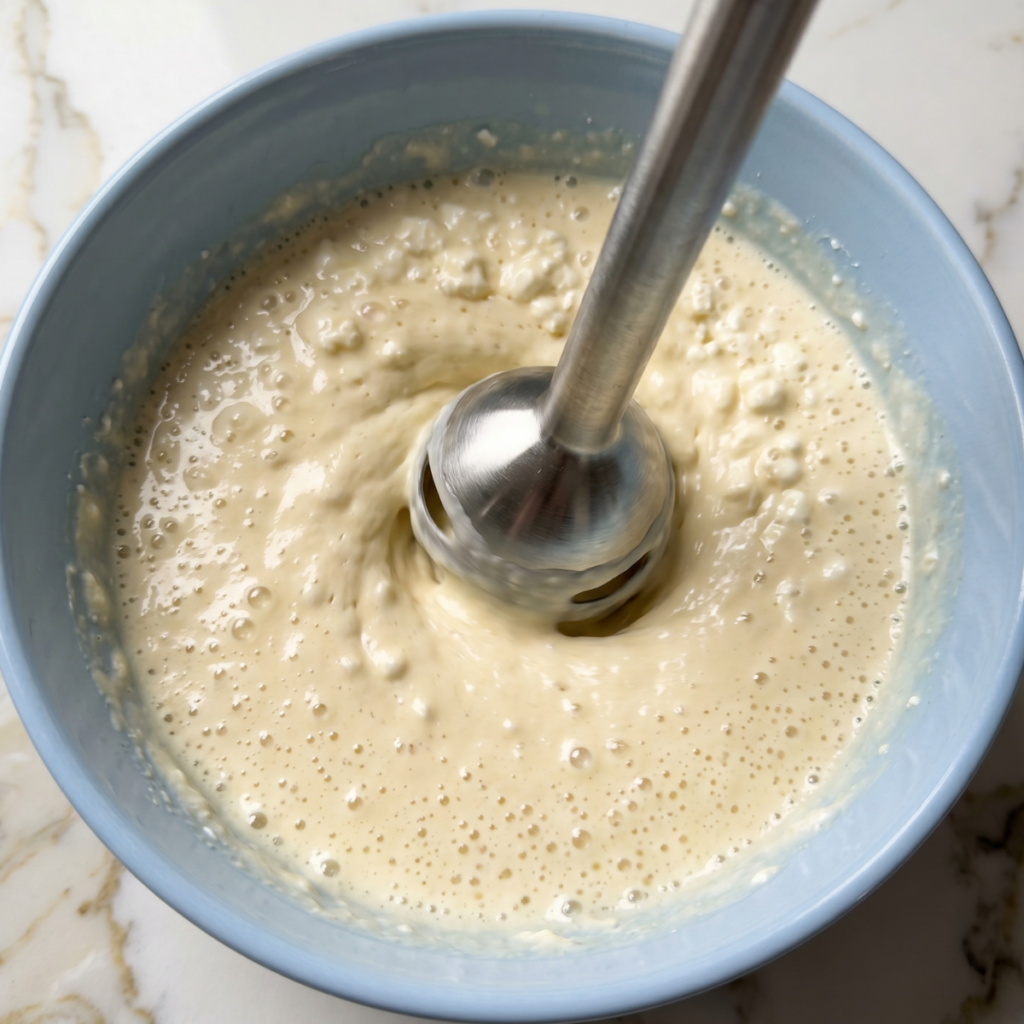
    • Combine the cottage cheese, eggs, granulated sugar, melted butter, vanilla extract, and lemon zest in a large bowl and stir until completely smooth and the sugar is dissolved into the mixture
    • If your cottage cheese has large curds, blend the mixture briefly with an immersion blender or in a regular blender for about 20 seconds for a smoother, more even texture throughout the finished bake
    • Taste the batter at this stage and check the sweetness; it should taste pleasantly sweet with a faint tang from the cottage cheese and bright lemon that makes you want to keep tasting it

    Step 2: Add the Dry Ingredients

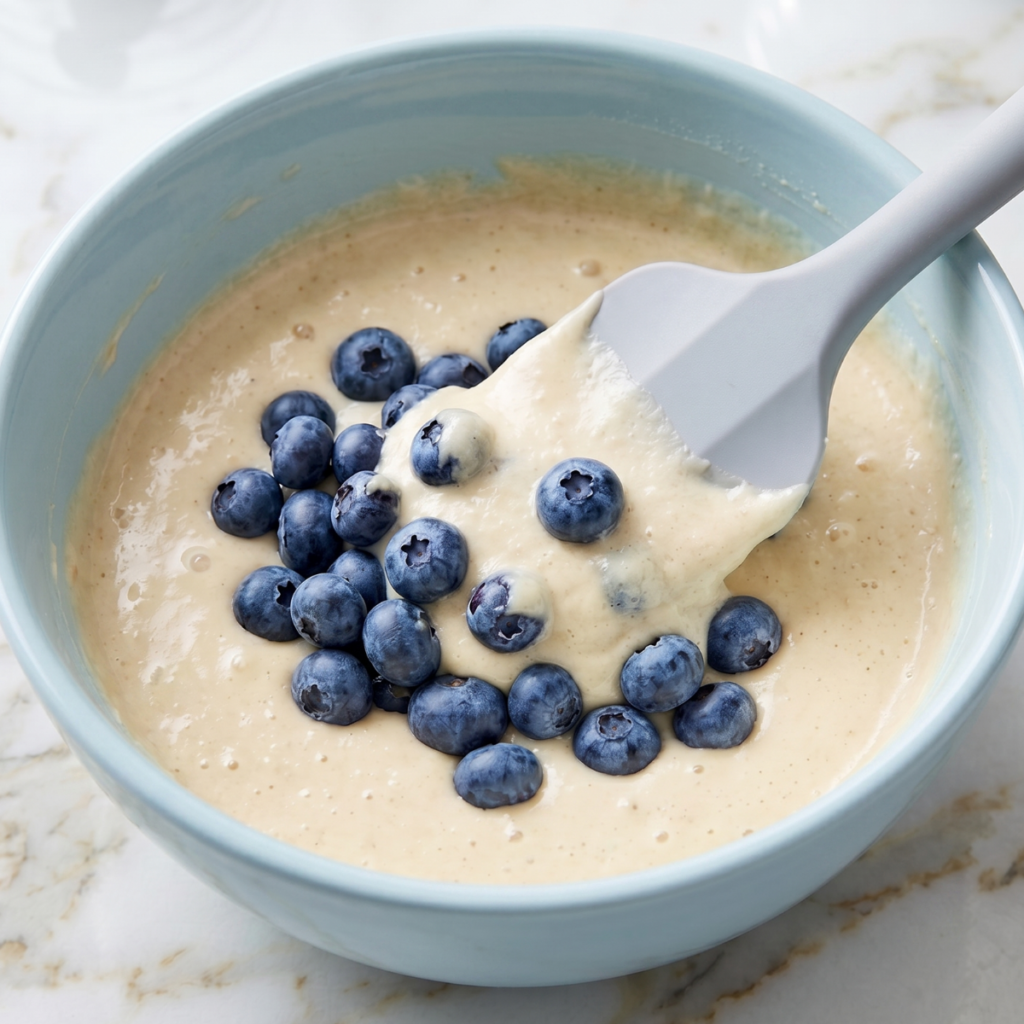
    • Sift the flour, baking powder, and salt directly over the cottage cheese mixture and fold gently with a spatula until just combined with no dry streaks visible
    • Do not overmix; the batter should look slightly lumpy and loose rather than smooth and thick, which is exactly right for the custardy texture this bake is known for
    • Fold in three-quarters of the blueberries with a few gentle strokes, reserving the remaining quarter for scattering on top so the surface has visible whole fruit
    • The batter will look very loose and pourable compared to a regular cake batter; this is correct and the cottage cheese thickens and sets beautifully in the oven

    Step 3: Pour, Top, and Bake

    • Pour the batter into the prepared baking dish and spread it evenly to the corners; the batter is thin enough that it mostly levels itself
    • Scatter the reserved blueberries evenly over the surface of the batter so the top will have visible jammy blueberry pockets after baking
    • Sprinkle the remaining tablespoon of granulated sugar evenly over the entire surface; this is the step that creates the thin, caramelized golden crust on top
    • Bake at 375 degrees F for 35 to 40 minutes until the top is deep golden, the edges have set and pulled slightly from the sides of the pan, and the center feels just barely jiggly when you shake the dish gently

    Step 4: Cool, Cut, and Serve

    • Let the bake cool in the dish for at least 15 minutes before cutting; the cottage cheese layer needs this time to firm up from its custardy state into something that slices cleanly
    • Run a thin knife around the edges of the pan before cutting to release any spots that have stuck, then cut into squares with one clean downward press without sawing
    • Serve warm for the softest, most custardy interior, or at room temperature once fully cooled for cleaner slices that hold their shape on a plate
    • Dust with a small amount of powdered sugar right before serving if you want a finished presentation; a few extra fresh blueberries alongside each square look beautiful and taste even better

    Blueberry Cottage Cheese Breakfast Bake Variations

    Mia’s “Extra Blueberries and Lemon” Version

    Mia conducted a formal assessment of the blueberry-to-bake ratio after the first successful batch and determined that more blueberries were needed. She submitted this opinion while eating her second square and maintained it through the entire breakfast conversation. For her version, increase the blueberries to two full cups and add an extra teaspoon of lemon zest alongside the original amount. The bake turns a deeper purple where the blueberries concentrate, and the lemon flavor runs through every bite more prominently. Mia calls this “the correct version,” and I have been making it her way ever since.

    Ben’s “Prove It Is Protein” Version

    Ben remains scientifically interested in the protein content of this bake ever since I told him cottage cheese was the reason it offered more protein than regular breakfast cake. For his version, add two tablespoons of vanilla protein powder to the dry ingredients alongside the flour and increase the sugar by one teaspoon to compensate for the slight bitterness some protein powders bring. The texture is barely different, the protein content increases meaningfully, and Ben eats it before school while looking satisfied with himself for eating something nutritious that tastes like dessert. This version is a genuine win.

    The Mixed Berry Meal Prep Version

    The Mixed Berry Meal Prep Version is the version I make on Sunday when I want the whole week of breakfasts handled by Monday morning. Use one cup of blueberries and half a cup each of raspberries and chopped strawberries for a mixed berry version that is even more colorful and slightly more tart. Bake in a 9×13 dish for 30 to 35 minutes to account for the thinner layer and cut into twelve portions once cooled. Each portion goes into an individual container in the fridge and reheats in the microwave in sixty seconds. Ben grabs one before school and calls it “the berry thing,” which is a term of endearment from him.

    Substitutions

    Full-fat cottage cheese to ricotta: Whole milk ricotta substitutes in exactly the same quantity and gives an even smoother, more delicate texture since ricotta has smaller curds than cottage cheese. The protein content drops slightly, but the bake is silkier, and the flavor is slightly milder and creamier. Mia preferred the ricotta version, and I did not tell her the recipe had changed.

    All-purpose flour to oat flour or almond flour: Oat flour in the same quantity gives a slightly nuttier, heartier result that is still soft and custardy inside. Almond flour in the same quantity makes the bake denser and richer and keeps it lower in carbs, which is how this recipe works beautifully as a low-carb protein breakfast option without any major adjustments.

    Fresh blueberries to frozen: Frozen blueberries work perfectly and are what I use most often since they are always available and already measured. Do not thaw them before adding to the batter; adding them frozen keeps them from bleeding too much into the batter before it goes into the oven. The finished bake will have slightly more purple streaking throughout, which Mia considers an improvement.

    Granulated sugar to honey or maple syrup: Two tablespoons of honey or maple syrup in place of the granulated sugar in the batter gives a more complex, natural sweetness and a slightly denser texture. Reduce the sugar topping to a light sprinkle rather than a full tablespoon since liquid sweeteners make the top less likely to caramelize into the thin crust. The flavor is warmer and more rounded with either substitution.

    Equipment

    • 8×8 or 9×9 inch baking dish (glass or ceramic)
    • Large mixing bowl for the batter
    • Rubber spatula for folding
    • Immersion blender or regular blender (optional; for a smoother batter if using large-curd cottage cheese)
    • Zester or fine grater for the lemon zest
    • Fine mesh strainer for dusting powdered sugar
    • Sharp knife for cutting clean squares
    • Wire cooling rack for resting the dish before cutting
    • Measuring cups and spoons

    Storage Tips

    Make Ahead

    • Bake the full dish on Sunday and portion it into individual containers for the whole week of breakfasts; this is one of the best meal prep breakfast ideas that actually holds up beautifully for five days
    • The batter can be mixed the night before and stored covered in the fridge; stir gently before pouring into the pan and add two extra minutes to the bake time since the batter will be cold
    • Bake the day before serving and refrigerate overnight; the texture firms further overnight and the slices are actually cleaner and hold their shape better on day two

    Refrigerator

    • Store cut squares in an airtight container in the fridge for up to 5 days; the cottage cheese content means refrigeration is non-negotiable after the first day
    • Layer squares between parchment sheets in the container to prevent the blueberry tops from sticking together
    • The bake firms up in the fridge and the texture shifts from custardy to something closer to a dense, moist cake which is equally good and arguably easier to grab and go

    Freezing

    • Freeze individual squares wrapped tightly in plastic wrap and stored in a freezer bag for up to 2 months
    • Thaw overnight in the fridge or at room temperature for 30 minutes; the texture returns very close to the original once thawed
    • Do not freeze the whole uncut bake, as the cottage cheese layer can develop a slightly grainy texture when thawed in a large mass

    Reheating

    • Reheat individual squares in the microwave at 50 percent power for 45 to 60 seconds until just warmed through; full power can make the cottage cheese layer rubbery
    • Reheat in a 325 degree F oven for 8 to 10 minutes for the closest result to freshly baked with a slightly crisp top edge
    • These squares are genuinely excellent eaten cold straight from the fridge, which Mia prefers and Ben considers “acceptable for a school morning.”

    Family Secret Worth Sharing

    My mom always added a small spoonful of cream cheese to her cottage cheese bakes alongside the regular cottage cheese, about two tablespoons blended smooth, and I thought this was just her slightly extra approach to things until I tried leaving it out, and the interior of the bake was noticeably less rich and less velvety. The cream cheese adds a subtle dairy richness that cottage cheese alone cannot quite reach on its own, and it smooths out the slight graininess that some cottage cheese brands bring to baked goods. I blend it in with the cottage cheese before anything else goes into the bowl. Ben has never noticed it is in there, and Mia has never questioned why hers tastes slightly more special than anything she has had elsewhere. That is exactly the kind of secret worth keeping.

    Troubleshooting FAQs

    The bake is still jiggly and soft in the center after 40 minutes. Is it done?
    A very slight jiggle in the very center is acceptable and similar to cheesecake; it will firm up during the resting time. But if the center looks liquid or underset rather than just slightly wobbly, give it another 5 minutes and check again. The edges should be fully set, golden, and pulling from the pan sides. If the top is browning too quickly before the center is done, cover loosely with foil for the remaining bake time.

    The bake tastes bland and not sweet enough. What went wrong?
    The sugar was measured incorrectly, the cottage cheese was unsweetened and quite tangy, or the lemon zest overpowered the sweetness. Taste the batter before it goes into the pan and adjust with an extra tablespoon of sugar if needed. The batter should taste pleasantly sweet before baking since it does not gain sweetness in the oven other than from the caramelized topping. This is the exact mistake I made on my first batch, and Mia’s silent fork placement told me everything.

    The cottage cheese texture is grainy and visible in the finished bake. How do I fix it?
    Blend the cottage cheese briefly before mixing it with the other ingredients. Even 20 seconds with an immersion blender smooths out large curds completely and gives a uniform, silky interior without any visible curds. This single step is what separates a smooth custardy bake from one that looks like it has white lumps throughout. It takes less than a minute and makes a noticeable difference in the finished texture.

    Can I make this recipe dairy-free?
    Yes, with some adjustments. A good quality dairy-free cottage cheese or thick coconut yogurt substitute in the same quantity with a slightly different but still pleasant flavor. Skip the cream cheese addition in this case. Use dairy-free butter or coconut oil in place of the melted butter. The protein content will be lower depending on the dairy-free alternative used, but the bake will still have a pleasant soft texture and hold together well.

    The Breakfast Bake That Made Cottage Cheese Acceptable to a Nine-Year-Old

    Ben now requests this on Sunday mornings with a directness that suggests he has moved past his initial skepticism about cottage cheese entirely and would prefer we not discuss it. Mia asks for the blueberry version specifically, which is all the versions, because she has never once asked for a version without blueberries. This blueberry cottage cheese bake sits naturally alongside our healthy high-protein breakfast bake recipes as one of the most nourishing and genuinely satisfying starts to any morning, and on the weekdays when meal prep is the priority it works right alongside our easy protein breakfast meal prep recipes for a full week of breakfasts sorted in one Sunday hour. For the mornings when the whole table wants something sweet and filling that does not require standing at a stove, this bake next to our easy healthy morning recipes covers every breakfast preference without a single complaint. Some recipes earn their place in the permanent rotation quietly, and this one did it in a single successful Sunday morning.

    Don’t forget to snap a picture of your blueberry cottage cheese breakfast bake before that… (trust me, it will disappear quickly), and leave a rating below. We’d love to hear how this blueberry cottage cheese recipe becomes part of your family morning story.
  • Best Breakfast Enchiladas

    Best Breakfast Enchiladas

    I poured the entire can of enchilada sauce instead of half, and the tortillas dissolved overnight into something completely unrecognizable. Ben lifted one with a spoon and said “it went liquid.” Mia said it smelled right. These breakfast enchiladas became everything they are supposed to be the moment I measured the sauce properly, and the whole family has been asking for them every weekend since.

    Why This Recipe Is Special

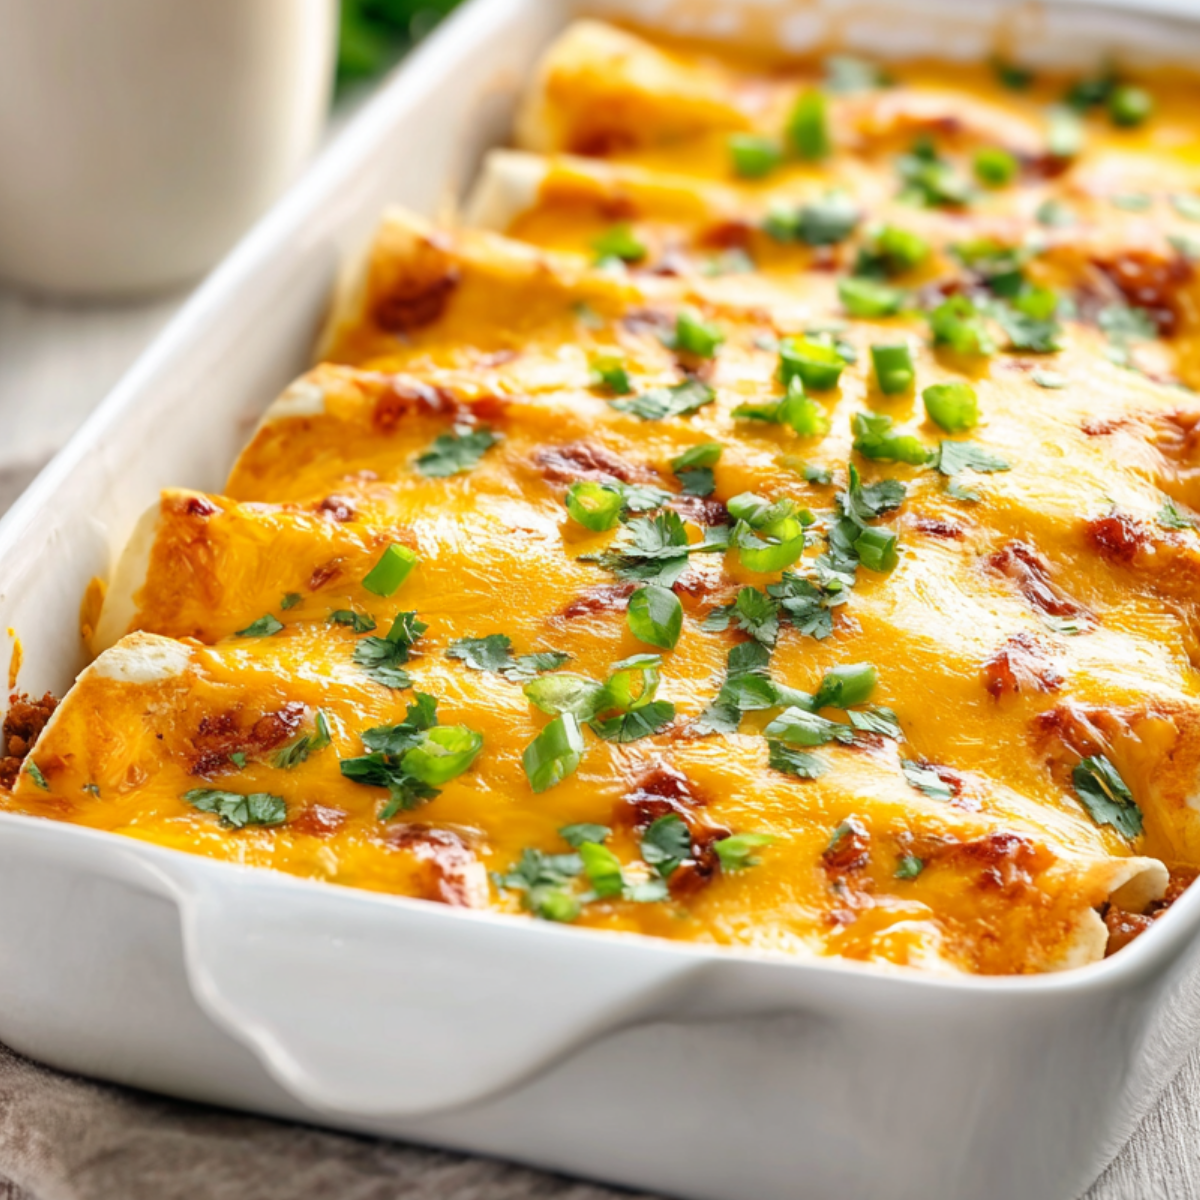
    This is the breakfast casserole that makes Saturday morning feel like an occasion without making the cook feel like they are running a restaurant. Flour tortillas rolled around a filling of scrambled eggs, seasoned sausage, and cheese, covered in a creamy enchilada sauce and more cheese, then baked until golden and bubbling. You can assemble it the night before and bake it fresh in the morning, which means you get all the warmth and indulgence of a made-from-scratch breakfast without standing over a stove at seven in the morning. Mia calls it “the fancy breakfast,” and Ben calls it “basically dinner for breakfast,” which is the kind of review that makes me make it again every time.

    How To Make Breakfast Enchiladas

    The successful batch happened on a Friday night when I decided to get ahead of Saturday morning for once. Both kids were invested from the start. Mia was carefully spooning the egg and sausage filling onto each tortilla with the precision of someone who takes her job seriously, and she made each one so neat and even that I told her she had a future in food. Ben was rolling them and placing them in the dish and providing a running announcement of each one as it went in, as though narrating a very small sporting event. When I poured the sauce over the top and scattered the last of the cheese, Ben said “that looks like the real thing.” It looked exactly like the real thing.

    The lesson from the dissolved batch was a ratio lesson and an overnight lesson at the same time. Too much sauce means the tortillas absorb everything overnight and lose all structure. The right amount of sauce covers everything generously but leaves the tortillas with enough integrity to hold their shape through the bake. I also learned that adding a light layer of sauce to the bottom of the dish before the enchiladas go in prevents sticking and gives even more flavor from beneath. Ben watched me do this step once and called it “layered strategy.” He was not wrong.

    Main Ingredients

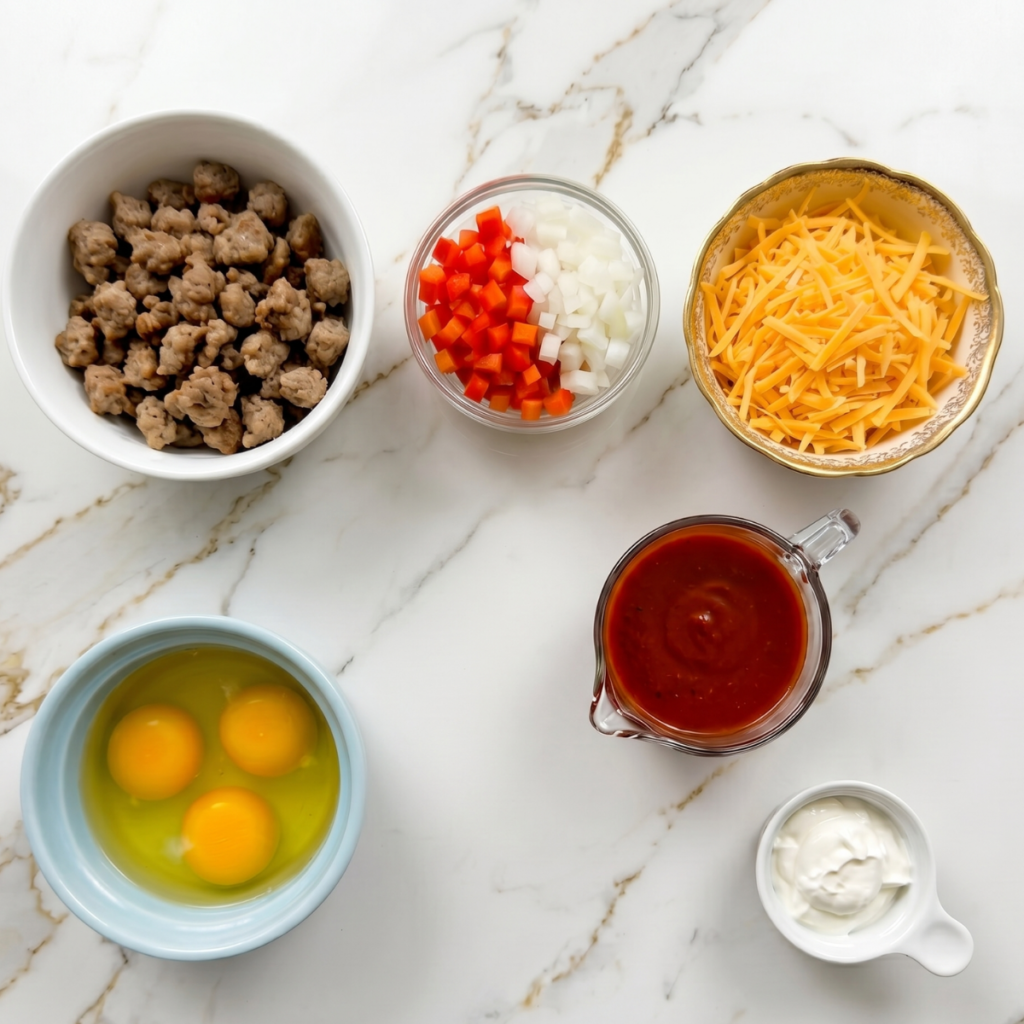
    • 8 medium flour tortillas – Medium tortillas roll more neatly than large ones and hold their shape better in the overnight soak
    • 1 lb breakfast sausage, crumbled and cooked – The savory base of every bite; cook it fully and drain any excess fat before it goes into the filling
    • 6 large eggs, scrambled – Scrambled low and slow so they stay soft; slightly underdone eggs finish cooking in the oven
    • 1 red bell pepper, finely diced and sauteed – Adds sweetness, color, and body to the filling
    • 1/2 small onion, finely diced and sauteed – Cooked with the pepper so it softens fully before going into the filling
    • 2 cups shredded cheddar or Monterey Jack, divided – Half stirred into the filling, half scattered over the top for the golden bubbly finish
    • 1 can (10 oz) red enchilada sauce – Use the whole can for the sauce; reserve two tablespoons for the pan bottom
    • 1/2 cup sour cream – Stirred into the enchilada sauce to create a creamy, slightly tangy coating that bakes into the most indulgent topping
    • 1/2 teaspoon cumin – Added to the sausage while it cooks for warmth throughout the filling
    • 1/2 teaspoon garlic powder – Savory depth in the filling
    • Salt and black pepper to taste – Season the filling generously before rolling
    • Fresh cilantro and sliced green onions for garnish – Added right before serving for a fresh bright finish against the golden cheesy top

    Step-by-Step Instructions

    Step 1: Make the Filling

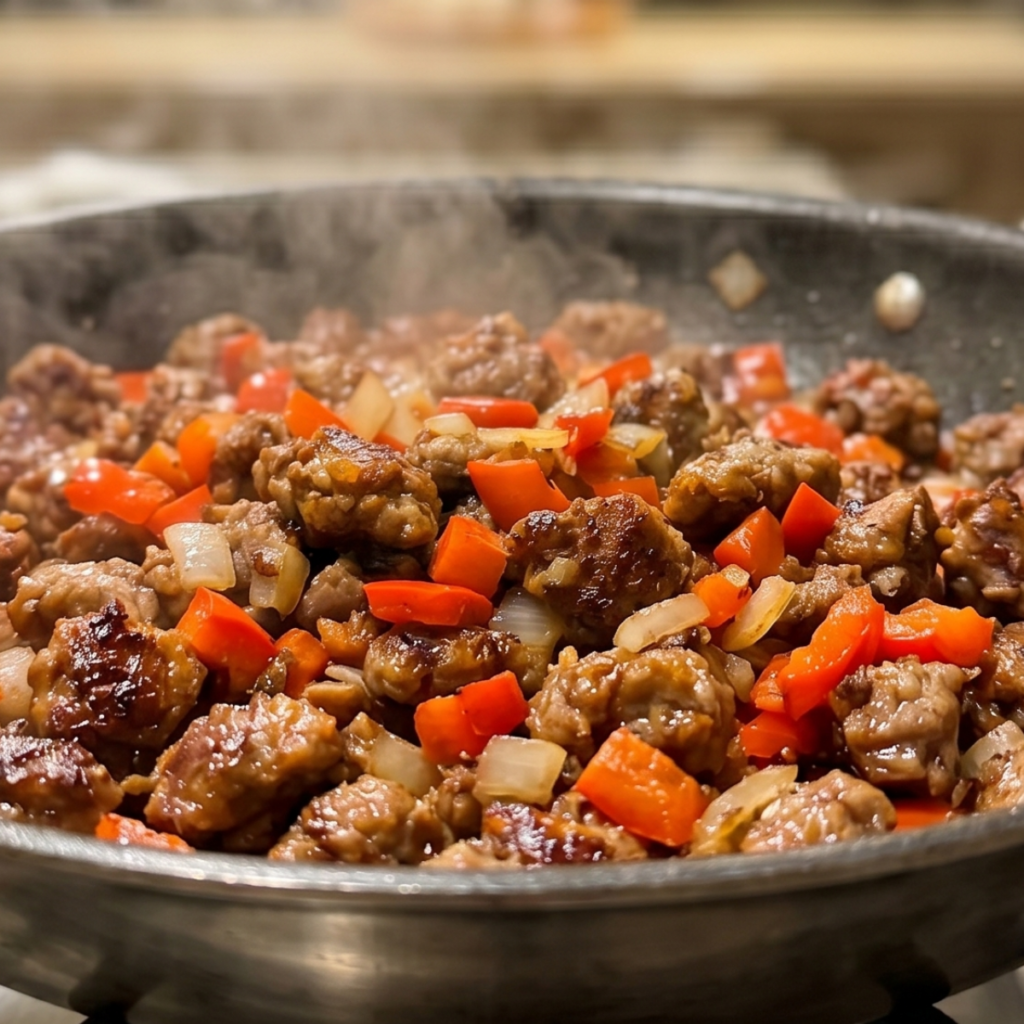
    • Cook the crumbled breakfast sausage in a large skillet over medium-high heat until deeply browned and cooked through; add the cumin and garlic powder in the last minute of cooking and stir so the spices bloom in the sausage fat
    • Transfer the cooked sausage to a bowl and use the same skillet to saute the diced onion and red bell pepper over medium heat for 3 to 4 minutes until softened and the onion is translucent
    • Scramble the eggs in a separate non-stick pan over medium-low heat until large soft curds form and the eggs are just slightly underdone; remove from heat immediately since they will finish cooking in the oven
    • Combine the sausage, sautéed vegetables, soft scrambled eggs, and one cup of shredded cheese in a large bowl; season with salt and pepper and stir gently until evenly mixed

    Step 2: Make the Sauce and Prep the Dish

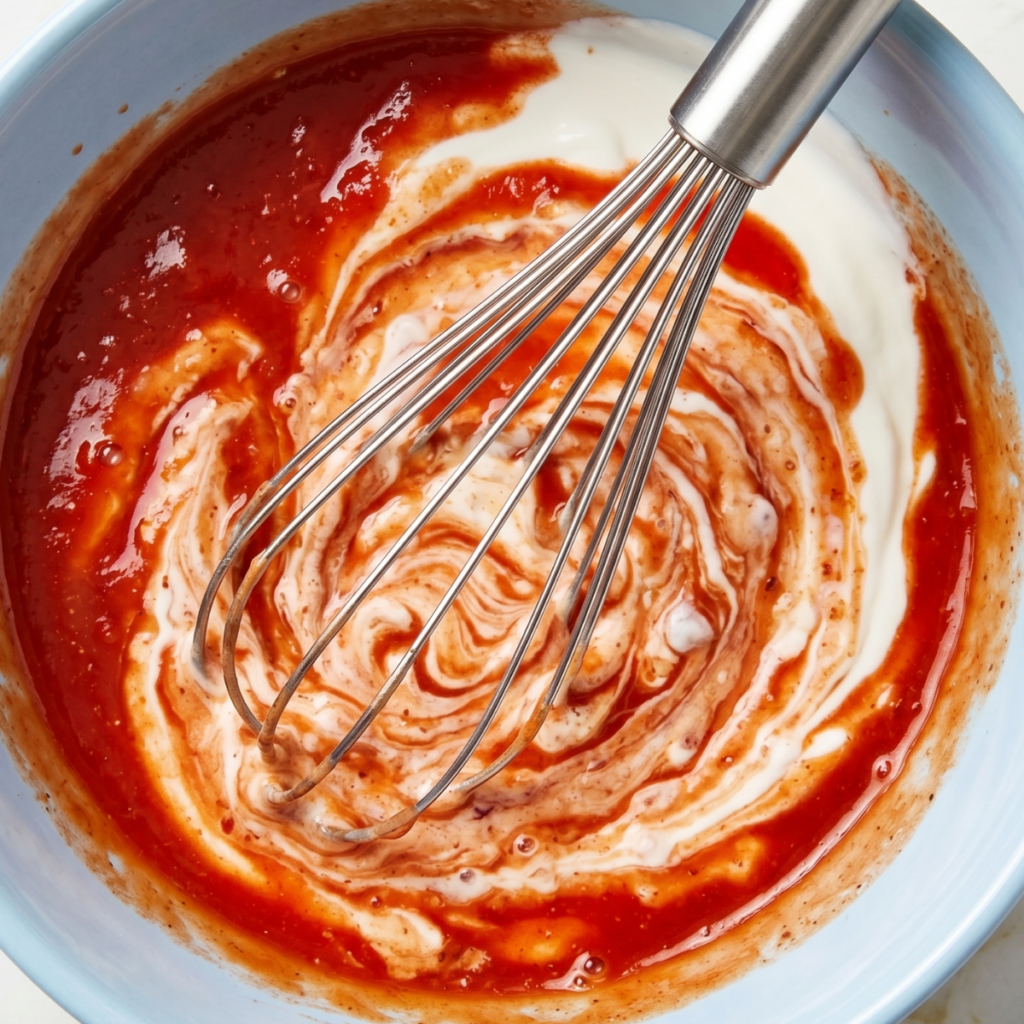
    • Whisk the enchilada sauce and sour cream together in a bowl until completely smooth; the sour cream adds a creamy, tangy quality that makes the sauce something genuinely special rather than just poured-from-a-can
    • Lightly grease a 9×13 inch baking dish and spread two to three tablespoons of the cream sauce across the bottom in a thin, even layer; this prevents sticking and adds flavor from underneath
    • Warm the flour tortillas for 20 to 30 seconds each in a dry skillet or microwave so they are pliable and roll without cracking; cold tortillas split open and the filling falls out
    • Taste the sauce and adjust with a pinch of salt or a small splash of hot sauce if you want a little more heat throughout

    Step 3: Roll and Arrange

    • Spoon a modest amount of filling down the center of each warm tortilla, leaving a small border at the edges so the filling does not spill out when rolling
    • Roll each tortilla firmly but gently and place it seam-side down in the prepared baking dish so it holds its shape without needing to be secured
    • Pack the rolled enchiladas snugly in the dish so they support each other during baking and do not unroll; a tight arrangement is actually better than leaving gaps
    • For the overnight version, stop here, cover tightly with foil, and refrigerate; take it out of the fridge. 20 minutes before baking to take the chill off

    Step 4: Sauce, Top, and Bake

    • Pour the remaining cream sauce evenly over the entire surface of the rolled enchiladas, spreading it gently so every tortilla is covered without flooding the dish
    • Scatter the remaining cup of shredded cheese evenly over the sauce so it covers the whole surface for maximum golden coverage during baking
    • Bake covered with foil at 375 degrees F for 20 minutes, then remove the foil and bake for another 10 to 15 minutes until the cheese is golden, bubbly, and developing blistered spots on top
    • Let the dish rest for 5 minutes before serving; scatter fresh cilantro and sliced green onions over the top and serve directly from the baking dish with sour cream and hot sauce alongside

    Breakfast Enchiladas Variations

    Mia’s “No Sausage, Extra Cheese” Version

    Mia went through a phase of not wanting sausage in her breakfast and negotiated an alternative filling with the calm certainty of someone who has thought this through. For her version, skip the sausage entirely and double the scrambled egg and cheese in the filling, adding a handful of sautéed mushrooms and extra bell pepper for body. The filling is lighter, and the cheese does significantly more of the flavor work, which Mia describes as “more correct.” She has eaten three portions of this version in one sitting and shown no signs of regret.

    Ben’s “Spicy Sausage Upgrade” Version

    Ben has been requesting spicy sausage in every egg dish for the past year with a persistence I have come to respect. For his version, swap the regular breakfast sausage for hot Italian or spicy chorizo, add a finely diced jalapeno to the sauteed vegetables, and use pepper jack instead of Monterey Jack for the topping. The heat builds through every layer, and the whole dish smells like something from a serious brunch spot. Ben described his first bite of this version by simply saying “yes,” which is the most complete review he has given any recipe.

    The Hash Brown Breakfast Enchiladas Version

    This is the version I make when I want the dish to be a complete meal with no sides needed. Add a layer of thawed and squeezed frozen hash browns to the bottom of each tortilla before the egg and sausage filling goes on. The hash browns absorb the sauce from beneath during baking and turn into something soft and potato-ey and deeply satisfying inside every rolled enchilada. Ben discovered this version when I was cleaning out the freezer and added hash browns somewhat impulsively, and he immediately said it was his favorite version, which it genuinely is.

    Substitutions

    Breakfast sausage to ground turkey or chorizo: Ground turkey seasoned with the same cumin, garlic powder, salt, and a pinch of smoked paprika works well for a leaner version. Mexican chorizo gives a completely different and absolutely excellent result since the spiced fat from the chorizo perfumes the entire filling. Both substitute in exactly the same quantity.

    Red enchilada sauce to green enchilada sauce: Green enchilada sauce gives a brighter, slightly tangier result that pairs beautifully with the eggs and cheese. The overall color of the dish changes from golden-orange to a softer green-gold, but the flavor is equally good. Use the same quantity and the same sour cream ratio for the sauce mixture.

    Sour cream to Greek yogurt in the sauce: Plain full-fat Greek yogurt stirred into the enchilada sauce gives a slightly more tangy, higher-protein result that is almost identical in texture to the sour cream version. Make sure it is at room temperature before whisking, or it may curdle slightly when it meets the warm sauce.

    Flour tortillas to corn tortillas: Corn tortillas give a more traditional enchilada flavor and are naturally gluten-free. They are more prone to cracking when cold, so warm them very well before rolling and handle them gently. They also absorb the sauce slightly differently and give a chewier, more rustic texture that many people prefer.

    Equipment

    • 9×13 inch baking dish (glass or ceramic)
    • Large skillet for the sausage and vegetables
    • Small non-stick pan for the scrambled eggs
    • Large mixing bowl for the filling
    • Medium bowl for the sauce mixture
    • Aluminum foil for the covered bake and for overnight storage
    • Rubber spatula for the eggs and for spreading the sauce
    • Sharp knife and cutting board for the vegetables and garnish
    • Measuring spoons for the spice blend
    • Wide serving spoon for scooping portions from the dish

    Storage Tips

    Make Ahead

    • Assemble the full dish without the sauce and cheese topping up to 24 hours ahead; add the sauce and cheese right before baking so the tortillas do not over-absorb overnight
    • Alternatively, assemble completely with sauce, cover tightly, and refrigerate overnight; the tortillas will soften slightly but hold their shape through the bake if the sauce quantity is correct
    • The filling can be made up to 2 days ahead and stored in the fridge; assemble and bake fresh in the morning for a barely-any-effort Saturday breakfast

    Refrigerator

    • Store leftover baked enchiladas covered in the fridge for up to 3 days; the flavors deepen overnight and leftovers are genuinely excellent
    • Cover the dish tightly with foil or transfer portions to airtight containers for easier reheating through the week
    • The sauce and cheese topping soften in the fridge but the flavors hold up very well for a satisfying weekday breakfast reheated quickly

    Freezing

    • Freeze the assembled unbaked enchiladas without the sauce topping for up to 1 month; add the sauce and cheese fresh before baking from frozen and add 15 to 20 extra minutes to the covered bake time
    • Freeze individual baked portions in airtight containers for up to 2 months for the easiest possible weekday breakfast
    • Thaw overnight in the fridge before reheating for the best texture; microwaving from fully frozen makes the tortillas slightly chewy

    Reheating

    • Reheat individual portions in the microwave, covered with a damp paper towel, at 70 percent power for 90 seconds to 2 minutes until hot throughout
    • Reheat the full dish in a 350 degree F oven covered with foil for 15 to 20 minutes, then uncovered for 5 minutes to re-melt and slightly re-crisp the cheese topping
    • A small spoonful of fresh sour cream on top of each reheated portion brings everything back to life and makes leftovers taste nearly as good as day one

    Family Secret Worth Sharing

    My mom always added a small block of cream cheese to her enchilada sauce, about two ounces, and stirred it in while the sauce was warm so it melted completely and gave the whole thing a silky, almost velvety quality that you cannot get from sour cream alone. She said it was the thing that made her enchiladas taste like restaurant enchiladas, and she was not exaggerating. I add it every time now, just a small amount, melted into the sauce before the sour cream goes in. Ben tasted the sauce once before it went on and said “that tastes expensive.” It costs about thirty cents extra and transforms the whole dish. My mom called this kind of thing a “kitchen investment,” and she was always correct about that.

    Troubleshooting FAQs

    The tortillas dissolved overnight, and the dish looks like soup. What happened?
    Too much sauce and the tortillas soaked it all up overnight. Use the sauce quantity in this recipe exactly and do not be tempted to add extra for more coverage. The right amount covers generously without flooding. If you want to assemble the night before, you can also hold the sauce and cheese for the morning, pour it on cold, and bake straight from the fridge with great results.

    The filling is falling out of the enchiladas when I try to serve them. How do I fix it?
    The enchiladas were not packed tightly enough in the dish or the portions were overfilled. Roll them firmly and place them seam-side down immediately. Pack them snugly so they lean against each other; the tight arrangement is what keeps them from unrolling during baking. A modest filling amount rolls cleanly and stays contained, while an overfilled tortilla splits and spills every time.

    The cheese on top is not browning. What do I do?
    The foil was left on too long, or the oven is running cool. Remove the foil for the last 10 to 15 minutes as directed. If the cheese is still not browning, switch to the broiler for 2 to 3 minutes on an upper rack and watch every second since shredded cheese goes from golden to burnt very quickly under a broiler.

    Can I make this the night before and bake it in the morning straight from the fridge?
    Yes, and this is actually the preferred method for the most flavorful result. Take the dish out of the fridge 20 minutes before baking to take the chill off slightly, then bake covered for 25 minutes instead of 20 since the filling will be cold. Remove the foil and bake another 10 to 15 minutes for the golden top. The overnight rest lets the flavors meld beautifully, and the dish tastes even better for it.

    Saturday Morning Just Found Its Signature Dish

    Saturday mornings in our house used to mean cereal and everyone fending for themselves. Now they mean this dish is coming out of the oven golden and bubbling while both kids are still in pajamas asking how much longer. Ben eats his from the corner where the cheese is thickest and calls this a strategic decision. Mia pours extra sour cream over her portion and considers this mandatory. These breakfast enchiladas have become one of our most loved make-ahead breakfast casserole recipes in the whole weekly rotation, sitting right alongside our easy cheesy casserole recipes that make a weekend feel genuinely taken care of from the very first meal. For the mornings when the table needs something hearty and completely satisfying, this dish next to our easy weekend egg recipes covers every craving before the day even starts. Some recipes become the ones your family builds a whole morning around, and this one did exactly that.

    Don’t forget to snap a picture of your breakfast enchiladas before that… (trust me, they will disappear quickly!), and leave a rating below. We’d love to hear how this breakfast enchiladas recipe becomes part of your family morning story.
  • 3 Secrets to the Best Chocolate Chip Banana Bread Bars

    3 Secrets to the Best Chocolate Chip Banana Bread Bars

    I pulled them out too soon because I was impatient and the toothpick completely lied to me. The center was still fully liquid. Mia took one bite and said “these are definitely not done.” Ben tried to eat his with a spoon and called it “experimental.” That underbaked disaster taught me the one test that makes this chocolate chip banana bread set perfectly every time.

    Why This Recipe Is Special

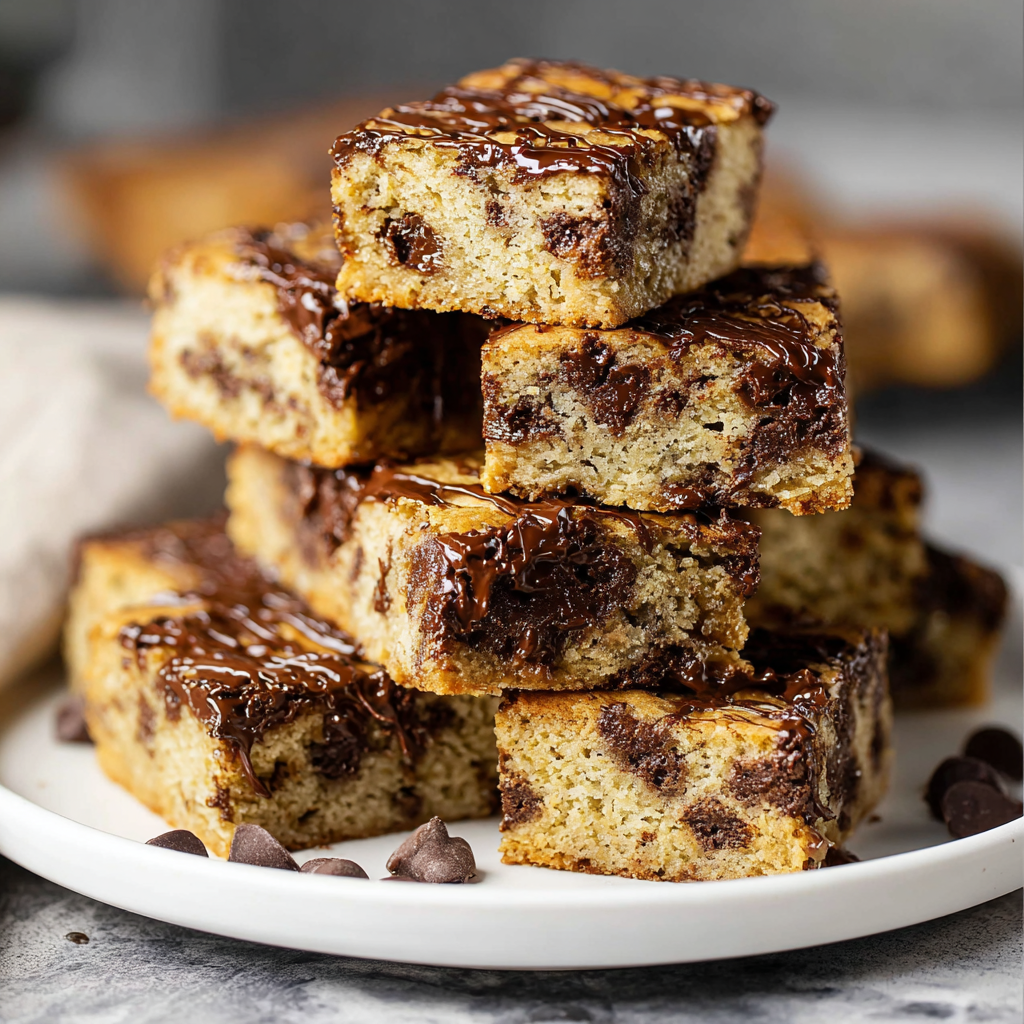
    These are not regular banana bread bars. They are dense, fudgy, soft in the center with slightly crispy edges, and loaded with melted chocolate chips that pool on the surface and set into glossy chocolate streaks as they cool. The banana flavor is deep and sweet, and the bars are cut into clean squares that hold their shape on a plate. Mia calls them “banana brownies” and Ben calls them “the chocolate ones,” and both of those names are better than anything I came up with. They disappear within the hour every single time I make them.

    How To Make Chocolate Chip Banana Bread

    The successful batch came on a rainy Saturday when both kids had announced they were bored and needed a project immediately. Mia was mashing the bananas with a fork and taking her job extremely seriously, announcing “more” every time she thought they needed another mash. Ben was measuring the chocolate chips and quietly eating approximately every fifth one, which he considered a reasonable quality control ratio. When the batter went into the pan and those chocolate chips scattered on top started to look glossy and beautiful, both kids sat in front of the oven window like it was the most important thing happening anywhere in the world. In our kitchen at that moment, it was.

    The lesson that fixed the underbaked disaster was understanding that banana bread bars behave differently than a loaf. In a 9×13 pan the batter spreads thin and bakes faster, but the high banana moisture content means the center can look done on the toothpick while still being liquid underneath. The fix is twofold: the toothpick test plus the edge test. The edges should pull away from the pan slightly and feel set and springy when you press them gently. If the edges pass and the toothpick comes out clean, they are done. Ben now does the edge press test every single time and takes it more seriously than I do.

    Main Ingredients

    • 3 very ripe bananas, mashed – Brown-spotted or almost entirely black; the riper the banana the sweeter and more intensely flavored the bars
    • 1/2 cup unsalted butter, melted – Melted rather than creamed for a denser, fudgier bar rather than a cakey one
    • 3/4 cup brown sugar, packed – Brown sugar adds depth and a subtle molasses note that white sugar cannot give these bars
    • 2 large eggs, room temperature – Room temperature eggs incorporate more evenly and give the bars a more even texture
    • 1 teaspoon vanilla extract – Rounds out the banana flavor and the chocolate without competing with either
    • 1.5 cups all-purpose flour – Spoon and level; too much flour and the bars become dry and cakey rather than fudgy
    • 1/2 teaspoon baking soda – Reacts with the natural acid in the banana for a gentle lift without making these too cakey
    • 1/2 teaspoon salt – Enhances every other flavor; do not skip it
    • 1/2 teaspoon cinnamon – Warm spice that bridges the banana and chocolate flavors beautifully
    • 1.5 cups chocolate chips, divided – One cup stirred into the batter, half cup scattered over the top for those glossy pools of chocolate on the surface

    Step-by-Step Instructions

    Step 1: Prep the Pan and Mash the Bananas

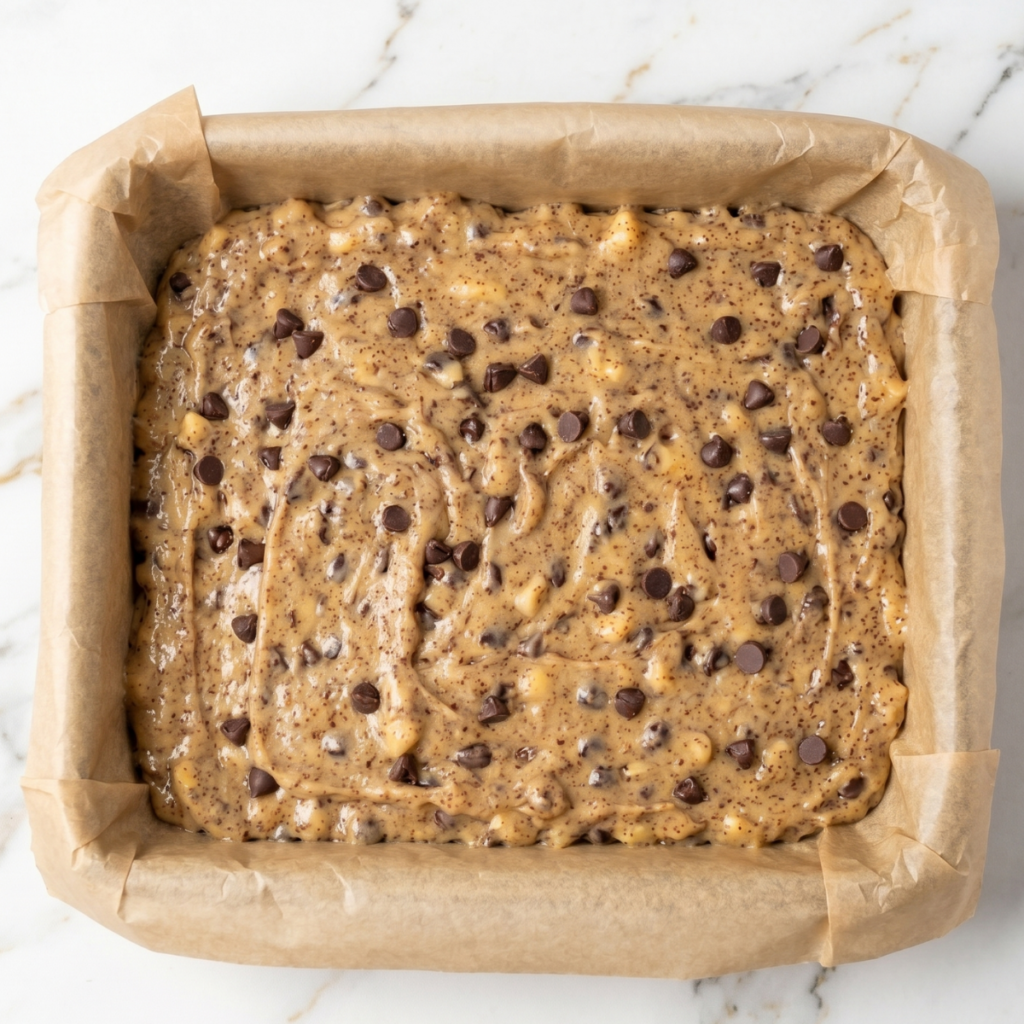
    • Preheat your oven to 350 degrees F and line a 9×13 inch baking pan with parchment paper, leaving an overhang on both sides for easy lifting
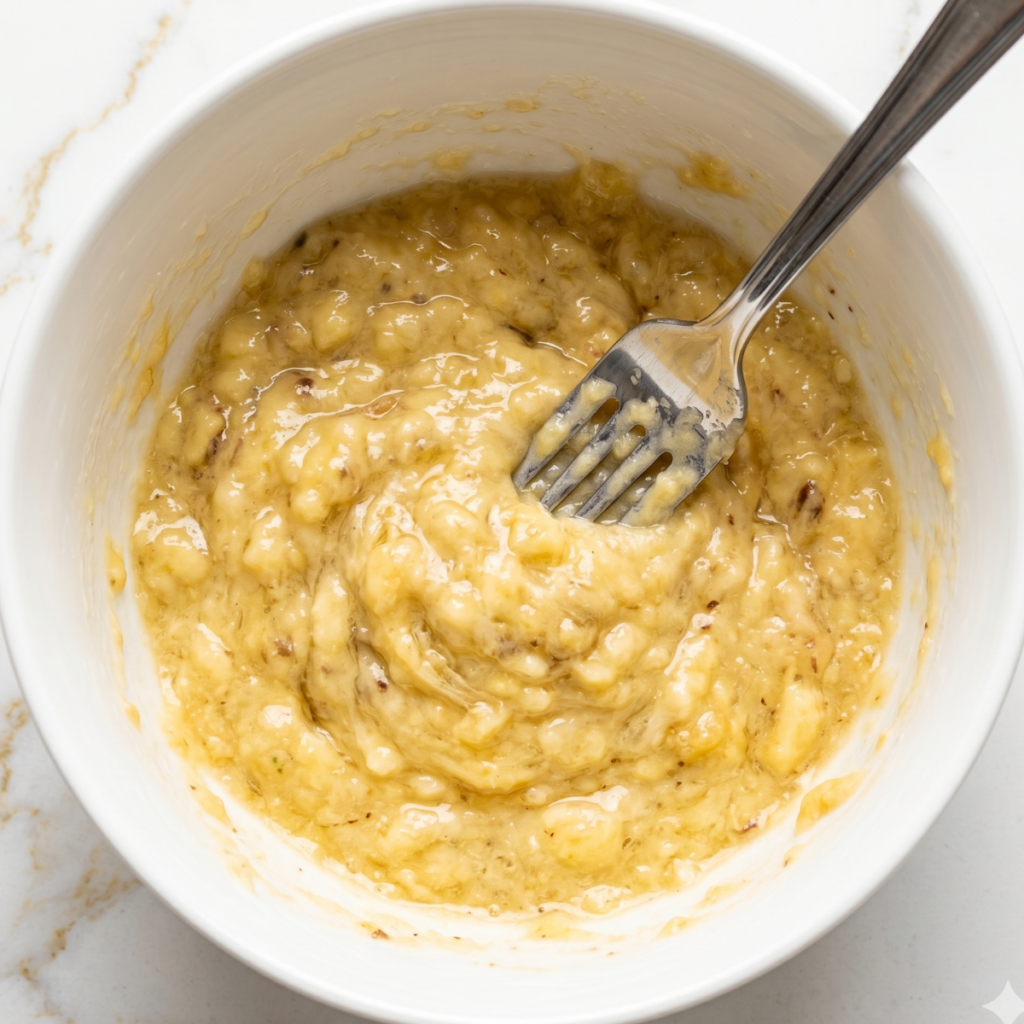
    • Peel the ripe bananas into a large bowl and mash thoroughly with a fork until almost completely smooth with only a few small lumps remaining; very ripe bananas will mash easily in about 60 seconds
    • The bananas should look like a thick paste rather than a chunky mixture; large banana chunks do not incorporate evenly into the batter and create wet spots in the finished bars
    • Melt the butter and let it cool for 5 minutes before adding it to the bananas; hot butter added directly can begin cooking the eggs when they go in and affect the texture

    Step 2: Mix the Batter

    • Add the melted cooled butter, brown sugar, eggs, and vanilla extract to the mashed bananas and stir with a spatula until completely combined and the mixture looks smooth and uniform
    • Sift the flour, baking soda, salt, and cinnamon directly over the banana mixture and fold gently with the spatula until just combined with no visible dry flour streaks remaining
    • Do not overmix; stir only until the flour disappears and stop immediately because overworked batter makes tough, cakey bars rather than tender, fudgy ones
    • Fold in one cup of the chocolate chips with a few gentle strokes so they are evenly distributed throughout the batter without being broken up

    Step 3: Pour, Top, and Bake

    • Pour the batter into the prepared pan and spread it evenly to the corners with an offset spatula so the bars bake to a consistent thickness throughout
    • Scatter the remaining half cup of chocolate chips evenly over the entire surface of the batter so every bar will have visible chocolate pools on top
    • Bake at 350 degrees F for 22 to 26 minutes until a toothpick inserted in the center comes out with just a few moist crumbs and the edges have pulled away from the sides of the pan slightly
    • Check both the toothpick and the edges; the edges should feel set and spring back gently when pressed and should look golden and slightly pulling away from the parchment

    Step 4: Cool, Cut, and Serve

    • Let the bars cool in the pan for at least 20 minutes before attempting to lift or cut them; hot bars will crumble and the chocolate chips need time to reset from liquid back to glossy pools
    • Lift the entire slab out of the pan using the parchment overhang and transfer to a cutting board for slicing
    • Cut into bars using a sharp knife in one clean downward press without sawing; wipe the knife between cuts for the cleanest edges that do not drag the melted chocolate across the surface
    • Serve at room temperature for the best flavor and texture; the chocolate chip pools are at their most beautiful glossy finish once the bars have cooled completely

    Chocolate Chip Banana Bread Variations

    Mia’s “Double Chocolate” Version

    Mia made an announcement after the first successful batch that the bars needed more chocolate, and she was not asking; she was informing. I respect that kind of conviction in a six-year-old. For her version, add three tablespoons of cocoa powder to the dry ingredients alongside the flour and increase the chocolate chips to two full cups, one cup in the batter and one scattered lavishly on top. The bars go darker, richer, and significantly more chocolate-forward while staying just as fudgy. Mia describes the result as “the correct amount of chocolate” and has been eating them this way ever since.

    Ben’s “Banana Cheesecake Bars” Version

    Ben discovered cheesecake-swirled banana bread at a bakery once and came home with a very specific request and a description that was more detailed than necessary. For his version, beat four ounces of softened cream cheese with two tablespoons of sugar and one egg until smooth, then drop spoonfuls over the batter before the chocolate chips go on top and swirl once with a skewer. The cream cheese layer bakes into a slightly tangy, creamy swirl that turns these into something genuinely special. Ben calls this version “the bakery one” and requests it for every occasion that could possibly justify a special occasion dessert.

    The Healthy Banana Bars Version

    On the weeks when I want something that feels like a treat but carries a little more nutritional goodness, this version is the one I reach for. Replace the all-purpose flour with whole wheat flour and swap the butter for the same quantity of coconut oil. Reduce the brown sugar to half a cup and add a tablespoon of honey for sweetness. The bars are denser, slightly nuttier, and a touch less sweet than the original, but both kids eat them just as happily, and I feel genuinely good about putting them in lunchboxes. Mia calls them “the healthy ones” with a tone that suggests she suspects I am up to something, which I am, but the bars are good enough that she eats them anyway.

    Substitutions

    All-purpose flour to oat flour: Certified gluten-free oat flour substitutes in the same quantity and gives a slightly nuttier, more wholesome flavor that pairs beautifully with banana. The bars will be a touch more delicate when warm, so give them the full 20-minute cooling time before cutting.

    Brown sugar to coconut sugar: Coconut sugar substitutes in exactly the same quantity and gives a slightly more caramel-like, less sweet result. The bars will be a shade darker in color, and the banana flavor will be more prominent since coconut sugar has a milder molasses note than brown sugar.

    Unsalted butter to coconut oil: Refined coconut oil in the same melted quantity gives a very slightly lighter texture and a subtle tropical note that works beautifully alongside the banana. Unrefined coconut oil adds a more noticeable coconut flavor, which some people love and others find too prominent.

    Semi-sweet chocolate chips to dark chocolate chips or chunks: Dark chocolate at 60 percent or above gives a less sweet, more intensely chocolatey result that adults tend to prefer. Chocolate chunks rather than chips give larger molten pockets that are genuinely dramatic when you cut the bars. Both substitute in exactly the same quantity.

    Equipment

    • 9×13 inch baking pan
    • Parchment paper with overhang on both sides for easy lifting
    • Large mixing bowl for the batter
    • Fork for mashing the bananas
    • Rubber spatula for folding the batter
    • Offset spatula for spreading the batter evenly in the pan
    • Sharp knife for slicing; wipe between cuts for clean edges
    • Wire cooling rack for cooling the slab before cutting
    • Toothpick for testing doneness

    Storage Tips

    Make Ahead

    • These bars are genuinely better the next day once the flavors have settled and the texture firms slightly into that perfect fudgy density
    • Bake the day before, cool completely, and cut fresh the morning of serving for the cleanest presentation
    • The batter can be mixed up to 24 hours ahead and stored covered in the fridge; stir gently before pouring into the pan and add a few extra minutes to the bake time since the batter will be cold

    Refrigerator

    • Store cut bars in an airtight container at room temperature for up to 3 days; the refrigerator actually dries out the texture and is not recommended
    • If the weather is very warm and the chocolate is getting soft, a brief spell in the fridge is fine but bring back to room temperature for 15 minutes before eating
    • Layer bars between parchment sheets in the container to prevent the chocolate tops from sticking together

    Freezing

    • Freeze individual bars wrapped tightly in plastic wrap and stored in a freezer bag for up to 2 months
    • Thaw at room temperature for about 30 minutes and they come back to almost exactly the original texture and flavor
    • These bars are excellent eaten slightly frozen on a warm day, which Mia discovered by accident and now considers a feature rather than a defect

    Reheating

    • These bars are best at room temperature and do not need reheating
    • For a warm dessert, microwave one bar at 50 percent power for 20 seconds until just slightly warm; the chocolate chips turn back to liquid pools and the whole thing tastes like it just came out of the oven
    • A warm bar with a small scoop of vanilla ice cream is one of the genuinely best things about having made a full batch of these, and Ben discovered this combination on his own and has never looked back

    Family Secret Worth Sharing

    My mom always browned the butter before adding it to any banana bread recipe she made, and I thought this was a step that only applied to fancy baking until I tried it in these bars and understood immediately. Browning the butter takes about four minutes and gives it a deep, nutty, almost caramel quality that amplifies the banana flavor and makes the chocolate taste more complex. You melt it in the saucepan over medium heat, keep stirring until it foams and then goes golden and smells like toasted hazelnuts, and then let it cool before using it exactly as you would the regular melted butter. I told Ben what browned butter was once while we were making these and he leaned over the saucepan and said “that smells like something really good is about to happen.” He was completely correct. My mom would have liked him very much.

    Troubleshooting FAQs

    The bars are still liquid in the center after the full bake time. What happened?
    The toothpick test alone is not reliable for these bars. You need the toothpick plus the edge test. The edges should pull away from the pan sides slightly and feel set and springy when pressed gently. If the edges pass and the toothpick shows moist crumbs rather than wet batter, the bars are done. If the center still looks wet and jiggly when you shake the pan, add five more minutes and test again. The high banana moisture can make the center look underdone even when it is set.

    The bars came out dry and cakey instead of fudgy. What went wrong?
    Either the flour was packed into the measuring cup rather than spooned and leveled, the butter was not melted, or the batter was overmixed after the flour went in. All three of these cause a tougher, cakier result. Spoon the flour into the cup rather than scooping; use melted, not softened, butter; and stop folding the moment the flour disappears. Those three habits together produce the dense fudgy bar this recipe is supposed to be.

    The chocolate chips on top sank into the batter during baking. How do I prevent that?
    Scatter the top chocolate chips after the batter is already in the pan and do it right before it goes into the oven. If you add them to the batter and then spread it, they migrate downward during spreading. Adding them as a topping at the last second means they sit on the surface, begin melting immediately in the oven heat, and stay as visible glossy pools on top rather than sinking.

    Can I make these in a smaller pan for thicker bars?
    Yes. An 8×8 inch pan gives significantly thicker, more brownie-like bars. Increase the bake time to 30 to 35 minutes and rely on the toothpick plus edge test even more carefully since the thicker batter takes longer to set in the center. The texture will be denser and fudgier than the 9×13 version, which many people prefer. Ben prefers the thicker version and has made his position very clear on this matter.

    The Bars That Use Up Every Overripe Banana Before It Can Become Guilt

    There are always overripe bananas on our counter. Always. This recipe is why I have stopped feeling bad about them and started feeling excited. Ben watches the bananas all week like they are ripening on a schedule he personally approved. Mia declared last month that she prefers the bananas “really brown” which is something no one in this house said before these bars came along. This chocolate chip banana bread recipe sits naturally alongside our classic banana bread recipe as the other way we celebrate an overripe banana in this kitchen, and for the days when the dessert table needs both something fruity and something truly chocolate-forward, these bars next to our fudgy chewy browkies cover every craving at the table without a single overlap. For the weeks when the baking rotation needs something new to sit alongside our favorite healthy brownie recipes, these bars land in the same category of one-bowl chocolate treats that take thirty minutes and disappear in twenty. Some recipes earn a permanent place in the kitchen, and this one did that quietly and completely.

    Don’t forget to snap a picture of your chocolate chip banana bread before that… (trust me, it will disappear quickly!), and leave a rating below. We’d love to hear how this chocolate chip banana bread becomes part of your family baking story.
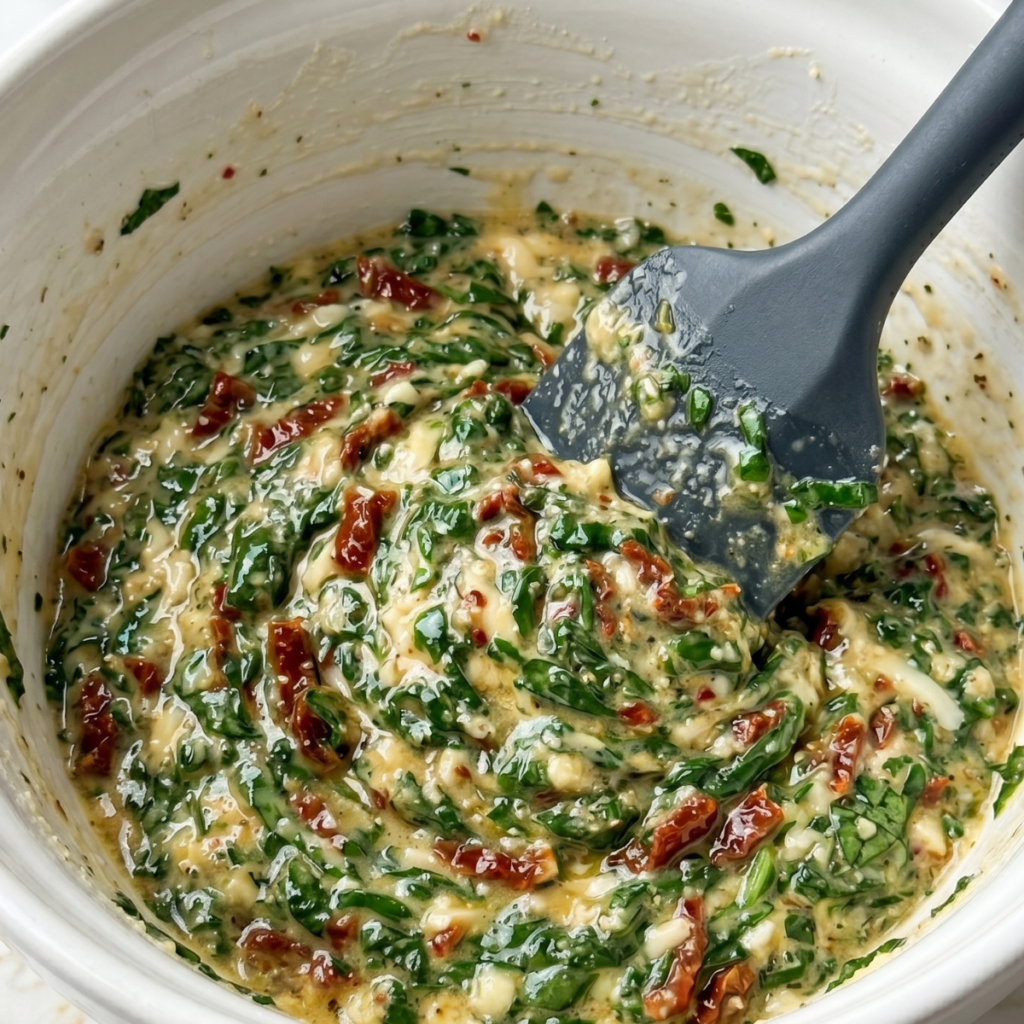
  • 4-Step Irresistible Creamy Pasta Salad

    4-Step Irresistible Creamy Pasta Salad

    I made it the morning of the party and tossed everything in the dressing four hours ahead. By the time it hit the table, the pasta had absorbed every single drop and looked deflated. Ben poked it and said “it absorbed itself.” Accurate. Once I learned to dress it at the right moment, this creamy pasta salad became the most requested dish I bring anywhere.

    Why This Recipe Is Special

    This is not a mayonnaise-heavy picnic pasta situation. This is shells, crispy bacon, sweet peas, tender shredded chicken, and a creamy, tangy dressing that coats everything just enough without drowning it. It tastes a little like a carbonara decided to become a pasta salad and nobody stopped it, which is exactly the right outcome. It works warm, at room temperature, or cold from the fridge. Mia eats it for breakfast when there are leftovers and considers this completely normal. I have stopped questioning it.

    How To Make Creamy Pasta Salad

    The successful version came together on a Friday afternoon when both kids had decided they were in charge of quality control. Mia was eating the peas straight from the bag and counting each one before it went in, which is not a useful kitchen contribution, but I found it genuinely endearing. Ben was crumbling the bacon and eating approximately half of it, which he described as “taste testing for consistency.” When I tossed the finished salad and that creamy dressing coated every shell and the bacon pieces and peas were distributed perfectly, both of them immediately grabbed a fork before I could get the bowl to the table. That is always the review I am working toward.

    The lesson that saved this recipe was timing the dressing. You dress the pasta when it is still just slightly warm, not hot and not fully cold. Warm pasta absorbs the dressing and carries the flavor into the shells rather than just coating the outside. Then you chill it for at least thirty minutes, taste it again, and add a small extra spoonful of dressing right before serving because chilling always mutes the flavor. Ben observed this second-dressing step once and asked if I was fixing it. I told him I was finishing it. He considered the distinction and said “okay, that makes sense.” It does.

    Main Ingredients

    • 12 oz medium pasta shells – Shell pasta catches the creamy dressing inside each piece; every bite has sauce in it no matter how you scoop
    • 2 cups cooked shredded chicken – Rotisserie chicken works perfectly; adds protein and makes this a complete meal rather than a side
    • 1.5 cups frozen peas, thawed – Do not cook them; just thaw and drain; they stay bright green and give a fresh sweet pop against the creamy dressing
    • 6 strips bacon, cooked crispy and crumbled – Must be genuinely crispy; soft bacon goes limp in the dressing and loses all texture contrast
    • 1/2 cup freshly grated parmesan – Stirred into the dressing and into the salad; adds saltiness and a depth that takes this beyond a basic pasta salad
    • 3 green onions, thinly sliced – Adds a fresh mild bite throughout every serving
    • For the dressing: 1/2 cup mayonnaise – Full-fat for the creamiest, most coating result
    • 1/2 cup sour cream – The tang that makes the dressing taste like something more than just mayo
    • 2 tablespoons white wine vinegar or lemon juice – Brightens the whole dressing and keeps it from being one-dimensionally rich
    • 1 teaspoon Dijon mustard – Adds depth and acts as an emulsifier that keeps the dressing smooth
    • 1 clove garlic, finely grated – Gives the dressing a savory base note that makes it taste homemade rather than store-bought
    • Salt and black pepper to taste – Season the dressing confidently; pasta absorbs a lot of salt and undersea Sunning is the main reason pasta salads taste flat

    Step-by-Step Instructions

    Step 1: Cook the Pasta and Make the Dressing

    • Cook the pasta shells in generously salted boiling water according to package directions until just al dente; do not overcook since the pasta will soften further as it absorbs the dressing during chilling
    • While the pasta cooks, whisk together the mayonnaise, sour cream, white wine vinegar, Dijon mustard, grated garlic, salt, and pepper in a large bowl until completely smooth
    • Stir half the grated parmesan into the dressing so it melts in and gives the base a slightly nutty, salty depth before any pasta goes in
    • Drain the pasta and let it cool for about 5 minutes until it is warm but not steaming hot; this is the ideal temperature for the first dressing toss

    Step 2: First Dress and Toss

    • Add the warm, drained pasta directly to the dressing bowl and toss gently but thoroughly until every shell is coated and the dressing starts to get absorbed into the pasta
    • Add the shredded chicken, thawed peas, and sliced green onions to the bowl and fold everything together with a large spoon until evenly distributed
    • Taste the salad at this stage and season with extra salt, pepper, or a splash more vinegar if anything feels flat; the pasta will absorb more seasoning as it chills, so be generous now
    • Cover the bowl tightly with plastic wrap and refrigerate for at least 30 minutes and up to overnight; the flavors meld and deepen beautifully with time

    Step 3: Add the Bacon and Final Dress

    • Remove the chilled pasta salad from the fridge and taste it again; it will need more seasoning and likely a little more dressing since the pasta absorbs the liquid during chilling
    • Add a spoonful of extra dressing, a small splash of vinegar, and an extra pinch of salt if needed; toss gently to redistribute everything evenly
    • Fold in most of the crumbled bacon at this stage, reserving a good handful for the top so it stays visible and gives a textural contrast on the surface
    • Sprinkle the remaining parmesan and the reserved bacon over the top and finish with a few extra sliced green onions and a crack of black pepper for presentation

    Step 4: Final Taste and Serve

    • Give the finished salad one final taste and adjust seasoning one last time; this is the moment it goes from good to genuinely great and the step most people skip
    • Transfer to a serving bowl if not already in one and make sure the bacon, peas, and green onions are visible on the surface so the salad looks as good as it tastes
    • Serve immediately at room temperature for the best flavor, or return to the fridge for up to 1 hour before serving if you need to keep it cold for a gathering
    • Set out extra dressing on the side if serving at a party; people always want more and having it ready means the bowl stays perfectly dressed through the whole meal

    Creamy Pasta Salad Variations

    Mia’s “Extra Peas, No Bacon” Version

    Mia went through a phase of refusing bacon that I do not fully understand and have stopped trying to explain. During this phase, she made her position very clear by removing every piece of bacon from her bowl with focused surgical precision and placing them on Ben’s plate without comment. For her version, double the peas to three cups and skip the bacon entirely. Add an extra tablespoon of parmesan into the dressing to make up for the lost savory depth. The salad is fresher, lighter, and genuinely lovely, and Mia eats two bowls every time, which is the only endorsement that matters.

    Ben’s “More Bacon and Carbonara Version”

    Ben has decided this pasta salad is essentially a cold carbonara, and he is not wrong. For his version, cook eight strips of bacon instead of six, use the pasta cooking water (a quarter cup, cooled) in the dressing alongside the vinegar for extra starchy creaminess, and add an extra half cup of parmesan throughout. The result is richer, saltier, and deeply satisfying in a way that justifies Ben’s carbonara comparison completely. He eats this with a very large fork and a very satisfied expression, and I find both of those things charming.

    The Cookout Crowd Version

    This is the version I double for every summer gathering, every potluck, and every occasion where I need a dish that disappears before anything else on the table. Double the entire recipe into a large mixing bowl, chill overnight, and dress again in the morning with an extra quarter cup of mayo mixed with a splash of vinegar. Transport it cold in the bowl covered with plastic wrap and let it sit at room temperature for twenty minutes before serving. It feeds twelve easily, holds up in the heat better than most cold salads, and the empty bowl always generates the question I most enjoy answering: what is in this?

    Substitutions

    Shell pasta to rotini or farfalle: Rotini spirals catch the creamy dressing in their grooves in a similar way to shells. Farfalle gives a more elegant presentation for a dinner party setting. Both cook in the same time range and work with exactly the same method. Avoid long pasta like spaghetti or linguine since the dressing does not cling to it evenly.

    Mayonnaise to Greek yogurt: Plain full-fat Greek yogurt in place of mayo gives a tangier, lighter dressing that is noticeably lower in fat. The texture is slightly less rich, and the dressing may need a touch more vinegar to balance. Use the same quantity and make sure the yogurt is at room temperature before whisking so it combines smoothly without curdling.

    Shredded chicken to canned tuna: Two well-drained cans of tuna transform this into a completely different but equally delicious pasta salad. The parmesan and peas work beautifully with the tuna in a way that feels Italian and intentional. Ben tried this version and called it “an acceptable swap,” which from Ben is genuine praise.

    Fresh peas to frozen and thawed: Frozen peas thawed in a colander under cold water for a few minutes are almost identical to fresh in both flavor and color. Fresh peas in season are slightly sweeter, but frozen are perfectly good and available all year, which makes this salad a recipe you can make any time rather than only in summer.

    Equipment

    • Large pot for boiling the pasta
    • Colander for draining the pasta
    • Large mixing bowl for the dressing and tossing
    • Whisk for the dressing
    • Microplane or fine grater for the garlic and parmesan
    • Large spoon or tongs for tossing the salad
    • Plastic wrap or airtight lid for chilling
    • Sharp knife and cutting board for the green onions and bacon

    Storage Tips

    Make Ahead

    • Make the salad up to 24 hours ahead without the bacon; add the bacon right before serving so it stays crispy and does not go soft in the dressing overnight
    • The dressing can be made up to 3 days ahead and stored in a sealed jar in the fridge; whisk it again before using since it may separate slightly
    • This is one of those rare salads that genuinely improves overnight as the pasta absorbs the dressing and the flavors deepen and settle into each other

    Refrigerator

    • Store covered in the fridge for up to 3 days; the pasta will continue to absorb the dressing and the salad will look less saucy by day two
    • Always re-dress with a fresh spoonful of mayo mixed with a splash of vinegar before serving leftovers; it brings the salad back to life immediately
    • Keep the salad covered to prevent the surface from drying out and the peas from going wrinkled

    Freezing

    • This salad does not freeze well; the mayo-based dressing separates when thawed and the pasta goes mushy
    • If you have leftover components separately, the cooked pasta can be frozen for up to 1 month and the bacon can be frozen for up to 2 months
    • The peas are best kept frozen raw and added fresh each time rather than freezing them as part of an assembled salad

    Reheating

    • This salad is served cold or at room temperature and does not need reheating
    • If the salad has been in the fridge and feels very cold and stiff, let it sit at room temperature for 15 to 20 minutes before serving so the dressing loosens and the flavors open up
    • A fresh crack of black pepper and a scatter of extra parmesan right before serving refresh the whole presentation after a night in the fridge

    Family Secret Worth Sharing

    My mom always added a teaspoon of sugar to her pasta salad dressing, and I spent years thinking it was unnecessary until I made a batch without it and the whole thing tasted sharper and less rounded than usual. The sugar does not make the dressing sweet; it balances the vinegar and the tang of the sour cream in a way that makes the whole dressing feel complete rather than slightly aggressive. I add it every time now and it is in the dressing ingredients in this recipe even though I forgot to mention it before the ingredient list. Add it. A small teaspoon. Mia asked me once why the dressing tasted so good and I told her it was a secret. She squinted at me for a moment and then said “is it sugar.” She is six years old and she was completely right. My mom would have found that very funny.

    Troubleshooting FAQs

    The pasta salad looks dry, and the dressing has disappeared. What happened?
    The pasta absorbed all of it during chilling, which is exactly what pasta does. This is not a problem; it is expected, and the fix is simple. Always make slightly more dressing than you think you need and always re-dress the salad right before serving. Mix one tablespoon of mayo with half a tablespoon of vinegar and a pinch of salt, fold it in, and the salad will look perfectly dressed again in under a minute.

    The pasta salad tastes flat and bland even though I seasoned the dressing. What went wrong?
    Two things cause flat pasta salad: not salting the pasta water enough and not re-seasoning after chilling. The pasta itself needs to be seasoned during cooking since it cannot absorb salt after it is cooked and drained. Also taste the salad again right before serving since chilling dulls every flavor significantly. A pinch of salt, an extra splash of vinegar, and another small squeeze of lemon will bring everything back immediately.

    The bacon went soft and chewy in the salad. How do I prevent that?
    Do not add the bacon until right before serving. Bacon loses its crispiness within about twenty minutes of being folded into a moist, creamy dressing. Cook it, crumble it, and keep it separately until the moment the salad goes on the table. For a party where the bowl will sit out for a while, keep a small bowl of extra crumbled bacon alongside so guests can add more as they serve themselves.

    Can I make this pasta salad without chicken to serve as a side dish?
    Absolutely, and it is excellent as a side. Simply leave out the chicken entirely, and the salad stands completely on its own as a creamy, bacon, and pea pasta side dish. You may want to add an extra half cup of peas and a little extra parmesan to compensate for the volume and flavor that the chicken was providing. It pairs beautifully with grilled meat, burgers, or anything coming off a barbecue.

    The Bowl That Never Makes It to the Table Intact

    There is a specific kind of compliment that happens when a dish disappears before you can announce what it is. That is what happens with this salad every single time I bring it somewhere. Ben has started referring to it as “the one that goes fast” and Mia requests it specifically for any occasion that involves eating outdoors, which she considers its natural habitat. This creamy pasta salad sits right alongside our creamy chicken salad recipes as one of the most crowd-pleasing cold dishes in our whole repertoire, and on the days when I want to serve it alongside something warm, it pairs beautifully with our easy summer dinner recipes that come together just as quickly. For the weeks when meal prep includes cold lunches, this pasta salad next to our easy cold pasta recipes means every lunch feels genuinely looked after rather than grabbed in a hurry. Some recipes become the ones people remember you for, and this one quietly has.

    Don’t forget to snap a picture of your creamy pasta salad before that… (trust me, it will disappear quickly), and leave a rating below. We’d love to hear how this creamy pasta salad becomes part of your family gathering story.
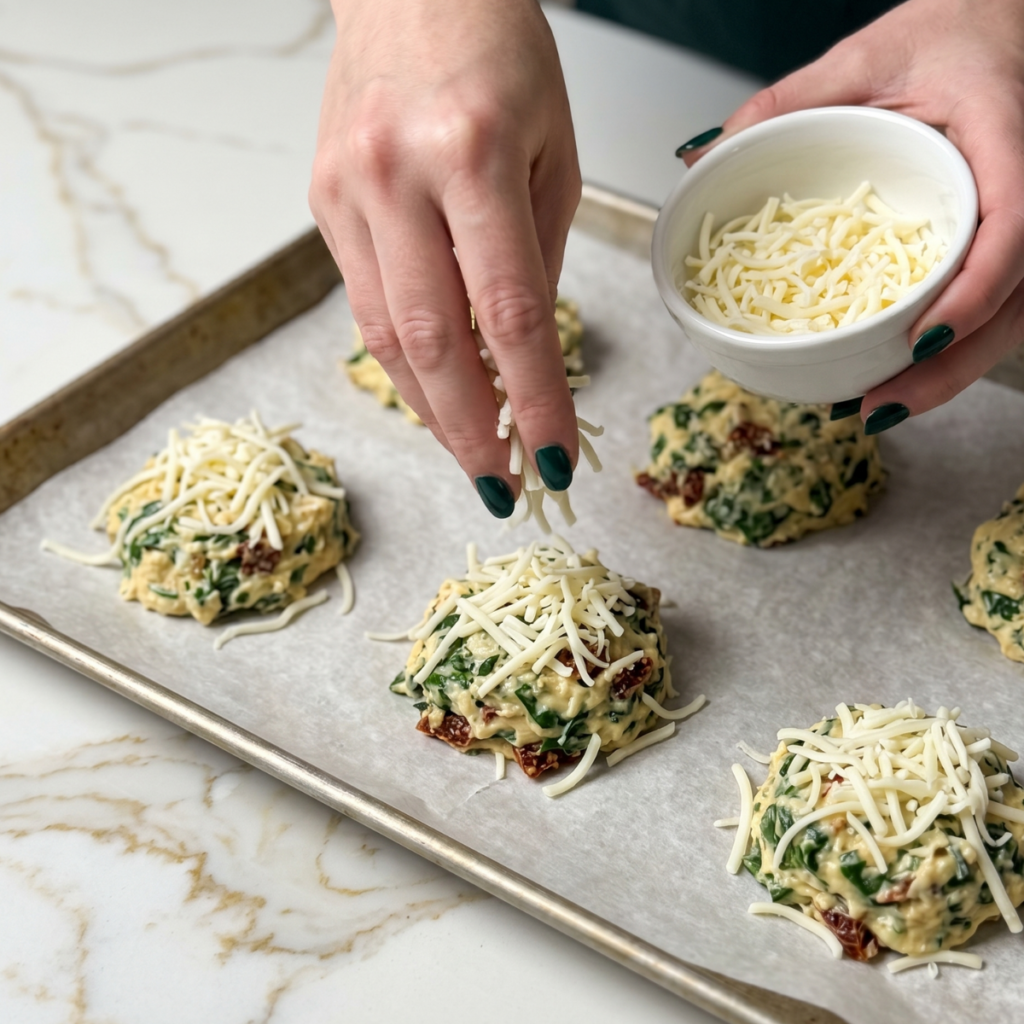
  • Best Vanilla French Beignets That Puff Up Light

    Best Vanilla French Beignets That Puff Up Light

    The oil was not hot enough, and every single one absorbed it like a sponge. Ben picked one up; it was visibly heavy, and said “this is not right.” Mia ate one out of loyalty and said “still good.” They were not. But once I got the temperature right, these vanilla French beignets became the most magical thing I have ever made in this kitchen.

    Why This Recipe Is Special

    Beignets are one of those things that feel genuinely celebratory every single time they appear on the table. The dough is pillowy and soft inside, the outside is golden and just barely crisp, and the powdered sugar goes everywhere in the best possible way. The vanilla in this recipe is not subtle; it perfumes the whole dough and gives every bite a warmth that plain beignets simply do not have. Mia takes one bite, closes her eyes for a second, and then immediately reaches for another. That is the only review that matters to me.

    How To Make Vanilla French Beignets

    The successful batch happened on a Sunday afternoon when both kids had declared the day officially boring and needed a project. Mia was measuring the flour with the focus of someone taking an exam. Ben was reading the yeast packet out loud and asking follow-up questions about what yeast actually does, which led to a genuinely good five-minute conversation about fermentation that I had not planned for. When the dough came together and felt soft and elastic and pillowy under my hands, I let both of them have a turn pressing it, which Mia described as “the best part.” Ben agreed and then pressed it one more time for good measure.

    The oil temperature lesson was the one that changed everything. Beignets need oil at exactly 350 to 360 degrees F. Too cold, and they absorb oil and go heavy. Too hot and the outside burns before the inside cooks through. I now use a thermometer every single time, and Ben has appointed himself the official temperature reader, which means he announces “three fifty-two” in a very authoritative voice approximately every thirty seconds while I fry. The beignets have been perfect ever since.

    Main Ingredients

    • 2.5 cups all-purpose flour, plus extra for dusting – Spoon and level; the right flour amount gives the perfect soft but structured dough
    • 2.25 teaspoons active dry yeast (one standard packet) – Must be proofed in warm liquid first; this is not optional for a properly risen beignet
    • 3/4 cup warm whole milk (110 degrees F) – Activates the yeast; too hot kills it, too cold and it will not activate at all
    • 1/4 cup granulated sugar – Feeds the yeast and gives the dough its subtle sweetness
    • 2 tablespoons unsalted butter, softened – Adds richness and gives the beignets their tender, slightly glossy interior crumb
    • 1 large egg, room temperature – Gives structure and helps the dough hold together beautifully during frying
    • 2 teaspoons pure vanilla extract – The heart of this recipe; use good quality vanilla and do not reduce the amount
    • 1/4 teaspoon salt – Balances the sweetness and enhances the vanilla
    • Neutral oil for frying – Vegetable or canola oil; at least 3 inches deep in the pot for the beignets to float and fry evenly
    • 1 cup powdered sugar, for dusting – Applied generously and immediately while the beignets are still hot; this is non-negotiable

    Step-by-Step Instructions

    Step 1: Proof the Yeast and Make the Dough

    • Combine the warm milk (110 degrees F), sugar, and yeast in a large bowl and let it sit undisturbed for 5 to 10 minutes until the mixture is foamy and fragrant; if it does not foam, the yeast is dead and you need to start again with fresh yeast
    • Add the softened butter, egg, vanilla extract, and salt to the yeast mixture and stir until combined
    • Add the flour one cup at a time, stirring after each addition until a soft, slightly sticky dough forms that pulls away from the sides of the bowl
    • Turn the dough out onto a lightly floured surface and knead for 3 to 4 minutes until smooth and elastic; the dough should spring back slowly when you press it with your finger

    Step 2: Rest and Roll the Dough

    • Place the dough in a lightly oiled bowl, cover with a clean kitchen towel or plastic wrap, and let it rise in a warm spot for 1 to 1.5 hours until doubled in size
    • Punch the risen dough down gently to release the air, then turn it onto a lightly floured surface
    • Roll the dough out to about half an inch thickness and cut into squares or rounds roughly 2 to 3 inches across using a knife or biscuit cutter
    • Place the cut pieces on a lightly floured parchment-lined tray and cover loosely; let them rest for 15 minutes while the oil heats so they puff slightly before frying

    Step 3: Fry the Beignets

    • Heat at least 3 inches of neutral oil in a deep heavy-bottomed pot to exactly 350 to 360 degrees F using a kitchen thermometer; do not guess the temperature
    • Fry 3 to 4 beignets at a time without crowding, lowering them gently into the oil with a slotted spoon; they will puff and float to the surface within about 30 seconds
    • Cook for 1 to 2 minutes per side until deep golden brown on both sides, turning once with a slotted spoon or tongs; the total fry time per beignet is about 3 minutes
    • Transfer to a paper towel-lined tray to drain for about 30 seconds and monitor the oil temperature between batches, adjusting the heat as needed to keep it in the correct range

    Step 4: Dust and Serve

    • While the beignets are still hot, transfer them to a serving plate and dust immediately and very generously with powdered sugar through a fine mesh strainer
    • Pile them on the plate and dust again from above so the powdered sugar settles into every crack and crevice; this is not a moment for restraint
    • Serve immediately while the inside is still soft and pillowy and the outside is at peak golden; beignets are a now-food, not a later-food
    • Set up a dipping station alongside if desired with vanilla custard, Nutella, jam, or honey so everyone can customize their experience

    Vanilla French Beignets Variations

    Mia’s “Nutella-Filled” Version

    Mia discovered that Nutella-filled beignets existed when she saw them on a baking video and immediately treated this as urgent news. She presented the information to me at breakfast the following morning with the energy of someone reporting a major development. For filled beignets, roll the dough slightly thinner, place a small teaspoon of Nutella in the center of each piece, fold the edges up, and pinch firmly to seal and fry sealed-side down first. The Nutella melts inside during frying into a warm, gooey center that Mia describes as “the whole point of beignets.” She is probably right.

    Ben’s “Cinnamon Sugar Instead” Version

    Ben has a position on powdered sugar, which is that cinnamon sugar is objectively better, and he is willing to discuss the topic at length. For his version, skip the powdered sugar entirely and toss the hot beignets immediately in a bowl of cinnamon sugar instead, two tablespoons of cinnamon mixed with half a cup of granulated sugar. The sugar sticks to the hot surface and creates a light caramelized coating that Ben calls “the superior finish.” He makes this argument every batch, and he has converted Mia to cinnamon sugar on at least three separate occasions.

    The Vanilla Custard Dipping Version

    This is the version I make when the table needs to feel genuinely special. Whisk together two egg yolks, two tablespoons of sugar, one tablespoon of cornstarch, and one cup of warm whole milk in a small saucepan over medium heat, stirring constantly until it thickens into a silky custard. Add a full teaspoon of vanilla and a small knob of butter at the end, let it cool slightly, and serve it warm in a small bowl alongside the beignet pile. Ben dips every single one with careful precision. Mia dunks hers completely and does not apologize for it.

    Substitutions

    Active dry yeast to instant yeast: Instant yeast can be added directly to the dry ingredients without proofing first. Use the same quantity. The rise time will be slightly shorter, about 45 minutes to 1 hour rather than the full hour and a half. Keep an eye on the dough and go by size rather than time; it should double regardless of which yeast you use.

    Whole milk to oat milk or almond milk: Non-dairy milks work for activating the yeast and making the dough, though the beignets will be very slightly less rich. Make sure whatever non-dairy milk you use is warmed to the same 110 degrees F range for the yeast to activate properly. Avoid milks with strong flavors that would compete with the vanilla.

    All-purpose flour to bread flour: Bread flour has slightly more protein, which gives the beignets a chewier, more structured interior. The dough will feel a little stiffer during kneading and may need a touch more milk to come together. The finished beignets are denser than the all-purpose version but have a beautiful pull when you tear them open.

    Frying oil to an air fryer: Spray each cut piece of dough generously with cooking spray and air fry at 350 degrees F for 6 to 8 minutes, flipping halfway through. The result is less golden and less puffy than the deep-fried version but significantly lighter. Dust with powdered sugar immediately out of the air fryer while still hot for the best result.

    Equipment

    • Large mixing bowl for the dough
    • Deep heavy-bottomed pot for frying (Dutch oven or large saucepan)
    • Kitchen thermometer (candy or deep-fry thermometer; the single most important piece of equipment for this recipe)
    • Slotted spoon or spider strainer for lowering dough into oil and removing beignets
    • Rolling pin for rolling the dough to even thickness
    • Sharp knife or biscuit cutter for cutting the pieces
    • Parchment-lined tray for resting the cut pieces before frying
    • Paper towel-lined tray for draining after frying
    • Fine mesh strainer for dusting the powdered sugar
    • Clean kitchen towel or plastic wrap for covering the dough during rising

    Storage Tips

    Make Ahead

    • Make the dough the night before, let it complete its first rise, then cover tightly and refrigerate overnight; bring to room temperature for 30 minutes before rolling and frying
    • The uncooked cut pieces can be placed on a parchment-lined tray, covered, and refrigerated for up to 4 hours before frying for same-day convenience
    • The powdered sugar and any dipping sauces can be prepared well ahead; only the frying needs to happen close to serving time

    Refrigerator

    • Beignets are genuinely best eaten fresh and warm; they are a serve-immediately kind of food that does not wait well at room temperature
    • Leftover cooked beignets can be stored loosely covered at room temperature for up to 1 day; they will lose their puffiness but still taste good
    • Store the raw dough wrapped tightly in the fridge for up to 2 days; this is much better than storing cooked beignets

    Freezing

    • Freeze-cut uncooked dough pieces on a lined tray until solid, then transfer to a freezer bag for up to 1 month
    • Thaw frozen dough pieces at room temperature for 30 to 45 minutes until slightly puffed before frying; do not fry from fully frozen
    • Cooked beignets do not freeze well, as the texture of the fried dough changes significantly when thawed

    Reheating

    • Reheat leftover beignets in a 325 degree F oven for 5 to 6 minutes until warmed through; they will not be as puffy as fresh but are still genuinely good
    • Air fryer reheating at 320 degrees F for 3 minutes works well and brings back some of the exterior texture
    • Dust with a fresh layer of powdered sugar after reheating since the original dusting will have absorbed into the surface during storage

    Family Secret Worth Sharing

    My mom always added a tiny pinch of nutmeg to her beignet dough, and I genuinely did not understand why until I made them without it and the whole flavor felt less warm, less rounded, and slightly flat. Nutmeg is one of those spices that you cannot identify when it is present but can absolutely detect when it is absent. She used just a small pinch, about an eighth of a teaspoon, whisked in with the flour. I added it to this recipe the second time I made the successful batch, told nobody, and waited. Mia ate two and then looked at the third one and said “these taste like they have a secret.” They do. That pinch of nutmeg is it. My mom would have been delighted to know a six-year-old figured it out.

    Troubleshooting FAQs

    My beignets are heavy and greasy instead of light and puffy. What went wrong?
    The oil was not hot enough. This is the single most common beignet problem and the one I know personally from my dough rock batch. Cold oil means the beignets absorb it before a crust can form on the outside. Make sure the oil reaches 350 to 360 degrees F before the first piece goes in and check the temperature between every batch. The thermometer is not optional; it is the whole recipe.

    The beignets are burning on the outside but raw in the middle. What happened?
    The oil is too hot, the dough pieces are too thick, or both. Keep the oil below 365 degrees F and roll the dough to a consistent half-inch thickness. If the outside is browning in under a minute per side, the oil is running too hot. Lower the heat slightly and let the temperature settle back into the correct range before continuing.

    My dough is not rising after an hour. What do I do?
    The yeast was not active. This can happen if the milk was too hot (above 115 degrees F kills yeast), too cold (below 105 degrees F will not activate it), or if the yeast itself was old and expired. Always proof the yeast first and wait for a genuinely foamy, fragrant result before adding flour. If the mixture looks flat and smells like nothing after ten minutes, start again with fresh yeast.

    The beignets are deflating as soon as they come out of the oil. What is happening?
    The dough was underproofed. The second rest after cutting, about 15 minutes on the tray before frying, is important for the gluten to relax and the pieces to puff slightly before they hit the oil. If you skip this rest or rush it, the beignets puff in the oil but collapse immediately once the heat source is removed. Give them the full rest and they will hold their shape beautifully.

    The Recipe That Made Sunday Afternoons Feel Like Paris

    There is powdered sugar on my ceiling from the first successful batch. I am not entirely sure how it got there, and I have decided not to investigate. Ben dusted so enthusiastically the whole kitchen went white for a moment, and Mia laughed so hard she nearly dropped her beignet. That is the kind of memory this recipe makes. These vanilla French beignets have become one of our most beloved special occasion baking recipes in the whole household, sitting right alongside our celebration dessert recipes that come out when something needs to feel genuinely festive. For the days when the whole house needs a treat that is a little extra, a little special, and completely impossible to eat without smiling, these beignets next to our easy homemade dessert recipes make the whole afternoon feel like somewhere worth being. Some recipes become moments, and this one always does.

  • 5-Ingredient Fluffy Apple Yogurt Pancakes

    5-Ingredient Fluffy Apple Yogurt Pancakes

    I flipped them before the bubbles formed and ended up with a pan of pale, half-raw pancake puddles. Ben looked at the mess and said, “Are those supposed to fold?” Mia said they looked “like fallen leaves” and meant it as a compliment. That morning taught me the one rule that makes these apple yogurt pancakes turn out golden and perfect without a single casualty.

    Why This Recipe Is Special

    These pancakes are softer, more tender, and more flavorful than any regular pancake I have made, and the yogurt is the reason for all three of those things. It gives the batter a slight tang that makes the sweetness of the apple pop, keeps the inside almost custard-soft, and creates edges that get genuinely golden without going crispy or dry. The grated apple disappears into the batter during cooking, but you taste it in every single bite. Mia asked me once what makes these different from regular pancakes. I told her it was the yogurt and apple. She considered this and said, “Keep doing that.” I have.

    How To Make Apple Yogurt Pancakes

    The successful batch came on a Saturday morning when both kids were sitting at the counter watching me with the focused energy of people who had been promised pancakes and intended to hold me to that. Mia was in charge of grating the apple, which she did with tremendous seriousness and approximately one tablespoon of tasting along the way. Ben was whisking the dry ingredients and announcing each one like a sports commentator. When the first properly cooked pancake came out golden and puffed with those soft golden edges and the kitchen smelled like warm apple and vanilla, both of them went completely quiet. That is the review I was going for.

    The lesson that fixed my folded pancake disaster was patience and bubbles. You pour the batter and then you wait. You do not touch it; you do not nudge it; you do not check by lifting the edge too early. You wait until the surface is covered in small bubbles that have opened up and the edges look matte and set rather than shiny and wet. That is the only moment to flip. Ben now stands at the stove as the official bubble announcer, which mostly means he says “not yet, not yet, not yet, NOW” and then looks very satisfied when the pancake comes out perfectly golden underneath.

    Main Ingredients

    • 1.5 cups all-purpose flour – Spoon and level; packed flour makes thick, dense pancakes that do not cook through properly
    • 1 cup plain whole milk yogurt – The ingredient that makes everything different; full-fat Greek yogurt also works and gives an even richer result
    • 1 large apple, peeled and grated – Grate on the fine side of a box grater; the finer the grate the more it melts into the batter during cooking
    • 2 large eggs – Room temperature eggs incorporate more smoothly into the yogurt batter
    • 2 tablespoons granulated sugar – Just enough to bring out the apple sweetness without making these dessert pancakes
    • 1 teaspoon baking powder – The lift that gives these their soft, fluffy interior
    • 1/2 teaspoon baking soda – Reacts with the yogurt acid for extra rise and that tender crumb
    • 1 teaspoon cinnamon – Warm spice that ties the apple and yogurt flavors together beautifully
    • 1/4 teaspoon salt – Enhances every other flavor; do not skip
    • 1 teaspoon vanilla extract – Rounds out the warmth of the cinnamon and the tang of the yogurt
    • 2 tablespoons melted butter, plus more for the pan – Goes into the batter for richness and helps create those golden edges
    • Powdered sugar for dusting – The finishing touch that makes every plate look like a Saturday morning should look

    Step-by-Step Instructions

    Step 1: Mix the Dry Ingredients

    • Whisk together the flour, sugar, baking powder, baking soda, cinnamon, and salt in a large bowl until completely combined
    • Make a well in the center of the dry ingredients to make it easier to incorporate the wet ingredients without overmixing
    • Peel the apple and grate it on the fine side of a box grater; gather the grated apple in a clean towel and squeeze out any excess juice so it does not make the batter too wet
    • Set the dry mixture and the grated apple aside while you prepare the wet ingredients

    Step 2: Mix the Wet Ingredients and Combine

    • Whisk together the yogurt, eggs, vanilla extract, and melted butter in a medium bowl until smooth and fully combined
    • Pour the wet ingredients into the well in the dry ingredients and stir gently with a spatula until just combined; the batter should still look slightly lumpy
    • Fold the grated apple into the batter with a few gentle strokes until evenly distributed; do not stir aggressively or the pancakes will be tough
    • Let the batter rest for 5 minutes before cooking; this allows the baking powder and soda to activate and the batter to thicken slightly to the perfect pourable consistency

    Step 3: Cook the Pancakes

    • Heat a non-stick skillet or griddle over medium-low heat and add a small knob of butter; let it melt and foam before adding any batter
    • Pour about a quarter cup of batter per pancake and cook without touching until the surface is covered in open bubbles and the edges look matte and set, about 2 to 3 minutes
    • Flip once, confidently, and cook for another 1 to 2 minutes until the second side is golden; do not press down or the soft interior will deflate
    • Transfer to a warm plate and cover loosely with foil while you cook the remaining batches; wiping the pan between batches with a paper towel keeps the butter from burning

    Step 4: Finish and Serve

    • Stack the finished pancakes on serving plates while still warm; they are best served immediately when the inside is still soft and the edges are at peak golden
    • Dust generously with powdered sugar through a fine-mesh strainer held high above the plate for an even, beautiful snow-like finish
    • Serve with maple syrup, a spoonful of plain yogurt on the side, fresh apple slices, or a drizzle of honey for a complete and genuinely lovely plate
    • Any leftover batter keeps covered in the fridge for up to 24 hours; give it a gentle stir before using, as the apple may settle slightly

    Apple Yogurt Pancakes Variations

    Mia’s “Cinnamon Sugar Every Bite” Version

    Mia has one position on cinnamon: more is always more. She asked if we could put cinnamon sugar inside the pancakes the way it is in a cinnamon roll, and honestly, I could not think of a reason not to. For her version, sprinkle a small pinch of cinnamon mixed with sugar directly onto each pancake immediately after pouring the batter, before it sets. It sinks slightly into the surface and caramelizes underneath during cooking into little pockets of cinnamon sweetness that make every bite taste like a warm bakery. She eats four without pausing and describes them as “the superior version.” She may be right.

    Ben’s “Apple Chunks Not Apple Mush” Version

    Ben objected to grating the apple on the grounds that he wanted to “actually see the apple in there.” He has opinions about texture that he holds firmly and expresses often. For his version, dice the peeled apple into very small pieces instead of grating, about a quarter inch, and fold them in at the same stage. The apple pieces hold their shape slightly during cooking and give each bite a soft, warm fruit texture that Ben describes as “like pie pancakes,” which is a completely accurate description and also the best one I have heard.

    The Yogurt Topping Stack Version

    This is the version I make when Sunday morning feels like it deserves something that looks as good as it tastes. Stack three pancakes on each plate with a generous spoonful of Greek yogurt between each layer, add a handful of thin apple slices alongside, drizzle with honey, and dust the whole tower with cinnamon and powdered sugar. It looks like something from a brunch menu and takes about three extra minutes. Ben called it “restaurant style” the first time I made it and now requests it specifically whenever we have a slow Sunday morning with nowhere to be.

    Substitutions

    Plain yogurt to Greek yogurt: Greek yogurt gives a thicker, richer batter and a slightly more pronounced tang that works beautifully with the cinnamon and apple. The pancakes will be a touch denser and more substantial. If using full-fat Greek yogurt, add a tablespoon of milk to loosen the batter slightly before cooking.

    All-purpose flour to whole wheat flour: Whole wheat flour works well here in a half-and-half ratio with all-purpose. Using all whole wheat produces a slightly nuttier, heartier pancake that still comes out soft and golden. Do not substitute entirely with almond or coconut flour, as the ratios and liquid absorption are completely different.

    Grated apple to unsweetened applesauce: Half a cup of unsweetened applesauce substitutes for one grated apple and adds even more moisture and sweetness to the batter. The texture of the finished pancake is slightly more tender, and the apple flavor is more evenly distributed throughout. No squeezing required, which saves a step on a rushed morning.

    Granulated sugar to maple syrup or honey: Two tablespoons of maple syrup or honey stirred into the wet ingredients in place of the sugar gives a more complex, natural sweetness that pairs beautifully with the apple and yogurt. The batter will be very slightly thinner, so reduce any additional milk by a tablespoon if the consistency feels too loose.

    Equipment

    • Large mixing bowl for dry ingredients
    • Medium mixing bowl for wet ingredients
    • Whisk for dry ingredients and wet ingredients
    • Rubber spatula for folding the batter
    • Box grater for the apple
    • Clean kitchen towel for squeezing excess apple juice
    • Non-stick skillet or griddle (10 to 12-inch)
    • Quarter-cup measure for portioning even pancakes
    • Thin spatula for flipping
    • Fine mesh strainer for the powdered sugar dusting
    • Warm plate or foil-covered plate for holding cooked pancakes

    Storage Tips

    Make Ahead

    • Mix the dry ingredients the night before and store covered at room temperature; combine with wet ingredients and apple fresh in the morning for a quicker start
    • The grated apple can be prepared the night before and stored in an airtight container in the fridge; give it a squeeze before adding to keep the batter from getting too wet
    • Cook a full batch, cool completely, and store for the week; these reheat beautifully and make one of the best quick breakfast options for school mornings

    Refrigerator

    • Store cooked pancakes in an airtight container or zip-lock bag in the fridge for up to 3 days
    • Stack with a small piece of parchment paper between each pancake to prevent them sticking together in the container
    • Raw batter keeps covered in the fridge for up to 24 hours; stir gently before using and expect slightly thicker pancakes from the rested batter

    Freezing

    • Freeze cooled pancakes in a single layer on a baking sheet until solid, then transfer to a freezer bag for up to 2 months
    • Separate each pancake with a small piece of parchment before freezing so they do not fuse together and can be taken out individually
    • Frozen pancakes go straight into the toaster from the freezer on the medium-high setting for a result almost identical to freshly made

    Reheating

    • Toaster reheating gives the best result; the edges get slightly crisp again and the inside warms through evenly in about 90 seconds
    • Microwave reheating works at 50 percent power for 30 seconds; cover with a damp paper towel to prevent drying out
    • Reheat in a dry non-stick pan over low heat for 1 minute per side if you want the closest result to freshly cooked without any drying

    Family Secret Worth Sharing

    My mom always added a pinch of cardamom to her apple pancake batter alongside the cinnamon, and I spent years thinking it was just her personal quirk until I made them without it one Saturday, and the whole flavor felt flatter. Cardamom has this floral, slightly citrusy warmth that you cannot quite identify when it is in there but miss immediately when it is gone. I add just a small pinch, maybe an eighth of a teaspoon, alongside the cinnamon every time. Ben has never noticed it. Mia noticed it immediately in the first batch I made with it and said, “These taste more like themselves today.” That is the most accurate description of what cardamom does to a recipe that I have ever heard from anyone, let alone a six-year-old. My mom would have agreed completely.

    Troubleshooting FAQs

    My pancakes are raw in the middle even though the outside looks done. What happened?
    The heat is too high. Yogurt pancakes need medium-low heat rather than medium-high because the yogurt and apple add moisture that needs time to cook through gently. If the outside is browning before the inside sets, reduce your heat by one notch and give each pancake a full 2 to 3 minutes on the first side before flipping. The surface bubbles are your best guide: wait until they have all opened before flipping.

    The batter is too thick to pour properly. How do I fix it?
    Add one tablespoon of milk at a time and stir gently until the batter pours from a spoon in a slow, thick ribbon rather than sitting in a lump. Different yogurt brands have very different thicknesses, so the batter may need adjusting depending on what you used. Greek yogurt in particular makes a thick batter that benefits from a small splash of milk to bring it to the right consistency.

    My pancakes are sticking to the pan even with butter. What do I do?
    The pan needs to be properly preheated before the butter goes in, and the butter needs to foam completely before the batter is added. A non-stick pan that has lost its coating will also cause sticking regardless of how much butter you use. Between batches, wipe the pan with a paper towel and add fresh butter each time; burnt butter residue from the previous batch is one of the most common causes of sticking.

    The pancakes are spreading too flat and not puffing up. What went wrong?
    Old baking powder or baking soda is the most common cause of flat pancakes. Test your baking powder by dropping a teaspoon into hot water; it should bubble immediately and vigorously. Also make sure the batter was not overmixed since aggressive stirring develops gluten, which prevents the pancakes from rising. A lumpy batter is a good batter for pancakes.

    The Saturday Morning Pancake That Fixed Everything

    There is something about a stack of warm pancakes dusted with powdered sugar on a Saturday morning that makes the whole week feel like it was worth it. Ben stations himself at the stove as a bubble monitor. Mia dusts the powdered sugar herself with tremendous ceremony. These apple yogurt pancakes have become one of our most beloved easy apple and fruit breakfast recipes in the whole household, sitting right alongside our wholesome weekend baking recipes that make a slow morning feel genuinely special. For the mornings when I want a full spread that covers everyone, these pancakes next to our fresh fruit and yogurt recipes give the whole table something to reach for, and nobody leaves hungry or unimpressed. Some recipes become the ones your kids remember, and I am quietly certain this one already has.

  • 3 Secrets to Perfect Spinach Egg Biscuits

    3 Secrets to Perfect Spinach Egg Biscuits

    I skipped the parchment paper on my first batch, and every single one cemented itself to the tray. Ben tried to scrape one off, and it came apart in pieces. Mia ate the pieces and said, “good even broken.” That accident taught me the one thing that makes these spinach egg biscuits work perfectly every time, and now they are our Sunday meal prep ritual.

    Why This Recipe Is Special

    These biscuits are the kind of thing you make once and immediately add to the permanent rotation. Keto, gluten-free, packed with protein, and golden and satisfying in a way that most low-carb breakfast food simply is not. The sun-dried tomatoes add a deep, slightly sweet, and tangy punch that makes every bite interesting, the spinach disappears into the egg base in the best possible way, and the cheese on top goes golden and blistered in the oven. Mia eats three before I can wrap the rest for the week. That is not a complaint.

    How To Make Spinach Egg Biscuits

    The successful batch came on the Sunday after the stuck-to-the-pan disaster, when I was determined to get it right. Mia had taken over chopping the sun-dried tomatoes with the small safety knife, which she uses with extreme concentration and a running commentary on how each piece looks. Ben was grating the cheese with what I can only describe as personal grievances, muttering at the grater every time a piece fell. When these came out of the oven properly golden with the cheese blistered on top and the whole kitchen smelling like a warm Italian cafe, both kids dropped what they were doing and came to stand directly next to the tray. I told them to wait five minutes. They waited approximately forty seconds.

    The thing that made the second batch perfect was parchment paper and giving the biscuits enough space on the tray. These need room to spread slightly and brown evenly rather than steaming against each other. I also learned that squeezing every last bit of moisture out of the spinach before it goes into the mixture is non-negotiable. Wet spinach makes wet biscuits that do not hold their shape, and Ben pointed this out during batch number three with the tone of someone who had clearly been waiting to say it for a while.

    Main Ingredients

    • 6 large eggs – The base that holds everything together; large eggs give the best structure
    • 1 cup baby spinach, roughly chopped – Squeeze completely dry after chopping; excess moisture is the enemy of a firm biscuit
    • 1/3 cup sun-dried tomatoes, drained and finely chopped – Oil-packed sun-dried tomatoes are more flavorful than dried ones; drain them well and pat dry
    • 1 cup shredded mozzarella cheese, divided – Three quarters goes into the batter, the rest gets scattered on top for that golden blistered finish
    • 1/4 cup grated parmesan – Adds saltiness and a deeper savory flavor that mozzarella alone cannot deliver
    • 1/4 cup almond flour – Gives the biscuits just enough structure without carbs; do not skip or substitute with regular flour
    • 2 cloves garlic, minced – Savory backbone of the whole biscuit
    • 1/2 teaspoon dried oregano – Ties the Italian flavor profile of the sun-dried tomatoes together
    • 1/4 teaspoon red pepper flakes – Adds a subtle warmth that lifts the whole biscuit; optional but worth it
    • Salt and black pepper to taste – Season confidently since the eggs and almond flour need it
    • Cooking spray or olive oil for the tray – And parchment paper; this step is not optional and I learned that the hard way

    Step-by-Step Instructions

    Step 1: Prep the Ingredients

    • Preheat your oven to 375 degrees F and line a large baking sheet with parchment paper; do not skip this step
    • Roughly chop the baby spinach, then gather it in a clean kitchen towel or paper towels and squeeze out as much moisture as possible until no more liquid comes out
    • Drain the sun-dried tomatoes thoroughly, pat them dry with paper towels, and chop finely so they distribute evenly throughout every biscuit
    • Mince the garlic and have all your ingredients measured and ready before the mixing starts so the batter comes together quickly without the eggs sitting too long

    Step 2: Mix the Batter

    • Crack the eggs into a large bowl and whisk until the yolks and whites are fully combined and the mixture is uniform in color
    • Add the almond flour, garlic, oregano, red pepper flakes, salt, and pepper to the eggs and whisk again until completely smooth with no almond flour lumps remaining
    • Fold in three quarters of the shredded mozzarella, all of the parmesan, the squeezed spinach, and the chopped sun-dried tomatoes until evenly distributed
    • The batter will be thick and slightly sticky, and should hold together when you scoop it; if it feels too wet, the spinach was not squeezed dry enough

    Step 3: Scoop and Top

    • Use a large cookie scoop or two spoons to portion the batter onto the prepared parchment-lined baking sheet, making 8 to 9 even mounds spaced at least 2 inches apart
    • Gently press each mound down slightly with the back of the spoon to flatten them into thick disc shapes rather than tall domes
    • Scatter the remaining shredded mozzarella evenly over the top of each biscuit so it covers most of the surface and will blister and brown during baking
    • Add a small pinch of extra red pepper flakes and a crack of black pepper on top of each one if you want a little more heat on the surface

    Step 4: Bake and Cool

    • Bake at 375 degrees F for 18 to 22 minutes until the tops are deeply golden, the cheese is blistered in spots, and the edges look set and slightly crisp
    • Let the biscuits cool on the tray for 5 minutes before attempting to move them; they firm up significantly as they cool and will hold together much better once they have rested
    • Slide a thin spatula carefully underneath each biscuit and lift gently; they should release cleanly from the parchment with no sticking
    • Serve warm immediately or let cool completely before storing for meal prep; they reheat beautifully and taste almost identical to freshly baked

    Spinach Egg Biscuits Variations

    Mia’s “No Spicy Please” Version

    Mia has a formal relationship with red pepper flakes that is best described as hostile. She inspects every biscuit before eating it and removes visible flakes with the precision of someone performing a very small surgery. For her version, skip the red pepper flakes entirely in both the batter and the topping, and add an extra pinch of dried basil instead for a sweeter, more herby flavor. She eats four of these without pause and then asks if there are more, which is the closest thing to a standing ovation she is capable of giving a recipe.

    Ben’s “Double Cheese, Obviously” Version

    Ben’s position on cheese is consistent and unwavering: there is never enough of it. He lobbied for more cheese during the second batch, and his suggestion was not wrong. For Ben’s version, increase the mozzarella in the batter to a full cup and add an extra generous scatter on top before baking. The cheese melts throughout the biscuit and creates little pockets of molten mozzarella inside every bite alongside the golden crust on top. Ben calls it “the real version,” and I have stopped arguing.

    The Meal Prep Sunday Version

    This is the version I make in a double batch every Sunday without fail. Two trays, eighteen biscuits, the whole week sorted in forty minutes. I wrap them individually in paper towels, store them in a zip-lock bag in the fridge, and both kids can grab one before school without any morning chaos. Ben reheats his in the toaster oven for three minutes and says it is better than a breakfast sandwich. Mia eats hers cold out of the bag sometimes, which she describes as “fine.” Coming from Mia, “fine” is a full endorsement.

    Substitutions

    Almond flour to coconut flour: Coconut flour absorbs much more liquid than almond flour, so use only 2 tablespoons in place of the quarter cup. The texture will be slightly denser and less crumbly, but it still works well. Do not substitute regular all-purpose flour if you need this to stay keto and gluten-free.

    Sun-dried tomatoes to roasted red peppers: Finely chopped drained roasted red peppers give a sweeter, less intense flavor than sun-dried tomatoes but work beautifully in the same quantity. Pat them very dry before adding since they contain more moisture than sun-dried tomatoes and can affect the batter consistency.

    Mozzarella to cheddar or Gruyère: Sharp cheddar gives a more intense, slightly tangy flavor that pairs well with the sun-dried tomatoes and garlic. Gruyere adds a nutty richness that makes these feel genuinely fancy for a meal prep biscuit. Both melt and blister beautifully on top during baking.

    Fresh spinach to frozen spinach: Frozen spinach works perfectly here but must be completely thawed and squeezed so aggressively dry that you almost cannot squeeze anymore. Frozen spinach holds significantly more water than fresh, and if not completely dried, it will make the batter too loose to hold its shape on the tray.

    Equipment

    • Large baking sheet
    • Parchment paper (non-negotiable after my first batch disaster)
    • Large mixing bowl for the batter
    • Whisk for the eggs and dry ingredients
    • Rubber spatula or wooden spoon for folding
    • Large cookie scoop or two tablespoons for portioning
    • Clean kitchen towel or paper towels for squeezing the spinach
    • Sharp knife and cutting board for the sun-dried tomatoes and garlic
    • Box grater for the parmesan if not using pre-grated
    • Thin spatula for lifting the biscuits off the tray

    Storage Tips

    Make Ahead

    • The batter can be mixed up to 24 hours ahead, covered tightly, and stored in the fridge; give it a good stir before scooping since the almond flour settles slightly
    • Bake the full batch on Sunday and the whole week of breakfasts is done; these are genuinely one of the best zero-carb meal prep options. I have found
    • Double the recipe for two trays and bake them simultaneously on different oven racks, rotating halfway through for even browning

    Refrigerator

    • Store cooled biscuits in an airtight container or zip-lock bag in the fridge for up to 5 days
    • Wrap each biscuit individually in a paper towel before storing to absorb any residual moisture and keep the bottoms from going soggy
    • The flavor actually improves on days two and three as the sun-dried tomato and garlic notes deepen in the fridge

    Freezing

    • Freeze completely cooled biscuits in a single layer on a tray, then transfer to a freezer bag once solid, for up to 2 months
    • Thaw overnight in the fridge or reheat directly from frozen in a 350 degree F oven for 8 to 10 minutes
    • Do not microwave from frozen, as the egg base gets rubbery; oven reheating from frozen gives a result almost indistinguishable from freshly baked

    Reheating

    • Reheat in a toaster oven at 350 degrees F for 3 to 4 minutes for the best result; the cheese gets slightly melty again and the edges crisp back up
    • Microwave reheating works at 50 percent power for 30 to 45 seconds; cover with a damp paper towel to prevent the egg from drying out
    • These biscuits also taste excellent at room temperature after 15 minutes out of the fridge, which makes them genuinely grab-and-go for rushed school mornings

    Family Secret Worth Sharing

    My mom had a rule about any egg-based baked dish that I thought was fussy until I understood why: always let the batter rest for ten minutes before scooping. She said eggs need a little time to fully absorb any dry ingredients mixed into them, and the texture of everything baked with eggs is better for it. I tested this with and without the rest on these biscuits, and she was completely right. The batch that rested had a tighter, more cohesive structure and held together on the tray instead of spreading too flat. Ben watched me wait the ten minutes once and said “why aren’t we scooping yet?” I told him Grandma’s rule. He looked at the batter for a moment and then said, “Okay, but she better be right.” She was. She always was.

    Troubleshooting FAQs

    My biscuits are spreading too flat on the tray instead of holding their shape. What went wrong?
    Two things cause flat biscuits: wet spinach or batter that has not been rested. Squeeze the spinach until it seems like nothing more can come out and then squeeze it one more time. Also let the batter rest for ten minutes after mixing so the almond flour has time to absorb the egg and the mixture becomes slightly firmer and more scoopable. Chilling the batter for twenty minutes in the fridge before scooping also helps significantly.

    The biscuits stuck to the pan even with cooking spray. How do I fix it?
    Parchment paper is the only reliable solution for egg-based biscuits. Cooking spray alone is not enough because the egg proteins bond directly to any unlined metal surface during baking. Line the tray with parchment every single time; let the biscuits cool for the full five minutes before lifting; and use a thin, flexible spatula rather than a thick one to get cleanly underneath each one.

    The inside of my biscuits is still wet after the bake time. What happened?
    The biscuits were either too thick, the oven was not fully preheated, or the spinach added too much moisture to the batter. Flatten each mound slightly more before baking so they are no thicker than about three quarters of an inch. Make sure your oven has reached the full 375 degrees F before the tray goes in, and always squeeze the spinach completely dry before adding it.

    Can I make these dairy-free?
    Yes, with some adjustments. Replace the mozzarella with a meltable dairy-free shredded cheese and the parmesan with two tablespoons of nutritional yeast for that savory depth. The texture of the biscuit is slightly different without the real cheese structure, but they still hold together well, and the flavor from the sun-dried tomatoes, garlic, and oregano carries the whole thing beautifully.

    Sunday Prep, Five-Day Payoff

    Sunday afternoons in our kitchen smell like garlic and sun-dried tomatoes now, and Monday through Friday mornings are genuinely easier because of it. Ben grabs two from the fridge and reheats them in the toaster oven while making his lunch. Mia eats hers cold in the car and calls it efficient. These spinach egg biscuits have become one of our most depended-on keto breakfast and meal prep recipes in the whole weekly rotation, sitting right alongside the other healthy spinach and egg breakfast recipes I reach for when I want real food without a lot of weekday effort. For the mornings when we need something quick alongside a drink, these pair perfectly with our healthy carrot juice recipe for a complete low-carb start that actually keeps everyone going until lunch. Some recipes quietly become the ones your whole routine is built around, and this one did exactly that.

  • 5-Minute Fluffy Mushroom Spinach Scrambled Eggs

    5-Minute Fluffy Mushroom Spinach Scrambled Eggs

    I had the heat too high and stirred too fast and produced what Ben described as “yellow bouncy bits.” He was nine and he was completely correct. Mia flatly refused to eat them on principle. I stood there staring at the pan, made them again slowly, and absolutely everything changed. These mushroom spinach scrambled eggs are now the most requested breakfast in our entire house.

    Why This Recipe Is Special

    Most scrambled eggs are fine. These are genuinely good. The mushrooms get properly golden before anything else goes in, which gives the whole dish a deep savory base that plain scrambled eggs simply do not have. The spinach wilts into the eggs in the last thirty seconds and adds color and freshness without making things soggy. The eggs themselves, cooked low and slow, come out in those big, soft, glossy curds that feel like something a restaurant actually tried to make. Ben calls them “fancy eggs” and requests them on school mornings, which tells you everything.

    How To Make Mushroom Spinach Scrambled Eggs

    The version that worked happened on a quiet Saturday when I had more time and less coffee-fueled impatience than usual. Mia was sitting on the counter eating mushroom slices straight from the cutting board before I could stop her. Ben was cracking the eggs into the bowl with excessive confidence and getting shell in approximately thirty percent of them. When the mushrooms hit the hot pan and that deep buttery, earthy smell went through the kitchen, Mia stopped eating them raw and said “okay that smells better than eating them plain.” High bar. She cleared it.

    The lesson that changed everything was learning that scrambled eggs and mushrooms need to be cooked separately before they come together. If you throw the eggs in with uncooked mushrooms, the mushrooms release water, the eggs cook in that liquid, and you get watery, rubbery eggs every single time. Golden mushrooms, first completely done, are set aside; eggs are cooked alone on low heat, then everything comes together at the very end. Ben watched me do it this way once and said “oh, that is actually a different recipe.” It is the same recipe. It is just done right.

    Main Ingredients

    • 4 large eggs – The base; crack them into a bowl and whisk well before they go anywhere near the pan
    • 1.5 cups cremini or button mushrooms, sliced – Cremini have a deeper flavor than white button; slice them evenly so they cook at the same rate
    • 2 cups fresh baby spinach – Goes in at the very end; it wilts down dramatically so use more than you think you need
    • 2 tablespoons unsalted butter, divided – One tablespoon for the mushrooms, one for the eggs; butter gives a richness that oil alone cannot match
    • 2 tablespoons whole milk or cream – Whisked into the eggs before cooking for the creamiest, softest curds
    • 2 cloves garlic, minced – Added to the mushrooms; gives the whole dish its savory backbone
    • Salt and black pepper to taste – Season the mushrooms as they cook and the eggs just before they set
    • 1/4 teaspoon red pepper flakes – Optional but adds a gentle warmth that lifts the whole dish; leave out for the kids’ version
    • Fresh chives or parsley, chopped – For garnish; adds a fresh finish that makes the whole plate look intentional

    Step-by-Step Instructions

    Step 1: Whisk the Eggs

    • Crack the eggs into a medium bowl and add the milk or cream, a pinch of salt, and a few cracks of black pepper
    • Whisk vigorously for about 60 seconds until the yolks and whites are completely combined and the mixture looks uniform in color with small bubbles on the surface
    • The more air you whisk in at this stage the fluffier and lighter the final curds will be, so do not rush this step
    • Set the whisked eggs aside at room temperature while you cook the mushrooms; do not add them to a cold pan straight from the fridge

    Step 2: Cook the Mushrooms

    • Heat one tablespoon of butter in a large non-stick skillet over medium-high heat until the butter foams and just starts to turn golden
    • Add the sliced mushrooms in a single layer and cook without stirring for 2 to 3 minutes until the undersides are deeply golden and they have released most of their moisture
    • Stir once, add the minced garlic and red pepper flakes if using, and cook for another minute until the garlic is fragrant and the mushrooms are golden all over
    • Season generously with salt and pepper, then transfer the mushrooms to a plate and set aside while you cook the eggs in the same pan

    Step 3: Scramble the Eggs Low and Slow

    • Reduce the heat to low and add the remaining tablespoon of butter to the same skillet; let it melt gently without browning
    • Pour in the whisked eggs and let them sit undisturbed for about 20 seconds until just the edges begin to set
    • Using a rubber spatula, push the eggs slowly from the edges toward the center in large, gentle sweeping strokes; do not stir quickly or constantly
    • Continue the slow fold-and-push method for 2 to 3 minutes until the eggs are in large soft glossy curds and still look slightly underdone; they will finish cooking from residual heat

    Step 4: Add Spinach, Finish, and Serve

    • Add the fresh baby spinach directly to the eggs in the pan and fold it in gently; the residual heat will wilt it in about 30 seconds without overcooking the eggs
    • Return the golden mushrooms to the pan and fold everything together with one or two gentle turns so the mushrooms are distributed without breaking up the egg curds
    • Remove the pan from the heat immediately and season with a final pinch of salt and pepper; the eggs will continue to firm up slightly as they sit
    • Plate immediately, garnish with fresh chives or parsley, and serve with toast, crusty bread, or alongside whatever else makes the morning feel good

    Mushroom Spinach Scrambled Eggs Variations

    Ben’s “Add Cheese to Everything” Version

    Ben has a standing rule that any egg dish is improved by cheese and he has never once been wrong about this. For his version, fold two tablespoons of grated parmesan or sharp cheddar into the eggs during the last 30 seconds of cooking, right before the spinach goes in. The cheese melts into the curds and adds a slightly salty, savory richness that makes the whole plate feel more substantial. Ben describes this version as “the actual good one,” which I choose not to take personally since he eats two servings every time.

    Mia’s “No Mushrooms, Extra Spinach” Version

    Mia went through a phase of refusing mushrooms entirely based on their texture, which she described as “too wet and too loud.” I did not fully understand the loud part, but I respected the position. For her version, skip the mushrooms entirely and double the spinach, adding it in two batches so it wilts fully without releasing too much liquid at once. A tiny pinch of nutmeg in the eggs gives her version a subtle warmth that she cannot identify but always eats without complaint. She has never asked what it is, and I have never offered the information.

    The High-Protein Meal Prep Version

    On the Sundays when I want the whole week’s breakfasts sorted in twenty minutes, I make a triple batch of the mushroom and spinach mixture, store it in the fridge, and just cook fresh eggs each morning with a scoop of the pre-cooked filling. The vegetables hold beautifully for four days, and fresh eggs take two minutes. This is one of the best prep meal ideas I have come across for busy weekday mornings when the kids need a real breakfast before school and nobody has time to cook something properly from scratch.

    Substitutions

    Cremini mushrooms to portobello or shiitake: Portobello mushrooms have a meatier texture and stronger flavor that makes the dish feel even more substantial. Shiitake adds an earthy, almost smoky quality that pairs beautifully with the eggs. Both need a slightly longer cook time than cremini, so give them an extra minute in the pan before adding the garlic.

    Fresh spinach to frozen spinach: Frozen spinach works in a time crunch but must be completely thawed and squeezed very dry before it goes into the pan. Excess moisture from frozen spinach will make the eggs watery in exactly the same way that undercooked mushrooms do. When properly drained, it tastes nearly identical to fresh and is a perfectly good weekday shortcut.

    Butter to olive oil or ghee: Olive oil gives a slightly more savory, less rich result that works well for anyone avoiding dairy. Ghee has an even higher smoke point than butter and adds a slightly nutty quality that is genuinely lovely with the mushrooms. Or substitutes in the exact same quantity with almost no change to the final dish.

    Whole milk to oat milk or no liquid at all: A small splash of oat milk works as a dairy-free swap and gives a similar creamy texture to the eggs. Leaving the liquid out entirely is also a perfectly valid option; the eggs will be slightly less fluffy and a little firmer but still delicious. Some people prefer their scrambled eggs without any liquid, and this recipe works both ways.

    Equipment

    • Large non-stick skillet (10 to 12-inch; non-stick is important for low-heat scrambling without sticking)
    • Medium mixing bowl for whisking the eggs
    • Whisk or fork for combining the eggs and milk
    • Rubber spatula (not a metal spoon or wooden spoon; rubber gives the gentlest fold)
    • Sharp knife and cutting board for the mushrooms and garlic
    • Plate for resting the cooked mushrooms while the eggs cook
    • Measuring spoons for the butter and seasoning

    Storage Tips

    Make Ahead

    • Cook the mushroom and spinach mixture up to 4 days ahead and store in a sealed container in the fridge; reheat briefly in the pan while the fresh eggs cook
    • Whisk the egg mixture (eggs plus milk and seasoning) up to 24 hours ahead and store covered in the fridge; give it a quick re-whisk before using
    • This is one of the best quick-to-go breakfast ideas for weekday mornings when prep has been done the night or weekend before

    Refrigerator

    • Store leftover cooked scrambled eggs in an airtight container in the fridge for up to 2 days; scrambled eggs do not hold as well as other dishes but are still perfectly good reheated
    • Store the mushroom and spinach filling separately from the eggs if possible for the best texture when reheating
    • Do not press the eggs flat in the container; leave them loosely packed so the curds do not compress and turn dense

    Freezing

    • The cooked mushroom and spinach mixture freezes well for up to 1 month; freeze in individual portions for easy single-serve breakfasts
    • Cooked scrambled eggs can be frozen but the texture changes noticeably; they become slightly watery and grainy on thawing, which most people find acceptable for a quick weekday breakfast
    • Thaw frozen portions overnight in the fridge and reheat gently in a skillet rather than the microwave for the best texture recovery

    Reheating

    • Reheat leftover scrambled eggs in a non-stick pan over the lowest possible heat, stirring gently, just until warmed through; high heat will make them rubbery
    • Microwave reheating at 50 percent power in 20-second bursts works in a pinch; stir between each burst and stop the moment the eggs are just warm
    • A tiny extra knob of butter added to the pan when reheating refreshes the richness and brings the eggs back closer to their original texture

    Family Secret Worth Sharing

    My mom had one rule about scrambled eggs that she repeated every single time anyone made them in her kitchen: take them off the heat before you think they are ready. She said eggs keep cooking for thirty seconds after the pan is off the stove, and the people who make rubbery eggs are always the ones who wait too long. She was right about this in the same way she was right about most things in the kitchen. I pull mine when the curds are still slightly glossy and just a touch underdone, and they are perfect by the time they hit the plate. Ben watched me do this once and asked why I was stopping early. I told him Grandma’s rule. He nodded, took a bite, and said, “Grandma understood eggs.” She really did.

    Troubleshooting FAQs

    My scrambled eggs keep coming out rubbery and dry. What am I doing wrong?
    Two things cause rubbery eggs every single time: too high a heat and cooking them too long. Scrambled eggs need low heat and patient, slow folding. The moment you feel tempted to turn up the heat because it is taking too long, resist it. Pull the eggs off the heat when they still look slightly underdone and let residual heat finish the job. The thirty-second rule from the family secret section is the most important thing in this whole recipe.

    The mushrooms are releasing a lot of water and going soggy instead of golden. How do I fix it?
    Do not crowd the pan and do not stir too early. Mushrooms need space and undisturbed contact with a hot surface to develop color. If you pack them in too tightly, they steam in each other’s moisture and go grey and soft. Cook them in a single layer, leave them alone for the first 2 to 3 minutes, and only stir once they have a visible golden color on the bottom. If your pan is not large enough, cook them in two batches.

    The spinach made my eggs watery. What went wrong?
    The spinach went in too early or the heat was too high when it was added. Fresh baby spinach wilts extremely quickly from residual heat alone and does not need any additional cooking time. Add it to the eggs after the pan comes off the heat, fold it in, and serve immediately. If spinach sits in a hot pan for more than 30 to 40 seconds, it releases liquid that makes the whole dish wet.

    Can I make this recipe with just egg whites?
    Yes, with one small adjustment. Egg whites cook faster than whole eggs and have less fat to slow the cooking process, so they set more quickly and go rubbery more easily. Use a slightly lower heat than you would for whole eggs and remove them from the heat even earlier. Two tablespoons of cream or a small knob of cream cheese folded in helps compensate for the missing richness from the yolks.

    The Breakfast That Finally Made Mornings Worth Getting Up For

    There is something about a pan of properly made scrambled eggs that makes a Tuesday morning feel like it was planned with intention rather than survived on autopilot. Ben eats his with toast and a level of focused satisfaction that he usually reserves for video games. Mia eats hers slowly, which is how you know she is genuinely enjoying something. These mushroom spinach scrambled eggs sit naturally right alongside our healthy high-protein breakfast ideas as one of the most filling and genuinely nourishing starts to the day, and on the mornings when I want something equally easy but with a completely different flavor, our healthy carrot juice recipe alongside these eggs makes the whole morning feel properly taken care of. For the weeks when I am meal prepping seriously and want everything sorted in one go, this recipe alongside our keto chicken broccoli recipe covers breakfast and dinner in one prep session, and the whole week runs smoother. Some mornings are just better than others, and this recipe is a good reason why.